Introduction
This is the official book of the radare project.
This is a collaborative and community-driven project, if you want to improve the status of the documentation check out the contributing chapter and submit pull requests to the repository
- GitHub
- ePUB
- Online Html - built with mdbook
- Gemini Capsule - md2gmi
The minimum version of radare2 required to follow this book is r2-5.8.x, but it is recommended to always use the last release or build it from git.
Book Editions
This book was written with Halibut in 2009 by pancake focusing on radare. The initial implementation of the tooling, unfortunately the code evolved faster than the documentation did, and the book became obsolete, for historical reasons this version can be found in this webpage:
During 2014, Maijin reorganized and updated the contents, other contributors over the Internet also helped to get new stuff in and after some reviews the book was now readily available for the first time in PDF, ePUB and Hardcover printed versions.
Unfornately, the documentation part of the project got stuck again; and 10 years later, in 2024, pancake worked back updating and polish its contents. Looking towards the 3rd edition that may be ready by the end of the same year.
History
In 2006, Sergi Àlvarez (aka pancake) while working as a forensic analyst he decided to write a small tool to recover some deleted files from an HFS+ disk by accident. As long as using the privative software from work it was a good toy project, following the concept of a block-based hexadecimal editor interface with a very simple repl to enter commands to search for byte patterns and dump the results to disk. And have the following characteristics:
- be extremely portable (unix friendly, command line, c, small)
- open disk devices, this is using 64bit offsets
- search for a string or hexpair
- review and dump the results to disk
After three years of intense development (in 2009) the project was too bloated to keep it as a monolitic tool and pancake decided to redesign the tool into a more pluggable and modular form. This way it was possible to create scripts, bindings and write plugins to add support for more architectures, debugging targets or improve the analysis capabilities by keeping the core intact.
Since then, the project has evolved to provide a complete framework for analyzing binaries, while making use of basic UNIX concepts. Those concepts include the famous "everything is a file", "small programs that interact using stdin/stdout", and "keep it simple" paradigms.
The need for scripting showed the fragility of the initial design: a monolithic tool made the API hard to use, and so a deep refactoring was needed. In 2009 radare2 (r2) was born as a fork of radare1. The refactor added flexibility and dynamic features. This enabled much better integration, paving the way to use r2 from different programming languages. Later on, the r2pipe API allowed access to radare2 via pipes from any language, and the r2papi provided an idiomatic and high level interface to use r2 through r2pipe from a large list of programming languages.
What started as a one-man project, with some eventual contributions, gradually evolved into a big community-based project around 2014. The number of users was growing fast, changing roles and contribution rules to ease the maintenance as much as possible.
It's important to instruct users to report their issues, as well as help developers willing to contribute to understand the codebase. The whole development is managed in radare2's GitHub and discussed in the Telegram and Discord channels.
There are several side projects that provide, among other things, a graphical user interface (Iaito), a decompiler (r2dec, r2ghidra), Frida integration (r2frida), Yara (r2yara), Unicorn, Keystone, and many other projects indexed in the r2pm, the radare2 package manager.
Since 2016, the community gathers once a year in r2con, a congress around radare2 that takes place in Barcelona.
Toolchain
The Radare2 project provides a collection of command-line tools, APIs and scripting capabilities that focus on several aspects of reverse engineering.
This chapter will give you a quick understanding of them, but you can check the dedicated sections for each tool at the end of this book.
radare2
When you run the radare2 command, you're presented with an interactive shell that gives you access to all the functionalities of the radare2 framework by running mnemonic commands or scripts.
At its core, radare2 lets you open various types of files and data sources, treating them all as if they were simple binary files. This includes executables, disk images, memory dumps, and even live processes or network connections.
Once you've opened a file, radare2 provides a wide array of commands for exploration and analysis. You can navigate through the file's contents, view disassembled code, examine data structures, and even modify the binary on the fly.
Some key features accessible through the radare2 command include:
- Hex editing capabilities
- Advanced code analysis and disassembly
- Debugging functionality
- Binary patching
- Data visualization tools
- Scripting support for automation and extending functionality
The radare2 command serves as the primary interface to these features, offering a flexible and powerful environment for reverse engineering, malware analysis, exploit development, and general binary exploration.
rax2
A minimalistic mathematical expression evaluator for the shell that is useful for making base conversions between floating point values, hexadecimal representations, hexpair strings to ASCII, octal to integer, and more. It also supports endianness settings and can be used as an interactive shell if no arguments are given.
Examples
$ rax2 1337
0x539

$ rax2 0x400000
4194304

$ rax2 -b 01111001
y

$ rax2 -S radare2
72616461726532

$ rax2 -s 617765736f6d65
awesome
rabin2
Another important tool distributed with radare2, rabin2 is designed to analyze binary files and extract various types of information from them. It supports a wide range of file formats (depending on which plugins are loaded or compiled in), the most famous ones are:
- ELF (Executable and Linkable Format)
- PE (Portable Executable)
- Mach-O (Mach Object)
- Java CLASS files
Key features and uses of rabin2 include:
- Extracting metadata: File type, architecture, OS, subsystem, etc.
- Listing symbols: Both imported and exported symbols.
- Displaying section information: Names, sizes, permissions, etc.
- Showing library dependencies.
- Extracting strings from the binary.
- Identifying entry points and constructor/destructors.
- Listing header structures and information.
rabin2 can be used standalone from the command line or integrated within other radare2 tools. It's particularly useful for quick analysis of binaries without the need to fully load them into a debugger or disassembler. The information provided by rabin2 is often used by other parts of the radare2 framework to enhance analysis and provide context during reverse engineering tasks.
rasm2
The command-line assembler and disassembler. It supports a wide range of architectures and can be used independently of the main radare2 tool. Key features include:
- Multi-architecture support: Can handle numerous architectures including x86, x86-64, ARM, MIPS, PowerPC, SPARC, and many others.
- Bi-directional operation: Functions as both an assembler (converting human-readable assembly code to machine code) and a disassembler (converting machine code back to assembly).
- Flexible input/output: Accepts input as hexadecimal strings, raw binary files, or text files containing assembly code.
- Shellcode generation: Useful for security research and exploit development.
- Inline assembly: Allows for quick assembly of individual instructions or small code snippets.
- Syntax highlighting: Provides colored output for better readability when disassembling.
- Plugins: Supports architecture-specific plugins for extended functionality.
For example assembling and disassembling a nop for java:
$ rasm2 -a java 'nop'
00

$ rasm2 -a x86 -d '90'
nop

$ rasm2 -a x86 -b 32 'mov eax, 33'
b821000000

$ echo 'push eax;nop;nop' | rasm2 -f -
509090
rahash2
Versatile command-line hashing tool that is part of the radare2 framework. It's designed to compute and verify cryptographic hashes and checksums for files, strings, or even large data streams like hard disks or network traffic.
- Supports a wide range of hash algorithms
- MD4, MD5, SHA1, SHA256, SHA384, SHA512, CRC16, CRC32, and more.
- Input data from files, stdin, or command-line strings.
- Block-based hashing
- Incremental hashing for large files
- Hash verification
- Various output formats, including raw bytes, hexadecimal strings, or radare2 commands.
- Basic encryption capabilities
Here are few usage examples:
$ rahash2 file
file: 0x00000000-0x00000007 sha256: 887cfbd0d44aaff69f7bdbedebd282ec96191cce9d7fa7336298a18efc3c7a5a
Algorithms can be selected by specifying them separated with the -a flag.
$ rahash2 -a md5 file
file: 0x00000000-0x00000007 md5: d1833805515fc34b46c2b9de553f599d
radiff2
The commandline Binary Diffing utility of the radare2 reverse engineering framework. It is designed to compare and analyze differences between binary files or sections of binary data.
Key features and capabilities of radiff2 include:
- Compare byte-per-byte changes between two files
- Delta diffing on files with different sizes, finding common sections
- Code Analysis diffing, finding functions in common
- Binary header comparing libraries, exports, etc
- Visualization options: graphs, ascii art, plain text, json
- Integration with radare2: Using the
ccommand or running it with the-rflag. - Patch generation, writing r2 scripts that patch one file to update it like the other.
radiff2 is particularly useful for cases where you need to identify and understand changes between different versions of binary files or compare potentially malicious files with known good versions.
rafind2
rafind2 is a command-line utility designed to search for byte patterns, strings, or hexadecimal values within binary files or any other type of file.
This tool implements the most common subcommands of the radare2's / (search) operation.
- Search for patterns, strings, binary data and regular expression
- Run across multiple files
- Output formats, showing offsets, json and even r2 commands
ragg2
Ragg2 is a versatile tool primarily serving as a shellcode compiler.
The tool is written on top of the r_egg library which can construct exploit payloads from the commandline, adding paddings, nops, sequences of bytes, compile small relocatable programs and even apply transformations to avoid some specific characters.
The ragg2-cc tool can compile C programs into raw linear instructions that are relocatable and are useful for injecting them in target processes or use them in exploits.
This feature is conceptually based on shellforge4, but only linux/osx x86-32/64 platforms are supported.
It can also compile a specific low level domain specific language and generate tiny binaries without the need of any system compiler or toolchain as exemplified below:
$ cat hi.r
/* hello world in r_egg */
write@syscall(4); //x64 write@syscall(1);
exit@syscall(1); //x64 exit@syscall(60);

main@global(128) {
 .var0 = "hi!\n";
 write(1,.var0, 4);
 exit(0);
}
$ ragg2 -O -F hi.r
$ ./hi
hi!

$ cat hi.c
main@global(0,6) {
 write(1, "Hello0", 6);
 exit(0);
}
$ ragg2 hi.c
$ ./hi.c.bin
Hello
rarun2
A launcher for running programs within different environments, with different arguments, permissions, directories, and overridden default file descriptors.
User Interfaces
Radare2 has seen many different user interfaces being developed over the years.
Maintaining a GUI is far from the scope of developing the core machinery of a reverse engineering toolkit; It is preferred to have a separate project and community, allowing both projects to collaborate and improve alongside each other. This allows individual developers to focus entirely on implementing a CLI or GUI feature instead of trying to juggle both graphical implementation and the low-level logic of the core CLI.
In the past, there have been at least 5 different native user interfaces (ragui, r2gui, gradare, r2net, bokken) but none of them got enough maintenance power to take off and they all died.
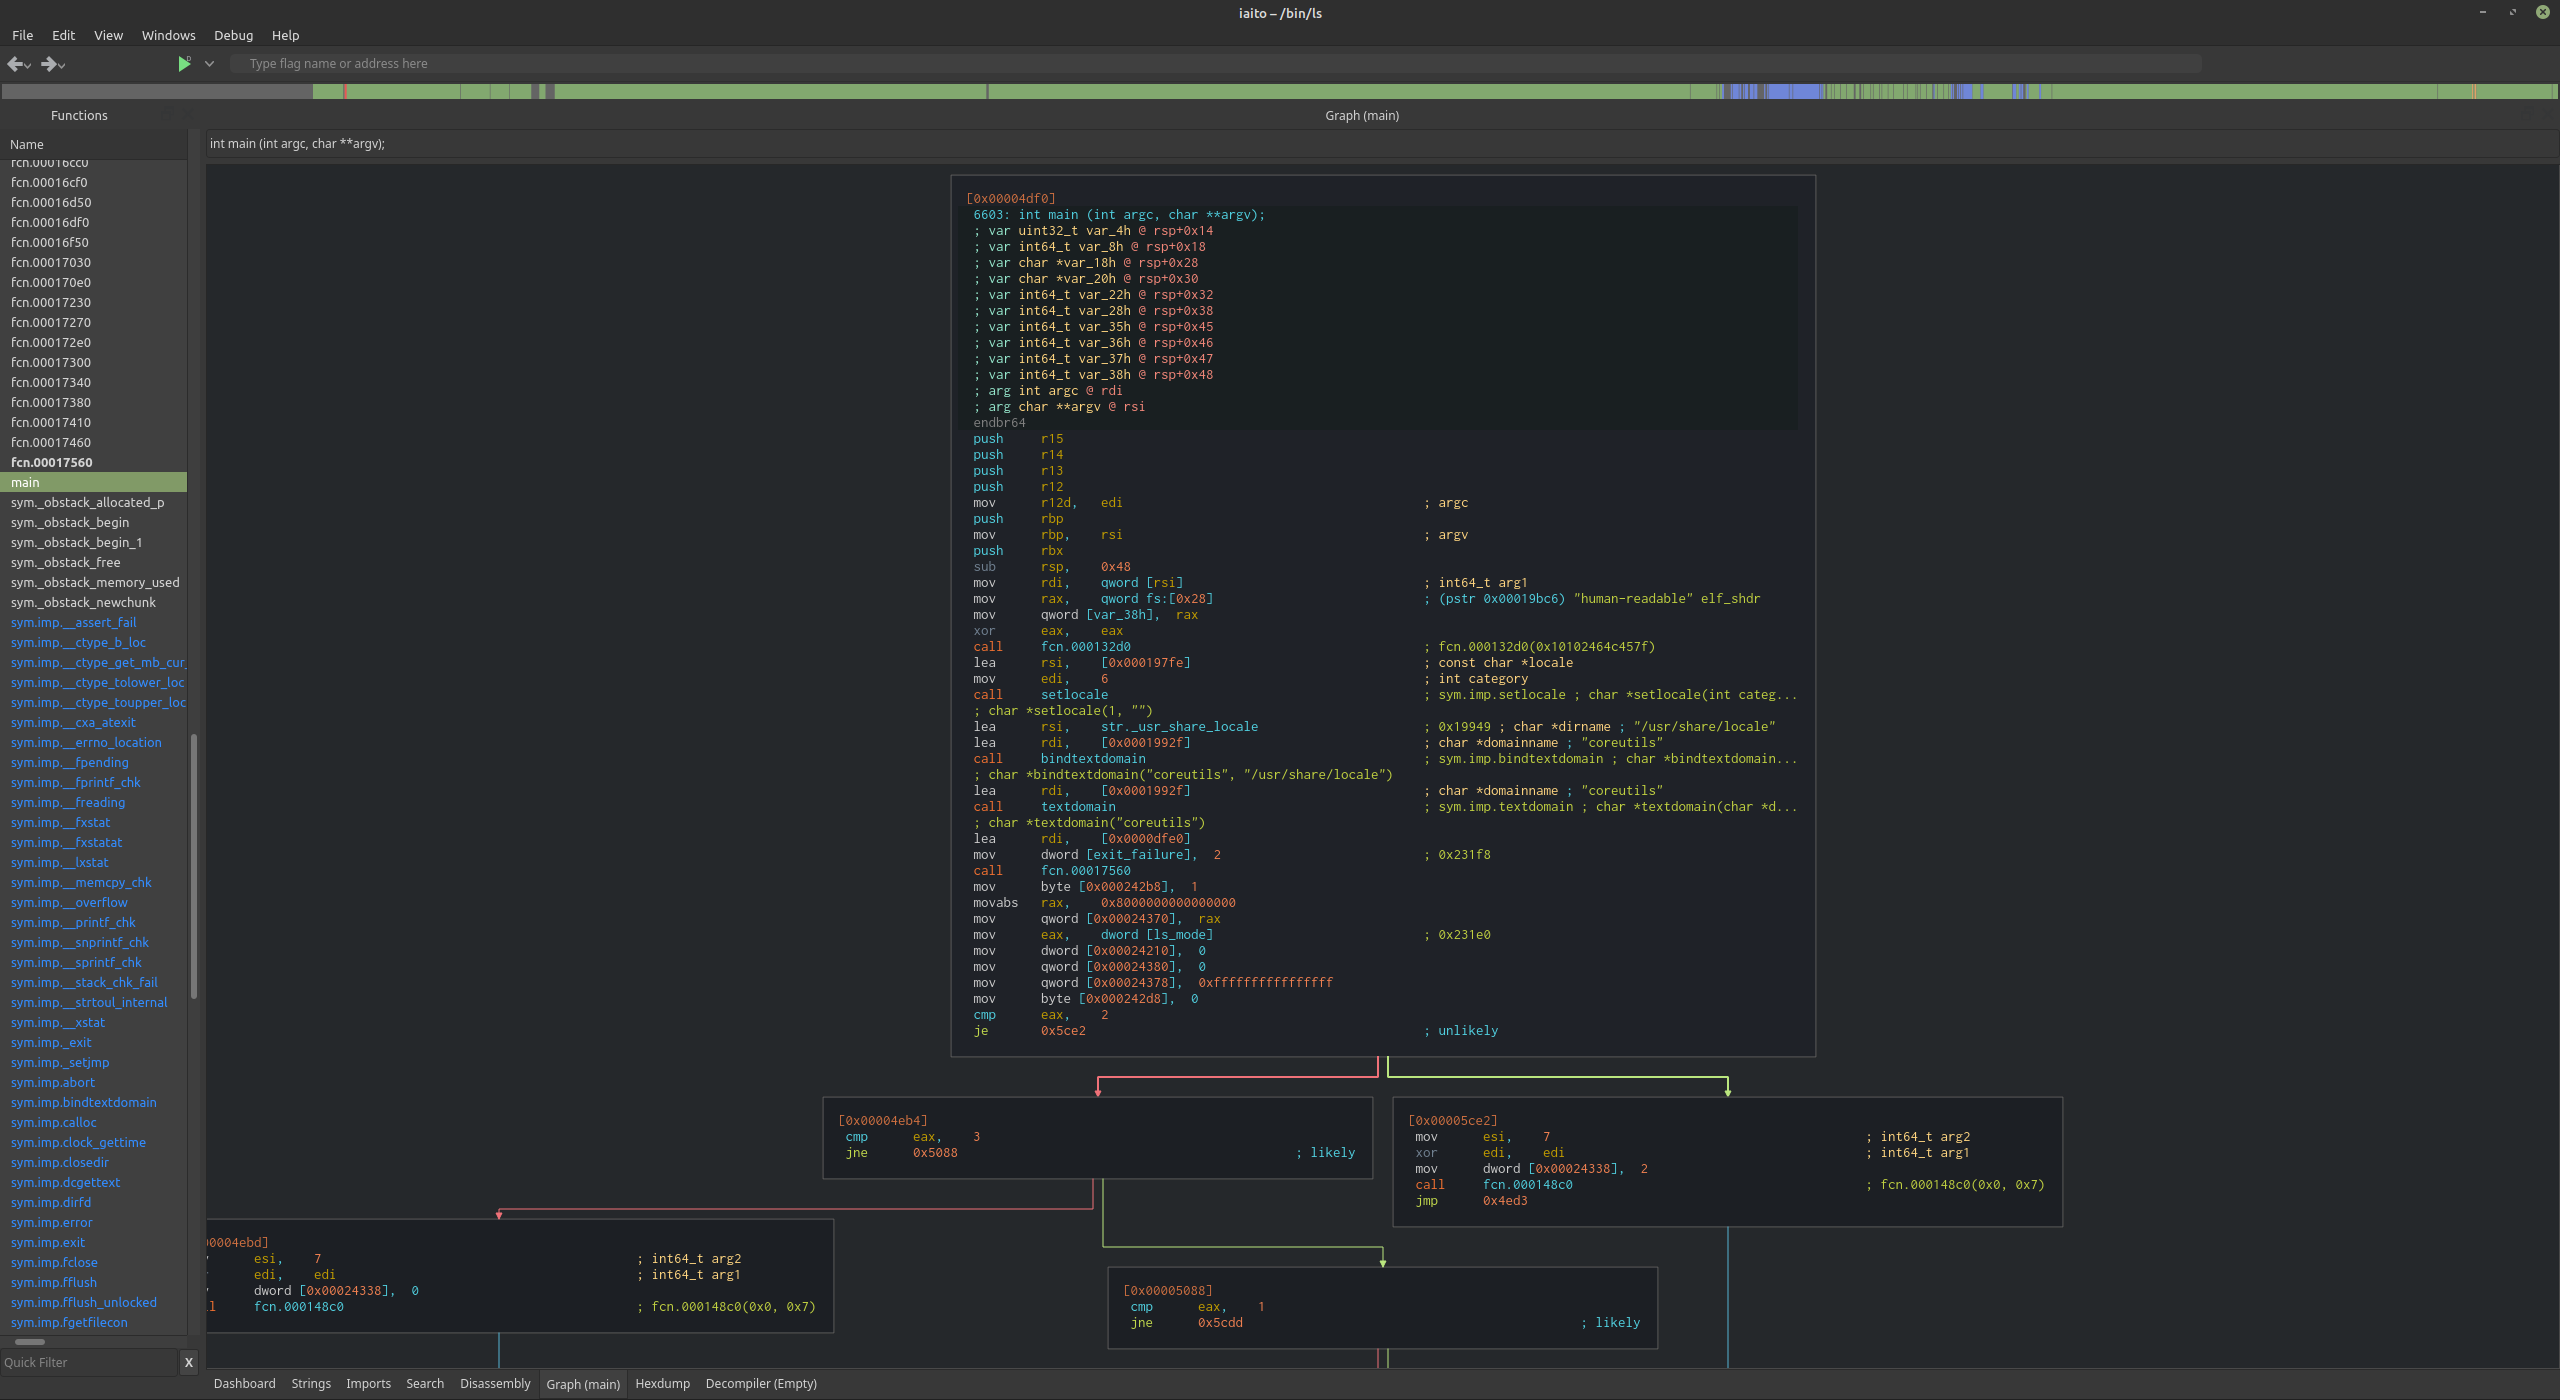
Iaito
The current main radare2 GUI is Iaito. It is written in C++ using Qt and was originally authored by Hugo Teso.
- Download: https://github.com/radareorg/iaito
WebUI
In addition, r2 includes an embedded webserver with a basic HTML/JS interface. Add -c=H to your command-line flags to automatically start the webserver and open it in your browser.
$ r2 -c=H /bin/ls
r2con
Starting in 2016 we organized the first public and international congress about radare.
Highlighting all aspects of radare2, this congress brings the oportunity to everyone to learn more about manual and automated reverse engineering, static and dynamic analysis, fuzzing, forensics, exploiting, unpacking, malware, ... this congress allows everyone to understand how to use r2 and how to extend it for your own purposes, it will also serve as an excuse for all developers to meet and discuss design and implementation tips for the future of the project.
The congress was started as a 2 days filled with trainings and presentations.
Other rules and aspects that make r2con a special conference:
- Chill ambient with beers and sunny weather
- All presentations are recorded and published (some trainings too)
- Located in Barcelona, organized the 2nd week of September
- Small event, started with 50 attendeeds, reached it's top with 300
- r2wars and crackme competitions
- Vegan meals
- Chiptune party
Contribute!
If you want to contribute to the Radare2 book, you can do it at the Github repository.
Suggested contributions include:
- Crackme writeups
- CTF writeups
- Explain how to use Radare2
- Documentation to help developers
- Conference presentations/workshops using Radare2
- Missing content from the Radare1 book updated to Radare2
Please get permission to port any content you do not own/did not create before you put it in the Radare2 book.
See https://github.com/radareorg/radare2/blob/master/DEVELOPERS.md for general help on contributing to radare2.
Installation
Radare2 is available for a wide range of target operating systems and architectures, making it a versatile tool for reverse engineering tasks.
Whether you are using Windows, Linux, macOS, or even mobile or embedded operating systems, radare2 can be installed and utilized effectively. This chapter provides a comprehensive guide on how to get radare2 up and running on your system, covering various methods from downloading and installing binary distributions to compiling the software from source code. This flexibility ensures that users can tailor the installation process to their specific needs and system configurations.
To install radare2, users can choose from several options. One straightforward method is to download precompiled binary distributions, which are available for many platforms and can be installed quickly with minimal setup.
But usually the recommended way to install is by compiling it from the git repository, the upstream branch is always stable and ready to use for everyone.
The chapter also delves into specific configuration options and post-installation setup to optimize radare2 for different use cases, ensuring that you have a fully functional and efficient reverse engineering environment which is key to follow up with the rest of contents in the book.
Downloading
You can get radare from the GitHub repository: https://github.com/radareorg/radare2
Binary packages are available for a number of operating systems (Ubuntu, Maemo, Gentoo, Windows, iPhone, and so on). But you are highly encouraged to get the source and compile it yourself to better understand the dependencies, to make examples more accessible and, of course, to have the most recent version.
Downloadable versions of the latest releases of Radare2 are available in https://github.com/radareorg/radare2/releases itself.
For distributions we aim to recommend the use of release source tarballs to build the program. But users may probably want to use the last code from git that's why we always mention "use r2 from git", because we don't aim to fix bugs in releases, always test your bug or problems in the last development branch master.
The radare development repository is often more stable than the 'stable' releases. To obtain the latest version:
$ git clone https://github.com/radareorg/radare2.git
This will probably take a while, so take a coffee break and continue reading this book.
To update your local copy of the repository, use git pull anywhere in the radare2 source code tree:
$ git pull
The most common way to get r2 updated and installed system wide is by using, but we may learn more about building
$ sys/install.sh
r2env
r2env is a lightweight tool version managers: either clone the repo and add its bin to your PATH and enable shell integration, or install via pip. The simplest option:
pip install r2env
This makes the r2env command available and sets up shims for r2 / radare2 so the active version is used automatically.
Replace <version-or-ref> with a tag, branch, or other reference you want to install.
r2env install <version-or-ref>
To remove a build later, use r2env uninstall (see the repo README for the exact syntax and any extra flags). If anything behaves unexpectedly, consult the r2env GitHub README for up-to-date flags, usage details, and platform-specific dependencies.
Helper Scripts
Take a look at the scripts in sys/, they are used to automate stuff related to syncing, building and installing r2 and its bindings.
The most important one is sys/install.sh. It will pull, clean, build and symstall r2 system wide.
Symstalling is the process of installing all the programs, libraries, documentation and data files using symlinks instead of copying the files.
By default it will be installed in /usr/local, but you can specify a different prefix using the argument --prefix.
This is useful for developers, because it permits them to just run 'make' and try changes without having to run make install again.
Building From Source
One of radare2's core development principles is portability; consequently, it can be compiled on many systems and architectures. To achieve this and maximize flexibility, we maintain two build systems: GNU Make (classic autotools style ./configure + make) and Meson (modern ninja-based builds).
Most contributors work on GNU/Linux with GCC or macOS with Clang, so those platforms are the most thoroughly tested and best supported. However, builds are also possible with TinyCC, Emscripten, Microsoft Visual Studio, Sun Studio, etc.
Some features can be disabled at compile time to tailor the binary for your environment:
- Pick which plugins are built (static vs shared)
- Choose system or bundled third-party libraries (capstone, openssl, zlib, etc.)
- Disable the native debugger
- Disable fork/exec support
- Disable threading support
The debugger can be disabled at configure time — useful for WebAssembly builds, sandboxed environments, or ports to platforms where the debugger is not supported. Use the --disable-debugger configure flag (or set -Ddebugger=false with meson) to disable it.
Currently, the debugger layer is available on many platforms (Windows, Linux, macOS, BSDs, etc.). Some I/O plugins are OS-specific and may require third-party tools such as GDB, WinDBG, or Wine.
Build systems overview
- GNU Make (./configure + make): traditional, flexible, well suited for Unix-like systems and advanced customization via environment variables.
- Meson + Ninja: faster incremental builds, better Windows support, declarative options. We expose most important knobs as meson options (see below).
Choose the system you prefer; both can be used to produce equivalent results.
Selecting plugins: ./configure-plugins (Make-based workflow)
radare2 ships with a small helper script named configure-plugins (found in the repository root). Its purpose is to generate plugins.cfg and the generated build headers/make fragments that control which plugins are built as static (compiled into the libraries) or shared (built as separate .so/.dylib files).
Key points:
- Default plugin list is taken from
dist/plugins-cfg/plugins.def.cfg. Whenplugins.cfgis missing,configure-pluginscopies the default file there. plugins.cfgcontains two shell variables:STATICandSHARED, which list plugin names in the formlib.plugin(for exampleio.debug,asm.x86)../configure-pluginsreadsplugins.cfgand generates:libr/config.h(macros describing which plugins are static)libr/asm/d/config.inc(gperf registrations for static asm plugins)libr/config.mk(Makefile fragments used by the build)
Usage and useful flags (from the script help):
./configure-plugins --shared name1 name2— mark the named plugins as shared (remove from STATIC and add to SHARED)../configure-plugins --static name1 name2— mark the named plugins as static (compiled into the relevant library)../configure-plugins --list— print the current static / shared lists../configure-plugins --rm-static <dir>— when provided a directory (e.g. an installation lib dir), remove shared plugin files that correspond to plugins marked as static (helper when switching a build to static plugins to avoid stale shared objects)../configure-plugins --without-gpl— useplugins.nogpl.cfgdefaults instead of the distributed one (useful to avoid GPL-only plugins)../configure-plugins -n— do nothing (don't generate files, useful to inspect what would happen).
Notes:
- After changing plugins with
configure-plugins, re-run./configureand rebuild (or re-run the Make build) so the generated headers and make fragments are picked up. - For Meson builds, plugin selection works differently (see the Meson options section). Meson has an option
-Dplugins='comma,separated,list'to build only a specific set of plugins.
If you want to customize further or need help choosing specific plugin names, check dist/plugins-cfg/plugins.def.cfg for the canonical default list, and src/plugins documentation (see src/plugins/dev.md) for guidance on plugin naming and structure.
The most relevant ./configure options (Make)
When using ./configure there are many options; these are the most commonly useful ones and how to use them.
-
Installation directories
--prefix=/path— set installation prefix (default/usr/local).--exec-prefix=EPREFIX— install arch-dependent files in EPREFIX.
-
Tuning the install paths
--bindir,--libdir,--datadir,--sysconfdir,--mandir, etc. — set specific target directories.
-
Cross-build settings
--host=HOSTand--build=BUILD— useful when cross-compiling.
-
Feature toggles (picks the most important ones)
--disable-debugger— build without native debugger support.--disable-threads— build without threading APIs.--disable-loadlibs— disable runtime loading of plugin libraries (forces static behaviour in some cases).--without-qjs— build without QuickJS.--without-dylink— disable dynamic loading of plugins.--without-fork— disable fork support.--without-ptrace-wrap— do not build ptrace-wrap support (used by some debugger backends).--without-gpl— avoid building GPL-only components.
-
Third-party libraries and system vs bundled
--with-capstone4,--with-capstone5,--with-capstone-next— choose which bundled capstone branch to build.--with-syscapstone/--without-syscapstone— force use (or avoid) system capstone.--with-syslz4,--with-syszip,--with-sysxxhash— force use of system libraries when available.--with-ssl/--with-ssl-crypto— enable SSL support if available.--with-libuv— prefer libuv when available.
-
Misc
--with-rpath— set rpath handling in built binaries.--with-new-abi— enable the new/experimental ABI changes.--with-compiler=...or setCC=environment variable to choose compiler.
Environment variables you will commonly set when invoking configure or make:
CC— C compiler (e.g.,CC=clang).CFLAGS— extra compiler flags (e.g.,CFLAGS='-O2 -g').LDFLAGS— linker flags (LDFLAGS='-L/opt/local/lib').CPPFLAGS— preprocessor flags (CPPFLAGS='-I/opt/local/include').
Examples (Make):
-
Build for local prefix and disable debugger:
./configure --prefix=$HOME/.local --disable-debugger make make install
-
Cross-compile example (simple):
./configure --host=arm-linux-gnueabihf --prefix=/usr make
After running ./configure (and/or configure-plugins) build with make or gmake depending on your platform.
Meson: options and how to use them
The Meson build exposes many options (see meson_options.txt). Meson options are passed via -Dname=value when configuring the build directory. Some common options and their meanings:
-
General build options
-Dlocal=true|false— prepare a local/side-by-side installation (sets rpath if needed).-Dstatic_runtime=true— link all libraries statically into the binary.-Dblob=true— build a single dispatching binary (calls different handlers depending on argv[0]).-Dwant_threads=true|false— enable threading support.-Ddebugstuff=true|false— enable handling of debug hooks and logs.-Dchecks_level=<int>— control assert levels (0..3).
-
Plugin selection
-Dplugins='comma,separated,list'— explicitly build only the named plugins (plugin names withoutp/prefix; uselib.pluginformat, e.g.io.debug,asm.x86).-Duse_dylink=true|false— enable (default true) building of shared plugin libraries.
-
Capstone / third-party selection
-Dwant_capstone=true|false— build capstone support.-Duse_sys_capstone=true|false— use system capstone instead of bundled.-Duse_capstone_version=v4|v5|next— select which capstone branch to use.-Duse_sys_magic=true|false,-Duse_sys_zlib=true|false,-Duse_sys_lz4=true|false,-Duse_sys_xxhash=true|false— prefer system libraries.
-
Debugger / runtime
-Ddebugger=true|false— build with debugger support.-Dwant_qjs=true|false— enable QuickJS runtime.-Dwant_ptrace_wrap=true|false— build ptrace wrapper support.
-
Tests and extras
-Denable_tests=true|false— build unit tests (test/unit).-Denable_libfuzzer=true|false— build libFuzzer targets.-Denable_r2r=true|false— build the r2r regression executable.
A few additional Meson-specific options you will find handy:
-Dstatic_themes=true— compile default themes into the binary so they are available even if not installed on disk.-Dnogpl=true— avoid GPL-only components.-Duse_webui=true— build/install bundled WebUIs.
Examples (Meson):
- Basic configure + build (default options):
meson setup builddir
ninja -C builddir
- Configure with options and a prefix:
meson setup builddir --prefix=/usr -Dlocal=true -Dwant_qjs=false -Duse_capstone_version=v5
ninja -C builddir
ninja -C builddir install
- Single-line example using environment variables and a release build:
CC=clang LDFLAGS='-fuse-ld=gold' meson setup release --buildtype=release --prefix=$HOME/.local -Dlocal=true -Dstatic_runtime=false
ninja -C release
Notes on plugin selection parity between Make and Meson:
- Make uses
configure-pluginsand theplugins.cfgmechanism. - Meson accepts a
-Dpluginsoption and also exposes flags for static/shared linking via-Duse_dylinkand-Dstatic_runtime. The semantics are slightly different but accomplish the same goal: control which plugins are built and how they are linked.
Quick workflow examples
Build with GNU Make, local prefix, and static plugins for smaller distribution:
./configure-plugins --static io.bind asm.mycpu
./configure --prefix=$HOME/.local --disable-debugger --without-qjs
make -j$(nproc)
make install
The Make build system also permits doing installations with symlinks, so you don't have to reinstall after recompiling because all system-wide files will be pointing to the ones in the builddir.
Build with Meson, minimal plugin set, release build:
meson setup release --buildtype=release --prefix=$HOME/.local -Dplugins='io.debug,asm.x86' -Dwant_qjs=false -Duse_sys_capstone=true
ninja -C release
ninja -C release install
Cleaning and housekeeping
To ensure a clean tree before rebuilding:
git clean -xdf
git reset --hard origin/master
git pull
If you need to remove previously installed files when switching prefixes, run the make purge step after configuring with the intended prefix.
Windows Binaries
To build radare2 on Windows, use the Meson build system. While you can compile r2 on Windows with Cygwin, MinGW, or WSL using the acr/make build system, those methods are unofficial and unsupported and may produce unexpected results.
Prebuilt binaries are available on the releases page. If you're signed in to GitHub, you can also access the CI artifacts that are produced for every commit.
Prerequisites
Building radare2 on Windows using Microsoft Visual Studio involves setting up several key tools. You will need to install Microsoft Visual Studio, along with the Meson build system and the Ninja build tool. These tools are necessary for configuring and compiling the radare2 source code.
These are the requirements to get the environment ready.
- 3 GB of free disk space
- Visual Studio (2019 or higher)
- Python 3
- Meson
- Ninja
- Git
Downloading the code
You may need to download the zip/tgz or git clone the last code from git in order to run the following commands in cmd or powershell:
git clone https://github.com/radareorg/radare2
Follow these instructions to pull the build tools to get the project compiled on your Windows machine.
Native Windows Compilation
The build process on windows has been heavily simplified to just 3 batch scripts, which is how it's executed in the CI and the recommended workflow.
The scripts expect you to have Python, Git, Visual Studio and PowerShell, and will run Meson and Ninja by default (both easily installable via pip).
preconfigure.batfind vscode, checks for python installation etcconfigure.batrun the meson configure step.make.batbuild radare2 and createprefixdirectory with the distributable folder.
You can run make from the root directory of the project everytime you modify the source code in case you are developing to get the new binaries ready to test in that directory.
The configure.bat will also create a directory named vs which contains the visual studio project in case you want to use the graphical IDE for developing or debugging. This .vsproj is constructed automatically from the meson scripts, this simplifies maintainance.
Crosscompiling
MinGW builds are supported, but official releases are compiled with the Microsoft compiler to maximize compatibility and standardization with other Windows software.
If you want to build r2 for Windows on Linux, use the sys/mingw32.sh script — it autodetects the MinGW toolchain on your system and produces the .exe and .dll files.
Note: Cygwin support was largely removed several years ago. Today, most users prefer WSL or native builds, which also work well on ReactOS and across many Windows versions without requiring extra compatibility software.
Installing Build Dependencies
Take the following sub-sections of this chapter as a guide to install the software you need to compile radare2 from source:
Install Visual Studio 2019 (or higher)
Please install Visual Studio with the Visual C++ toolset (MSVC), the C++ libraries, and the Windows SDK that matches your target platform.
You can download Visual Studio — the Community editions are free — from here:
Install Python3
Conda is probably the best Python distribution for Windows, but if you already have Python installed you can skip the following steps.
You can install Python3 on Windows using Conda, the official installer, or package managers like choco or winget — pick whichever you prefer.
After installing, make sure the Python bin directory is on your PATH so you can open CMD or PowerShell and run python3 (for example, python3 --version to verify).
Now you are ready to install meson and ninja — the radare2 build tools — using pip:
pip install ninja
pip install meson
Install Git for Windows
All Radare2 code is managed with Git and hosted on GitHub.
To install Git for Windows, follow these steps:
-
Download Git for Windows from the official website.
-
In the installation wizard, choose the following options:
- Use a TrueType font in all console windows
- Use Git from the Windows Command Prompt
- Use the native Windows Secure Channel library (instead of OpenSSL)
- Checkout Windows-style, commit Unix-style line endings (
core.autocrlf=true) - Use Windows' default console window (instead of Mintty)
*. After installation, verify it by running git --version to confirm Git is available.
Compiling for Android
Radare2 can be cross-compiled for other architectures/systems as well, like Android.
Prerequisites
- Python 3
- Make
- Git
- Binutils
- pkg-config
Step-by-step
Download and Install Termux App
Download the Termux application from the official site and install it.
Update & Upgrade
First time installation of termux require updating the repo to fetch all the available packages.
$ pkg update && pkg upgrade -y
Install required packages
$ pkg install build-essential git python3 binutils wget pkg-config
build-essential contains all the required build tool like make,gcc etc.
Download or clone Radare2 repo
$ git clone https://github.com/radareorg/radare2
If you are limited by disk space, you can either clone the repository with a depth of 1 by adding --depth 1 in clone command or build from a tarball. Cloning the repository provides the most up-to-date code, whereas tarballs are only generated during releases, which may not contains latest update and bug fixes.
Build and Installation
Building and installing Radare2 after cloning the repository is straightforward using the following commands:
cd radare2
sh sys/install.sh
It will install required packages if you already didn't and start the installation.
~/radare2 $ sh sys/install.sh
/data/data/com.termux/files/home/radare2
Termux environment detected. Installing necessary packages
No mirror or mirror group selected. You might want to select one by running 'termux-change-repo'
Checking availability of current mirror:
[*] https://packages-cf.termux.dev/apt/termux-main: ok
Hit:1 https://packages-cf.termux.dev/apt/termux-main stable InRelease
Reading package lists... Done
Building dependency tree... Done
Reading state information... Done
All packages are up to date.
No mirror or mirror group selected. You might want to select one by running 'termux-change-repo'
Checking availability of current mirror:
[*] https://packages-cf.termux.dev/apt/termux-main: ok
Reading package lists... Done
Building dependency tree... Done
Reading state information... Done
git is already the newest version (2.45.2).
build-essential is already the newest version (4.1).
binutils is already the newest version (2.42).
pkg-config is already the newest version (0.29.2-2).
0 upgraded, 0 newly installed, 0 to remove and 0 not upgraded.
/data/data/com.termux/files/home/radare2
From https://github.com/radareorg/radare2
 * branch            master     -> FETCH_HEAD
Already up to date.
[*] Finding make is /data/data/com.termux/files/usr/bin/make OK
[*] Configuring the build system ... OK
[*] Checking out capstone... OK
[*] Checking out vector35-arm64... OK
[*] Checking out vector35-armv7... OK
[*] Running configure... OK
[*] Ready. You can now run 'make'.
configure-plugins: Loading ./plugins.cfg ..
configure-plugins: Generating libr/config.h
configure-plugins: Generating libr/asm/d/config.inc
configure-plugins: Generating libr/config.mk
........
........
cd "/data/data/com.termux/files/usr/lib/radare2/" && rm -f last && ln -fs 5.9.3 last
cd "/data/data/com.termux/files/usr/share/radare2/" && rm -f last && ln -fs 5.9.3 last
mkdir -p "/data/data/com.termux/files/usr/share/radare2/5.9.3/"
/data/data/com.termux/files/usr/bin/sh ./configure-plugins --rm-static //data/data/com.termux/files/usr/lib/radare2/last/
configure-plugins: Loading ./plugins.cfg ..
Removed 0 shared plugins that are already static

~/radare2 $ r2 -v
radare2 5.9.3 275 @ linux-arm-64
birth: git.5.9.2-146-g13ea460 2024-06-28__20:22:10
commit: 13ea460b3ea28ef37361eb1d679561037c521d27
options: gpl -O? cs:5 cl:2 make
Flatpak releases
The easiest way to get iaito and radare2 installed in your Linux distro is by using Flatpak.
This method ensures a well-tested, sandboxed environment that doesn't interfere with your system dependencies. In this section, we will guide you through the steps to install and configure iaito using Flatpak.
First, ensure that Flatpak is installed and configured on your system. If Flatpak is not already installed, you can add it through your distribution's package manager. For example, on Debian-based systems, you can install Flatpak with the following command:
sudo apt install flatpak
Next, you need to add the Flathub repository, which hosts iaito and many other applications. Run the following command to add Flathub:
flatpak remote-add --if-not-exists flathub https://flathub.org/repo/flathub.flatpakrepo
With Flatpak and the Flathub repository set up, you can install iaito by executing the following command in your terminal:
flatpak install flathub org.radare.iaito
During the installation process, you may be prompted to confirm the installation and to enter your user password. Flatpak will handle all necessary dependencies for iaito, ensuring a smooth installation process. Once the installation is complete, you can launch iaito using the following command:
flatpak run org.radare.iaito
Enable optional Web UI
By default neither the web component nor the network permissions are enabled, if you want to be able to start the web UI from menu Edit > Start web server you need to run this commands:
flatpak install --user org.radare.iaito.webui
flatpak override --user --share=network org.radare.iaito
CLI Configuration
To allow usage of CLI radare applications you need to define the following aliases:
alias r2='flatpak run --command=r2 org.radare.iaito'
alias r2agent='flatpak run --command=r2agent org.radare.iaito'
alias r2frida-compile='flatpak run --command=r2frida-compile org.radare.iaito'
alias r2p='flatpak run --command=r2p org.radare.iaito'
alias r2pm='flatpak run --command=r2pm --share=network --devel org.radare.iaito'
alias r2r='flatpak run --command=r2r org.radare.iaito'
alias r2sdb='flatpak run --command=r2sdb org.radare.iaito'
alias rabin2='flatpak run --command=rabin2 org.radare.iaito'
alias radare2='flatpak run --command=radare2 org.radare.iaito'
alias radiff2='flatpak run --command=radiff2 org.radare.iaito'
alias rafind2='flatpak run --command=rafind2 org.radare.iaito'
alias rafs2='flatpak run --command=rafs2 org.radare.iaito'
alias ragg2='flatpak run --command=ragg2 org.radare.iaito'
alias rahash2='flatpak run --command=rahash2 org.radare.iaito'
alias rapatch2='flatpak run --command=rapatch2 org.radare.iaito'
alias rarun2='flatpak run --command=rarun2 org.radare.iaito'
alias rasign2='flatpak run --command=rasign2 org.radare.iaito'
alias rasm2='flatpak run --command=rasm2 org.radare.iaito'
alias ravc2='flatpak run --command=ravc2 org.radare.iaito'
alias rax2='flatpak run --command=rax2 org.radare.iaito'
alias sleighc='flatpak run --command=sleighc org.radare.iaito'
alias yara='flatpak run --command=yara org.radare.iaito'
alias yarac='flatpak run --command=yarac org.radare.iaito'
With this commands, by default no local files will be accesible.
To allow acces to a folder please use the special permissions procedure explained below or use zenity inside the flatpak sandbox to open a dialog using XDG portals.
Example:
$ alias r2='flatpak run --command=r2 org.radare.iaito'
$ r2 -
[0x00000000]> o `!zenity --file-selection`
Sandbox Configuration
To manage the sandbox permissions for iaito, you can use the Flatseal utility. Flatseal allows you to configure Flatpak application permissions easily.
Install Flatseal with the following command:
flatpak install flathub com.github.tchx84.Flatseal
Then, run Flatseal to adjust iaito's permissions:
flatpak run com.github.tchx84.Flatseal
Alternatively this can be configured via CLI using flatpak override, here there are some examples on how to configure it:
- To allow radare plugins to connect to your network or Internet:
flatpak override --user --share=network org.radare.iaito
- To allow some plugins to attach to a usb device:
flatpak override --user --device=all org.radare.iaito
- To allow some plugins to access to an specific folder not selected by the GUI (with optional
:roto only allow read only):
flatpak override --user --filesystem=/mnt/hdd:ro org.radare.iaito
- To reset back to default required permissions this command can be used:
flatpak override --user --reset org.radare.iaito
The Flatpak version of iaito comes bundled with several useful plugins: r2dec, r2ghidra, r2frida, r2yara, and r2ai. These plugins enhance the functionality of radare2, providing additional capabilities for decompilation, integration with Ghidra, dynamic analysis with Frida, and YARA rule matching.
Snap releases
The Snap package system is a cross-platform solution for packaging and distributing software on Linux. Snaps bundle all necessary dependencies, ensuring they work on any Linux distribution. This makes Snap an ideal choice for distributing radare2.
Radare2 is distributed via Snap by building it from the continuous integration (CI) system for each release. This means every new official release is packaged and made available to Snap users automatically. While the builds are automated, they are only done for official releases, not for every git commit. This ensures that Snap users have a stable and tested version of radare2.
Snap packages can run in a sandboxed environment, isolating them from the rest of the system. This enhances security and prevents conflicts with other software. Sandboxed snaps can request permissions for specific resources, but they remain contained within their sandbox, ensuring stability and security.
To use radare2 Snap builds, note that they have different program names to avoid conflicts with other installations. Snap versions of radare2 programs are prefixed with radare2.. For example, to run the stable build, use:
sudo snap install radare2 --classic
radare2.radare2 /bin/ls
radare2.rabin2 -z /bin/sleep
This way, you can maintain a stable version alongside a development version without conflicts.
To allow using radare commands without this prefix, it can be solved by using shell aliases. So as an example could be something like this:
alias r2='radare2.r2'
alias r2agent='radare2.r2agent'
alias r2frida-compile='radare2.r2frida-compile'
alias r2mcp='radare2.r2mcp'
alias r2p='radare2.r2p'
alias r2pm='radare2.r2pm'
alias r2r='radare2.r2r'
alias r2sdb='radare2.r2sdb'
alias rabin2='radare2.rabin2'
alias radiff2='radare2.radiff2'
alias rafind2='radare2.rafind2'
alias rafs2='radare2.rafs2'
alias ragg2='radare2.ragg2'
alias rahash2='radare2.rahash2'
alias rapatch2='radare2.rapatch2'
alias rarun2='radare2.rarun2'
alias rasign2='radare2.rasign2'
alias rasm2='radare2.rasm2'
alias ravc2='radare2.ravc2'
alias rax2='radare2.rax2'
alias sleighc='radare2.sleighc'
alias yara='radare2.yara'
alias yarac='radare2.yarac'
alias clang-format-radare2='radare2.clang-format-radare2'
The snap build comes bundled with several useful plugins: r2dec, r2ghidra, r2frida, r2yara, r2ai, and r2mcp. These plugins enhance the functionality of radare2, providing additional capabilities for decompilation, integration with Ghidra, dynamic analysis with Frida, and YARA rule matching.
Iaito Snap
Also iaito, as a radare GUI, can be installed using this packaging system.
To install it is required to run the following command:
sudo snap install iaito --classic
In the same way radare2 snap include a set of commands, iaito snap also include radare2 commands prefixed with iaito. (for example iaito.r2, iaito.rax2,...).
This commands can be used from CLI, and allow to use the same environment as iaito GUI.
But to use radare2 from CLI it is prefered to install and use the main radare2 snap package.
Configure MCP
Claude Desktop Integration
In the Claude Desktop app, press CMD + , to open the Developer settings. Edit the configuration file and restart the client after editing the JSON file as explained below:
-
Locate your Claude Desktop configuration file:
- macOS:
~/Library/Application Support/Claude/claude_desktop_config.json - Windows:
%APPDATA%\Claude\claude_desktop_config.json
- macOS:
-
Add the following to your configuration file:
{
  "mcpServers": {
    "radare2": {
      "command": "radare2.r2mcp"
    }
  }
}
VS Code Integration
To use r2mcp with GitHub Copilot Chat in Visual Studio Code by adding it to your user configuration (see also add an mcp server to vscode):
- Open the Command Palette with
CMD + Shift + P(macOS) orCtrl + Shift + P(Windows/Linux). - Search for and select
Copilot: Open User Configuration(typically found in~/Library/Application Support/Code/User/mcp.jsonin macOS). - Add the following to your configuration file:
{
  "servers": {
    "radare2": {
      "type": "stdio",
      "command": "radare2.r2mcp"
    }
  },
  "inputs": []
}
Zed Integration
You can use r2mcp with Zed as well by adding it to your configuration:
- Open the command palette:
CMD + Shift + P(macOS) orCtrl + Shift + P(Windows/Linux).1º - Search of
agent: open configurationor search ofsettings. - Add your server as such:
  "context_servers": {
    "r2-mcp-server": {
      "source": "custom",
      "command": "radare2.r2mcp"
    }
  }
Note: you will need another LLM agent, such as Claude, Gemini or else to be able to use it.
Docker containers
Docker is a software that use OS-level virtualization to deliver software in packages called images and containers when running them. Containers bundle their own software and are isolated from the host system, this prevents conflicts with other installed software.
There are several implamentations to run Docker images but radare2 images only have been tested with docker, podman and nerdctl.
Available images
There are 2 mantained docker images, one for the official releases and one targeted to be build locally from GIT. Both can be used similarly.
Stable version
This docker image can be found in Docker Hub and contain the latest radare2 stable version. This image is based on Ubuntu and the same radare2 snap build. The Dockerfile used to build it can be found in this dedicated repository.
The resulting build includes the following projects:
- radare2
- r2ghidra
- r2frida (only in supported platforms)
- r2dec
- r2yara
- r2ai
- r2mcp
- r2pipe (for Python)
- r2book (as info page)
To use this docker image you can use either:
docker run -ti radare/radare2
podman run -ti docker.io/radare/radare2
nerdctl run -ti radare/radare2
To use the docker image as one shot so it removes everything inside the container on exit just add --rm as follows:
docker run --rm -ti radare/radare2
Another example to use for debugging inside the docker:
docker run --tty --interactive --privileged --cap-add=SYS_PTRACE --security-opt seccomp=unconfined --security-opt apparmor=unconfined radare/radare2
GIT version
Alternatively there is a version from radare2 GIT aimed to be build locally, also called r2docker.
This will build an image using Debian with radare2 from GIT with latest changes.
The Dockerfile to build can be found inside the dist/docker directory in the radare2 source tree.
To build this other image run the following lines:
git clone https://github.com/radareorg/radare2.git
cd radare2
make -C dist/docker
This will build an image with the following plugins by default:
It is possible to specify more packages using the R2PM make variable:
make -C dist/docker R2PM=radius2
Also, you can select the architecture (amd64 / arm64) to compile the image by using the ARCH make variable.
This Dockerfile also used by Remnux distribution from SANS, and is available on the Docker Hub, but it might not contain latest changes.
Run a container as r2web server
By default both images are intended to be used in a interactive terminal.
But both can also be launched directly to use the radare2 web UI.
The do so it can be launched using the following command:
docker run -p 9090:9090 radare/radare2 r2 -c '=h' -
Or the following docker-compose structure:
version: "3.8"
services:
  radare2:
    image: radare/radare2
    command: r2 -c '=h' -
    network_mode: bridge
    ports:
      - "9090:9090"
Or if debugging functionality is required:
version: "3.8"
services:
  radare2:
    image: radare/radare2
    command: r2 -c '=h' -
    network_mode: bridge
    ports:
      - "9090:9090"
    privileged: true
    cap_add:
      - SYS_PTRACE
    security_opt:
      - "seccomp=unconfined"
      - "apparmor=unconfined"
Run a container as MCP server
Claude Desktop Integration
In the Claude Desktop app, press CMD + , to open the Developer settings. Edit the configuration file and restart the client after editing the JSON file as explained below:
-
Locate your Claude Desktop configuration file:
- macOS:
~/Library/Application Support/Claude/claude_desktop_config.json - Windows:
%APPDATA%\Claude\claude_desktop_config.json
- macOS:
-
Add the following to your configuration file:
{
  "mcpServers": {
    "radare2": {
      "command": "docker",
      "args": ["run", "--rm", "-i", "-v", "/tmp/data:/data", "--entrypoint", "r2mcp", "radare/radare2"]
    }
  }
}
VS Code Integration
To use r2mcp with GitHub Copilot Chat in Visual Studio Code by adding it to your user configuration (see also add an mcp server to vscode):
- Open the Command Palette with
CMD + Shift + P(macOS) orCtrl + Shift + P(Windows/Linux). - Search for and select
Copilot: Open User Configuration(typically found in~/Library/Application Support/Code/User/mcp.jsonin macOS). - Add the following to your configuration file:
{
  "servers": {
    "radare2": {
      "type": "stdio",
      "command": "docker",
      "args": ["run", "--rm", "-i", "-v", "/tmp/data:/data", "--entrypoint", "r2mcp", "radare/radare2"]
    }
  },
  "inputs": []
}
Zed Integration
You can use r2mcp with Zed as well by adding it to your configuration:
- Open the command palette:
CMD + Shift + P(macOS) orCtrl + Shift + P(Windows/Linux).1º - Search of
agent: open configurationor search ofsettings. - Add your server as such:
  "context_servers": {
    "r2-mcp-server": {
      "source": "custom",
      "command": "docker",
      "args": ["run", "--rm", "-i", "-v", "/tmp/data:/data", "--entrypoint", "r2mcp", "radare/radare2"],
      "env": {}
    }
  }
Note: you will need another LLM agent, such as Claude, Gemini or else to be able to use it.
Nix
radare2 ships a Nix flake for reproducible builds and development environments on Linux and macOS. The packaging lives in dist/nix/ and a redirect shim in the repository root ties it to the lock file.
Running radare2
Run radare2 directly without installing it:
nix run github:radareorg/radare2
Open an interactive shell with r2 and related tools in PATH:
nix shell github:radareorg/radare2
Build the package into the Nix store:
nix build github:radareorg/radare2
The resulting result/bin/radare2 is a symlink to the built binary.
Development Shell
Clone the repository and enter the dev shell to get all build dependencies (meson, ninja, capstone, zlib, etc.) without installing them system-wide:
git clone https://github.com/radareorg/radare2
cd radare2
nix develop
Inside the dev shell, build radare2 normally:
meson setup build
ninja -C build
You can also build directly from local source with Nix:
nix build
Overlays
The flake exposes an overlay so you can add radare2 to your own Nix configuration:
# In your flake.nix inputs:
inputs.radare2.url = "github:radareorg/radare2";

# In your outputs:
nixpkgs.overlays = [ radare2.overlays.default ];
After applying the overlay, pkgs.radare2 is available in your package set.
Formatting
Run nix fmt to format .nix files in the repository using nixfmt (RFC 166 style).
Troubleshooting
Sometimes, old builds or conflicting versions can cause problems, such as tools using the wrong version of libraries, plugins not loading, or crashes with segmentation faults at startup. Here are some steps to help you resolve these issues.
We will assume you have tried to build radare2 with meson and make:
- your builddir doesnt contain spaces
- the repository is a clean clone
- you read the error messages carefully
- you have at least make, gcc, git, patch working
First, if you encounter issues during startup, you can use the R2_DEBUG=1 environment variable to see detailed debugging information. This can help you understand what is going wrong during the initialization of radare2.
export R2_DEBUG=1
radare2 -
To remove old builds of radare2 from your system, you can run the make purge command. This command will remove previous installations of radare2 from various common prefix paths.
./configure --prefix=/old/r2/prefix/installation
make purge
Additionally, you may need to remove the plugin directory from your home directory to ensure no old or incompatible plugins are causing issues. You can do this by deleting the local/share/radare2/plugins directory.
rm -rf ~/.local/share/radare2/plugins
If you use r2pm (radare2 package manager), it is also a good idea to clear the r2pm cache to free up some disk space and remove potentially problematic cached files. You can do this by deleting the ~/.local/share/radare2/r2pm directory.
rm -rf ~/.local/share/radare2/r2pm
By following these steps, you can clean up old installations and resolve common issues that might arise during the installation and usage of radare2.
Using Radare2
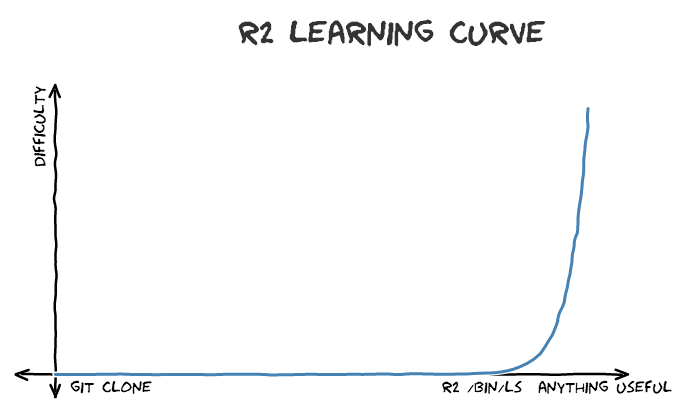
The learning curve is usually somewhat steep at the beginning. Although after an hour of using it you should easily understand how most things work, and how to combine the various tools radare offers. You are encouraged to read the rest of this book to understand how some non-trivial things work, and to ultimately improve your skills.
Navigation, inspection and modification of a loaded binary file is performed using three simple actions: seek (to position), print (buffer), and alternate (write, append).
The 'seek' command is abbreviated as s and accepts an expression as its argument. The expression can be something like 10, +0x25, or [0x100+ptr_table]. If you are working with block-based files, you may prefer to set the block size to a required value with b command, and seek forward or backwards with positions aligned to it. Use s++ and s-- commands to navigate this way.
If radare2 opens an executable file, by default it will open the file in Virtual Addressing (VA) mode and the sections will be mapped to their virtual addresses. In VA mode, seeking is based on the virtual address and the starting position is set to the entry point of the executable. Using -n option you can suppress this default behavior and ask radare2 to open the file in non-VA mode for you. In non-VA mode, seeking is based on the offset from the beginning of the file.
The 'print' command is abbreviated as p and has a number of submodes — the second letter specifying a desired print mode. Frequent variants include px to print in hexadecimal, and pd for disassembling.
To be allowed to write files, specify the -w option to radare2 when opening a file. The w command can be used to write strings, hexpairs (x subcommand), or even assembly opcodes (a subcommand). Examples:
> w hello world         ; string
> wx 90 90 90 90        ; hexpairs
> wa jmp 0x8048140      ; assemble
> wf inline.bin         ; write contents of file
Appending a ? to a command will show its help message, for example, p?.
Appending ?* will show commands starting with the given string, e.g. p?*.
To enter visual mode, press V<enter>. Use q to quit visual mode and return to the prompt.
In visual mode you can use HJKL keys to navigate (left, down, up, and right, respectively). You can use these keys in cursor mode toggled by c key. To select a byte range in cursor mode, hold down SHIFT key, and press navigation keys HJKL to mark your selection.
While in visual mode, you can also overwrite bytes by pressing i. You can press TAB to switch between the hex (middle) and string (right) columns. Pressing q inside the hex panel returns you to visual mode. By pressing p or P you can scroll different visual mode representations. There is a second most important visual mode - curses-like panels interface, accessible with V! command.
Commandline
Radare2 can be used directly from the command line, allowing you to run commands without entering the interactive mode. This is handy for quick tasks or when you want to include radare2 in shell scripts. You can perform analyses, extract information, or manipulate binary files with just a single line in your terminal.
For example, if we want to show 10 bytes from the entrypoint directly from the system shell we can use:
$ r2 -q -c 'p8 10 @ entry0' /bin/ls
The -q flag is by definition the quiet mode, but when combined with -c it will return to the shell right after executing the specified commands.
Command-line flags are options you add when starting radare2. These flags let you customize how radare2 behaves from the start. You can tell radare2 to analyze a file immediately, use a specific configuration, or set various other parameters. Understanding these flags helps you set up radare2 efficiently for different tasks.
We can set some options at startup time with the -e flag like this:
r2 -e scr.color=0 -e io.cache=true /bin/ls
The help message, accessed by running radare2 with the -h flag, shows all available options. It's a quick reference for radare2's capabilities. By exploring this message, you can discover features you might not know about.
$ radare2 -h
Usage: r2 [-ACdfjLMnNqStuvwzX] [-P patch] [-p prj] [-a arch] [-b bits] [-c cmd]
          [-s addr] [-B baddr] [-m maddr] [-i script] [-e k=v] file|pid|-|--|=
 --           run radare2 without opening any file
 -            same as 'r2 malloc://512'
 =            read file from stdin (use -i and -c to run cmds)
 -=           perform !=! command to run all commands remotely
 -0           print \x00 after init and every command
 -2           close stderr file descriptor (silent warning messages)
 -a [arch]    set asm.arch
 -A           run 'aaa' command to analyze all referenced code
 -b [bits]    set asm.bits
 -B [baddr]   set base address for PIE binaries
 -c 'cmd..'   execute radare command
 -C           file is host:port (alias for -c+=http://%s/cmd/)
 -d           debug the executable 'file' or running process 'pid'
 -D [backend] enable debug mode (e cfg.debug=true)
 -e k=v       evaluate config var
 -f           block size = file size
 -F [binplug] force to use that rbin plugin
 -h, -hh      show help message, -hh for long
 -H ([var])   display variable
 -i [file]    run script file
 -I [file]    run script file before the file is opened
 -j           use json for -v, -L and maybe others
 -k [OS/kern] set asm.os (linux, macos, w32, netbsd, ...)
 -l [lib]     load plugin file
 -L, -LL      list supported IO plugins (-LL list core plugins)
 -m [addr]    map file at given address (loadaddr)
 -M           do not demangle symbol names
 -n, -nn      do not load RBin info (-nn only load bin structures)
 -N           do not load user settings and scripts
 -NN          do not load any script or plugin
 -q           quiet mode (no prompt) and quit after -i
 -qq          quit after running all -c and -i
 -Q           quiet mode (no prompt) and quit faster (quickLeak=true)
 -p [prj]     use project, list if no arg, load if no file
 -P [file]    apply rapatch file and quit
 -r [rarun2]  specify rarun2 profile to load (same as -e dbg.profile=X)
 -R [rr2rule] specify custom rarun2 directive
 -s [addr]    initial seek
 -S           start r2 in sandbox mode
 -t           load rabin2 info in thread
 -u           set bin.filter=false to get raw sym/sec/cls names
 -v, -V       show radare2 version (-V show lib versions)
 -w           open file in write mode
 -x           open without exec-flag (asm.emu will not work), See io.exec
 -X           same as -e bin.usextr=false (useful for dyldcache)
 -z, -zz      do not load strings or load them even in raw
Common Uses
At first sight it may seem like there are so many options and without some practical use cases it may feel a bit overwhelming, this sections aims to address that by sharing some of the most common ways to get started.
Open a file in write mode and do not parse the headers (raw mode).
$ r2 -nw file
Quickly get into the r2 shell opening a 512B malloc virtual file, handy for testing things. note that a single dash is an alias for malloc://512
$ r2 -
Specify which sub-binary you want to select when opening a fatbin file:
$ r2 -a ppc -b 32 ls.fat
Run a script before entering the prompt:
$ r2 -i patch.r2 target.bin
Execute a command and quit without entering the interactive mode:
$ r2 -qc ij hi.bin > imports.json
Set the configuration variable:
$ r2 -e scr.color=0 blah.bin
Spawn and start debugging a program:
$ r2 -d ls
Attach to an already running process by its process id (PID):
$ r2 -d 1234
Load an existing project file:
$ r2 -p test
Command Syntax
In a single line we can describe the syntax of the radare2 commands like this:
 .- ignore special characters, same as full command quotes "?e hi > ho"
 |    .- interpret the output of the command or run a script `.?`
 |   /   .-- the repeat prefix operator, run a command N times   .------------.
 |  |   /     . the command to run                               | , = csv    |
 |  |  |    /    . command suffix output modifier --------------<  j = json   |
 |  |  |   |    /                                                | * = r2cmds |
 |  |  |   |   |                                                 `------------'
['][.][N][cmd[,?*j]][~filter][@[@[@]]addr!size][|>pipe] ; another command
                           |  | | |  \________/ | |     |
                           |  | | |      |      |  \    `--- cmd separator
 output filter modifier _.'  /  | |      |       \  `-- redirect to file
   @ temporal seek  --------'  /  |       \       `--- pipe to system shell
       @@ foreach operator ---'   |        `--- foreach modifiers @? @@? @@@?
                                   `--- advanced foreach (addr+size on items)
People who use Vim daily and are familiar with its commands will find themselves at home. You will see this format used throughout the book. Commands are identified by a single case-sensitive character [a-zA-Z].
As an exercise for the reader you may want to read the following lines and understand the purpose of the syntax with examples.
ds                    ; call the debugger's 'step' command
px 200 @ esp          ; show 200 hex bytes at esp
pc > file.c           ; dump buffer as a C byte array to file.c
wx 90 @@ sym.*        ; write a nop on every symbol
pd 2000 | grep eax    ; grep opcodes that use the 'eax' register
px 20 ; pd 3 ; px 40  ; multiple commands in a single line
Repetitions
To repeatedly execute a command, prefix the command with a number:
px    # run px
3px   # run px 3 times
An useful way to use this command is to draw the classic donut animation with 100?3d or perform an specific amount of steps when debugging like: 10ds (that will do the same as ds 10
Shell Execution
The ! prefix is used to execute a command in shell context. If you want to use the cmd callback from the I/O plugin you must prefix with :.
Note that a single exclamation mark will run the command and print the output through the RCons API. This means that the execution will be blocking and not interactive. Use double exclamation marks -- !! -- to run a standard system call.
All the socket, filesystem and execution APIs can be restricted with the cfg.sandbox configuration variable.
Environment
When executing system commands from radare2, we will get some special environment variables that can be used to script radare2 from shellscripts without the need to depend on r2pipe.
The environment variables can be listed and modified with the % command.
Note that the environment variables will be different depending on how we execute code with radare2:
- runtime environment (R2CORE tells where the instance is in memory)
- debugger environment (as clean as described in a rarun2 profile)
- spawning processes with ! (get some context details, like offset, file, ..)
- r2pipe environment (
R2PIPE_INandR2PIPE_OUTwith the pipe descriptors)
[0x00000000]> !export | grep R2_
export R2_ARCH="arm"
export R2_BITS="64"
export R2_BSIZE="256"
export R2_COLOR="0"
export R2_DEBUG="0"
export R2_ENDIAN="little"
export R2_FILE="malloc://512"
export R2_IOVA="1"
export R2_OFFSET="0"
export R2_SIZE="512"
export R2_UTF8="1"
export R2_XOFFSET="0x00000000"
[0x00000000]>
We can also find the location in memory of the RCore instance in the current process. This can be useful when injecting code inside radare2 (like when injecting r2 via r2frida or using native api calls on live runtimes without having to pass pointers or depend on RLang setups) We may learn more about this in the scripting chapter.
[0x00000000]> %~R2
R2CORE=0x140018000
[0x00000000]>
Pipes
The standard UNIX pipe | is also available in the radare2 shell. You can use it to filter the output of an r2 command with any shell program that reads from stdin, such as grep, less, wc. If you do not want to spawn anything, or you can't, or the target system does not have the basic UNIX tools you need (Windows or embedded users), you can also use the built-in grep (~).
Filtering
The ~ is a special character that is used by the console filtering features. It can be chained multiple times to perform multiple filters like grepping, xml or json indentation, head/tail operations, select column of output, etc
You may find that ~ is very similar to using the unix | pipe, but this
As you may expect appending a question mark will display the help message.
[0x00000000]> ~?
Usage: [command]~[modifier][word,word][endmodifier][[column]][:line]
modifier:
|  &            all words must match to grep the line
|  $[n]         sort numerically / alphabetically the Nth column
|  $            sort in alphabetic order
|  $$           sort + uniq
|  $!           inverse alphabetical sort
|  $!!          reverse the lines (like the `tac` tool)
|  ,            token to define another keyword
|  +            case insensitive grep (grep -i)
|  *            zoom level
|  ^            words must be placed at the beginning of line
|  !            negate grep
|  ?            count number of matching lines
|  ?.           count number chars
|  ??           show this help message
|  ?ea          convert text into seven segment style ascii art
|  :s..e        show lines s-e
|  ..           internal 'less'
|  ...          internal 'hud' (like V_)
|  ....         internal 'hud' in one line
|  :)           parse C-like output from decompiler
|  :))          code syntax highlight
|  <50          perform zoom to the given text width on the buffer
|  <>           xml indentation
|  {:           human friendly indentation (yes, it's a smiley)
|  {:..         less the output of {:
|  {:...        hud the output of {:
|  {}           json indentation
|  {}..         less json indentation
|  {}...        hud json indentation
|  {=}          gron-like output (key=value)
|  {path}       json path grep
endmodifier:
|  $            words must be placed at the end of line
column:
|  [n]          show only column n
|  [n-m]        show column n to m
|  [n-]         show all columns starting from column n
|  [i,j,k]      show the columns i, j and k
Examples:
|  i~:0         show first line of 'i' output
|  i~:-2        show the second to last line of 'i' output
|  i~:0..3      show first three lines of 'i' output
|  pd~mov       disasm and grep for mov
|  pi~[0]       show only opcode
|  i~0x400$     show lines ending with 0x400
The ~ character enables internal grep-like function used to filter output of any command:
pd 20~call ; disassemble 20 instructions and grep output for 'call'
Additionally, you can grep either for columns or for rows:
pd 20~call:0          ; get first row
pd 20~call:1          ; get second row
pd 20~call[0]         ; get first column
pd 20~call[1]         ; get second column
Or even combine them:
pd 20~call:0[0] ; grep the first column of the first row matching 'call'
This internal grep function is a key feature for scripting radare2, because it can be used to iterate over a list of offsets or data generated by disassembler, ranges, or any other command. Refer to the loops section (iterators) for more information.
Output Evaluation
The . character at the begining of the command is used to interpret or evaluate the output of the command you execute.
The purpose of this syntax rings some bells when you use the * suffix or the -r flag in all the r2 shell commands.
For example, we can load the symbols from a binary in disk by running the following line:
> .!rabin2 -rs $R2_FILE
Temporal Seek
The @ character is used to specify a temporary offset at which the command to its left will be executed.
The original seek position in a file is then restored.
For example, pd 5 @ 0x100000fce to disassemble 5 instructions at address 0x100000fce.
Most of the commands offer autocompletion support using <TAB> key, for example seek or flags commands.
It offers autocompletion using all possible values, taking flag names in this case.
The command history can be interactively inspected with !~....
To extend the autocompletion support to handle more commands or enable autocompletion to your own commands defined in core, I/O plugins you must use the !!! command.
Expressions
Expressions are mathematical representations of 64-bit numerical values. These are handled anywhere RNum API is used, the api takes a string that can contain multiple math operations with different numeric bases and operations and computes the resulting value.
They can be displayed in different formats, be compared or used with all commands accepting numeric arguments. Expressions can use traditional arithmetic operations, as well as binary and boolean ones.
To evaluate mathematical expressions prepend them with command ?:
[0xb7f9d810]> ?vi 0x8048000
134512640
[0xv7f9d810]> ?vi 0x8048000+34
134512674
[0xb7f9d810]> ?vi 0x8048000+0x34
134512692
[0xb7f9d810]> ? 1+2+3-4*3
hex     0xfffffffffffffffa
octal   01777777777777777777772
unit    17179869184.0G
segment fffff000:0ffa
int64   -6
string  "\xfa\xff\xff\xff\xff\xff\xff\xff"
binary  0b1111111111111111111111111111111111111111111111111111111111111010
fvalue: -6.0
float:  nanf
double: nan
trits   0t11112220022122120101211020120210210211201
Supported arithmetic operations are:
 +   addition
 -   subtraction
 *   multiplication
 /   division
 %   modulus
 &   binary and
 |   binary or
 ^   binary xor
 >>  shift right
 <<  shift left
For example, using the ?vi command we the the integer (base10) value resulting it from evaluating the given math expression
[0x00000000]> ?vi 1+2+3
6
To use of binary OR should quote the whole command to avoid executing the | pipe:
[0x00000000]> "? 1 | 2"
hex     0x3
octal   03
unit    3
segment 0000:0003
int32   3
string  "\x03"
binary  0b00000011
fvalue: 2.0
float:  0.000000f
double: 0.000000
trits   0t10
Note that on modern r2 versions you can use the single quote at the begining of the command to avoid evaluating the rest of the expression:
'? 1 | 2 is the equivalent to "? 1 | 2"
Numbers can be displayed in several formats:
0x033   : hexadecimal can be displayed
3334    : decimal
sym.fo  : resolve flag offset
10K     : KBytes  10*1024
10M     : MBytes  10*1024*1024
You can also use variables and seek positions to build complex expressions.
Use the ?$? command to list all the available commands or read the refcard chapter of this book.
$$    here (the current virtual seek)
$l    opcode length
$s    file size
$j    jump address (e.g. jmp 0x10, jz 0x10 => 0x10)
$f    jump fail address (e.g. jz 0x10 => next instruction)
$m    opcode memory reference (e.g. mov eax,[0x10] => 0x10)
$b    block size
Some more examples:
[0x4A13B8C0]> ? $m + $l
140293837812900 0x7f98b45df4a4 03771426427372244 130658.0G 8b45d000:04a4 140293837812900 10100100 140293837812900.0 -0.000000
Disassembling the very next instruction after the current one
[0x4A13B8C0]> pd 1 @ +$l
0x4A13B8C2   call 0x4a13c000
Basic Debugger Session
To debug a program, start radare with the -d option. Note that you can attach to a running process by specifying its PID, or you can start a new program by specifying its name and parameters:
$ pidof mc
32220
$ r2 -d 32220
$ r2 -d /bin/ls
$ r2 -a arm -b 16 -d gdb://192.168.1.43:9090
...
In the second case, the debugger will fork and load the debugee ls program in memory.
It will pause its execution early in ld.so dynamic linker. As a result, you will not yet see the entrypoint or any shared libraries at this point.
You can override this behavior by setting another name for an entry breakpoint. To do this, add a radare command
e dbg.bep=entry or e dbg.bep=main to your startup script, usually it is ~/.config/radare2/radare2rc.
Another way to continue until a specific address is by using the dcu command. Which means: "debug continue until" taking the address of the place to stop at. For example:
dcu main
Be warned that certain malware or other tricky programs can actually execute code before main() and thus you'll be unable to control them. (Like the program constructor or the tls initializers)
Below is a list of most common commands used with debugger:
> d?            ; get help on debugger commands
> ds 3          ; step 3 times
> db 0x8048920  ; setup a breakpoint
> db -0x8048920 ; remove a breakpoint
> dc            ; continue process execution
> dcs           ; continue until syscall
> dd            ; manipulate file descriptors
> dm            ; show process maps
> dmp A S rwx   ; change permissions of page at A and size S
> dr eax=33     ; set register value. eax = 33
There is another option for debugging in radare, which may be easier: using visual mode.
That way you will neither need to remember many commands nor to keep program state in your mind.
To enter visual debugger mode use Vpp:
[0xb7f0c8c0]> Vpp
The initial view after entering visual mode is a hexdump view of the current target program counter (e.g., EIP for x86).
Pressing p will allow you to cycle through the rest of visual mode views.
You can press p and P to rotate through the most commonly used print modes.
Use F7 or s to step into and F8 or S to step over current instruction.
With the c key you can toggle the cursor mode to mark a byte range selection
(for example, to later overwrite them with nop). You can set breakpoints with F2 key.
In visual mode you can enter regular radare commands by prepending them with :.
For example, to dump a one block of memory contents at ESI:
<Press ':'>
x @ esi
To get help on visual mode, press ?. To scroll the help screen, use arrows. To
exit the help view, press q.
A frequently used command is dr, which is used to read or write values of the target's general purpose registers.
For a more compact register value representation you might use dr= command.
You can also manipulate the hardware and the extended/floating point registers.
Tooling
Radare2 is not just the only tool provided by the radare2 project. The rest of chapters in this book are focused on explaining the use of the radare2 tool, this chapter will focus on explaining all the other companion tools that are shipped inside the radare2 project.
All the functionalities provided by the different APIs and plugins have also different tools to allow to use them from the commandline and integrate them with shellscripts easily.
Thanks to the ortogonal design of the framework it is possible to do all the things that r2 is able from different places:
- These companion tools
- Native library APIs
- The r2 shell
- Using the high level R2Papi
- Scripting with r2pipe/r2js
Rax2
The rax2 utility comes with the radare framework and aims to be a minimalistic expression evaluator for the shell. It is useful for making base conversions between floating point values, hexadecimal representations, hexpair strings to ascii, octal to integer. It supports endianness conversion.
This is the help message of rax2, this tool can be used in the command-line or interactively (reading the values from stdin), so it can be used as a multi-base calculator.
Inside r2, the functionality of rax2 is available under the ? command. For example:
[0x00000000]> ? 3+4
As you can see, the numeric expressions can contain mathematical expressions like addition, subtraction, .. as well as group operations with parenthesis.
The syntax in which the numbers are represented define the base, for example:
- 3 : decimal, base 10
- 0xface : hexadecimal, base 16
- 0472 : octal, base 8
- 2M : units, 2 megabytes
- ...
This is the help message of rax2 -h, which will show you a bunch more syntaxes
$ rax2 -h
Usage: rax2 [options] [expr ...]
  =[base]                      ;  rax2 =10 0x46 -> output in base 10
  int     ->  hex              ;  rax2 10
  hex     ->  int              ;  rax2 0xa
  -int    ->  hex              ;  rax2 -77
  -hex    ->  int              ;  rax2 0xffffffb3
  int     ->  bin              ;  rax2 b30
  int     ->  ternary          ;  rax2 t42
  bin     ->  int              ;  rax2 1010d
  ternary ->  int              ;  rax2 1010dt
  float   ->  hex              ;  rax2 3.33f
  hex     ->  float            ;  rax2 Fx40551ed8
  oct     ->  hex              ;  rax2 35o
  hex     ->  oct              ;  rax2 Ox12 (O is a letter)
  bin     ->  hex              ;  rax2 1100011b
  hex     ->  bin              ;  rax2 Bx63
  ternary ->  hex              ;  rax2 212t
  hex     ->  ternary          ;  rax2 Tx23
  raw     ->  hex              ;  rax2 -S < /binfile
  hex     ->  raw              ;  rax2 -s 414141
  -l                           ;  append newline to output (for -E/-D/-r/..
  -a      show ascii table     ;  rax2 -a
  -b      bin -> str           ;  rax2 -b 01000101 01110110
  -B      str -> bin           ;  rax2 -B hello
  -d      force integer        ;  rax2 -d 3 -> 3 instead of 0x3
  -e      swap endianness      ;  rax2 -e 0x33
  -D      base64 decode        ;
  -E      base64 encode        ;
  -f      floating point       ;  rax2 -f 6.3+2.1
  -F      stdin slurp code hex ;  rax2 -F < shellcode.[c/py/js]
  -h      help                 ;  rax2 -h
  -i      dump as C byte array ;  rax2 -i < bytes
  -k      keep base            ;  rax2 -k 33+3 -> 36
  -K      randomart            ;  rax2 -K 0x34 1020304050
  -L      bin -> hex(bignum)   ;  rax2 -L 111111111 # 0x1ff
  -n      binary number        ;  rax2 -n 0x1234 # 34120000
  -N      binary number        ;  rax2 -N 0x1234 # \x34\x12\x00\x00
  -r      r2 style output      ;  rax2 -r 0x1234
  -s      hexstr -> raw        ;  rax2 -s 43 4a 50
  -S      raw -> hexstr        ;  rax2 -S < /bin/ls > ls.hex
  -t      tstamp -> str        ;  rax2 -t 1234567890
  -x      hash string          ;  rax2 -x linux osx
  -u      units                ;  rax2 -u 389289238 # 317.0M
  -w      signed word          ;  rax2 -w 16 0xffff
  -v      version              ;  rax2 -v
Some examples:
Calculator:
$ rax2 3+0x80
0x83
$ rax2 -d "1<<8"
256
Base conversion:
$ rax2 '=2' 73303325
100010111101000010100011101b
The single quote for '=2' is not mandatory for bash but is necessary for some shell like zsh.
Conversion in hex string
$ rax2 -s 4142
AB
$ rax2 -S AB
4142
$ rax2 -S < bin.foo
...
Endianness conversion:
$ rax2 -e 33
0x21000000
$ rax2 -e 0x21000000
33
Base64 decoding
$ rax2 -D ZQBlAA== | rax2 -S
65006500
Randomart:
$ rax2 -K 90203010
+--[0x10302090]---+
|Eo. .            |
| . . . .         |
|      o          |
|       .         |
|        S        |
|                 |
|                 |
|                 |
|                 |
+-----------------+
Rafind2
Rafind2 is the command line fronted of the r_search library. Which allows you to search for strings, sequences of bytes with binary masks, etc
$ rafind2 -h
Usage: rafind2 [-mXnzZhqv] [-a align] [-b sz] [-f/t from/to] [-[e|s|S] str] [-x hex] -|file|dir ..
 -a [align] only accept aligned hits
 -b [size]  set block size
 -e [regex] search for regex matches (can be used multiple times)
 -f [from]  start searching from address 'from'
 -h         show this help
 -i         identify filetype (r2 -nqcpm file)
 -j         output in JSON
 -m         magic search, file-type carver
 -M [str]   set a binary mask to be applied on keywords
 -n         do not stop on read errors
 -r         print using radare commands
 -s [str]   search for a specific string (can be used multiple times)
 -S [str]   search for a specific wide string (can be used multiple times). Assumes str is UTF-8.
 -t [to]    stop search at address 'to'
 -q         quiet - do not show headings (filenames) above matching contents (default for searching a single file)
 -v         print version and exit
 -x [hex]   search for hexpair string (909090) (can be used multiple times)
 -X         show hexdump of search results
 -z         search for zero-terminated strings
 -Z         show string found on each search hit
That's how to use it, first we'll search for "lib" inside the /bin/ls binary.
$ rafind2 -s lib /bin/ls
0x5f9
0x675
0x679
...
$
Note that the output is pretty minimal, and shows the offsets where the string lib is found. We can then use this output to feed other tools.
Counting results:
$ rafind2 -s lib /bin/ls | wc -l
Displaying results with context:
$ export F=/bin/ls
$ for a in `rafind2 -s lib $F` ; do \
    r2 -ns $a -qc'x 32' $F ; done
0x000005f9  6c69 622f 6479 6c64 .. lib/dyld........
0x00000675  6c69 622f 6c69 6275 .. lib/libutil.dyli
0x00000679  6c69 6275 7469 6c2e .. libutil.dylib...
0x00000683  6c69 6200 000c 0000 .. lib......8......
0x000006a5  6c69 622f 6c69 626e .. lib/libncurses.5
0x000006a9  6c69 626e 6375 7273 .. libncurses.5.4.d
0x000006ba  6c69 6200 0000 0c00 .. lib.......8.....
0x000006dd  6c69 622f 6c69 6253 .. lib/libSystem.B.
0x000006e1  6c69 6253 7973 7465 .. libSystem.B.dyli
0x000006ef  6c69 6200 0000 0000 .. lib......&......
rafind2 can also be used as a replacement of file to identify the mimetype of a file using the internal magic database of radare2.
$ rafind2 -i /bin/ls
0x00000000 1 Mach-O
Also works as a strings replacement, similar to what you do with rabin2 -z, but without caring about parsing headers and obeying binary sections.
$ rafind2 -z /bin/ls| grep http
0x000076e5 %http://www.apple.com/appleca/root.crl0\r
0x00007ae6 https://www.apple.com/appleca/0
0x00007fa9 )http://www.apple.com/certificateauthority0
0x000080ab $http://crl.apple.com/codesigning.crl0
Rarun2
Rarun2 is a tool allowing to setup a specified execution environment - redefine stdin/stdout, pipes, change the environment variables and other settings useful to craft the boundary conditions you need to run a binary for debugging.
$ rarun2 -h
Usage: rarun2 -v|-t|script.rr2 [directive ..]
It takes the text file in key=value format to specify the execution environment. Rarun2 can be used as both separate tool or as a part of radare2.
To load the rarun2 profile in radare2 you need to use either -r to load the profile from file or -R to specify the directive from string.
The format of the profile is very simple. Note the most important keys - program and arg*
One of the most common usage cases - redirect the output of debugged program in radare2. For this you need to use stdio, stdout, stdin, input, and a couple similar keys.
Here is the basic profile example:
program=/bin/ls
arg1=/bin
# arg2=hello
# arg3="hello\nworld"
# arg4=:048490184058104849
# arg5=:!ragg2 -p n50 -d 10:0x8048123
# arg6=@arg.txt
# arg7=@300@ABCD # 300 chars filled with ABCD pattern
# system=r2 -
# aslr=no
setenv=FOO=BAR
# unsetenv=FOO
# clearenv=true
# envfile=environ.txt
timeout=3
# timeoutsig=SIGTERM # or 15
# connect=localhost:8080
# listen=8080
# pty=false
# fork=true
# bits=32
# pid=0
# pidfile=/tmp/foo.pid
# #sleep=0
# #maxfd=0
# #execve=false
# #maxproc=0
# #maxstack=0
# #core=false
# #stdio=blah.txt
# #stderr=foo.txt
# stdout=foo.txt
# stdin=input.txt # or !program to redirect input from another program
# input=input.txt
# chdir=/
# chroot=/mnt/chroot
# libpath=$PWD:/tmp/lib
# r2preload=yes
# preload=/lib/libfoo.so
# setuid=2000
# seteuid=2000
# setgid=2001
# setegid=2001
# nice=5
Sample rarun2 script
When this script is executed with rarun2, it will:
- Run the program "./pp400"
- Pass "10" as the first argument
- Use the contents of "foo.txt" as standard input
- Change the working directory to "/tmp" before execution
This setup is often used for debugging, testing, or analyzing programs in a controlled environment, especially in the context of reverse engineering or security research.
$ cat foo.rr2
#!/usr/bin/rarun2
program=./pp400
arg0=10
stdin=foo.txt
chdir=/tmp
#chroot=.
./foo.rr2
Using a program via TCP/IP
$ nc -l 9999
$ rarun2 program=/bin/ls connect=localhost:9999
Debugging a Program Redirecting the stdio into Another Terminal
1 - open a new terminal and type 'tty' to get a terminal name:
$ tty ; clear ; sleep 999999
/dev/ttyS010
2 - Create a new file containing the following rarun2 profile named foo.rr2:
#!/usr/bin/rarun2
program=/bin/ls
stdio=/dev/ttys010
3 - Launch the following radare2 command:
$ r2 -r foo.rr2 -d /bin/ls
r2pm
Radare2 has its own package manager for managing external plugins or tools that have a close relationship to radare2.
- Most packages are tested and maintained for UNIX systems
- Some of them support Windows and even wasm (r2js)
- Installs by default in your home, use
-gto do it system-wide - Most of them are building it from source, but others have support for binary builds
The radare2-extras repository contains a lot of third-party packages that aim to be updated and maintained (but also less used than the ones shipped in the main repository), so it's a great place to check before writing your own plugin as maybe this thing was done already by someone else.
Package Database
$ r2pm -U
$R2PM_DBDIR: No such file or directory.
Run 'r2pm init' to initialize the package repository
$ r2pm init
git clone https://github.com/radareorg/radare2-pm
Cloning into 'radare2-pm'...
remote: Counting objects: 147, done.
remote: Compressing objects: 100% (139/139), done.
remote: Total 147 (delta 26), reused 57 (delta 7), pack-reused 0
Receiving objects: 100% (147/147), 42.68 KiB | 48.00 KiB/s, done.
Resolving deltas: 100% (26/26), done.
/home/user/.local/share/radare2/r2pm/git/radare2-pm
r2pm database initialized. Use 'r2pm -U' to update later today
The packages database is pulled from the radare2-pm repository. At any point of the time we can update the database using r2pm -U:
$ r2pm -U
HEAD is now at 7522928 Fix syntax
Updating 7522928..1c139e0
Fast-forward
 db/ldid2 | 18 ++++++++++++++++++
 1 file changed, 18 insertions(+)
 create mode 100644 db/ldid2
Updating /home/user/.local/share/radare2/r2pm/db ...
Already up to date.
There are many commands available to let you install or uninstall anything easily:
$ r2pm -h
Usage: r2pm [-flags] [pkgs...]
Commands:
 -a [repository]   add or -delete external repository
 -c ([git/dir])    clear source cache (R2PM_GITDIR)
 -ci <pkgname>     clean + install
 -cp               clean the user's home plugin directory
 -d,doc [pkgname]  show documentation and source for given package
 -e [pkgname]      edit using $EDITOR the given package script
 -f                force operation (Use in combination of -U, -i, -u, ..)
 -gi <pkg>         global install (system-wide)
 -h                display this help message
 -H variable       show the value of given internal environment variable (See -HH)
 -HH               show all the internal environment variable values
 -i <pkgname>      install/update package and its dependencies (see -c, -g)
 -I                information about repository and installed packages
 -l                list installed packages
 -q                be quiet
 -r [cmd ...args]  run shell command with R2PM_BINDIR in PATH
 -s [<keyword>]    search available packages in database matching a string
 -t [YYYY-MM-DD]   force a moment in time to pull the code from the git packages
 -u <pkgname>      r2pm -u baleful (See -f to force uninstall)
 -uci <pkgname>    uninstall + clean + install
 -ui <pkgname>     uninstall + install
 -U                initialize/update database and upgrade all outdated packages
 -v                show version
Sample Session
For example lang-python3 (which is used for writing r2 plugins in Python):
$ r2pm -i lang-python3
...
mkdir -p ~/.config/radare2/plugins
cp -f lang_python3.so ~/.config/radare2/plugins
...
Note that if we used -i switch it installs the plugin in the $HOME directory, in case of -gi it will install the plugin systemwide (requires sudo).
After this we will be able to see the plugin in the list of installed:
$ r2pm -l
lang-python3
To uninstall the plugin just simply run
$ r2pm -u lang-python3
Rabin2
Under this bunny-arabic-like name, radare hides a powerful tool to handle binary files, to get information on imports, sections, headers and other data. Rabin2 can present it in several formats accepted by other tools, including radare2 itself. Rabin2 understands many file formats: Java CLASS, ELF, PE, Mach-O or any format supported by plugins, and it is able to obtain symbol import/exports, library dependencies, strings of data sections, xrefs, entrypoint address, sections, architecture type.
Usage: rabin2 [-AcdeEghHiIjlLMqrRsSUvVxzZ] [-@ at] [-a arch] [-b bits] [-B addr]
              [-C F:C:D] [-f str] [-m addr] [-n str] [-N m:M] [-P[-P] pdb]
              [-o str] [-O help] [-k query] [-D lang mangledsymbol] file
 -@ [addr]       show section, symbol or import at addr
 -A              list sub-binaries and their arch-bits pairs
 -a [arch]       set arch (x86, arm, .. or <arch>_<bits>)
 -b [bits]       set bits (32, 64 ...)
 -B [addr]       override base address (pie bins)
 -c              list classes
 -cc             list classes in header format
 -C [fmt:C:D]    create [elf,mach0,pe] with Code and Data hexpairs (see -a)
 -d              show debug/dwarf information
 -D lang name    demangle symbol name (-D all for bin.demangle=true)
 -e              program entrypoint
 -ee             constructor/destructor entrypoints
 -E              globally exportable symbols
 -f [str]        select sub-bin named str
 -F [binfmt]     force to use that bin plugin (ignore header check)
 -g              same as -SMZIHVResizcld -SS -SSS -ee (show all info)
 -G [addr]       load address . offset to header
 -h              this help message
 -H              header fields
 -i              imports (symbols imported from libraries)
 -I              binary info
 -j              output in json
 -k [sdb-query]  run sdb query. for example: '*'
 -K [algo]       calculate checksums (md5, sha1, ..)
 -l              linked libraries
 -L [plugin]     list supported bin plugins or plugin details
 -m [addr]       show source line at addr
 -M              main (show address of main symbol)
 -n [str]        show section, symbol or import named str
 -N [min:max]    force min:max number of chars per string (see -z and -zz)
 -o [str]        output file/folder for write operations (out by default)
 -O [str]        write/extract operations (-O help)
 -p              show always physical addresses
 -P              show debug/pdb information
 -PP             download pdb file for binary
 -q              be quiet, just show fewer data
 -qq             show less info (no offset/size for -z for ex.)
 -Q              show load address used by dlopen (non-aslr libs)
 -r              radare output
 -R              relocations
 -s              symbols
 -S              sections
 -SS             segments
 -SSS            sections mapping to segments
 -t              display file hashes
 -T              display file signature
 -u              unfiltered (no rename duplicated symbols/sections)
 -U              resoUrces
 -v              display version and quit
 -V              show binary version information
 -w              display try/catch blocks
 -x              extract bins contained in file
 -X [fmt] [f] .. package in fat or zip the given files and bins contained in file
 -z              strings (from data section)
 -zz             strings (from raw bins [e bin.str.raw=1])
 -zzz            dump raw strings to stdout (for huge files)
 -Z              guess size of binary program
Environment:
 R2_NOPLUGINS:     1|0|               # do not load shared plugins (speedup loading)
 RABIN2_ARGS:                         # ignore cli and use these program arguments
 RABIN2_CHARSET:   e cfg.charset      # set default value charset for -z strings
 RABIN2_DEBASE64:  e bin.str.debase64 # try to debase64 all strings
 RABIN2_DEMANGLE=0:e bin.demangle     # do not demangle symbols
 RABIN2_DMNGLRCMD: e bin.demanglercmd # try to purge false positives
 RABIN2_LANG:      e bin.lang         # assume lang for demangling
 RABIN2_MAXSTRBUF: e bin.str.maxbuf   # specify maximum buffer size
 RABIN2_PDBSERVER: e pdb.server       # use alternative PDB server
 RABIN2_PREFIX:    e bin.prefix       # prefix symbols/sections/relocs with a specific string
 RABIN2_STRFILTER: e bin.str.filter   # r2 -qc 'e bin.str.filter=??' -
 RABIN2_MACHO_NOFUNCSTARTS=0|1        # if set it will ignore the FUNCSTART information
 RABIN2_MACHO_NOSWIFT=0|1
 RABIN2_MACHO_SKIPFIXUPS=0|1
 RABIN2_CODESIGN_VERBOSE=0|1
 RABIN2_STRPURGE:  e bin.str.purge    # try to purge false positives
 RABIN2_SYMSTORE:  e pdb.symstore     # path to downstream symbol store
 RABIN2_SWIFTLIB:  1|0|               # load Swift libs to demangle (default: true)
 RABIN2_VERBOSE:   e bin.verbose      # show debugging messages from the parser
Headers
Rabin2's -I option is the quick, one-shot way to get a summary of a file's binary headers and general properties without fully loading it into radare2. This is especially handy for scripting, triage, or replacing small helper scripts (for example, checksec.sh) because it exposes security-relevant attributes (NX, RELRO, stack canary, PIE/pic, etc.) and other metadata (architecture, bits, interpreter, section layout hints).
The output is intentionally concise and machine-friendly — each property is printed as a key/value pair. Example:
$ rabin2 -I /bin/ls
arch     x86
binsz    128456
bintype  elf
bits     64
canary   true
class    ELF64
crypto   false
endian   little
havecode true
intrp    /lib64/ld-linux-x86-64.so.2
lang     c
linenum  false
lsyms    false
machine  AMD x86-64 architecture
maxopsz  16
minopsz  1
nx       true
os       linux
pcalign  0
pic      true
relocs   false
relro    partial
rpath    NONE
static   false
stripped true
subsys   linux
va       true
What each important field means
- arch / asm.arch: CPU architecture family (x86, arm, mips, etc.).
- bits / asm.bits: Operand width / target word size (32 / 64).
- bintype / file.type: Binary container format (elf / pe / mach0 / coredump / raw).
- class: More specific layout (e.g. ELF64 / ELF32).
- endian: Endianness (little / big).
- machine: Human-readable CPU model.
- intrp: Program interpreter (dynamic loader), e.g. /lib64/ld-linux-x86-64.so.2.
- binsz: Total size of the file in bytes.
- havecode: Whether executable code sections have been detected.
- nx: NX / DEP enabled (true when the binary's segments are not executable where they shouldn't be).
- canary: Stack-smashing protector (stack canary) presence (true/false).
- relro: RELocation Read-Only status; typical values: none / partial / full.
- pic / pie: Whether the binary is position-independent (PIC for shared objects, PIE for executables). In rabin2 output
picis generally true for shared objects and position-independent executables. - rpath / runpath: RPATH or RUNPATH embedded in the binary (or NONE).
- static: Whether the binary is fully statically linked.
- stripped: Symbols stripped from the binary (true when symbol tables are absent).
- lsyms / linenum: Presence of local symbols or line number info (debug information).
- pcalign: Preferred alignment for program/sections.
- minopsz / maxopsz: Minimum/maximum instruction sizes reported for the architecture.
- va: Whether the binary uses virtual addresses (i.e. mapped with proper virtual addressing).
- crypto: Whether cryptographic features (or crypto sections) were detected — usually false for normal binaries.
Mapping rabin2 fields to checksec output
The popular checksec.sh script reports security hardening flags like RELRO, Canary, NX, PIE, RPATH/RUNPATH. You can get the same information with rabin2 -I:
- RELRO: map to
relro(none / partial / full) - Stack Canary:
canary(true/false) - NX / DEP:
nx(true/false) - PIE:
pic/asm.bits+ PIE detection (rabin2 reportspic/pie-related properties) - RPATH/RUNPATH:
rpath(orrunpathif present)
Because rabin2 reads binary headers directly (using rbin), it can be used as a drop-in replacement for checksec in many cases. Example quick checks:
$ rabin2 -I /path/to/bin | rg -E "relro|canary|nx|pic|rpath|static"
relro    partial
canary   true
nx       true
pic      true
rpath    NONE
static   false
Or produce a JSON-like output suitable for automation (combine with other rabin2 options):
# Get headers + libs + imports in a compact form
$ rabin2 -I -l -i /path/to/bin
# Or generate radare2 script-style settings to import into r2 session (-Ir)
$ rabin2 -Ir /path/to/bin
Using the -Ir option
Passing -Ir to rabin2 emits radare2 config commands (e key=value) so you can import the detected properties directly into a running radare2 session or into an r2 script. This is what radare2 uses internally when it loads an external header parser. Example:
$ rabin2 -Ir /bin/ls
e cfg.bigendian=false
e asm.bits=64
e asm.dwarf=true
e bin.lang=c
e file.type=elf
e asm.os=linux
e asm.arch=x86
e asm.pcalign=0
These e assignments help radare2 set its environment (architecture, endianness, bits, file type, and assembler options) automatically.
Relating rabin2 to radare2 interactive info commands (iH / ih)
Inside a radare2 session there are a family of i (info) commands that provide quick access to the same metadata you get from rabin2. The most relevant to headers are the header/info variants — typically invoked as iH (capital H) and ih in the radare2 command set. They expose the binary header metadata, interpreter, section/segment hints, security flags, and other attributes discovered by the rbin subsystem.
iH/ih: show headers and high-level metadata when working interactively. They allow you to inspect the same security flags (NX, RELRO, canary, PIE) and interpreter/settings without leaving an r2 session.i?family: there are many otheri*commands (imports, exports, libraries, sections, strings) that correlate directly to rabin2's-i,-E,-l,-S,-z, etc.
Note: rabin2 is essentially a command-line wrapper around the rbin API — the same code radare2 uses internally — so the information is consistent between both tools. Use rabin2 for quick external inspection and iH/ih when you are already inside an r2 analysis session.
Examples and practical tips
- Quick security triage of a binary (checksec replacement):
# single-line human friendly output (tailor with awk/rg/jq)
$ rabin2 -I /bin/ls

# script-friendly (radare2 commands):
$ rabin2 -Ir /bin/ls

# combine with other rabin2 flags for more info
$ rabin2 -I -S -l -i -z /bin/ls
- Automating checks (example shell snippet):
#!/usr/bin/env bash
file=${1:-/bin/ls}
info=$(rabin2 -I "$file")
relro=$(echo "$info" | awk '/^relro/{print $2}')
canary=$(echo "$info" | awk '/^canary/{print $2}')
nx=$(echo "$info" | awk '/^nx/{print $2}')
pic=$(echo "$info" | awk '/^pic/{print $2}')
printf "RELRO=%s\nCANARY=%s\nNX=%s\nPIC=%s\n" "$relro" "$canary" "$nx" "$pic"
- When you want r2 to automatically adopt the environment detected by rabin2 (arch/endianness/bits), pipe
rabin2 -Iroutput into radare2 or include it in your r2 session scripts.
Summary
Rabin2 -I is a fast, scriptable way to extract header metadata and security-relevant flags from binaries. It maps cleanly to the properties reported by tools such as checksec.sh and the interactive radare2 iH/ih info commands. Use -Ir when you want to import settings into radare2 automatically.
Code Entrypoints
The -e option passed to rabin2 will show entrypoints for given binary. Two examples:
$ rabin2 -e /bin/ls
[Entrypoints]
vaddr=0x00005310 paddr=0x00005310 baddr=0x00000000 laddr=0x00000000 haddr=0x00000018 type=program

1 entrypoints

$ rabin2 -er /bin/ls
fs symbols
f entry0 1 @ 0x00005310
f entry0_haddr 1 @ 0x00000018
s entry0
Imports
Rabin2 is able to find imported objects by an executable, as well as their offsets in its PLT. This information is useful, for example, to understand what external function is invoked by call instruction. Pass -i flag to rabin2 to get a list of imports. An example:
$ rabin2 -i /bin/ls
[Imports]
nth vaddr      bind   type   lib name
-------------------------------------
   1 0x000032e0  GLOBAL    FUNC __ctype_toupper_loc
   2 0x000032f0  GLOBAL    FUNC getenv
   3 0x00003300  GLOBAL    FUNC sigprocmask
   4 0x00003310  GLOBAL    FUNC __snprintf_chk
   5 0x00003320  GLOBAL    FUNC raise
   6 0x00000000  GLOBAL    FUNC free
   7 0x00003330  GLOBAL    FUNC abort
   8 0x00003340  GLOBAL    FUNC __errno_location
   9 0x00003350  GLOBAL    FUNC strncmp
  10 0x00000000    WEAK  NOTYPE _ITM_deregisterTMCloneTable
  11 0x00003360  GLOBAL    FUNC localtime_r
  12 0x00003370  GLOBAL    FUNC _exit
  13 0x00003380  GLOBAL    FUNC strcpy
  14 0x00003390  GLOBAL    FUNC __fpending
  15 0x000033a0  GLOBAL    FUNC isatty
  16 0x000033b0  GLOBAL    FUNC sigaction
  17 0x000033c0  GLOBAL    FUNC iswcntrl
  18 0x000033d0  GLOBAL    FUNC wcswidth
  19 0x000033e0  GLOBAL    FUNC localeconv
  20 0x000033f0  GLOBAL    FUNC mbstowcs
  21 0x00003400  GLOBAL    FUNC readlink
...
Exports
Rabin2 is able to find exports. For example:
$ rabin2 -E /usr/lib/libr_bin.so | head
[Exports]

nth  paddr       vaddr      bind   type size lib name
-----------------------------------------------------
210 0x000ae1f0 0x000ae1f0 GLOBAL   FUNC  200 r_bin_java_print_exceptions_attr_summary
211 0x000afc90 0x000afc90 GLOBAL   FUNC  135 r_bin_java_get_args
212 0x000b18e0 0x000b18e0 GLOBAL   FUNC   35 r_bin_java_get_item_desc_from_bin_cp_list
213 0x00022d90 0x00022d90 GLOBAL   FUNC  204 r_bin_class_add_method
214 0x000ae600 0x000ae600 GLOBAL   FUNC  175 r_bin_java_print_fieldref_cp_summary
215 0x000ad880 0x000ad880 GLOBAL   FUNC  144 r_bin_java_print_constant_value_attr_summary
216 0x000b7330 0x000b7330 GLOBAL   FUNC  679 r_bin_java_print_element_value_summary
217 0x000af170 0x000af170 GLOBAL   FUNC   65 r_bin_java_create_method_fq_str
218 0x00079b00 0x00079b00 GLOBAL   FUNC   15 LZ4_createStreamDecode
Symbols and Exports
With rabin2, the generated symbols list format is similar to the imports list. Use the -s option to get it:
$ rabin2 -s /bin/ls | head
[Symbols]

nth paddr       vaddr      bind   type   size lib name
------------------------------------------------------
110 0x000150a0 0x000150a0 GLOBAL FUNC 56 _obstack_allocated_p
111 0x0001f600 0x0021f600 GLOBAL  OBJ  8 program_name
112 0x0001f620 0x0021f620 GLOBAL  OBJ  8 stderr
113 0x00014f90 0x00014f90 GLOBAL FUNC 21 _obstack_begin_1
114 0x0001f600 0x0021f600   WEAK  OBJ  8 program_invocation_name
115 0x0001f5c0 0x0021f5c0 GLOBAL  OBJ  8 alloc_failed_handler
116 0x0001f5f8 0x0021f5f8 GLOBAL  OBJ  8 optarg
117 0x0001f5e8 0x0021f5e8 GLOBAL  OBJ  8 stdout
118 0x0001f5e0 0x0021f5e0 GLOBAL  OBJ  8 program_short_name
With the -sr option rabin2 produces a radare2 script instead. It can later be passed to the core to automatically flag all symbols and to define corresponding byte ranges as functions and data blocks.
$ rabin2 -sr /bin/ls | head
fs symbols
f sym.obstack_allocated_p 56 0x000150a0
f sym.program_invocation_name 8 0x0021f600
f sym.stderr 8 0x0021f620
f sym.obstack_begin_1 21 0x00014f90
f sym.program_invocation_name 8 0x0021f600
f sym.obstack_alloc_failed_handler 8 0x0021f5c0
f sym.optarg 8 0x0021f5f8
f sym.stdout 8 0x0021f5e8
f sym.program_invocation_short_name 8 0x0021f5e0
Debug Symbols
Radare2 automatically parses available imports and exports sections in the binary, moreover, it can load additional debugging information if present. Two main formats are supported: DWARF and PDB (for Windows binaries). Note that, unlike many tools radare2 doesn't rely on Windows API to parse PDB files, thus they can be loaded on any other supported platform - e.g. Linux or OS X.
DWARF debug info loads automatically by default because usually it's stored right in the executable file. PDB is a bit of a different beast - it is always stored as a separate binary, thus the different logic of handling it.
At first, one of the common scenarios is to analyze the file from Windows distribution. In this case, all PDB files are available on the Microsoft server, which is by default is in options. See all pdb options in radare2:
pdb.autoload = 0
pdb.extract = 1
pdb.server = https://msdl.microsoft.com/download/symbols
pdb.useragent = Microsoft-Symbol-Server/6.11.0001.402
Using the variable pdb.server you can change the address where radare2 will try to
download the PDB file by the GUID stored in the executable header.
You can make use of multiple symbol servers by separating each URL with a space:
e pdb.server = https://msdl.microsoft.com/download/symbols https://symbols.mozilla.org
On Windows, you can also use local network share paths (UNC paths) as symbol servers.
Usually, there is no reason to change default pdb.useragent, but who knows where
could it be handy?
Because those PDB files are stored as "cab" archives on the server, pdb.extract=1
says to automatically extract them.
Note that for the automatic downloading to work you need "cabextract" tool, and wget/curl installed.
Sometimes you don't need to do that from the radare2 itself, thus - two handy rabin2 options:
 -P              show debug/pdb information
 -PP             download pdb file for binary
where -PP automatically downloads the pdb for the selected binary, using those
pdb.* config options. -P will dump the contents of the PDB file, which is useful
sometimes for a quick understanding of the symbols stored in it.
Apart from the basic scenario of just opening a file, PDB information can be additionally
manipulated by the id commands:
[0x000051c0]> id?
|Usage: id Debug information
| Output mode:
| '*'              Output in radare commands
| id               Source lines
| idp [file.pdb]   Load pdb file information
| idpi [file.pdb]  Show pdb file information
| idpd             Download pdb file on remote server
Where idpi is basically the same as rabin2 -P.
Note that idp can be also used not only in the static analysis mode, but also
in the debugging mode, even if connected via WinDbg.
For simplifying the loading PDBs, especially for the processes with many linked DLLs,
radare2 can autoload all required PDBs automatically - you need just set the
e pdb.autoload=true option. Then if you load some file in debugging mode
in Windows, using r2 -d file.exe or r2 -d 2345 (attach to pid 2345), all
related PDB files will be loaded automatically.
DWARF information loading, on the other hand, is completely automated. You don't need to run any commands/change any options:
r2 `which rabin2`
[0x00002437 8% 300 /usr/local/bin/rabin2]> pd $r
0x00002437  jne 0x2468                  ;[1]
0x00002439  cmp qword reloc.__cxa_finalize_224, 0
0x00002441  push rbp
0x00002442  mov rbp, rsp
0x00002445  je 0x2453                   ;[2]
0x00002447  lea rdi, obj.__dso_handle   ; 0x207c40 ; "@| "
0x0000244e  call 0x2360                 ;[3]
0x00002453  call sym.deregister_tm_clones ;[4]
0x00002458  mov byte [obj.completed.6991], 1 ; obj.__TMC_END__ ; [0x2082f0:1]=0
0x0000245f  pop rbp
0x00002460  ret
0x00002461  nop dword [rax]
0x00002468  ret
0x0000246a  nop word [rax + rax]
;-- entry1.init:
;-- frame_dummy:
0x00002470  push rbp
0x00002471  mov rbp, rsp
0x00002474  pop rbp
0x00002475  jmp sym.register_tm_clones  ;[5]
;-- blob_version:
0x0000247a  push rbp                    ; ../blob/version.c:18
0x0000247b  mov rbp, rsp
0x0000247e  sub rsp, 0x10
0x00002482  mov qword [rbp - 8], rdi
0x00002486  mov eax, 0x32               ; ../blob/version.c:24 ; '2'
0x0000248b  test al, al                 ; ../blob/version.c:19
0x0000248d  je 0x2498                   ;[6]
0x0000248f  lea rax, str.2.0.1_182_gf1aa3aa4d ; 0x60b8 ; "2.0.1-182-gf1aa3aa4d"
0x00002496  jmp 0x249f                  ;[7]
0x00002498  lea rax, 0x000060cd
0x0000249f  mov rsi, qword [rbp - 8]
0x000024a3  mov r8, rax
0x000024a6  mov ecx, 0x40               ; section_end.ehdr
0x000024ab  mov edx, 0x40c0
0x000024b0  lea rdi, str._s_2.1.0_git__d___linux_x86__d_git._s_n ; 0x60d0 ; "%s 2.1.0-git %d @ linux-x86-%d git.%s\n"
0x000024b7  mov eax, 0
0x000024bc  call 0x2350                 ;[8]
0x000024c1  mov eax, 0x66               ; ../blob/version.c:25 ; 'f'
0x000024c6  test al, al
0x000024c8  je 0x24d6                   ;[9]
0x000024ca  lea rdi, str.commit:_f1aa3aa4d2599c1ad60e3ecbe5f4d8261b282385_build:_2017_11_06__12:18:39 ; ../blob/version.c:26 ; 0x60f8 ; "commit: f1aa3aa4d2599c1ad60e3ecbe5f4d8261b282385 build: 2017-11-06__1
0x000024d1  call sym.imp.puts           ;[?]
0x000024d6  mov eax, 0                  ; ../blob/version.c:28
0x000024db  leave                       ; ../blob/version.c:29
0x000024dc  ret
;-- rabin_show_help:
0x000024dd  push rbp                    ; .//rabin2.c:27
As you can see, it loads function names and source line information.
List Libraries
Rabin2 can list libraries used by a binary with the -l option:
$ rabin2 -l `which r2`
[Linked libraries]
libr_core.so
libr_parse.so
libr_search.so
libr_cons.so
libr_config.so
libr_bin.so
libr_debug.so
libr_asm.so
libr_anal.so
libr_reg.so
libr_bp.so
libr_io.so
libr_fs.so
libr_arch.so
libr_syscall.so
libr_hash.so
libr_magic.so
libr_flag.so
libr_egg.so
libr_crypto.so
libr_util.so
libpthread.so.0
libc.so.6

22 libraries
Lets check the output with ldd command:
$ ldd `which r2`
linux-vdso.so.1 (0x00007fffba38e000)
libr_core.so => /usr/lib64/libr_core.so (0x00007f94b4678000)
libr_parse.so => /usr/lib64/libr_parse.so (0x00007f94b4425000)
libr_search.so => /usr/lib64/libr_search.so (0x00007f94b421f000)
libr_cons.so => /usr/lib64/libr_cons.so (0x00007f94b4000000)
libr_config.so => /usr/lib64/libr_config.so (0x00007f94b3dfa000)
libr_bin.so => /usr/lib64/libr_bin.so (0x00007f94b3afd000)
libr_debug.so => /usr/lib64/libr_debug.so (0x00007f94b38d2000)
libr_asm.so => /usr/lib64/libr_asm.so (0x00007f94b2fbd000)
libr_anal.so => /usr/lib64/libr_anal.so (0x00007f94b2fbd000)
libr_reg.so => /usr/lib64/libr_reg.so (0x00007f94b2db4000)
libr_bp.so => /usr/lib64/libr_bp.so (0x00007f94b2baf000)
libr_io.so => /usr/lib64/libr_io.so (0x00007f94b2944000)
libr_fs.so => /usr/lib64/libr_fs.so (0x00007f94b270e000)
libr_arch.so => /usr/lib64/libr_arch.so (0x00007f94b1c69000)
libr_syscall.so => /usr/lib64/libr_syscall.so (0x00007f94b1a63000)
libr_hash.so => /usr/lib64/libr_hash.so (0x00007f94b185a000)
libr_magic.so => /usr/lib64/libr_magic.so (0x00007f94b164d000)
libr_flag.so => /usr/lib64/libr_flag.so (0x00007f94b1446000)
libr_egg.so => /usr/lib64/libr_egg.so (0x00007f94b1236000)
libr_crypto.so => /usr/lib64/libr_crypto.so (0x00007f94b1016000)
libr_util.so => /usr/lib64/libr_util.so (0x00007f94b0d35000)
libpthread.so.0 => /lib64/libpthread.so.0 (0x00007f94b0b15000)
libc.so.6 => /lib64/libc.so.6 (0x00007f94b074d000)
libr_lang.so => /usr/lib64/libr_lang.so (0x00007f94b0546000)
libr_socket.so => /usr/lib64/libr_socket.so (0x00007f94b0339000)
libm.so.6 => /lib64/libm.so.6 (0x00007f94affaf000)
libdl.so.2 => /lib64/libdl.so.2 (0x00007f94afdab000)
/lib64/ld-linux-x86-64.so.2 (0x00007f94b4c79000)
libssl.so.1.0.0 => /usr/lib64/libssl.so.1.0.0 (0x00007f94afb3c000)
libcrypto.so.1.0.0 => /usr/lib64/libcrypto.so.1.0.0 (0x00007f94af702000)
libutil.so.1 => /lib64/libutil.so.1 (0x00007f94af4ff000)
libz.so.1 => /lib64/libz.so.1 (0x00007f94af2e8000)
If you compare the outputs of rabin2 -l and ldd, you will notice that rabin2 lists fewer libraries than ldd. The reason is that rabin2 does not follow and does not show dependencies of libraries. Only direct binary dependencies are shown.
Strings
The -z option is used to list readable strings found in the .rodata section of ELF binaries, or the .text section of PE files. Example:
$ rabin2 -z /bin/ls | head
[Strings]
nth paddr      vaddr      len size section type  string
-------------------------------------------------------
000 0x000160f8 0x000160f8  11  12 (.rodata) ascii dev_ino_pop
001 0x00016188 0x00016188  10  11 (.rodata) ascii sort_files
002 0x00016193 0x00016193   6   7 (.rodata) ascii posix-
003 0x0001619a 0x0001619a   4   5 (.rodata) ascii main
004 0x00016250 0x00016250  10  11 (.rodata) ascii ?pcdb-lswd
005 0x00016260 0x00016260  65  66 (.rodata) ascii # Configuration file for dircolors, a utility to help you set the
006 0x000162a2 0x000162a2  72  73 (.rodata) ascii # LS_COLORS environment variable used by GNU ls with the --color option.
007 0x000162eb 0x000162eb  56  57 (.rodata) ascii # Copyright (C) 1996-2018 Free Software Foundation, Inc.
008 0x00016324 0x00016324  70  71 (.rodata) ascii # Copying and distribution of this file, with or without modification,
009 0x0001636b 0x0001636b  76  77 (.rodata) ascii # are permitted provided the copyright notice and this notice are preserved.
With the -zr option, this information is represented as a radare2 commands list. It can be used in a radare2 session to automatically create a flag space called "strings" pre-populated with flags for all strings found by rabin2.
Furthermore, this script will mark corresponding byte ranges as strings instead of code.
$ rabin2 -zr /bin/ls | head
fs stringsf str.dev_ino_pop 12 @ 0x000160f8
Cs 12 @ 0x000160f8
f str.sort_files 11 @ 0x00016188
Cs 11 @ 0x00016188
f str.posix 7 @ 0x00016193
Cs 7 @ 0x00016193
f str.main 5 @ 0x0001619a
Cs 5 @ 0x0001619a
f str.pcdb_lswd 11 @ 0x00016250
Cs 11 @ 0x00016250
Sections
Rabin2 called with the -S option gives complete information about the sections of an executable. For each section the index, offset, size, alignment, type and permissions, are shown. The next example demonstrates this:
$ rabin2 -S /bin/ls
[Sections]

nth paddr          size vaddr         vsize perm name
-----------------------------------------------------
00 0x00000000     0 0x00000000     0 ----
01 0x00000238    28 0x00000238    28 -r-- .interp
02 0x00000254    32 0x00000254    32 -r-- .note.ABI_tag
03 0x00000278   176 0x00000278   176 -r-- .gnu.hash
04 0x00000328  3000 0x00000328  3000 -r-- .dynsym
05 0x00000ee0  1412 0x00000ee0  1412 -r-- .dynstr
06 0x00001464   250 0x00001464   250 -r-- .gnu.version
07 0x00001560   112 0x00001560   112 -r-- .gnu.version_r
08 0x000015d0  4944 0x000015d0  4944 -r-- .rela.dyn
09 0x00002920  2448 0x00002920  2448 -r-- .rela.plt
10 0x000032b0    23 0x000032b0    23 -r-x .init
11 0x000032d0  1648 0x000032d0  1648 -r-x .plt
12 0x00003940    24 0x00003940    24 -r-x .plt.got
13 0x00003960 73931 0x00003960 73931 -r-x .text
14 0x00015a2c     9 0x00015a2c     9 -r-x .fini
15 0x00015a40 20201 0x00015a40 20201 -r-- .rodata
16 0x0001a92c  2164 0x0001a92c  2164 -r-- .eh_frame_hdr
17 0x0001b1a0 11384 0x0001b1a0 11384 -r-- .eh_frame
18 0x0001e390     8 0x0021e390     8 -rw- .init_array
19 0x0001e398     8 0x0021e398     8 -rw- .fini_array
20 0x0001e3a0  2616 0x0021e3a0  2616 -rw- .data.rel.ro
21 0x0001edd8   480 0x0021edd8   480 -rw- .dynamic
22 0x0001efb8    56 0x0021efb8    56 -rw- .got
23 0x0001f000   840 0x0021f000   840 -rw- .got.plt
24 0x0001f360   616 0x0021f360   616 -rw- .data
25 0x0001f5c8     0 0x0021f5e0  4824 -rw- .bss
26 0x0001f5c8   232 0x00000000   232 ---- .shstrtab
With the -Sr option, rabin2 will flag the start/end of every section, and will pass the rest of information as a comment.
$ rabin2 -Sr /bin/ls | head
fs sections
"f section. 1 0x00000000"
"f section..interp 1 0x000002a8"
"f section..note.gnu.build_id 1 0x000002c4"
"f section..note.ABI_tag 1 0x000002e8"
"f section..gnu.hash 1 0x00000308"
"f section..dynsym 1 0x000003b8"
"f section..dynstr 1 0x00000fb8"
"f section..gnu.version 1 0x00001574"
"f section..gnu.version_r 1 0x00001678"
Radiff2
radiff2 is a powerful tool within the radare2 suite designed for binary diffing. It can be somehow compared to the well known diff utility from UNIX, but with focus on comparing binary files.
It supports several types of diffing, including 1:1 binary diffing, delta diffing, code analysis diffing, and binary data (bindata) diffing.
These features allow users to compare two binaries at various levels, from raw data to disassembled code, providing insights into changes and differences between them. Additionally, radiff2 supports architecture and bits specification, graph diffing, and more, making it a versatile tool for reverse engineering tasks.
Many of these diffing features are also available in the c command within the radare2 shell. Opening the door to compare data from disk or process memory when using any io backend at any time without leaving the current session.
You can learn more about this tool by checking the help message or reading the manpage with man radiff2.
$ radiff2 -h
Usage: radiff2 [-abBcCdjrspOxuUvV] [-A[A]] [-g sym] [-m graph_mode][-t %] [file] [file]
  -a [arch]  specify architecture plugin to use (x86, arm, ..)
  -A [-A]    run aaa or aaaa after loading each binary (see -C)
  -b [bits]  specify register size for arch (16 (thumb), 32, 64, ..)
  -B         output in binary diff (GDIFF)
  -c         count of changes
  -C         graphdiff code (columns: off-A, match-ratio, off-B) (see -A)
  -d         use delta diffing
  -D         show disasm instead of hexpairs
  -e [k=v]   set eval config var value for all RCore instances
  -g [sym|off1,off2]   graph diff of given symbol, or between two offsets
  -G [cmd]   run an r2 command on every RCore instance created
  -i         diff imports of target files (see -u, -U and -z)
  -j         output in json format
  -n         print bare addresses only (diff.bare=1)
  -m [aditsjJ]  choose the graph output mode
  -O         code diffing with opcode bytes only
  -p         use physical addressing (io.va=0)
  -q         quiet mode (disable colors, reduce output)
  -r         output in radare commands
  -s         compute edit distance (no substitution, Eugene W. Myers O(ND) diff algorithm)
  -ss        compute Levenshtein edit distance (substitution is allowed, O(N^2))
  -S [name]  sort code diff (name, namelen, addr, size, type, dist) (only for -C or -g)
  -t [0-100] set threshold for code diff (default is 70%)
  -x         show two column hexdump diffing
  -X         show two column hexII diffing
  -u         unified output (---+++)
  -U         unified output using system 'diff'
  -v         show version information
  -V         be verbose (current only for -s)
  -z         diff on extracted strings
  -Z         diff code comparing zignatures

Graph Output formats: (-m [mode])
  <blank/a>  Ascii art
  s          r2 commands
  d          Graphviz dot
  g          Graph Modelling Language (gml)
  j          json
  J          json with disarm
  k          SDB key-value
  t          Tiny ascii art
  i          Interactive ascii art
Practical examples
Here are a few practical examples of how to use radiff2:
To compare two binaries:
radiff2 bin1 bin2
To use graph diffing to compare functions by name:
radiff2 -g main bin1 bin2
To count the number of changes between two binaries:
radiff2 -c bin1 bin2
To output the diff in a unified format:
radiff2 -u bin1 bin2
To compare the opcodes of two functions:
radiff2 -O bin1 bin2
Generating and Applying Patches
To compare two binaries and generate a patch file, you can use the following command:
$ echo hello > 1
$ echo hallo > 2
$ radiff2 -r 1 2
wx 61 @ 0x00000001
$ radiff2 -r 2 1
wx 65 @ 0x00000001
$
Note the -r flag will generate an r2 script, which can then be used to generate one binary from the other one using radare2 like this:
$ rahash2 -a md5 1 2
1: 0x00000000-0x00000005 md5: b1946ac92492d2347c6235b4d2611184
2: 0x00000000-0x00000005 md5: aee97cb3ad288ef0add6c6b5b5fae48a

$ radiff2 -r 1 2 > patch.r2
$ radare2 -qnw -i patch.r2 1

$ rahash2 -a md5 1 2
1: 0x00000000-0x00000005 md5: aee97cb3ad288ef0add6c6b5b5fae48a
2: 0x00000000-0x00000005 md5: aee97cb3ad288ef0add6c6b5b5fae48a
Let's explain the radare2 flags one by one:
- -q : quit after executing the script
- -n : do not load/parse binary headers
- -w : open in read-write mode
- -i : specify which script to run
Data Diffing
Data diffing with radiff2 allows you to compare binary data between files of different sizes. This is useful for identifying differences at the byte level, regardless of file length.
For example, comparing two files with radiff2 -x shows the differences in two column hexdump+ascii format:
$ cat 1
hello
$ cat 2
hallo
$ radiff2 -x 1 2
  offset     0 1 2 3 4 5 6 7 01234567    0 1 2 3 4 5 6 7 01234567
0x00000000! 68656c6c6f0a     hello.     68616c6c6f0a     hallo.
Also in hexII format:
$ radiff2 -X 1 2
0x00000000! .h.e.l.l.o0a         .h.a.l.l.o0a
or even the unified diff format using the -U flag:
$ radiff2 -U 1 2
--- /tmp/r_diff.61dd4e41da041	2024-07-22 14:07:37.682683431 +0200
+++ /tmp/r_diff.61dd4e41da06b	2024-07-22 14:07:37.682683431 +0200
@@ -1 +1 @@
-hello
+hallo
Let's understand the output because in your terminal you'll see some green and red highlighting the added or removed bytes from the byte-to-byte comparison.
!sign after the offset explains if the block is equal or not- hexdump portion of file 1
- hexdump portion of file 2
When comparing files of different sizes, we will need to use the -d flag which performs a delta-diffing algorithm, trying to find the patterns of bytes that has been added or removed when a specific change is found.
$ cat 1
hello
$ cat 3
helloworld
$ radiff2 1 3
INFO: File size differs 6 vs 11
INFO: Buffer truncated to 6 byte(s) (5 not compared)
0x00000005 0a => 77 0x00000005
$ radiff2 -d 1 3
INFO: File size differs 6 vs 11
0x00000000 68656c6c6f0a => 68656c6c6f776f726c640a 0x00000000
$
For JSON output, use radiff2 -j -d to get detailed diff information in JSON format:
$ radiff2 -j -d 1 3 |jq .
INFO: File size differs 6 vs 11
{
  "files": [
    {
      "filename": "1",
      "size": 6,
      "sha256": "5891b5b522d5df086d0ff0b110fbd9d21bb4fc7163af34d08286a2e846f6be03"
    },
    {
      "filename": "3",
      "size": 11,
      "sha256": "8cd07f3a5ff98f2a78cfc366c13fb123eb8d29c1ca37c79df190425d5b9e424d"
    }
  ],
  "changes": [
    {
      "addr": 0,
      "from": "68656c6c6f0a",
      "to": "68656c6c6f776f726c640a"
    }
  ]
}
$
These examples demonstrate how radiff2 can effectively highlight differences in files of varying lengths, providing clear insights into changes at the binary level.
Code Diffing
This tool can be also used to compare code, which can be really handy when analyzing two shellcodes, functions or libraries, looking for changes in its code.
To understand this feature we will start by using the basic delta diffing from the previous data analysis example but using the -D flag to display the changes in assembly instead of hexadecimal data.
Note that radiff2 permits to specify the arch/bits/.. settings using these flags:
$ radiff2 -h | grep -e arch -e bits
-a [arch]  specify architecture plugin to use (x86, arm, ..)
-b [bits]  specify register size for arch (16 (thumb), 32, 64, ..)
Let's test it out!
$ cat 1
j0X40PZHf5sOf5A0PRXRj0X40hXXshXf5wwPj0X4050binHPTXRQSPTUVWaPYS4J4A
$ cat 2
j0X4PX0PZHf5sOf5A0PRXRj0X40hXXshXf5wwPj0X4050binHPTXRQSPTUVWaPYS4J
Wen can compare the changes as disassembly like this:
$ radiff2 -D 5 6
  push 0x30
  pop rax
  xor al, 0x30
+ push rax
+ pop rax
  pop rdx
  xor ax, 0x4f73
  xor ax, 0x3041
  push rax
So we can see that the second file added an extra push rax + pop rax which is basically a nop, and maybe this was introduced to bypass some signatures to avoid being detected.
If you are looking for some more advanced bindiffing tool for code you may want to have a look at the r2diaphora and the zignatures features under the z command in the radare2 shell.
It's also possible to compare the changes between two functions using the -g flag, but you'll need to analize both binaries using the -A flag, and tell the symbol name as target.
Binary Diffing
radiff2 is also able to compare binaries by checking the differences between the output of rabin2. This is, the symbols, libraries, strings, etc.
The relevant flags for this feature are:
- -A/-AA analy
- -i [ifscm] -> compare imports, fields, symbols, classes,..
Binary Diffing
This section is based on the https://radare.today article "binary diffing"
Without any parameters, radiff2 by default shows what bytes are changed and their corresponding offsets:
$ radiff2 genuine cracked
0x000081e0 85c00f94c0 => 9090909090 0x000081e0
0x0007c805 85c00f84c0 => 9090909090 0x0007c805

$ rasm2 -d 85c00f94c0
test eax, eax
sete al
Notice how the two jumps are nop'ed.
For bulk processing, you may want to have a higher-level overview of differences. This is why radare2 is able to compute the distance and the percentage of similarity between two files with the -s option:
$ radiff2 -s /bin/true /bin/false
similarity: 0.97
distance: 743
If you want more concrete data, it's also possible to count the differences, with the -c option:
$ radiff2 -c genuine cracked
2
If you are unsure whether you are dealing with similar binaries, with -C flag you can check there are matching functions. It this mode, it will give you three columns for all functions: "First file offset", "Percentage of matching" and "Second file offset".
$ radiff2 -C /bin/false /bin/true
  entry0  0x4013e8 |   MATCH  (0.904762) | 0x4013e2  entry0
  sym.imp.__libc_start_main  0x401190 |   MATCH  (1.000000) | 0x401190  sym.imp.__libc_start_main
  fcn.00401196  0x401196 |   MATCH  (1.000000) | 0x401196  fcn.00401196
  fcn.0040103c  0x40103c |   MATCH  (1.000000) | 0x40103c  fcn.0040103c
  fcn.00401046  0x401046 |   MATCH  (1.000000) | 0x401046  fcn.00401046
  fcn.000045e0   24 0x45e0 | UNMATCH  (0.916667) | 0x45f0    24 fcn.000045f0
  ...
Moreover, we can ask radiff2 to perform analysis first - adding -A option will run aaa on the binaries.
And we can specify binaries architecture for this analysis too using
$ radiff2 -AC -a x86 /bin/true /bin/false | grep UNMATCH
[x] Analyze all flags starting with sym. and entry0 (aa)
[x] Analyze len bytes of instructions for references (aar)
[x] Analyze function calls (aac)
[ ] [*] Use -AA or aaaa to perform additional experimental analysis.
[x] Constructing a function name for fcn.* and sym.func.* functions (aan))
[x] Analyze all flags starting with sym. and entry0 (aa)
[x] Analyze len bytes of instructions for references (aar)
[x] Analyze function calls (aac)
[ ] [*] Use -AA or aaaa to perform additional experimental analysis.
[x] Constructing a function name for fcn.* and sym.func.* functions (aan))
                        sub.fileno_500   86 0x4500 | UNMATCH  (0.965116) | 0x4510    86 sub.fileno_510
                    sub.__freading_4c0   59 0x44c0 | UNMATCH  (0.949153) | 0x44d0    59 sub.__freading_4d0
                        sub.fileno_440  120 0x4440 | UNMATCH  (0.200000) | 0x4450   120 sub.fileno_450
                     sub.setlocale_fa0   64 0x3fa0 | UNMATCH  (0.104651) | 0x3fb0    64 sub.setlocale_fb0
                          fcn.00003a50  120 0x3a50 | UNMATCH  (0.125000) | 0x3a60   120 fcn.00003a60
And now a cool feature : radare2 supports graph-diffing, à la DarunGrim, with the -g option. You can either give it a symbol name, of specify two offsets, if the function you want to diff is named differently in compared files. For example, radiff2 -md -g main /bin/true /bin/false | xdot - will show differences in main() function of Unix true and false programs. You can compare it to radiff2 -md -g main /bin/false /bin/true | xdot - (Notice the order of the arguments) to get the two versions.
This is the result:
Parts in yellow indicate that some offsets do not match. The grey piece means a perfect match. The orange one highlights a strong difference. If you look closely, you will see that the left part of the picture has mov eax, 0x1; pop rbx; pop rbp; ret, while the right one has xor edx, edx; pop rbx; pop rbp; ret.
Binary diffing is an important feature for reverse engineering. It can be used to analyze security updates, infected binaries, firmware changes and more...
We have only shown the code analysis diffing functionality, but radare2 supports additional types of diffing between two binaries: at byte level, deltified similarities, and more to come.
We have plans to implement more kinds of bindiffing algorithms into r2, and why not, add support for ASCII art graph diffing and better integration with the rest of the toolkit.
Rasm2
The command-line assembler and disassembler that is part of the radare2 framework. It supports a wide range of architectures and can be used independently of the main radare2 tool. Key features include:
- Multi-architecture support: Can handle numerous architectures including x86, x86-64, ARM, MIPS, PowerPC, SPARC, and many others.
- Bi-directional operation: Functions as both an assembler (converting human-readable assembly code to machine code) and a disassembler (converting machine code back to assembly).
- Flexible input/output: Accepts input as hexadecimal strings, raw binary files, or text files containing assembly code.
- Shellcode generation: Useful for security research and exploit development.
- Inline assembly: Allows for quick assembly of individual instructions or small code snippets.
- Syntax highlighting: Provides colored output for better readability when disassembling.
- Plugins: Supports architecture-specific plugins for extended functionality.
Help
$ rasm2 -h
Usage: rasm2 [-ACdDehLBvw] [-a arch] [-b bits] [-o addr] [-s syntax]
             [-f file] [-F fil:ter] [-i skip] [-l len] 'code'|hex|0101b|-
 -a [arch]    set architecture to assemble/disassemble (see -L)
 -A           show Analysis information from given hexpairs
 -b [bits]    set cpu register size (8, 16, 32, 64) (RASM2_BITS)
 -B           binary input/output (-l is mandatory for binary input)
 -c [cpu]     select specific CPU (depends on arch)
 -C           output in C format
 -d, -D       disassemble from hexpair bytes (-D show hexpairs)
 -e           use big endian instead of little endian
 -E           display ESIL expression (same input as in -d)
 -f [file]    read data from file
 -F [in:out]  specify input and/or output filters (att2intel, x86.pseudo, ...)
 -h, -hh      show this help, -hh for long
 -i [len]     ignore/skip N bytes of the input buffer
 -j           output in json format
 -k [kernel]  select operating system (linux, windows, darwin, ..)
 -l [len]     input/Output length
 -L           list RAsm plugins: (a=asm, d=disasm, A=analyze, e=ESIL)
 -LL          list RAnal plugins (see anal.arch=?) combines with -j
 -o,-@ [addr] set start address for code (default 0)
 -O [file]    output file name (rasm2 -Bf a.asm -O a)
 -N           same as r2 -N (or R2_NOPLUGINS) (not load any plugin)
 -p           run SPP over input for assembly
 -q           quiet mode
 -r           output in radare commands
 -s [syntax]  select syntax (intel, att)
 -v           show version information
 -x           use hex dwords instead of hex pairs when assembling.
 -w           what's this instruction for? describe opcode
 If '-l' value is greater than output length, output is padded with nops
 If the last argument is '-' reads from stdin
Environment:
 R2_NOPLUGINS   do not load shared plugins (speedup loading)
 R2_LOG_LEVEL=X    change the log level
 R2_DEBUG          if defined, show error messages and crash signal
 R2_DEBUG_ASSERT=1 lldb -- r2 to get proper backtrace of the runtime assert
 RASM2_ARCH        same as rasm2 -a
 RASM2_BITS        same as rasm2 -b
Plugins
Plugins for supported target architectures can be listed with the -L option. Knowing a plugin name, you can use it by specifying its name to the -a option
$ rasm2 -L
_dAe  8 16       6502        LGPL3   6502/NES/C64/Tamagotchi/T-1000 CPU
_dAe  8          8051        PD      8051 Intel CPU
_dA_  16 32      arc         GPL3    Argonaut RISC Core
a___  16 32 64   arm.as      LGPL3   as ARM Assembler (use ARM_AS environment)
adAe  16 32 64   arm         BSD     Capstone ARM disassembler
_dA_  16 32 64   arm.gnu     GPL3    Acorn RISC Machine CPU
_d__  16 32      arm.winedbg LGPL2   WineDBG's ARM disassembler
adAe  8 16       avr         GPL     AVR Atmel
adAe  16 32 64   bf          LGPL3   Brainfuck (by pancake, nibble) v4.0.0
_dA_  32         chip8       LGPL3   Chip8 disassembler
_dA_  16         cr16        LGPL3   cr16 disassembly plugin
_dA_  32         cris        GPL3    Axis Communications 32-bit embedded processor
adA_  32 64      dalvik      LGPL3   AndroidVM Dalvik
ad__  16         dcpu16      PD      Mojang's DCPU-16
_dA_  32 64      ebc         LGPL3   EFI Bytecode
adAe  16         gb          LGPL3   GameBoy(TM) (z80-like)
_dAe  16         h8300       LGPL3   H8/300 disassembly plugin
_dAe  32         hexagon     LGPL3   Qualcomm Hexagon (QDSP6) V6
_d__  32         hppa        GPL3    HP PA-RISC
_dAe             i4004       LGPL3   Intel 4004 microprocessor
_dA_  8          i8080       BSD     Intel 8080 CPU
adA_  32         java        Apache  Java bytecode
_d__  32         lanai       GPL3    LANAI
_d__  8          lh5801      LGPL3   SHARP LH5801 disassembler
_d__  32         lm32        BSD     disassembly plugin for Lattice Micro 32 ISA
_dA_  16 32      m68k        BSD     Capstone M68K disassembler
_dA_  32         malbolge    LGPL3   Malbolge Ternary VM
_d__  16         mcs96       LGPL3   condrets car
adAe  16 32 64   mips        BSD     Capstone MIPS disassembler
adAe  32 64      mips.gnu    GPL3    MIPS CPU
_dA_  16         msp430      LGPL3   msp430 disassembly plugin
_dA_  32         nios2       GPL3    NIOS II Embedded Processor
_dAe  8          pic         LGPL3   PIC disassembler
_dAe  32 64      ppc         BSD     Capstone PowerPC disassembler
_dA_  32 64      ppc.gnu     GPL3    PowerPC
_d__  32         propeller   LGPL3   propeller disassembly plugin
_dA_  32 64      riscv       GPL     RISC-V
_dAe  32         rsp         LGPL3   Reality Signal Processor
_dAe  32         sh          GPL3    SuperH-4 CPU
_dA_  8 16       snes        LGPL3   SuperNES CPU
_dAe  32 64      sparc       BSD     Capstone SPARC disassembler
_dA_  32 64      sparc.gnu   GPL3    Scalable Processor Architecture
_d__  16         spc700      LGPL3   spc700, snes' sound-chip
_d__  32         sysz        BSD     SystemZ CPU disassembler
_dA_  32         tms320      LGPLv3  TMS320 DSP family (c54x,c55x,c55x+,c64x)
_d__  32         tricore     GPL3    Siemens TriCore CPU
_dAe  32         v810        LGPL3   v810 disassembly plugin
_dAe  32         v850        LGPL3   v850 disassembly plugin
_dAe  8 32       vax         GPL     VAX
adA_  32         wasm        MIT     WebAssembly (by cgvwzq) v0.1.0
_dA_  32         ws          LGPL3   Whitespace esotheric VM
a___  16 32 64   x86.as      LGPL3   Intel X86 GNU Assembler
_dAe  16 32 64   x86         BSD     Capstone X86 disassembler
a___  16 32 64   x86.nasm    LGPL3   X86 nasm assembler
a___  16 32 64   x86.nz      LGPL3   x86 handmade assembler
_dA_  16         xap         PD      XAP4 RISC (CSR)
_dA_  32         xcore       BSD     Capstone XCore disassembler
_dAe  32         xtensa      GPL3    XTensa CPU
adA_  8          z80         GPL     Zilog Z80
NOTE the "ad" in the first column means both assembler and disassembler are offered by a corresponding plugin. "d" indicates disassembler, "a" means only assembler is available.
Assembler
Assembling is the action to take a computer instruction in human readable form (using mnemonics) and convert that into a bunch of bytes that can be executed by a machine.
In radare2, the assembler and disassembler logic is implemented in the r_arch API (r_asm and r_anal were merged into r_arch), and can be used with the pa and pad commands from the commandline as well as using rasm2.
Rasm2 can be used to quickly copy-paste hexpairs that represent a given machine instruction. The following line is assembling this mov instruction for x86/32.
$ rasm2 -a x86 -b 32 'mov eax, 33'
b821000000
Apart from the specifying the input as an argument, you can also pipe it to rasm2:
$ echo 'push eax;nop;nop' | rasm2 -f -
5090
As you have seen, rasm2 can assemble one or many instructions. In line by separating them with a semicolon ;, but can also read that from a file, using generic nasm/gas/.. syntax and directives. You can check the rasm2 manpage for more details on this.
The pa and pad are a subcommands of print, what means they will only print assembly or disassembly. In case you want to actually write the instruction it is required to use wa or wx commands with the assembly string or bytes appended.
The assembler understands the following input languages and their flavors: x86 (Intel and AT&T variants), olly (OllyDBG syntax), powerpc (PowerPC), arm and java. For Intel syntax, rasm2 tries to mimic NASM or GAS.
There are several examples in the rasm2 source code directory. Consult them to understand how you can assemble a raw binary file from a rasm2 description.
Lets create an assembly file called selfstop.rasm:
;
; Self-Stop shellcode written in rasm for x86
;
; --pancake
;

.arch x86
.equ base 0x8048000
.org 0x8048000  ; the offset where we inject the 5 byte jmp

selfstop:
  push 0x8048000
  pusha
  mov eax, 20
  int 0x80

  mov ebx, eax
  mov ecx, 19
  mov eax, 37
  int 0x80
  popa
  ret
;
; The call injection
;

  ret
Now we can assemble it in place:
[0x00000000]> e asm.bits = 32
[0x00000000]> wx `!rasm2 -f a.rasm`
[0x00000000]> pd 20
	   0x00000000    6800800408   push 0x8048000 ;  0x08048000
	   0x00000005    60           pushad
	   0x00000006    b814000000   mov eax, 0x14 ;  0x00000014
	   0x0000000b    cd80         int 0x80
		  syscall[0x80][0]=?
	   0x0000000d    89c3         mov ebx, eax
	   0x0000000f    b913000000   mov ecx, 0x13 ;  0x00000013
	   0x00000014    b825000000   mov eax, 0x25 ;  0x00000025
	   0x00000019    cd80         int 0x80
		  syscall[0x80][0]=?
	   0x0000001b    61           popad
	   0x0000001c    c3           ret
	   0x0000001d    c3           ret
Visual mode
Assembling also is accessible in radare2 visual mode through pressing A key to insert the assembly in the current offset.
The cool thing of writing assembly using the visual assembler interface that the changes are done in memory until you press enter.
So you can check the size of the code and which instructions is overlapping before committing the changes.
Disassembler
Disassembling is the inverse action of assembling. Rasm2 takes hexpair as an input (but can also take a file in binary form) and show the human readable form.
To do this we can use the -d option of rasm2 like this:
$ rasm2 -a x86 -b 32 -d '90'
nop
or for java:
$ rasm2 -a java 'nop'
00

Rasm2 also have the `-D` flag to show the disassembly like `-d` does, but includes offset and bytes.

In radare2 there are many commands to perform a disassembly from a specific place in memory.

```console
$ rasm2 -a x86 -b 32 'mov eax, 33'
b821000000

$ echo 'push eax;nop;nop' | rasm2 -f -
509090
You might be interested in trying if you want different outputs for later parsing with your scripts, or just grep to find what you are looking for:
pd N
Disassemble N instructions
pD N
Disassemble N bytes
pda
Disassemble all instructions (seeking 1 byte, or the minimum alignment instruction size), which can be useful for ROP
pi, pI
Same as pd and pD, but using a simpler output.
Disassembler Configuration
The assembler and disassembler have many small switches to tweak the output.
Those configurations are available through the e command. Here there are the most common ones:
- asm.bytes - show/hide bytes
- asm.offset - show/hide offset
- asm.lines - show/hide lines
- asm.ucase - show disasm in uppercase
- ...
Use the e??asm. for more details.
ragg2
ragg2 stands for radare2's egg compiler, it's the basic tool to compile relocatable snippets of code and modify paddings and inject sequences in order to be used for injection in target processes when doing exploiting.
ragg2 compiles programs written in a simple high-level language into tiny binaries for x86, x86-64, and ARM.
The final bytestream can be rendered in a variety of output formats, including raw binary, C arrays, and various executable formats. This flexibility allows users to generate code that can be easily integrated into different types of projects or testing scenarios. Additionally, ragg2 can perform operations like encoding and encryption on the generated shellcode, which can be useful for evading detection or bypassing security measures in controlled testing environments.
Example
By default it will compile it's own ragg2 language, but you can also compile C code using GCC or Clang shellcodes depending on the file extension. Lets create C file called a.c:
int main() {
	write(1, "Hello World\n", 13);
	return 0;
}
That small C program can be compiled with ragg2 like this:
$ ragg2 -a x86 -b32 a.c
e900000000488d3516000000bf01000000b80400000248c7c20d0000000f0531c0c348656c6c6f20576f726c640a00

$ rasm2 -a x86 -b 32 -D e900000000488d3516000000bf01000000b80400000248c7c20d0000000f0531c0c348656c6c6f20576f726c640a00
0x00000000   5               e900000000  jmp 5
0x00000005   1                       48  dec eax
0x00000006   6             8d3516000000  lea esi, [0x16]
0x0000000c   5               bf01000000  mov edi, 1
0x00000011   5               b804000002  mov eax, 0x2000004
0x00000016   1                       48  dec eax
0x00000017   6             c7c20d000000  mov edx, 0xd
0x0000001d   2                     0f05  syscall
0x0000001f   2                     31c0  xor eax, eax
0x00000021   1                       c3  ret
0x00000022   1                       48  dec eax
0x00000023   2                     656c  insb byte es:[edi], dx
0x00000025   1                       6c  insb byte es:[edi], dx
0x00000026   1                       6f  outsd dx, dword [esi]
0x00000027   3                   20576f  and byte [edi + 0x6f], dl
0x0000002a   2                     726c  jb 0x98
0x0000002c   3                   640a00  or al, byte fs:[eax]
Help message
Checking the help from the commandline will give you a wide understanding of what's the tool about and its capabilities
Usage: ragg2 [-FOLsrxhvz] [-a arch] [-b bits] [-k os] [-o file] [-I path]
             [-i sc] [-E enc] [-B hex] [-c k=v] [-C file] [-p pad] [-q off]
             [-S string] [-f fmt] [-nN dword] [-dDw off:hex] [-e expr] file|f.asm|-
 -a [arch]       select architecture (x86, mips, arm)
 -b [bits]       register size (32, 64, ..)
 -B [hexpairs]   append some hexpair bytes
 -c [k=v]        set configuration options
 -C [file]       append contents of file
 -d [off:dword]  patch dword (4 bytes) at given offset
 -D [off:qword]  patch qword (8 bytes) at given offset
 -e [egg-expr]   take egg program from string instead of file
 -E [encoder]    use specific encoder. see -L
 -f [format]     output format (raw, c, pe, elf, mach0, python, javascript)
 -F              output native format (osx=mach0, linux=elf, ..)
 -h              show this help
 -i [shellcode]  include shellcode plugin, uses options. see -L
 -I [path]       add include path
 -k [os]         operating system's kernel (linux,bsd,osx,w32)
 -L              list all plugins (shellcodes and encoders)
 -n [dword]      append 32bit number (4 bytes)
 -N [dword]      append 64bit number (8 bytes)
 -o [file]       output file
 -O              use default output file (filename without extension or a.out)
 -p [padding]    add padding after compilation (padding=n10s32)
                 ntas : begin nop, trap, 'a', sequence
                 NTAS : same as above, but at the end
 -P [size]       prepend debruijn pattern
 -q [fragment]   debruijn pattern offset
 -r              show raw bytes instead of hexpairs
 -s              show assembler
 -S [string]     append a string
 -v              show version
 -w [off:hex]    patch hexpairs at given offset
 -x              execute
 -X [hexpairs]   execute rop chain, using the stack provided
 -z              output in C string syntax
First Example
$ cat hello.r
exit@syscall(1);

main@global() {
	exit(2);
}

$ ragg2 -a x86 -b 64 hello.r
48c7c00200000050488b3c2448c7c0010000000f054883c408c3
0x00000000   1                       48  dec eax
0x00000001   6             c7c002000000  mov eax, 2
0x00000007   1                       50  push eax
0x00000008   1                       48  dec eax
0x00000009   3                   8b3c24  mov edi, dword [esp]
0x0000000c   1                       48  dec eax
0x0000000d   6             c7c001000000  mov eax, 1
0x00000013   2                     0f05  syscall
0x00000015   1                       48  dec eax
0x00000016   3                   83c408  add esp, 8
0x00000019   1                       c3  ret

$ rasm2 -a x86 -b 64 -D 48c7c00200000050488b3c2448c7c0010000000f054883c408c3
0x00000000   7           48c7c002000000  mov rax, 2
0x00000007   1                       50  push rax
0x00000008   4                 488b3c24  mov rdi, qword [rsp]
0x0000000c   7           48c7c001000000  mov rax, 1
0x00000013   2                     0f05  syscall
0x00000015   4                 4883c408  add rsp, 8
0x00000019   1                       c3  ret
Injectable machine code in different forms
Consider the following program:
$ cat code1.c
int main()
{
	write(1, "Hello World\n", 13);
	exit(0);
}
One can get raw machine code of the above program like this:
$ ragg2 code1.c
eb0e66666666662e0f1f84000000000050bf01000000488d359f000000ba0d000000e81900000031ff89442404e85e00000031d289042489d059c30f1f440000897c24fc48897424f0895424ec8b5424fc895424dc488b7424f048897424d08b5424ec895424cc8b7c24dc488b7424d08b5424ccb8010000000f0548894424e0488b4424e089c1894c24c88b4424c8c3897c24fc8b7c24fc897c24ec8b7c24ecb83c0000000f0548894424f0488b4424f089c1894c24e88b4424e8c348656c6c6f20576f726c640a00
If you want it in a file, you may use the '-O' flag which uses the default filename or you may specify the output filename using '-o' option.
$ ragg2 -O code1.c
$ cat code1
eb0e66666666662e0f1f84000000000050bf01000000488d359f000000ba0d000000e81900000031ff89442404e85e00000031d289042489d059c30f1f440000897c24fc48897424f0895424ec8b5424fc895424dc488b7424f048897424d08b5424ec895424cc8b7c24dc488b7424d08b5424ccb8010000000f0548894424e0488b4424e089c1894c24c88b4424c8c3897c24fc8b7c24fc897c24ec8b7c24ecb83c0000000f0548894424f0488b4424f089c1894c24e88b4424e8c348656c6c6f20576f726c640a00
Printing as in raw
$ ragg2 -o code1.raw code1.c
$ cat code1.raw
eb0e66666666662e0f1f84000000000050bf01000000488d359f000000ba0d000000e81900000031ff89442404e85e00000031d289042489d059c30f1f440000897c24fc48897424f0895424ec8b5424fc895424dc488b7424f048897424d08b5424ec895424cc8b7c24dc488b7424d08b5424ccb8010000000f0548894424e0488b4424e089c1894c24c88b4424c8c3897c24fc8b7c24fc897c24ec8b7c24ecb83c0000000f0548894424f0488b4424f089c1894c24e88b4424e8c348656c6c6f20576f726c640a00
The above is a basic 'raw' output. ragg2 offers a number of output format options via -f. One can find it through ragg2 -h or ragg2's manpage.
-f format output format (raw, c, pe, elf, mach0, python, javascript)
The following is 'c' format output - shellcode which can be readily used in your C program.
$ ragg2 -f c -o code1.c.c code1.c
$ cat code1.c.c
const unsigned char cstr[201] = ""\
  "\xeb\x0e\x66\x66\x66\x66\x66\x2e\x0f\x1f\x84\x00\x00\x00\x00\x00\x50\xbf\x01\x00\x00"\
  "\x00\x48\x8d\x35\x9f\x00\x00\x00\xba\r\x00\x00\x00\xe8\x19\x00\x00\x00"\
  "\x31\xff\x89\x44\x24\x04\xe8\x5e\x00\x00\x00\x31\xd2\x89\x04\x24\x89\xd0\x59\xc3\x0f"\
  "\x1f\x44\x00\x00\x89\x7c\x24\xfc\x48\x89\x74\x24\xf0\x89\x54\x24\xec\x8b\x54\x24\xfc\x89\x54\x24\xdc"\
  "\x48\x8b\x74\x24\xf0\x48\x89\x74\x24\xd0\x8b\x54\x24\xec\x89\x54\x24\xcc\x8b\x7c\x24\xdc\x48\x8b\x74\x24\xd0"\
  "\x8b\x54\x24\xcc\xb8\x01\x00\x00\x00\x0f\x05\x48\x89\x44\x24\xe0\x48\x8b\x44\x24\xe0\x89"\
  "\xc1\x89\x4c\x24\xc8\x8b\x44\x24\xc8\xc3\x89\x7c\x24\xfc\x8b\x7c\x24\xfc\x89\x7c\x24\xec\x8b"\
  "\x7c\x24\xec\xb8\x3c\x00\x00\x00\x0f\x05\x48\x89\x44\x24\xf0\x48\x8b\x44\x24\xf0\x89\xc1"\
  "\x89\x4c\x24\xe8\x8b\x44\x24\xe8\xc3\x48\x65\x6c\x6c\x6f\x20\x57\x6f\x72\x6c\x64\n\x00";
You may readily use it in C programs like this:
$ cat code1.c.c
int main()
{
	const unsigned char cstr[201] = ""\
	  "\xeb\x0e\x66\x66\x66\x66\x66\x2e\x0f\x1f\x84\x00\x00\x00\x00\x00\x50\xbf\x01\x00\x00"\
	  "\x00\x48\x8d\x35\x9f\x00\x00\x00\xba\r\x00\x00\x00\xe8\x19\x00\x00\x00"\
	  "\x31\xff\x89\x44\x24\x04\xe8\x5e\x00\x00\x00\x31\xd2\x89\x04\x24\x89\xd0\x59\xc3\x0f"\
	  "\x1f\x44\x00\x00\x89\x7c\x24\xfc\x48\x89\x74\x24\xf0\x89\x54\x24\xec\x8b\x54\x24\xfc\x89\x54\x24\xdc"\
	  "\x48\x8b\x74\x24\xf0\x48\x89\x74\x24\xd0\x8b\x54\x24\xec\x89\x54\x24\xcc\x8b\x7c\x24\xdc\x48\x8b\x74\x24\xd0"\
	  "\x8b\x54\x24\xcc\xb8\x01\x00\x00\x00\x0f\x05\x48\x89\x44\x24\xe0\x48\x8b\x44\x24\xe0\x89"\
	  "\xc1\x89\x4c\x24\xc8\x8b\x44\x24\xc8\xc3\x89\x7c\x24\xfc\x8b\x7c\x24\xfc\x89\x7c\x24\xec\x8b"\
	  "\x7c\x24\xec\xb8\x3c\x00\x00\x00\x0f\x05\x48\x89\x44\x24\xf0\x48\x8b\x44\x24\xf0\x89\xc1"\
	  "\x89\x4c\x24\xe8\x8b\x44\x24\xe8\xc3\x48\x65\x6c\x6c\x6f\x20\x57\x6f\x72\x6c\x64\n\x00";

	void (*func)() = cstr;
	func();
	return 0;
}
Compile and run it.
$ gcc code1.c.c -o code1.c.elf -zexecstack
code1.c.c: In function ‘main’:
code1.c.c:14:19: warning: initialization from incompatible pointer type [-Wincompatible-pointer-types]
  void (*func)() = cstr;
                   ^~~~
$ ./code1.c.elf
Hello World
Similar to how the above code is readily usable in C programs, ragg2 can emit python-ready and js-ready code too(using the '-f python' and -f javascript' options).
To generate an executable binary for your native architecture, you may use the '-F' option.
$ ragg2 -F -o code1.elf code1.c
$ ./code1.elf
Hello World
You may specify the binary format output.
$ ragg2 -f elf -o code1_f.elf code1.c
$ ./code1_f.elf
Hello World
or
$ ragg2 -f mach0 -o code1_f.mach0 code1.c
$ file code1_f.mach0
code1_f.mach0: Mach-O 64-bit x86_64 executable
Same with the 'PE' format.
In the above examples, the target architecture is the architecture of your machine. But target architecture can explicitly be specified using the '-a' option.
$ ragg2 -f raw -a x86 -b 32 code1.c
eb4e66666666662e0f1f840000000000575683ec108b4424208b4c241c8b54241c8b742420bf66000000894c240889f18944240489f85389d3cd805b8944240c8b44240c8904248b042483c4105e5fc3535683ec24e8000000005881c0661e0000b9010000008d9083e2ffffbe0d000000c704240100000089542404c74424080d00000089c389442420894c241c89742418e82900000031c9c70424000000008b5c242089442414894c2410e86f00000031c083c4245e5bc30f1f80000000005553575683ec148b4424308b4c242c8b5424288b7424288b7c242c8b5c2430bd04000000894c240c89f98954240889da8944240489e85389f3cd805b894424108b4424108904248b042483c4145e5f5b5dc366666666662e0f1f84000000000083ec088b44240c8b4c240cba0100000089042489d05389cbcd805b8944240483c408c348656c6c6f20576f726c640a00
The '-b' option can be used to specify the bits. One can see the supported architectures from ragg2's help or manpage.
 -a [arch]       select architecture (x86, mips, arm)
 -b [bits]       register size (32, 64, ..)
The '-r' flag can be used to generate binary output instead of the above hex-string style output.
$ ragg2 -f raw -r code1.c | rax2 -S
efbfbd31efbfbdefbfbd4424efbfbd5e31d28924efbfbdefbfbd59efbfbd44efbfbd7c24efbfbd48efbfbd
7424efbfbdefbfbd5424efbfbdefbfbd5424efbfbdefbfbd5424efbfbd48efbfbd7424efbfbd48efbfbd74
24d08b5424efbfbdefbfbd5424cc8b7c24efbfbd48efbfbd7424d08b5424ccb848efbfbd4424efbfbd48ef
bfbd4424efbfbdefbfbdefbfbdefbfbd4c24c88b4424efbfbdc3897c24efbfbdefbfbd7c24efbfbdefbfbd
7c24efbfbdefbfbd7c24efbfbdefbfbd3c48efbfbd4424efbfbd48efbfbd4424efbfbdefbfbdefbfbdefbf
bd4c24efbfbdefbfbd4424efbfbdefbfbd48656c6c6f20576f726c640a
$ ragg2 -f raw -a x86 -b 64 -r code1.c | xxd
00000000: eb0e 6666 6666 662e 0f1f 8400 0000 0000  ..fffff.........
00000010: 50bf 0100 0000 488d 359f 0000 00ba 0d00  P.....H.5.......
00000020: 0000 e819 0000 0031 ff89 4424 04e8 5e00  .......1..D$..^.
00000030: 0000 31d2 8904 2489 d059 c30f 1f44 0000  ..1...$..Y...D..
00000040: 897c 24fc 4889 7424 f089 5424 ec8b 5424  .|$.H.t$..T$..T$
00000050: fc89 5424 dc48 8b74 24f0 4889 7424 d08b  ..T$.H.t$.H.t$..
00000060: 5424 ec89 5424 cc8b 7c24 dc48 8b74 24d0  T$..T$..|$.H.t$.
00000070: 8b54 24cc b801 0000 000f 0548 8944 24e0  .T$........H.D$.
00000080: 488b 4424 e089 c189 4c24 c88b 4424 c8c3  H.D$....L$..D$..
00000090: 897c 24fc 8b7c 24fc 897c 24ec 8b7c 24ec  .|$..|$..|$..|$.
000000a0: b83c 0000 000f 0548 8944 24f0 488b 4424  .<.....H.D$.H.D$
000000b0: f089 c189 4c24 e88b 4424 e8c3 4865 6c6c  ....L$..D$..Hell
000000c0: 6f20 576f 726c 640a 00				   o World..
Using '-z' flag instead of '-r' would generate a C-style hex-string output.
$ ragg2 -f raw -z code1.c
"\xeb\x0e\x66\x66\x66\x66\x66\x2e\x0f\x1f\x84\x00\x00\x00\x00\x00\x50\xbf\x01\x00\x00\x00\x48\x8d\x35\x9f\x00\x00\x00\xba\x0d\x00\x00\x00\xe8\x19\x00\x00\x00\x31\xff\x89\x44\x24\x04\xe8\x5e\x00\x00\x00\x31\xd2\x89\x04\x24\x89\xd0\x59\xc3\x0f\x1f\x44\x00\x00\x89\x7c\x24\xfc\x48\x89\x74\x24\xf0\x89\x54\x24\xec\x8b\x54\x24\xfc\x89\x54\x24\xdc\x48\x8b\x74\x24\xf0\x48\x89\x74\x24\xd0\x8b\x54\x24\xec\x89\x54\x24\xcc\x8b\x7c\x24\xdc\x48\x8b\x74\x24\xd0\x8b\x54\x24\xcc\xb8\x01\x00\x00\x00\x0f\x05\x48\x89\x44\x24\xe0\x48\x8b\x44\x24\xe0\x89\xc1\x89\x4c\x24\xc8\x8b\x44\x24\xc8\xc3\x89\x7c\x24\xfc\x8b\x7c\x24\xfc\x89\x7c\x24\xec\x8b\x7c\x24\xec\xb8\x3c\x00\x00\x00\x0f\x05\x48\x89\x44\x24\xf0\x48\x8b\x44\x24\xf0\x89\xc1\x89\x4c\x24\xe8\x8b\x44\x24\xe8\xc3\x48\x65\x6c\x6c\x6f\x20\x57\x6f\x72\x6c\x64\x0a\x00"
Instead of using C, a domain specific language designed for ragg2 can also be used - you may refer to this page.
The -e option can be used if you want to input the code as an argument to ragg2 and not as a file. Note that you can only use ragg2 language here(and not C).
$ ragg2 -e "exit@syscall(60); write@syscall(4); main@global(128) {write(1, \"Hello World\n\", 13); exit(0);}"
554889e54881ec8000000048c7c00d00000050c7452048656c6cc745246f20576fc74528726c640ac7452c00000000c7453000000000488d452048898518000000488b45185048c7c00100000050488b3c24488b742408488b54241048c7c0040000000f054883c41848c7c00000000050488b3c2448c7c03c0000000f054883c4084881c4800000005dc3
Other options like architecture, bits, output file format etc., can be used here too.
$ ragg2 -e "exit@syscall(60); write@syscall(4); main@global(128) {write(1, \"Hello World\n\", 13); exit(0);}"  -f elf -o output.elf
$ file output.elf
output.elf: ELF 64-bit LSB executable, x86-64, version 1 (SYSV), statically linked, corrupted section header size
$ ragg2 -e "exit@syscall(60); write@syscall(4); main@global(128) {write(1, \"Hello World\n\", 13); exit(0);}"  -f c
const unsigned char cstr[139] = ""\
  "\x55\x48\x89\xe5\x48\x81\xec\x80\x00\x00\x00\x48\xc7\xc0\r\x00\x00\x00\x50\xc7"\
  "\x45\x20\x48\x65\x6c\x6c\xc7\x45\x24\x6f\x20\x57\x6f\xc7\x45\x28\x72\x6c\x64\n\xc7\x45\x2c\x00\x00\x00\x00\xc7\x45\x30\x00\x00"\
  "\x00\x00\x48\x8d\x45\x20\x48\x89\x85\x18\x00\x00\x00\x48\x8b\x45\x18\x50\x48\xc7\xc0\x01"\
  "\x00\x00\x00\x50\x48\x8b\x3c\x24\x48\x8b\x74\x24\x08\x48\x8b\x54\x24\x10\x48\xc7\xc0\x04\x00\x00"\
  "\x00\x0f\x05\x48\x83\xc4\x18\x48\xc7\xc0\x00\x00\x00\x00\x50\x48\x8b\x3c\x24\x48\xc7"\
  "\xc0\x3c\x00\x00\x00\x0f\x05\x48\x83\xc4\x08\x48\x81\xc4\x80\x00\x00\x00"\
  "\x5d\xc3";
In case you just want to execute the input, you may use the -x option.
-x execute (just-in-time)
$ cat code1.c
int main()
{
	write(1, "Hello World\n", 13);
	exit(0);
}
$ ragg2 -x code1.c
Hello World
Syntax of the language
The code of r_egg is compiled as in a flow. It is a one-pass compiler; this means that you have to define the proper stackframe size at the beginning of the function, and you have to define the functions in order to avoid getting compilation errors.
The compiler generates assembly code for x86-{32,64} and arm. But it aims to support more platforms. This code is compiled with the r_arch interface (r_asm and r_anal merged into r_arch) and injected into a tiny binary with r_bin.
You may like to use r_egg to create standalone binaries, position-independent raw eggs to be injected on running processes or to patch on-disk binaries.
The generated code is not yet optimized, but it's safe to be executed at any place in the code.
Preprocessor
ragg2 uses the spp preprocessor. So you can use defines, build conditionals and so on.
Aliases
Sometimes you just need to replace at compile time a single entity on multiple places. Aliases are translated into 'equ' statements in assembly language. This is just an assembler-level keyword redefinition.
AF_INET@alias(2);printf@alias(0x8053940);
Includes
Use cat(1) or the preprocessor to concatenate multiple files to be compiled.
INCDIR@alias("/usr/include/ragg2");sys-osx.r@include(INCDIR);
Hashbang
eggs can use a hashbang to make them executable.
$ head -n1 hello.r
#!/usr/bin/ragg2 -X
$ ./hello.r
Hello World!
Main
The execution of the code is done as in a flow. The first function to be defined will be the first one to be executed. If you want to run main() just do like this:
#!/usr/bin/ragg2 -X
main();
  ...
main@global(128,64) {
  ...
}
Function definition
You may like to split up your code into several code blocks. Those blocks are bound to a label followed by root brackets '{ ... }'
Function signatures
name@type(stackframesize,staticframesize) { body }name: name of the function to definetype: see function types belowstackframesize: get space from stack to store local variablesstaticframesize: get space from stack to store static variables (strings)body: code of the function
Function types
- alias: Used to create aliases
- data: the body of the block is defined in .data
- inline: the function body is inlined when called
- global: make the symbol global
- fastcall: function that is called using the fast calling convention
- syscall: define syscall calling convention signature
Syscalls
r_egg offers a syntax sugar for defining syscalls. The syntax is like this:
exit@syscall(1);

@syscall() {
: mov eax, .arg
: int 0x80
}

main@global() {
  exit (0);
}
Libraries
At the moment there is no support for linking r_egg programs to system libraries. but if you inject the code into a program (disk/memory) you can define the address of each function using the @alias syntax.
Core library
There's a work-in-progress libc-like library written completely in r_egg
Variables
.arg.arg0.arg1.arg2.var0.var2.fix.ret ; eax for x86, r0 for arm.bp.pc.sp
Attention: All the numbers after .var and .arg mean the offset with the
top of stack, not variable symbols.
Arrays
Supported as raw pointers. TODO: enhance this feature
Tracing
Sometimes r_egg programs will break or just not work as expected. Use the 'trace' architecture to get a arch-backend call trace:
$ ragg2 -a trace -s yourprogram.r
Pointers
TODO: Theorically '*' is used to get contents of a memory pointer.
Virtual registers
TODO: a0, a1, a2, a3, sp, fp, bp, pc
Math operations
Ragg2 supports local variables assignment by math operating, including the following operators:
+-*/&|^
Return values
The return value is stored in the a0 register, this register is set when calling a function or when typing a variable name without assignment.
$ cat test.r
add@global(4) {
	.var0 = .arg0 + .arg1;
	.var0;
}

main@global() {
	add (3,4);
}

$ ragg2 -F -o test test.r
$ ./test
$ echo $?
7
Traps
Each architecture have a different instruction to break the execution of the program. REgg language captures calls to 'break()' to run the emit_trap callback of the selected arch.
-
break(); --> compiles into 'int3' on x86 -
break;--> compiles into 'int3' on x86
Inline assembly
Lines prefixed with ':' char are just inlined in the output assembly.
: jmp 0x8048400: .byte 33,44
Labels
You can define labels using the : keyword like this:
:label_name:/* loop forever */goto(label_name)
Control flow
goto (addr)-- branch executionwhile (cond)if (cond)if (cond) { body } else { body }break ()-- executes a trap instruction
Comments
Supported syntax for comments are the multiline:
/* multiline comment */'
and for singline line comments use these:
// single line comment# single line comment
Shellcode Encoders
ragg2 offers a few ready-made shellcodes and encoders.
$ ragg2 -L
shellcodes:
      exec : execute cmd=/bin/sh suid=false
encoders:
       xor : xor encoder for shellcode
Using the '-i' option, one can generate specify and generate the shellcode.
$ ragg2 -i exec
31c048bbd19d9691d08c97ff48f7db53545f995257545eb03b0f05
Similar to the previous section, the output format(c, raw, elf etc.,) can be specified here too along with the architecture and bits.
ragg2 offers an xor encoder too. The following are the relevant flags/options.
$ ragg2 -h
 -c [k=v]        set configuration options
 -E [encoder]    use specific encoder. see -L
 -L              list all plugins (shellcodes and encoders)
$ ragg2 -E xor -c key=32 -i exec
6a1b596a205be8ffffffffc15e4883c60d301e48ffc6e2f911e0689bf1bdb6b1f0acb7df68d7fb73747fb97277747e901b2f25
The same can be done with a .c or .r file output. The first one is the normal output(machine code) and the second is xor encoded.
$ ragg2 -a x86 -f raw code1.c
eb0e66666666662e0f1f84000000000050bf01000000488d359f000000ba0d000000e81900000031ff89442404e85e00000031d289042489d059c30f1f440000897c24fc48897424f0895424ec8b5424fc895424dc488b7424f048897424d08b5424ec895424cc8b7c24dc488b7424d08b5424ccb8010000000f0548894424e0488b4424e089c1894c24c88b4424c8c3897c24fc8b7c24fc897c24ec8b7c24ecb83c0000000f0548894424f0488b4424f089c1894c24e88b4424e8c348656c6c6f20576f726c640a00

$ ragg2 -E xor -c key=127 -a x86 -f raw code1.c
6ac9596a7f5be8ffffffffc15e4883c60d301e48ffc6e2f994711919191919517060fb7f7f7f7f7f2fc07e7f7f7f37f24ae07f7f7fc5727f7f7f97667f7f7f4e80f63b5b7b97217f7f7f4eadf67b5bf6af26bc70603b7f7ff6035b8337f60b5b8ff62b5b93f42b5b83f62b5ba337f40b5b8f37f60b5baff42b5b93f62b5bb3f4035ba337f40b5baff42b5bb3c77e7f7f7f707a37f63b5b9f37f43b5b9ff6bef6335bb7f43b5bb7bcf6035b83f4035b83f6035b93f4035b93c7437f7f7f707a37f63b5b8f37f43b5b8ff6bef6335b97f43b5b97bc371a1313105f28100d131b757f
Padding and Patching
Ragg2, a tool in the radare2 suite, offers various options for padding and patching the generated bufferoutput. These options allow users to modify or extend the generated code in specific ways.
-
Appending Data:
- Append hex bytes (-B)
- Append file contents (-C)
- Append 32-bit or 64-bit numbers (-n, -N)
- Append strings (-S)
-
Patching Existing Data:
- Patch dword or qword at a given offset (-d, -D)
- Patch hex pairs at a given offset (-w)
-
Adding Padding:
- Add padding after compilation (-p)
- Options include NOP, trap instructions, or specific byte sequences
From ragg2 -h:
 -B [hexpairs]   append some hexpair bytes
 -C [file]       append contents of file
 -d [off:dword]  patch dword (4 bytes) at given offset
 -D [off:qword]  patch qword (8 bytes) at given offset
 -n [dword]      append 32bit number (4 bytes)
 -N [dword]      append 64bit number (8 bytes)
 -p [padding]    add padding after compilation (padding=n10s32)
                 ntas : begin nop, trap, 'a', sequence
                 NTAS : same as above, but at the end
 -S [string]     append a string
 -w [off:hex]    patch hexpairs at given offset
rahash2
Versatile command-line hashing tool that is part of the radare2 framework. It's designed to compute and verify cryptographic hashes and checksums for files, strings, or even large data streams like hard disks or network traffic.
Key features of rahash2 include:
Multiple algorithms Supports a wide range of hash algorithms, including MD4, MD5, SHA1, SHA256, SHA384, SHA512, CRC16, CRC32, and more.
Flexible input Can hash data from files, standard input, or directly from command-line strings.
Block-based hashing Can compute hashes for specific blocks or ranges within a file, which is ideal for forensics and checksuming large data.
Incremental hashing Supports hashing of data streams or large files in chunks, useful for processing data that doesn't fit in memory.
Hash verification and integrity checks comparing computed and provided hash.
Multiple hash outputs at once Can compute and display multiple hash types simultaneously for the same input.
**Integration with radare2: While it's a standalone tool, it integrates well with other radare2 utilities and can be used within r2 sessions.
Customizable output Offers various output formats, including raw bytes, hexadecimal strings, or radare2 commands.
Encryption capabilities Besides hashing, it also supports some basic encryption and decryption operations.
This is an example usage:
$ rahash2 -a md5 -s "hello world"
Note that rahash2 also permits to read from stdin in a stream, so you don't need 4GB of ram to compute the hash of a 4GB file.
Hashing by blocks
When doing forensics, it is useful to compute partial checksums. The reason for that is because you may want to split a huge file into small portions that are easier to identify by contents or regions in the disk.
This will spot the same hash for blocks containing the same contents. For example, if is filled with zeros.
It can also be used to find which blocks have changed between more than one sample dump.
This can be useful when analyzing ram dumps from a virtual machine for example. Use this command for this:
$ rahash2 -B -b 1M -a sha256 /bin/ls
Hashing with rabin2
The rabin2 tool parses the binary headers of the files, but it also have the ability to use the rhash plugins to compute checksum of sections in the binary.
$ rabin2 -K md5 -S /bin/ls
Obtaining hashes within radare2 session
Hashes can also be printed within a radare2 session as explained in the Print Section.
Examples
The rahash2 tool can be used to calculate checksums and has functions of byte streams, files, text strings.
$ rahash2 -h
Usage: rahash2 [-rBhLkv] [-b S] [-a A] [-c H] [-E A] [-s S] [-f O] [-t O] [file] ...
 -a algo     comma separated list of algorithms (default is 'sha256')
 -b bsize    specify the size of the block (instead of full file)
 -B          show per-block hash
 -c hash     compare with this hash
 -e          swap endian (use little endian)
 -E algo     encrypt. Use -S to set key and -I to set IV
 -D algo     decrypt. Use -S to set key and -I to set IV
 -f from     start hashing at given address
 -i num      repeat hash N iterations
 -I iv       use give initialization vector (IV) (hexa or s:string)
 -S seed     use given seed (hexa or s:string) use ^ to prefix (key for -E)
             (- will slurp the key from stdin, the @ prefix points to a file
 -k          show hash using the openssh's randomkey algorithm
 -q          run in quiet mode (-qq to show only the hash)
 -L          list all available algorithms (see -a)
 -r          output radare commands
 -s string   hash this string instead of files
 -t to       stop hashing at given address
 -x hexstr   hash this hexpair string instead of files
 -v          show version information
To obtain an MD5 hash value of a text string, use the -s option:
$ rahash2 -q -a md5 -s 'hello world'
5eb63bbbe01eeed093cb22bb8f5acdc3
It is possible to calculate hash values for contents of files. But do not attempt to do it for very large files because rahash2 buffers the whole input in memory before computing the hash.
To apply all algorithms known to rahash2, use all as an algorithm name:
$ rahash2 -a all /bin/ls
/bin/ls: 0x00000000-0x000268c7 md5: 767f0fff116bc6584dbfc1af6fd48fc7
/bin/ls: 0x00000000-0x000268c7 sha1: 404303f3960f196f42f8c2c12970ab0d49e28971
/bin/ls: 0x00000000-0x000268c7 sha256: 74ea05150acf311484bddd19c608aa02e6bf3332a0f0805a4deb278e17396354
/bin/ls: 0x00000000-0x000268c7 sha384: c6f811287514ceeeaabe73b5b2f54545036d6fd3a192ea5d6a1fcd494d46151df4117e1c62de0884cbc174c8db008ed1
/bin/ls: 0x00000000-0x000268c7 sha512: 53e4950a150f06d7922a2ed732060e291bf0e1c2ac20bc72a41b9303e1f2837d50643761030d8b918ed05d12993d9515e1ac46676bc0d15ac94d93d8e446fa09
/bin/ls: 0x00000000-0x000268c7 md4: fdfe7c7118a57c1ff8c88a51b16fc78c
/bin/ls: 0x00000000-0x000268c7 xor: 42
/bin/ls: 0x00000000-0x000268c7 xorpair: d391
/bin/ls: 0x00000000-0x000268c7 parity: 00
/bin/ls: 0x00000000-0x000268c7 entropy: 5.95471783
/bin/ls: 0x00000000-0x000268c7 hamdist: 00
/bin/ls: 0x00000000-0x000268c7 pcprint: 22
/bin/ls: 0x00000000-0x000268c7 mod255: ef
/bin/ls: 0x00000000-0x000268c7 xxhash: 76554666
/bin/ls: 0x00000000-0x000268c7 adler32: 7704fe60
/bin/ls: 0x00000000-0x000268c7 luhn: 01
/bin/ls: 0x00000000-0x000268c7 crc8smbus: 8d
/bin/ls: 0x00000000-0x000268c7 crc15can: 1cd5
/bin/ls: 0x00000000-0x000268c7 crc16: d940
/bin/ls: 0x00000000-0x000268c7 crc16hdlc: 7847
/bin/ls: 0x00000000-0x000268c7 crc16usb: 17bb
/bin/ls: 0x00000000-0x000268c7 crc16citt: 67f7
/bin/ls: 0x00000000-0x000268c7 crc24: 3e7053
/bin/ls: 0x00000000-0x000268c7 crc32: c713f78f
/bin/ls: 0x00000000-0x000268c7 crc32c: 6cfba67c
/bin/ls: 0x00000000-0x000268c7 crc32ecma267: b4c809d6
/bin/ls: 0x00000000-0x000268c7 crc32bzip2: a1884a09
/bin/ls: 0x00000000-0x000268c7 crc32d: d1a9533c
/bin/ls: 0x00000000-0x000268c7 crc32mpeg2: 5e77b5f6
/bin/ls: 0x00000000-0x000268c7 crc32posix: 6ba0dec3
/bin/ls: 0x00000000-0x000268c7 crc32q: 3166085c
/bin/ls: 0x00000000-0x000268c7 crc32jamcrc: 38ec0870
/bin/ls: 0x00000000-0x000268c7 crc32xfer: 7504089d
/bin/ls: 0x00000000-0x000268c7 crc64: b6471d3093d94241
/bin/ls: 0x00000000-0x000268c7 crc64ecma: b6471d3093d94241
/bin/ls: 0x00000000-0x000268c7 crc64we: 8fe37d44a47157bd
/bin/ls: 0x00000000-0x000268c7 crc64xz: ea83e12c719e0d79
/bin/ls: 0x00000000-0x000268c7 crc64iso: d243106d9853221c
Encoding with rahash2
As mentioned before, this tool also provide the tooling needed to encode and decode between different encodings
$ rahash2 -L | grep ^e
e  base64
e  base91
e  punycode
For example, to encode a string into base64 use the following line:
$ rahash2 -E base64 -s hello
You can decode it by using the -D flag instead of -E.
Encryption/Decryption
For encrypting data check the crypto hash plugins:
$ rahash2 -L | grep "^c" ✔
c aes-ecb Rijndael block cipher with Electronic Code Book mode
c aes-cbc Rijndael block cipher with Cipher Block Chaining mode
c aes-wrap Rijndael block cipher with Key Wrap Algorithm (RFC 3394)
c blowfish Bruce Schneier's symetric-key block cipher
c cps2 Capcom Play System 2
c des-ecb DES with with Electronic Code Book mode
c rc2 Ron Rivest's Code symmetric key encryption also known as ARC2
c rc4 Rivest Cipher 4
c rc6 Rivest's Cipher 6
c serpent-ecb Serpent block cipher with Electronic Code Book mode
c sm4-ecb ShāngMì4 block cipher with Electronic Code Book mode
c xor Byte level Exclusive Or
Here's an example usage to encrypt a string using rahash2:
$ rahash2 -E xor -S s:password -s hello | hexdump -C
00000000  18 04 1f 1f 18
Configuration
The core reads configuration files while starting. You can add e commands to these files to tune the radare2 configuration to your taste.
To prevent radare2 from parsing these files at startup, pass it the -N option.
All the configuration of radare2 is done with the eval commands. A typical startup configuration file looks like this:
$ cat ~/.radare2rc
e scr.color = 1
e dbg.bep   = loader
The configuration can also be changed with -e <config=value> command-line option. This way you can adjust configuration from the command line, keeping the configuration files intact. For example, to start with empty configuration and then adjust scr.color and asm.syntax the following line may be used:
$ radare2 -N -e scr.color=1 -e asm.syntax=intel -d /bin/ls
Internally, the configuration is stored in a hash table. The variables are grouped in namespaces: cfg., file., dbg., scr. and so on.
To get a list of all configuration variables just type e in the command line
prompt. To limit the output to a selected namespace, pass it with an ending dot to e. For example, e file. will display all variables defined inside the "file" namespace.
To get help about e command type e?:
Usage: e [var[=value]]  Evaluable vars
| e?asm.bytes     show description
| e??             list config vars with description
| e a             get value of var 'a'
| e a=b           set var 'a' the 'b' value
| e var=?         print all valid values of var
| e var=??        print all valid values of var with description
| e.a=b           same as 'e a=b' but without using a space
| e,k=v,k=v,k=v   comma separated k[=v]
| e-              reset config vars
| e*              dump config vars in r commands
| e!a             invert the boolean value of 'a' var
| ec [k] [color]  set color for given key (prompt, offset, ...)
| eevar           open editor to change the value of var
| ed              open editor to change the ~/.radare2rc
| ej              list config vars in JSON
| env [k[=v]]     get/set environment variable
| er [key]        set config key as readonly. no way back
| es [space]      list all eval spaces [or keys]
| et [key]        show type of given config variable
| ev [key]        list config vars in verbose format
| evj [key]       list config vars in verbose format in JSON
A simpler alternative to the e command is accessible from the visual mode. Type Ve to enter it, use arrows (up, down, left, right) to navigate the configuration, and q to exit it. The start screen for the visual configuration edit looks like this:
[EvalSpace]

    >  anal
       asm
       scr
       asm
       bin
       cfg
       diff
       dir
       dbg
       cmd
       fs
       hex
       http
       graph
       hud
       scr
       search
       io
For configuration values that can take one of several values, you can use the =? operator to get a list
of valid values:
[0x00000000]> e scr.nkey = ?
scr.nkey = fun, hit, flag
Environment
Radare2 uses several environment variables to determine where to look for important files and directories. You can view these variables and their current values by running the command "r2 -H" in your terminal.
This will display information such as:
- The version of radare2 you're using
- Installation prefix path
- Locations of various resource directories (e.g. for plugins, scripts, configuration files)
- File paths for things like the radare2 history file and cache
- Extensions used for shared libraries on your system
The exact values will depend on your operating system and how radare2 was built and installed. Understanding these variables can be helpful for troubleshooting or customizing your radare2 setup.
Some key variables to note include those pointing to plugin directories, configuration paths, and build flags. By examining the output of "r2 -H", you can see exactly where radare2 is looking for various resources on your system.
This information can be particularly useful if you are writing installation recipes for Makefiles.
$ r2 -H
R2_VERSION=5.8.9
R2_PREFIX=/usr/local
R2_MAGICPATH=/usr/local/share/radare2/5.8.9/magic
R2_INCDIR=/usr/local/include/libr
R2_BINDIR=/usr/local/bin
R2_LIBDIR=/usr/local/lib
R2_LIBEXT=dylib
R2_RCFILE=/Users/pancake/.radare2rc
R2_RDATAHOME=/Users/pancake/.local/share/radare2
R2_HISTORY=/Users/pancake/.cache/radare2/history
R2_CONFIG_HOME=/Users/pancake/.config//radare2
R2_CACHE_HOME=/Users/pancake/.cache/radare2
R2_LIBR_PLUGINS=/usr/local/lib/radare2/5.8.9
R2_USER_PLUGINS=/Users/pancake/.local/share/radare2/plugins
R2_ZIGNS_HOME=/Users/pancake/.local/share//radare2/zigns
RC Files
RC files in radare2 are configuration scripts that are automatically loaded when the tool starts up. They allow users to customize the default behavior and settings of radare2 without having to manually enter commands each time.
These files typically contain a series of radare2 commands that are executed sequentially on startup. This can include things like setting color schemes, defining custom commands, adjusting display options, or loading plugins.
RC files for radare2 are usually placed in specific locations where the tool looks for them by default. While I can't specify exact locations, users generally have options to place RC files in system-wide locations, user home directories, or project-specific folders.
Those files must be in 3 different places:
System Wide
When initializing, radare2 first checks for a system-wide configuration file. By default, it looks for a file named radare2rc in the /usr/share/radare2/ directory. This allows administrators to set up default configurations that will apply for all users on the system.
This system-wide script is loaded before any user-specific configurations, providing a baseline setup that can then be customized further by individual users if needed.
radare2 will first try to load /usr/share/radare2/radare2rc
Home Directories
Radare2 allows users to customize their experience through configuration files. These files contain r2 commands that are executed on startup, allowing users to set preferences like color schemes and other options.
The main configuration files are typically located in the user's home directory:
~/.radare2rc$XDG_CONFIG_HOME/radare2/rcor~/.config/radare2/rc$XDG_CONFIG_HOME/radare2/rc.d/*or~/.config/radare2/rc.d/*
An important feature is the R2_RCFILE environment variable. This variable allows users to specify a custom path to their radare2 configuration file. By setting this variable, users can override the default locations and use a configuration file from any location on their system.
This flexibility in configuration allows users to tailor radare2 to their specific needs and preferences, enhancing their workflow and user experience.
If scripting with r2 commands doesn't fit your needs you can also write it in r2js, the embedded javascript interpreter inside radare2, or in any other language like Python or C, you can just run the . foo.r2.js command to evaluate the specified file.
See the scripting chapter for more details.
File
Radare2 offers a convenient way to automatically execute scripts when opening specific files. This feature is particularly useful for customizing your analysis environment for different types of files or projects. To take advantage of this functionality, you can create a script file with the same name as the target file, but with an additional .r2 extension.
For example, if you frequently work with a file named "example.bin", you can create a corresponding script file called "example.bin.r2". Whenever you open "example.bin" in radare2, it will automatically detect and execute the commands contained in "example.bin.r2". This allows you to set up predefined configurations, run specific analysis commands, or perform any other desired operations tailored to that particular file.
This automatic script execution feature provides a seamless way to streamline your workflow and ensure consistent analysis setups for specific files or file types. By leveraging this capability, you can save time and effort by automating repetitive tasks and applying custom configurations without manual intervention each time you open a file in radare2.
Colors
Console access is wrapped in API that permits to show the output of any command as ANSI, W32 Console or HTML formats. This allows radare's core to run inside environments with limited displaying capabilities, like kernels or embedded devices. It is still possible to receive data from it in your favorite format.
To enable colors support by default, add a corresponding configuration option to the .radare2 configuration file:
$ echo 'e scr.color=1' >> ~/.radare2rc
Note that enabling colors is not a boolean option. Instead, it is a number because there are different color depth levels. This is:
- 0: black and white
- 1: 16 basic ANSI colors
- 2: 256 scale colors
- 3: 24bit true color
The reason for having such user-defined options is because there's no standard or portable way for the terminal programs to query the console to determine the best configuration, same goes for charset encodings, so r2 allows you to choose that by hand.
Usually, serial consoles may work with 0 or 1, while xterms may support up to 3. RCons will try to find the closest color scheme for your theme when you choose a different them with the eco command.
It is possible to configure the color of almost any element of disassembly output. For *NIX terminals, r2 accepts color specification in RGB format. To change the console color palette use ec command.
Type ec to get a list of all currently used colors. Type ecs to show a color palette to pick colors from:
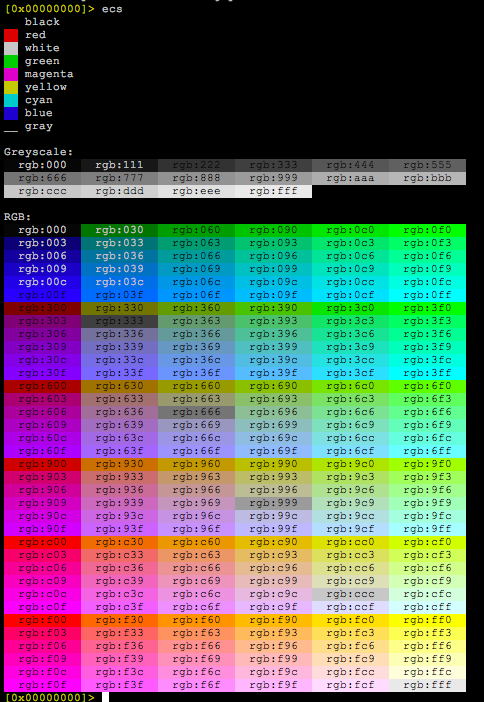
Themes
You can create your own color theme, but radare2 have its own predefined ones. Use the eco command to list or select them.
After selecting one, you can compare between the color scheme of the shell and the current theme by pressing Ctrl-Shift and then right arrow key for the toggle.
In visual mode use the R key to randomize colors or choose the next theme in the list.
If you were to create your own color scheme, in radare2, running ec* you will see the different variables and their hex colour codes. Change them how you feel following this example: ec call red. When you are done live testing, you can export your theme with ec* > mytheme.r2 and load it . mytheme.r2.
For a more permanent solution, themes live in radare2/libr/cons/d where you can copy your already made r2 theme. In libr/cons, run make -C d themes.c to prevent having to rebuild radare2 each time you tweak your theme. Restart radare2 and your theme will be live.
Configuration Variables
Below is a list of the most frequently used configuration variables. You can get a complete list by issuing e command without arguments. For example, to see all variables defined in the "cfg" namespace, issue e cfg. (mind the ending dot). You can get help on any eval configuration variable by using e? cfg.
The e?? command to get help on all the evaluable configuration variables of radare2. As long as the output of this command is pretty large you can combine it with the internal grep ~ to filter for what you are looking for:

The Visual mode has an eval browser that is accessible through the Vbe command.
asm.arch
Defines the target CPU architecture used for disassembling (pd, pD commands) and code analysis (a command). You can find the list of possible values by looking at the result of e asm.arch=? or rasm2 -L.
It is quite simple to add new architectures for disassembling and analyzing code. There is an interface for that. For x86, it is used to attach a number of third-party disassembler engines, including GNU binutils, Udis86 and a few handmade ones.
asm.bits
Determines width in bits of registers for the current architecture. Supported values: 8, 16, 32, 64. Note that not all target architectures support all combinations for asm.bits.
asm.syntax
Changes syntax flavor for disassembler between Intel and AT&T. At the moment, this setting affects Udis86 disassembler for Intel 32/Intel 64 targets only. Supported values are intel and att.
asm.pseudo
A boolean value to set the pseudo syntax in the disassembly. "False" indicates a native one, defined by the current architecture, "true" activates a pseudocode strings format. For example, it'll transform :
|           0x080483ff      e832000000     call 0x8048436
|           0x08048404      31c0           xor eax, eax
|           0x08048406      0205849a0408   add al, byte [0x8049a84]
|           0x0804840c      83f800         cmp eax, 0
|           0x0804840f      7405           je 0x8048416
to
|           0x080483ff      e832000000     0x8048436 ()
|           0x08048404      31c0           eax = 0
|           0x08048406      0205849a0408   al += byte [0x8049a84]
|           0x0804840c      83f800         var = eax - 0
|           0x0804840f      7405           if (!var) goto 0x8048416
It can be useful while disassembling obscure architectures.
asm.os
Selects a target operating system of currently loaded binary. Usually, OS is automatically detected by rabin -rI. Yet, asm.os can be used to switch to a different syscall table employed by another OS.
asm.flags
If defined to "true", disassembler view will have flags column.
asm.lines.call
If set to "true", draw lines at the left of the disassemble output (pd, pD commands) to graphically represent control flow changes (jumps and calls) that are targeted inside current block. Also, see asm.lines.out.
asm.lines.out
When defined as "true", the disassembly view will also draw control flow lines that go outside of the block.
asm.linestyle
A boolean value which changes the direction of control flow analysis. If set to "false", it is done from top to bottom of a block; otherwise, it goes from bottom to top. The "false" setting seems to be a better choice for improved readability and is the default one.
asm.offset
Boolean value which controls the visibility of offsets for individual disassembled instructions.
asm.trace
A boolean value that controls displaying of tracing information (sequence number and counter) at the left of each opcode. It is used to assist with programs trace analysis.
asm.bytes
A boolean value used to show or hide displaying of raw bytes of instructions.
asm.sub.reg
A boolean value used to replace register names with arguments or their associated role alias.
For example, if you have something like this:
|           0x080483ea      83c404         add esp, 4
|           0x080483ed      68989a0408     push 0x8049a98
|           0x080483f7      e870060000     call sym.imp.scanf
|           0x080483fc      83c408         add esp, 8
|           0x08048404      31c0           xor eax, eax
This variable changes it to:
|           0x080483ea      83c404         add SP, 4
|           0x080483ed      68989a0408     push 0x8049a98
|           0x080483f7      e870060000     call sym.imp.scanf
|           0x080483fc      83c408         add SP, 8
|           0x08048404      31c0           xor A0, A0
asm.sub.jmp
A boolean value used to substitute jump, call and branch targets in disassembly.
For example, when turned on, it'd display jal 0x80001a40 as jal fcn.80001a40 in the disassembly.
asm.sub.rel
A boolean value which substitutes pc relative expressions in disassembly. When turned on, it shows the references as string references.
For example:
0x5563844a0181 488d3d7c0e00. lea rdi, [rip + 0xe7c] ; str.argv__2d_:__s
When turned on, this variable lets you display the above instruction as:
0x5563844a0181 488d3d7c0e00. lea rdi, str.argv__2d_:__s ; 0x5563844a1004 ; "argv[%2d]: %s\n"
asm.sub.section
Boolean which shows offsets in disassembly prefixed with the name of the section or map.
That means, from something like:
0x000067ea 488d0def0c01. lea rcx, [0x000174e0]
to the one below, when toggled on.
0x000067ea 488d0def0c01. lea rcx, [fmap.LOAD1.0x000174e0]
asm.sub.varonly
Boolean which substitutes the variable expression with the local variable name.
For example: var_14h as rbp - var_14h, in the disassembly.
cfg.bigendian
Change endianness. "true" means big-endian, "false" is for little-endian. "file.id" and "file.flag" both to be true.
cfg.newtab
If this variable is enabled, help messages will be displayed along with command names in tab completion for commands.
scr.color
This variable specifies the mode for colorized screen output: "false" (or 0) means no colors, "true" (or 1) means 16-colors mode, 2 means 256-colors mode, 3 means 16 million-colors mode. If your favorite theme looks weird, try to bump this up.
scr.seek
This variable accepts a full-featured expression or a pointer/flag (eg. eip). If set, radare will set seek position to its value on startup.
scr.scrollbar
If you have set up any flagzones (fz?), this variable will let you display the scrollbar with the flagzones, in Visual mode. Set it to 1 to display the scrollbar at the right end, 2 for the top and 3 to display it at the bottom.
scr.utf8
A boolen variable to show UTF-8 characters instead of ANSI.
cfg.fortunes
Enables or disables "fortune" messages displayed at each radare start.
cfg.fortunes.type
Fortunes are classified by type. This variable determines which types are allowed for displaying when cfg.fortunes is true, so they can be fine-tuned on what's appropriate for the intended audience. Current types are tips, fun, nsfw, creepy.
stack.size
This variable lets you set the size of stack in bytes.
IO Configuration
The IO implementation is very complex and can be configured in many ways to serve the way the user needs. This chapter will introduce you to some of the most important configuration options under the eval.
[0x100003a84]> e??io.
             io.0xff: use this value instead of 0xff to fill unallocated areas
             io.aslr: disable ASLR for spawn and such
           io.autofd: change fd when opening a new file
          io.basemap: create a map at base address 0 when opening a file
            io.cache: change both of io.cache.{read,write}
       io.cache.auto: automatic cache all reads in the IO backend
      io.cache.nodup: do not cache duplicated cache writes
       io.cache.read: enable read cache for vaddr (or paddr when io.va=0)
      io.cache.write: enable write cache for vaddr (or paddr when io.va=0)
             io.exec: see !!r2 -h~-x
               io.ff: fill invalid buffers with 0xff instead of returning error
             io.mask: mask addresses before resolving as maps
          io.overlay: honor io overlay
             io.pava: use EXPERIMENTAL paddr -> vaddr address mode
           io.pcache: io.cache for p-level
      io.pcache.read: enable read-cache
     io.pcache.write: enable write-cache
          io.unalloc: check each byte if it's allocated
       io.unalloc.ch: char to display if byte is unallocated
               io.va: use virtual address layout
io.unalloc
When set to true it will be showing ? instead of 0xff in the hexdump/disasm views if there's no associated map. This causes the dump to be a bit slower, but probably more real.
See io.0xff and io.unalloc.ch for reference
io.cache
Enables the cache layer for the whole memory address space. This means that you can write and patch anywhere in memory and the underlying files won't be modified.
See io.cache.read and io.cache.write
Note that enabling the read cache will speedup readings from slow or remote endpoints, this is handy when performing analysis via GDB, so the read data from the remote process will be read once.
io.pcache
Enables a physical layer cache associated with each map. This way it is possible to keep the correct behaviour when accessing unallocated regions or multi-map regions honoring the proper permissions, unlike io.cache.
See io.pcache.read and io.pcache.write
io.va
When set to false, it will seek around physical addresses on the currently selected file descriptor, instead of the whole virtual address.
Introduction to Projects
When working on a binary analysis, there are scenarios where you need to continuously work on a single or a set of binaries over a long period of time. This could be due to the complexity of the binaries or the amount of time required for in-depth analysis.
In such cases, you often want to store and keep track of your progress, such as comments, function names, and other metadata, so you don’t have to redo or reanalyze the same information every time you reload the binary.
This chapter will explore how to handle these needs efficiently by introducing Radare2 projects. We will also discuss the challenges and limitations inherent in this process. Although managing projects may seem straightforward, it is one of the more difficult issues to address, and it's essential to understand why before delving into solutions.
Using Projects
Projects in Radare2 cover the way to save and restore metadata for your analysis sessions. A project stores all session data such as commands, analysis results, and optional binaries. This makes it easy to resume work later without needing to repeat previous steps. When a project is saved, Radare2 creates a dedicated directory with the project name containing:
- An
.r2script: A file that stores all commands needed to recreate the session. - Optional sdb files: These store structured data, including flags, types, and other annotations.
- A copy of the binary file you are analyzing (optional when
-e prj.filesis set).
You can start working on a binary and then save your progress by assigning a project name using the P command. Below is a step-by-step guide on how to manage projects in Radare2.
Warning
Projects has been always a topic of concern in r2land. The reason is because main devs don't use them and taking into account the whole perspective of the problems (see challenges section) when dealing with that in a tool as powerful and flexible as r2 it makes it hard to cope with every single aspect and we never wanted to announce it as a stable or desirable feature.
Taking into account that users known and care about <10% of the whole set of features of r2 it should be possible to create a simplified version of projects to cover only for those cases. We encourage everyone to read this chapter carefully, test all the related capabilities, submit patches and suggest ideas for improving them. Thanks in advance!
In Short
Use the r2 -p flag to list and select the project you want to open (if that was previously created).
When you are analyzing a program and want to save the project use the P command to do that like this: P+projectname.
Projects are kept in dir.projects in your home directory by default and structure the data in directories and files, containing r2 scripts and other companion files.
Note that if you want to export or import the project you must use the Pz command, which creates a zip file in the current directory or given path, which makes it ideal to send it to anyone else to continue working on that. Project metadata is versioned using ravc2 which makes use of git if available in the system, which lets you have better control on the changes over time.
Configuring the Project Directory
By default, Radare2 saves projects in the following directory:
[0x00000000]> e dir.projects
~/.local/share/radare2/projects
[0x00000000]>
This directory can be changed using the dir.projects configuration setting if you want to store your projects elsewhere.
Project Commands
You can manage projects using the P command in Radare2. Below is a breakdown of the available commands for project management.
[0x00000000]> P?
Usage: P[?.+-*cdilnsS] [file]  Project management
| P [file]          open project (formerly Po)
| P.                show current loaded project (see prj.name)
| P+ [name]         save project (same as Ps, but doesn't check for changes)
| P- [name]         delete project
| P*                print project script as r2 commands
| P!([cmd])         open a shell or run command in the project directory
| Pc                close current project
| Pd [N]            diff Nth commit
| Pi [file]         show project information
| Pl                list all projects
| Pn -              edit current loaded project notes using cfg.editor
| Pn[j]             manage notes associated with the project
| Ps [file]         save project (see dir.projects)
| PS [file]         save script file
| PS* [name]        print the project script file (like P*, but requires a project)
| Pz[ie] [zipfile]  import/export r2 project in zip form (.zrp extension)
Project Import and Export
Radare2 allows you to import and export projects as zip files using the Pz command. This can be helpful for sharing projects across different systems or for backup purposes.
To export the currently loaded project into a zip file:
[0x00000000]> Pze foo.zrp
The .zrp file (Zipped Radare Project) can later be imported using Pzi. This will load the contents into your project home directory and commit a new version if versioning is enabled.
[0x00000000]> Pzi foo.zrp
Saving a Project
When you save a project, Radare2 generates an .r2 script in the project's directory. This script includes all the commands necessary to recreate the current session. To save a project manually, use the Ps command:
[0x00000000]> Ps my_project
[master (root-commit) b4b06ef] default message
 Author: user <user@localhost>
 1 file changed, 10549 insertions(+)
 create mode 100644 rc.r2
You can also use P+ to save without checking if there was any change made since it was loaded:
[0x00000000]> P+ my_project
Opening and Reopening Projects
To open a project, simply use the P command followed by the project name. There is no need to specify the file associated with the project:
[0x00000000]> P my_project
If you want to open the project when starting Radare2, you can use the -p option:
$ r2 -p my_project
This allows you to reopen the project without specifying the binary file associated with it.
Project Configuration Options
There are several configuration options available to control how projects are stored and managed. You can view these options using the following command:
[0x00000000]> e prj.
Here are some key project-related options:
prj.alwaysprompt: Determines whether Radare2 always prompts before saving a project.prj.files: Specifies whether to save a copy of the analyzed binary in the project directory.prj.gpg: Enables encryption of project files using GPG.prj.history: Specifies whether to save the command history with the project.prj.name: Stores the name of the current project.prj.sandbox: Isolates the project in a sandboxed environment.prj.vc: Enables version control for projects.prj.vc.message: Stores a commit message for the project (if version control is enabled).prj.vc.type: Specifies the version control system used (e.g., Git).prj.zip: Determines whether to save the project in a zip format.
These options allow you to customize project behavior based on your needs.
Projects in Iaito
Projects also work in Iaito, the graphical interface for Radare2. In Iaito, project management options are available through the user interface, making it easy to create, open, and save projects without using the command line.
When starting iaito a dialog to select a file or project is shown, those projects reuse the same commands and apis than radare2, both tools may behave the same way.
Annotations
Annotations are a handy feature introduced in Radare2 5.9.6 that allows users to associate cross-project metadata with specific functions. Unlike comments or other metadata that are tied to a specific project or session, annotations are persistent and stored globally. This makes them particularly useful for tracking notes and observations across different projects without needing to worry about manually saving them.
The annotations are associated with the filename and function address, and it's stored in a dedicated cache directory, making them available even after you leave the session. You can think of annotations as a place to store function-specific notes, decompilation output, or other important information that you want to keep handy.
R2_CACHEDIR=~/.local/share/radare2/cache/
${R2_CACHEDIR}/ano.${filename}.{func_address}.txt
Using the ano
Annotations can be managed using the ano command. Below is an overview of the available options:
[0x00000000]> ano?
Usage: ano  [*] # function anotations
| ano                show or edit annotations for the current function
| ano-*              remove all annotations for current file
| ano-$$             remove annotations for current function
| ano*               dump all annotations in ano= commands
| ano=[base64:]text  set anotation text in base64 for current function
| anoe               edit annotation using cfg.editor
| anos               show current function annotation
| anol               display first line of function annotation if any
[0x00000000]>
Key Features
Persistent Across Sessions:
Annotations are stored globally in the XDG cache directory. This ensures that they are accessible across different sessions, even if no project is used.
Multiline Annotations:
Annotations can contain multiple lines of text, making them ideal for storing detailed notes, such as decompilation output, comments, or any other observations about a function.
Only the first line of the annotation will be displayed in the disassembly. Take this in mind when writing them to make them look nicer in the disassembly listing.
You can disable this feature by toggling the e asm.anos eval variable.
Cross-Project:
Since annotations are not tied to any specific project, they can be shared across different projects that analyze the same binary. This is useful when working with multiple teams or revisiting an old analysis.
Examples
Setting an Annotation for a Function
To add an annotation to the current function, you can simply use the ano= command with base64-encoded text:
[0x00000000]> ano=[b64text]
Editing and Viewing Annotations
If you want to manually edit the annotation for the current function, use the anoe command, which allows you to modify the annotation interactively:
[0x00000000]> anoe
You can also view the full annotation using anos:
[0x00000000]> anos
If you only want to see the first line of the annotation (which is useful for quick reference), you can use anol:
[0x00000000]> anol
Removing Annotations
To remove all annotations for the current file, you can use the ano-* command:
[0x00000000]> ano-*
Annotations In Action
Using Annotations to Cache Decompilation Output
Annotations can also be used to improve efficiency when working with decompiled code. For example, the decai -e cache=true setting in Radare2 enables the caching of decompiled output. This prevents Radare2 from having to re-decompile the same function multiple times, thus saving time during the analysis.
Here's an example of how this works:
- Decompiling a function using AI requires consuming tokens or cpu time, which tends to be slow and expensive.
- By enabling caching with
decai -e cache=true, Decai will store the decompilation output in an annotation. The next time you view the same function, the cached annotation will be used instead of calling the decompiler again.
This is particularly helpful when working with large binaries or performing repetitive decompilation tasks.
$ r2pm -ci decai # install the decai decompiler
$ r2 -c 'decai -e cache=true' <binary>
By leveraging annotations in this way, you can significantly reduce the overhead of reprocessing functions during analysis.
Handmade Projects
When you need full control and complete flexibility over your project metadata, you can choose to create a set of scripts that manage your binary analysis. This allows you to:
- Load the binary.
- Set the base address.
- Configure the memory layout.
- Run specific analysis commands.
- Add comments, set dwords, rename functions, ..
Note that having full control on the commands you run is important in a variety os sutations (read the section on challenges for more details).
As long as handmade projects are organized in directories and files it is ideal to use it with git, allowing other people to jump into the same files and have a proper versioned.
These scripts are essentially the entry points for your analysis. However, this approach comes with a trade-off: comments, flags, or function names won’t be saved automatically when exiting the session. Instead, you’ll need to manually type them into the scripts every time they are required.
This workflow demands consistency and discipline from the user. It’s crucial to maintain an organized system to ensure that important metadata isn’t lost, as nothing is auto-saved unless explicitly written into the project script by the user.
Advantages and Best Practices
Handmade projects allow you to fully customize your setup. Since they are typically organized into directories and files, they are ideal for use with Git, which provides version control and enables collaboration.
Folder Organization
To begin, create a directory to store the binaries you want to work on. Then, you can create a Makefile or a shell script to automate running commands:
$ mkdir project/bins
$ cd project

$ cp /bin/ls bins/ls
$ echo r2 -s main -i script.r2 bins/ls > main.sh
$ chmod +x main.sh
Next, you can edit the script.r2 file to include the commands you need:
aaa
CC good boy @ sym.success
Running the script is simple. Just execute ./main.sh to open the project. You can set up custom memory maps, load contents from RAM, enable cache, patch instructions, and much more.
Radare2 Primitives
Much of Radare2’s environment is built around shell commands. Many commands include a * suffix or subcommand that lists data in Radare2 commands.
For example, to save flags:
> f* > flags.r2
And to reload them:
> . flags.r2
You can apply this same principle to comments (CC*), function names (afn*@@F), and more.
Default Script Example
If you save an .r2 script in the same directory as the binary, Radare2 will prompt you to run it upon opening the binary. This can save time by eliminating the need to use the -i flag:
$ echo '?e hello world' > ls.r2
$ cp /bin/ls .
$ r2 ls
Do you want to run the 'ls.r2' script? (y/N)
Advanced Customization
You can learn more about custom handmade projects in the firmware reversing chapter of this book, where you’ll find examples of setting up memory layouts and project configurations.
For users who enjoy customization, Radare2 allows you to modify the environment by tweaking variables such as scr.prompt for a custom command prompt. For example:
$ r2 -p jeje
 -- The more 'a' you add after 'aa' the more analysis steps are executed.
[0x00000000]> e scr.prompt.prj=true
<jeje>[0x00000000]> e prj.name
jeje
<jeje>[0x00000000]>
Autosaving Options
Radare2 also provides a mechanism for users to define actions that are performed when leaving the shell. The cmd.exit configuration variable can be set to run specific commands or scripts when the session ends. For example, you could create a .r2.js script that saves all comments and function names before closing the session.
However, it’s important to remember that it’s up to the user to manage and manually update project scripts with new flags, analysis commands, or comments. While this approach requires more effort, it offers unmatched flexibility.
Project Versioning
Radare2 includes a built-in version control system that operates similarly to Git, offering project versioning under the command ravc2 (or its API counterpart, rvc). This allows users to manage their project history, track changes, revert to previous versions, and more. Radare2's project versioning system integrates seamlessly with Git, allowing you to choose between Radare2's versioning system or wrapping Git under the same interface.
Versioning projects can be especially useful when collaborating with others or tracking complex analyses. Since Radare2 projects are essentially scripts, they are easy to read, review, and compare between different versions. This makes version control a great tool for managing your analysis history and for collaborative work.
Basic Usage of ravc2
Below is the basic syntax for using ravc2. This command offers a range of actions to initialize repositories, manage branches, commit changes, and view project history.
$ ravc2 -h
Usage: ravc2 [-qvh] [action] [args ...]
Flags:
 -q       quiet mode
 -v       show version
 -h       display this help message
 -j       json output
Actions:
 init     [git | rvc]          initialize a repository with the given vc
 branch   [name]               if a name is provided, create a branch with that name, otherwise list branches
 commit   [message] [files...] commit the files with the message
 checkout [branch]             switch to the given branch
 status                        print a status message
 reset                         remove all uncommitted changes
 log                           print all commits
 RAVC2_USER=[n]                override cfg.user value to author commit
Versioning Actions Explained
Initializing a Repository
To start versioning your project, you need to initialize a repository. You can choose between rvc (Radare2's native version control) or git.
$ ravc2 init [git | rvc]
git: Initializes a Git repository inside your project directory.rvc: Initializes anrvcrepository, Radare2’s internal version control.
Creating and Listing Branches
You can create a new branch or list existing branches using the branch command:
$ ravc2 branch [name]
If a branch name is provided, a new branch with that name will be created. If no name is provided, Radare2 will list all the branches in the repository.
Committing Changes
Once you've made changes to your project, you can commit them with a message. You can specify which files to commit, or leave it empty to commit all changes.
$ ravc2 commit "Your commit message" [files...]
Checking Out Branches
Switch to a different branch using the checkout command:
$ ravc2 checkout [branch]
This will update your project to the state of the selected branch.
Viewing Project Status
To see the current status of your project, such as which files have been modified or staged for commit, use the status command:
$ ravc2 status
Resetting Uncommitted Changes
If you want to discard all uncommitted changes and revert to the last committed state, use the reset command:
$ ravc2 reset
Viewing Commit History
To view the full commit history of your project, use the log command. This will list all commits made to the project:
$ ravc2 log
Customizing Author Information
You can override the author name of your commits using the RAVC2_USER environment variable. This is useful when working on shared projects or if you need to commit as a different user.
RAVC2_USER=[name]
Challenges Managing Projects
Managing metadata during binary analysis is a critical aspect of reverse engineering. Metadata includes function and variable names, comments, analysis flags, decompilation results, and much more. However, there are several inherent challenges that reverse engineering tools need to address to ensure efficient and consistent project management.
Key Points
Below we will enumerate some of the key challenges that reversing tools need to take into account when saving metadata associated with a project. This complexity is magnified when working in collaborative environments or when dealing with long-term projects that may span multiple tool versions.
Let's explore some of these challenges:
Lack of a Standard Format
There is no universally accepted format for saving or sharing metadata associated with binary analysis. Different tools may have their own methods, making interoperability and collaboration across tools challenging.
Tool Evolution and Metadata Changes
As tools evolve, their analysis algorithms and metadata formats may change. This means that older analysis data may become obsolete or incompatible with newer versions of the tool, potentially leading to discrepancies when reloading projects.
Metadata Storage and Analysis Dependency
The order in which metadata is stored and loaded is crucial. For example, you cannot name a function before it is analyzed, and any changes to the analysis steps could affect the final outcome. This creates dependencies between analysis steps and metadata storage.
Metadata Origin
Some of the patches applied into the file come from the bin parser, like symbol names or reloc patches. But others can be defined by analysis commands or even by user scripts or the user itself. Knowing who created this information is relevant to the project because it helps understand the consequences of each action r2 performs in the binary.
All tools available out there have no way to correlate consequences with the trigger that is the origin of the metadata created.
Impact of Analysis Order
The sequence in which analysis steps are performed can significantly impact the final results. Skipping or reordering analysis commands can lead to different interpretations of the binary.
Versioning and Rebaselining
Projects can be versioned over time, but rebasing metadata can lead to unexpected outcomes. For instance, changes in one version may conflict with updates in another version, making it difficult to reconcile differences.
Real-Time Syncing and Conflicts
Synchronizing metadata in real-time between different clients or sessions can lead to conflicts. This can occur when multiple users are analyzing the same binary simultaneously, or when working across distributed systems.
Large Metadata Sets
As analysis progresses, the amount of metadata grows, and storing or loading large sets of metadata becomes slower compared to keeping it in memory. This adds overhead to project management and can affect performance.
Address Space Layout Randomization (ASLR)
When debugging, binaries can be loaded at different addresses due to ASLR (Address Space Layout Randomization). This means that metadata must be adaptable to different memory layouts, complicating the process of restoring projects in different environments.
Note that this problem happens also when working via frida or remote gdb instances. The project metadata needs to save the information relative to the mapthat it is associated, which doesnt needs to be in the same order or even allocated at all because that depends on the state of the execution of the child.
User Settings and Metadata Registration
User-specific settings can influence how analysis and metadata are registered. For example, if different users have different analysis preferences, the resulting metadata could vary significantly even for the same binary.
Handling Incremental Metadata Patches
Metadata must be updated incrementally during the analysis. Each change to the analysis (e.g., renaming a function, adding a comment) must be stacked properly, and failure to do so can lead to inconsistency or corruption of the project state.
Timestamping every single element in memory may help creating a proper log to do/undo every action you perform inside r2. But this is currently not possible for all operations, and also note that different io layers can be swapped at any time breaking the whole scope of the data.
Case Study
In the case of Radare2, the flexibility of the tool—while powerful—adds an additional layer of complexity. Radare2 allows users to configure many aspects of the tool, from analysis steps to how metadata is handled. This makes it harder to find a one-size-fits-all solution for serializing project information into a file and restoring it accurately.
Unlike other tools that may impose stricter constraints or fewer configuration options, Radare2's versatility requires more care when saving and loading projects. This flexibility, while advantageous for advanced users, can lead to additional challenges in managing project metadata.
Commandline
Most command names in radare are derived from action names. They should be easy to remember, as they are short. Actually, all commands are single letters. Subcommands or related commands are specified using the second character of the command name. For example, / foo is a command to search plain string, while /x 90 90 is used to look for hexadecimal pairs.
The general format for a valid command (as explained in the Command Format chapter) looks like this:
[.][times][cmd][~grep][@[@iter]addr!size][|>pipe] ; ...
For example,
> 3s +1024 ; seeks three times 1024 from the current seek
If a command starts with =!, the rest of the string is passed to the currently loaded IO plugin (a debugger, for example). Most plugins provide help messages with =!? or =!help.
$ r2 -d /bin/ls
> =!help      ; handled by the IO plugin
If a command starts with !, the POSIX system() C function is called to pass the command to your shell. Check !? for more options and usage examples.
> !ls ; run `ls` in the shell
The meaning of the arguments (iter, addr, size) depends on the specific command. As a rule of thumb, most commands take a number as an argument to specify the number of bytes to work with, instead of the currently defined block size. Some commands accept math expressions or strings.
> px 0x17     ; show 0x17 bytes in hexs at current seek
> s base+0x33 ; seeks to flag 'base' plus 0x33
> / lib       ; search for 'lib' string.
The @ sign is used to specify a temporary offset location or a seek position at which the command is executed, instead of current seek position. This is quite useful as you don't have to seek around all the time.
> p8 10 @ 0x4010  ; show 10 bytes at offset 0x4010
> f patata @ 0x10 ; set 'patata' flag at offset 0x10
Using @@ you can execute a single command on a list of flags matching the glob. You can think of this as a foreach operation:
> s 0
> / lib             ; search 'lib' string
> p8 20 @@ hit0_*   ; show 20 hexpairs at each search hit
The > operation is used to redirect the output of a command into a file (overwriting it if it already exists).
> pr > dump.bin   ; dump 'raw' bytes of current block to file named 'dump.bin'
> f  > flags.txt  ; dump flag list to 'flags.txt'
The | operation (pipe) is similar to what you are used to expect from it in a *NIX shell: an output of one command as input to another.
[0x4A13B8C0]> f | grep section | grep text
0x0805f3b0 512 section._text
0x080d24b0 512 section._text_end
You can pass several commands in a single line by separating them with a semicolon ;:
> px ; dr
Using _, you can print the result that was obtained by the last command.
[0x00001060]> axt 0x00002004
main 0x1181 [DATA] lea rdi, str.argv__2d_:__s
[0x00001060]> _
main 0x1181 [DATA] lea rdi, str.argv__2d_:__s
Dietline
Radare2 comes with the lean readline-like input capability through the lean library to handle the command edition and history navigation. It allows users to perform cursor movements, search the history, and implements autocompletion. Moreover, due to the radare2 portability, dietline provides the uniform experience among all supported platforms. It is used in all radare2 subshells - main prompt, SDB shell, visual prompt, and offsets prompt. It also implements the most common features and keybindings compatible with the GNU Readline.
Dietline supports two major configuration modes : Emacs-mode and Vi-mode.
It also supports the famous Ctrl-R reverse history search. Using TAB key it allows to scroll through the
autocompletion options.
Autocompletion
In the every shell and radare2 command autocompletion is supported. There are multiple modes of it -
files, flags, and SDB keys/namespaces. To provide the easy way to select possible completion options
the scrollable popup widget is available. It can be enabled with scr.prompt.popup, just set it to
the true.
Emacs (default) mode
By default dietline mode is compatible with readline Emacs-like mode key bindings. Thus active are:
Moving
Ctrl-a- move to the beginning of the lineCtrl-e- move to the end of the lineCtrl-b- move one character backwardCtrl-f- move one character forward
Deleting
Ctrl-w- delete the previous wordCtrl-u- delete the whole lineCtrl-h- delete a character to the leftCtrl-d- delete a character to the rightAlt-d- cuts the character after the cursor
Killing and Yanking
Ctrl-k- kill the text from point to the end of the line.Ctrl-x- kill backward from the cursor to the beginning of the current line.Ctrl-t- kill from point to the end of the current word, or if between words, to the end of the next word. Word boundaries are the same as forward-word.Ctrl-w- kill the word behind point, using white space as a word boundary. The killed text is saved on the kill-ring.Ctrl-y- yank the top of the kill ring into the buffer at point.Ctrl-]- rotate the kill-ring, and yank the new top. You can only do this if the prior command is yank or yank-pop.
History
Ctrl-r- the reverse search in the command history
Vi mode
Radare2 also comes with in vi mode that can be enabled by toggling scr.prompt.vi. The various keybindings available in this mode are:
Entering command modes
ESC- enter into the control modei- enter into the insert mode
Moving
j- acts like up arrow keyk- acts like down arrow keya- move cursor forward and enter into insert modeI- move to the beginning of the line and enter into insert modeA- move to the end of the line and enter into insert mode^- move to the beginning of the line0- move to the beginning of the line$- move to the end of the lineh- move one character backwardl- move one character forwardb- move cursor to the beginning of the current word, of if between word boundaries, to the beginning of the previous word.B- same asb, but only counting white-space as word boundarye- move cursor the end of the current word, or if between boundaries, to the end of the next wordE- same ase, but only counting white-space as word boundaryw- move cursor to the beginning of the next wordW- same asw, but only counting white-space as word boundaryf<char>- move cursor forward to the first<char>found. For examplefjwill move the cursor to the firstjcharacter found (if it found one)F<char>- same asf<char>, but search backwardst<char>- same asf<char>but stop before<char>. For exampletjwill move the cursor forward to the character just beforejT<char>- same ast<char>, but search backwards
Deleting and Yanking
x- cuts the characterdw- delete the current word from the current positiondiw- delete inside the current worddb- delete the previous wordD- delete from the current cursor position to the end of lineC- same asD, but enter insert mode afterdd- delete the whole line (from any position)cc- same asdd, but enter insert mode afterdh- delete a character to the leftdl- delete a character to the rightd$- same asDd^- delete from the current cursor position to the beginning of linede- kill from point to the end of the current word, or if between words, to the end of the next word. Word boundaries are the same as forward-word.df<char>- delete from current position to the position of the first<char>encountereddF<char>- same asdf<char>, but delete backwardsdt<char>- delete from current position to the position of the character right before the first<char>encountereddT<char>- same asdt<char>, but delete backwardsdi"- delete everything between two"charactersdi'- delete everything between two'charactersdi(- delete everything between(and)charactersdi[- delete everything between[and]charactersdi{- delete everything between{and}charactersdi<- delete everything between<and>charactersp- yank the top of the kill ring into the buffer at point.c- alldcommands have theirccounterpart which enters insert mode after deleting
Other
~- swap the case of the current character and move one character forward
If you are finding it hard to keep track of which mode you are in, just set scr.prompt.mode=true to update the color of the prompt based on the vi-mode.
Seeking
To move around the file we are inspecting we will need to change the offset at which we are using the s command.
The argument is a math expression that can contain flag names, parenthesis, addition, subtraction, multiplication of immediates of contents of memory using brackets.
Some example commands:
[0x00000000]> s 0x10
[0x00000010]> s+4
[0x00000014]> s-
[0x00000010]> s+
[0x00000014]>
Observe how the prompt offset changes. The first line moves the current offset to the address 0x10.
The second does a relative seek 4 bytes forward.
And finally, the last 2 commands are undoing, and redoing the last seek operations.
Instead of using just numbers, we can use complex expressions, or basic arithmetic operations to represent the address to seek.
To do this, check the ?$? Help message which describes the internal variables that can be used in the expressions. For example, this is the same as doing s+4 .
[0x00000000]> s $$+4
From the debugger (or when emulating) we can also use the register names as references. They are loaded as flags with the .dr* command, which happens under the hood.
[0x00000000]> s rsp+0x40
Here's the full help of the s command. We will explain in more detail below.
[0x00000000]> s?
Usage: s   # Help for the seek commands. See ?$? to see all variables
| s               print current address
| s addr          seek to address
| s.[?]hexoff     seek honoring a base from core->offset
| s:pad           print current address with N padded zeros (defaults to 8)
| s-              undo seek
| s-*             reset undo seek history
| s- n            seek n bytes backward
| s--[n]          seek blocksize bytes backward (/=n)
| s+              redo seek
| s+ n            seek n bytes forward
| s++[n]          seek blocksize bytes forward (/=n)
| s[j*=!]         list undo seek history (JSON, =list, *r2, !=names, s==)
| s/ DATA         search for next occurrence of 'DATA' (see /?)
| s/x 9091        search for next occurrence of \x90\x91
| sa ([+-]addr)   seek to block-size aligned address (addr=$$ if not specified)
| sb ([addr])     seek to the beginning of the basic block
| sC[?] string    seek to comment matching given string
| sd ([addr])     show delta seek compared to all possible reference bases
| sf              seek to next function (f->addr+f->size)
| sf function     seek to address of specified function
| sf.             seek to the beginning of current function
| sfp             seek to the function prelude checking back blocksize bytes
| sff             seek to the nearest flag backwards (uses fd and ignored the delta)
| sg/sG           seek begin (sg) or end (sG) of section or file
| sh              open a basic shell (aims to support basic posix syntax)
| sl[?] [+-]line  seek to line
| sn/sp ([nkey])  seek to next/prev location, as specified by scr.nkey
| snp             seek to next function prelude
| spp             seek to prev function prelude
| so ([[-]N])     seek to N opcode(s) forward (or backward when N is negative), N=1 by default
| sr PC           seek to register (or register alias) value
| ss[?]           seek silently (without adding an entry to the seek history)
| sort [file]     sort the contents of the file

> 3s++        ; 3 times block-seeking
> s 10+0x80   ; seek at 0x80+10
If you want to inspect the result of a math expression, you can evaluate it using the ? command. Simply pass the expression as an argument. The result can be displayed in hexadecimal, decimal, octal or binary formats.
> ? 0x100+200
0x1C8 ; 456d ; 710o ; 1100 1000
There are also subcommands of ? that display the output in one specific format (base 10, base 16 ,...). See ?v and ?vi.
In the visual mode, you can press u (undo) or U (redo) inside the seek history to return back to previous or forward to the next location.
Open file
As a test file, let's use a simple hello_world.c compiled in Linux ELF format.
After we compile it let's open it with radare2:
$ r2 hello_world
Now we have the command prompt:
[0x00400410]>
And it is time to go deeper.
Seeking at any position
All seeking commands that take an address as a command parameter can use any numeral base such as hex, octal, binary or decimal.
Seek to an address 0x0. An alternative command is simply 0x0
[0x00400410]> s 0x0
[0x00000000]>
Print current address:
[0x00000000]> s
0x0
[0x00000000]>
There is an alternate way to print current position: ?v $$.
Seek N positions forward, space is optional:
[0x00000000]> s+ 128
[0x00000080]>
Undo last two seeks to return to the initial address:
[0x00000080]> s-
[0x00000000]> s-
[0x00400410]>
We are back at 0x00400410.
There's also a command to show the seek history:
[0x00400410]> s*
f undo_3 @ 0x400410
f undo_2 @ 0x40041a
f undo_1 @ 0x400410
f undo_0 @ 0x400411
# Current undo/redo position.
f redo_0 @ 0x4005b4
Partial Seeks
Another important s subcommand is the s.. one which permits to seek to another address taking the higher nibbles of the current address as reference, this technique works great for kernel, aslr or large binaries where you really don't want to type different or large numbers everytime.
[0x100003a84]> s..00
[0x100003a00]> s..3b00
[0x100003b00]> s..0000
[0x100000000]> s 0
[0x00000000]>
Dereferencing pointers
Sometimes programs store pointers in memory, these needs to be derefenced in order to follow them and see what are they pointing at.
The r2 shell provides many ways to do this, that's because reading pointers from memory can be tricky and powerful it gives the power to the user to do it in the way that works the best for them.
Use the * command, which acts like in C. It reads the the value from the given address ($$ stands for current seek) and honors asm.bits and cfg.bigendian.
[0x004000c8]> s `*$$`
[0x0040032e]>
This is the help message from the * command, which can be used as an alias for wv to write a value or to read from memory like the brackets syntax would do on any math expression in r2:
[0x100003a84]> *
Usage: *<addr>[=[0x]value]  Pointer read/write data/values
| *entry0=cc           write trap in entrypoint
| *entry0+10=0x804800  write value in delta address
| *entry0              read byte at given address
| */                   end multiline comment. (use '/*' to start mulitiline comment
[0x100003a84]>
Note that * can be also expressed as a math expression using the brackets syntax:
[0x100003a84]> ?v [$$]
0xa9ba6ffcd503237f
[0x100003a84]>
Alternatively you can always use data analysis (ad) and the periscoped hexdump (pxr) to analyze linked lists, nested structures, pointers and more!
There are several more commands and features to follow and analyze pointers:
- aav : analyze all values pointing to code or data in a given range
- aaw : analyze all meta words (defined by Cd) as pointers to code
- pdp : disassemble following pointers in stack for ropchain gadgets
- pxw/pxq : word/qword hexdumps
- ahp : set pointer hints for analysis
- :iP : diversity pointer infromation from
- pxt : delta pointer table dumping, handy for manual switch table analysis
Block Size
The block size determines how many bytes radare2 commands will process when not given an explicit size argument. You can temporarily change the block size by specifying a numeric argument to the print commands. For example px 20.
[0x00000000]> b?
Usage: b[f] [arg] # Get/Set block size
| b 33 set block size to 33
| b eip+4 numeric argument can be an expression
| b display current block size
| b+3 increase blocksize by 3
| b-16 decrease blocksize by 16
| b* display current block size in r2 command
| bf foo set block size to flag size
| bj display block size information in JSON
| bm 1M set max block size
The b command is used to change the block size:
[0x00000000]> b 0x100 # block size = 0x100
[0x00000000]> b+16 # ... = 0x110
[0x00000000]> b-32 # ... = 0xf0
The bf command is used to change the block size to value specified by a flag. For example, in symbols, the block size of the flag represents the size of the function. To make that work, you have to either run function analysis af (which is included in aa) or manually seek and define some functions e.g. via Vd.
[0x00000000]> bf sym.main # block size = sizeof(sym.main)
[0x00000000]> pD @ sym.main # disassemble sym.main
You can combine two operations in a single pdf command. Except that pdf neither uses nor affects global block size.
[0x00000000]> pdf @ sym.main # disassemble sym.main
Another way around is to use special variables $FB and $FS which denote Function's Beginning and Size at the current seek. Read more about Usable variables.
[0x00000000]> s sym.main + 0x04
[0x00001ec9]> pD @ $FB !$FS # disassemble current function
/ 211: int main (int argc, char **argv, char **envp);
| 0x00001ec5 55 push rbp
| 0x00001ec6 4889e5 mov rbp, rsp
| 0x00001ec9 4881ecc0000000 sub rsp, 0xc0
...
\ 0x00001f97 c3 ret
Note: don't put space after ! size designator. See also Command Format.
Sections
The concept of sections is tied to the information extracted from the binary. We can display this information by using the i command.
Displaying information about sections:
[0x00005310]> iS
[Sections]
00 0x00000000 0 0x00000000 0 ----
01 0x00000238 28 0x00000238 28 -r-- .interp
02 0x00000254 32 0x00000254 32 -r-- .note.ABI_tag
03 0x00000278 176 0x00000278 176 -r-- .gnu.hash
04 0x00000328 3000 0x00000328 3000 -r-- .dynsym
05 0x00000ee0 1412 0x00000ee0 1412 -r-- .dynstr
06 0x00001464 250 0x00001464 250 -r-- .gnu.version
07 0x00001560 112 0x00001560 112 -r-- .gnu.version_r
08 0x000015d0 4944 0x000015d0 4944 -r-- .rela.dyn
09 0x00002920 2448 0x00002920 2448 -r-- .rela.plt
10 0x000032b0 23 0x000032b0 23 -r-x .init
...
As you may know, binaries have sections and maps. The sections define the contents of a portion of the file that can be mapped in memory (or not). What is mapped is defined by the segments.
Before the IO refactoring done by condret, the S command was used to manage what we now call maps. Currently the S command is deprecated because iS and om should be enough.
Firmware images, bootloaders and binary files usually place various sections of a binary at different addresses in memory. To represent this behavior, radare offers the iS. Use iS? to get the help message. To list all created sections use iS (or iSj to get the json format). The iS= will show the region bars in ascii-art.
You can create a new mapping using the om subcommand as follows:
om fd vaddr [size] [paddr] [rwx] [name]
For Example:
[0x0040100]> om 4 0x00000100 0x00400000 0x0001ae08 rwx test
You can also use om command to view information about mapped sections:
[0x00401000]> om
6 fd: 4 +0x0001ae08 0x00000100 - 0x004000ff rwx test
5 fd: 3 +0x00000000 0x00000000 - 0x0000055f r-- fmap.LOAD0
4 fd: 3 +0x00001000 0x00001000 - 0x000011e4 r-x fmap.LOAD1
3 fd: 3 +0x00002000 0x00002000 - 0x0000211f r-- fmap.LOAD2
2 fd: 3 +0x00002de8 0x00003de8 - 0x0000402f r-- fmap.LOAD3
1 fd: 4 +0x00000000 0x00004030 - 0x00004037 rw- mmap.LOAD3
Use om? to get all the possible subcommands. To list all the defined maps use om (or omj to get the json format or om* to get the r2 commands format). To get the ascii art view use om=.
It is also possible to delete the mapped section using the om-mapid command.
For Example:
[0x00401000]> om-6
Mapping Files
Radare's I/O subsystem allows you to map the contents of files into the same I/O space used to contain a loaded binary. New contents can be placed at random offsets.
The o command permits the user to open a file, this is mapped at offset 0 unless it has a known binary header and then the maps are created in virtual addresses.
Sometimes, we want to rebase a binary, or maybe we want to load or map the file in a different address.
When launching r2, the base address can be changed with the -B flag. But you must notice the difference when opening files with unknown headers, like bootloaders, so we need to map them using the -m flag (or specifying it as argument to the o command).
radare2 is able to open files and map portions of them at random places in memory specifying attributes like permissions and name. It is the perfect basic tooling to reproduce an environment like a core file, a debug session, by also loading and mapping all the libraries the binary depends on.
Opening files (and mapping them) is done using the o (open) command. Let's read the help:
[0x00000000]> o?
|Usage: o [com- ] [file] ([offset])
| o list opened files
| o-1 close file descriptor 1
| o-!* close all opened files
| o-- close all files, analysis, binfiles, flags, same as !r2 --
| o [file] open [file] file in read-only
| o+ [file] open file in read-write mode
| o [file] 0x4000 rwx map file at 0x4000
| oa[-] [A] [B] [filename] Specify arch and bits for given file
| oq list all open files
| o* list opened files in r2 commands
| o. [len] open a malloc://[len] copying the bytes from current offset
| o= list opened files (ascii-art bars)
| ob[?] [lbdos] [...] list opened binary files backed by fd
| oc [file] open core file, like relaunching r2
| of [file] open file and map it at addr 0 as read-only
| oi[-|idx] alias for o, but using index instead of fd
| oj[?] list opened files in JSON format
| oL list all IO plugins registered
| om[?] create, list, remove IO maps
| on [file] 0x4000 map raw file at 0x4000 (no r_bin involved)
| oo[?] reopen current file (kill+fork in debugger)
| oo+ reopen current file in read-write
| ood[r] [args] reopen in debugger mode (with args)
| oo[bnm] [...] see oo? for help
| op [fd] prioritize given fd (see also ob)
| ox fd fdx exchange the descs of fd and fdx and keep the mapping
Prepare a simple layout:
$ rabin2 -l /bin/ls
[Linked libraries]
libselinux.so.1
librt.so.1
libacl.so.1
libc.so.6
4 libraries
Map a file:
[0x00001190]> o /bin/zsh 0x499999
List mapped files:
[0x00000000]> o
- 6 /bin/ls @ 0x0 ; r
- 10 /lib/ld-linux.so.2 @ 0x100000000 ; r
- 14 /bin/zsh @ 0x499999 ; r
Print hexadecimal values from /bin/zsh:
[0x00000000]> px @ 0x499999
Unmap files using the o- command. Pass the required file descriptor to it as an argument:
[0x00000000]> o-14
You can also view the ascii table showing the list of the opened files:
[0x00000000]> ob=
Print Modes
One of the key features of radare2 is displaying information in many formats. The goal is to offer a selection of display choices to interpret binary data in the best possible way.
Binary data can be represented as integers, shorts, longs, floats, timestamps, hexpair strings, or more complex formats like C structures, disassembly listings, decompilation listing, be a result of an external processing...
Below is a list of available print modes listed by p?:
[0x00005310]> p?
|Usage: p[=68abcdDfiImrstuxz] [arg|len] [@addr]
| p[b|B|xb] [len] ([S]) bindump N bits skipping S bytes
| p[iI][df] [len] print N ops/bytes (f=func) (see pi? and pdi)
| p[kK] [len] print key in randomart (K is for mosaic)
| p-[?][jh] [mode] bar|json|histogram blocks (mode: e?search.in)
| p2 [len] 8x8 2bpp-tiles
| p3 [file] print stereogram (3D)
| p6[de] [len] base64 decode/encode
| p8[?][j] [len] 8bit hexpair list of bytes
| p=[?][bep] [N] [L] [b] show entropy/printable chars/chars bars
| pa[edD] [arg] pa:assemble pa[dD]:disasm or pae: esil from hex
| pA[n_ops] show n_ops address and type
| pb[?] [n] bitstream of N bits
| pB[?] [n] bitstream of N bytes
| pc[?][p] [len] output C (or python) format
| pC[aAcdDxw] [rows] print disassembly in columns (see hex.cols and pdi)
| pd[?] [sz] [a] [b] disassemble N opcodes (pd) or N bytes (pD)
| pf[?][.nam] [fmt] print formatted data (pf.name, pf.name $<expr>)
| pF[?][apx] print asn1, pkcs7 or x509
| pg[?][x y w h] [cmd] create new visual gadget or print it (see pg? for details)
| ph[?][=|hash] ([len]) calculate hash for a block
| pj[?] [len] print as indented JSON
| pm[?] [magic] print libmagic data (see pm? and /m?)
| po[?] hex print operation applied to block (see po?)
| pp[?][sz] [len] print patterns, see pp? for more help
| pq[?][is] [len] print QR code with the first Nbytes
| pr[?][glx] [len] print N raw bytes (in lines or hexblocks, 'g'unzip)
| ps[?][pwz] [len] print pascal/wide/zero-terminated strings
| pt[?][dn] [len] print different timestamps
| pu[?][w] [len] print N url encoded bytes (w=wide)
| pv[?][jh] [mode] show variable/pointer/value in memory
| pwd display current working directory
| px[?][owq] [len] hexdump of N bytes (o=octal, w=32bit, q=64bit)
| pz[?] [len] print zoom view (see pz? for help)
[0x00005310]>
Tip: when using JSON output, you can append the
~{}to the command to get a pretty-printed version of the output:
[0x00000000]> oj
[{"raised":false,"fd":563280,"uri":"malloc://512","from":0,"writable":true,"size":512,"overlaps":false}]
[0x00000000]> oj~{}
[
{
"raised": false,
"fd": 563280,
"uri": "malloc://512",
"from": 0,
"writable": true,
"size": 512,
"overlaps": false
}
]
For more on the magical powers of ~ see the help in ?@?, and the Command Format chapter earlier in the book.
Hexadecimal View
px gives a user-friendly output showing 16 pairs of numbers per row with offsets and raw representations:
[0x00000000]> px
- offset - 0 1 2 3 4 5 6 7 8 9 A B C D E F 0123456789ABCDEF
0x00000000 6ad5 e6a9 85dc 6339 63d9 b3b8 84bb 00d0 j.....c9c.......
0x00000010 407b 849d 13eb f6cc 0a8b 64e2 d395 33e3 @{........d...3.
0x00000020 08e8 3801 d013 0414 2702 4bdb 1283 876e ..8.....'.K....n
pxw shows 32-bit word dump:
[0x00000000]> pxw
0x00000000 0xa9e6d56a 0x3963dc85 0xb8b3d963 0xd000bb84 j.....c9c.......
0x00000010 0x9d847b40 0xccf6eb13 0xe2648b0a 0xe33395d3 @{........d...3.
0x00000020 0x0138e808 0x140413d0 0xdb4b0227 0x6e878312 ..8.....'.K....n
Endianness configuration can changes the way the hexadecimal view is displayed:
[0x00000000]> e cfg.bigendian
false
[0x00000000]> e cfg.bigendian = true
[0x00000000]> pxw
0x00000000 0x6ad5e6a9 0x85dc6339 0x63d9b3b8 0x84bb00d0 j.....c9c.......
0x00000010 0x407b849d 0x13ebf6cc 0x0a8b64e2 0xd39533e3 @{........d...3.
0x00000020 0x08e83801 0xd0130414 0x27024bdb 0x1283876e ..8.....'.K....n
pxq show 64-bit quad-words dump:
[0x00000000]> pxq
0x00000000 0x3963dc85a9e6d56a 0xd000bb84b8b3d963 j.....c9c.......
0x00000010 0xccf6eb139d847b40 0xe33395d3e2648b0a @{........d...3.
0x00000020 0x140413d00138e808 0x6e878312db4b0227 ..8.....'.K....n
8 bits Hexpair List of Bytes
[0x00404888]> p8 16
31ed4989d15e4889e24883e4f0505449
Date/Time Formats
Currently supported timestamp output modes are:
[0x00404888]> pt?
|Usage: pt [dn] print timestamps
| pt. print current time
| pt print UNIX time (32 bit `cfg.bigendian`) Since January 1, 1970
| ptd print DOS time (32 bit `cfg.bigendian`) Since January 1, 1980
| pth print HFS time (32 bit `cfg.bigendian`) Since January 1, 1904
| ptn print NTFS time (64 bit `cfg.bigendian`) Since January 1, 1601
For example, you can 'view' the current buffer as timestamps in the ntfs time:
[0x08048000]> e cfg.bigendian = false
[0x08048000]> pt 4
29:04:32948 23:12:36 +0000
[0x08048000]> e cfg.bigendian = true
[0x08048000]> pt 4
20:05:13001 09:29:21 +0000
As you can see, the endianness affects the result. Once you have printed a timestamp, you can grep the output, for example, by year:
[0x08048000]> pt ~1974 | wc -l
15
[0x08048000]> pt ~2022
27:04:2022 16:15:43 +0000
The default date format can be configured using the cfg.datefmt variable. Formatting rules for it follow the well known strftime(3) format. Check the manpage for more details, but these are the most important:
%a The abbreviated name of the day of the week according to the current locale.
%A The full name of the day of the week according to the current locale.
%d The day of the month as a decimal number (range 01 to 31).
%D Equivalent to %m/%d/%y. (Yecch—for Americans only).
%H The hour as a decimal number using a 24-hour clock (range 00 to 23).
%I The hour as a decimal number using a 12-hour clock (range 01 to 12).
%m The month as a decimal number (range 01 to 12).
%M The minute as a decimal number (range 00 to 59).
%p Either "AM" or "PM" according to the given time value.
%s The number of seconds since the Epoch, 1970-01-01 00:00:00 +0000 (UTC). (TZ)
%S The second as a decimal number (range 00 to 60). (The range is up to 60 to allow for occasional leap seconds.)
%T The time in 24-hour notation (%H:%M:%S). (SU)
%y The year as a decimal number without a century (range 00 to 99).
%Y The year as a decimal number including the century.
%z The +hhmm or -hhmm numeric timezone (that is, the hour and minute offset from UTC). (SU)
%Z The timezone name or abbreviation.
Basic Types
There are print modes available for all basic types. If you are interested in a more complex structure, type pf?? for format characters and pf??? for examples:
[0x00499999]> pf??
|pf: pf[.k[.f[=v]]|[v]]|[n]|[0|cnt][fmt] [a0 a1 ...]
| Format:
| b byte (unsigned)
| B resolve enum bitfield (see t?)
| c char (signed byte)
| C byte in decimal
| d 0xHEX value (4 bytes) (see 'i' and 'x')
| D disassemble one opcode
| e temporally swap endian
| E resolve enum name (see t?)
| f float value (4 bytes)
| F double value (8 bytes)
| i signed integer value (4 bytes) (see 'd' and 'x')
| n next char specifies size of signed value (1, 2, 4 or 8 byte(s))
| N next char specifies size of unsigned value (1, 2, 4 or 8 byte(s))
| o octal value (4 byte)
| p pointer reference (2, 4 or 8 bytes)
| q quadword (8 bytes)
| r CPU register `pf r (eax)plop`
| s 32bit pointer to string (4 bytes)
| S 64bit pointer to string (8 bytes)
| t UNIX timestamp (4 bytes)
| T show Ten first bytes of buffer
| u uleb128 (variable length)
| w word (2 bytes unsigned short in hex)
| x 0xHEX value and flag (fd @ addr) (see 'd' and 'i')
| X show formatted hexpairs
| z null terminated string
| Z null terminated wide string
| ? data structure `pf ? (struct_name)example_name`
| * next char is pointer (honors asm.bits)
| + toggle show flags for each offset
| : skip 4 bytes
| . skip 1 byte
| ; rewind 4 bytes
| , rewind 1 byte
Use triple-question-mark pf??? to get some examples using print format strings.
[0x00499999]> pf???
|pf: pf[.k[.f[=v]]|[v]]|[n]|[0|cnt][fmt] [a0 a1 ...]
| Examples:
| pf 3xi foo bar 3-array of struct, each with named fields: 'foo' as hex, and 'bar' as int
| pf B (BitFldType)arg_name` bitfield type
| pf E (EnumType)arg_name` enum type
| pf.obj xxdz prev next size name Define the obj format as xxdz
| pf obj=xxdz prev next size name Same as above
| pf *z*i*w nb name blob Print the pointers with given labels
| pf iwq foo bar troll Print the iwq format with foo, bar, troll as the respective names for the fields
| pf 0iwq foo bar troll Same as above, but considered as a union (all fields at offset 0)
| pf.plop ? (troll)mystruct Use structure troll previously defined
| pfj.plop @ 0x14 Apply format object at the given offset
| pf 10xiz pointer length string Print a size 10 array of the xiz struct with its field names
| pf 5sqw string quad word Print an array with sqw struct along with its field names
| pf {integer}? (bifc) Print integer times the following format (bifc)
| pf [4]w[7]i Print an array of 4 words and then an array of 7 integers
| pf ic...?i foo bar "(pf xw yo foo)troll" yo Print nested anonymous structures
| pf ;..x Print value located 6 bytes from current offset
| pf [10]z[3]i[10]Zb Print an fixed size str, widechar, and var
| pfj +F @ 0x14 Print the content at given offset with flag
| pf n2 print signed short (2 bytes) value. Use N instead of n for printing unsigned values
| pf [2]? (plop)structname @ 0 Prints an array of structs
| pf eqew bigWord beef Swap endianness and print with given labels
| pf.foo rr (eax)reg1 (eip)reg2 Create object referencing to register values
| pf tt troll plop print time stamps with labels troll and plop
Some examples are below:
[0x4A13B8C0]> pf i
0x00404888 = 837634441
[0x4A13B8C0]> pf
0x00404888 = 837634432.000000
High-level Languages Views
Valid print code formats for human-readable languages are:
pcCpc*print 'wx' r2 commandspchC half-words (2 byte)pcwC words (4 byte)pcdC dwords (8 byte)pciC array of bytes with instructionspcaGAS .byte blobpcA.bytes with instructions in commentspcsstringpcSshellscript that reconstructs the binpcjjsonpcJjavascriptpcoObjective-CpcppythonpckkotlinpcrrustpcvJaVapcVV (vlang.io)pcyyarapczSwift
If we need to create a .c file containing a binary blob, use the pc command, that creates this output. The default size is like in many other commands: the block size, which can be changed with the b command.
We can also just temporarily override this block size by expressing it as an argument.
[0xB7F8E810]> pc 32
#define _BUFFER_SIZE 32
unsigned char buffer[_BUFFER_SIZE] = {
0x89, 0xe0, 0xe8, 0x49, 0x02, 0x00, 0x00, 0x89, 0xc7, 0xe8, 0xe2, 0xff, 0xff, 0xff, 0x81, 0xc3, 0xd6, 0xa7, 0x01, 0x00, 0x8b, 0x83, 0x00, 0xff, 0xff, 0xff, 0x5a, 0x8d, 0x24, 0x84, 0x29, 0xc2 };
That cstring can be used in many programming languages, not just C.
[0x7fcd6a891630]> pcs
"\x48\x89\xe7\xe8\x68\x39\x00\x00\x49\x89\xc4\x8b\x05\xef\x16\x22\x00\x5a\x48\x8d\x24\xc4\x29\xc2\x52\x48\x89\xd6\x49\x89\xe5\x48\x83\xe4\xf0\x48\x8b\x3d\x06\x1a
Strings
Strings are probably one of the most important entry points when starting to reverse engineer a program because they usually reference information about functions' actions (asserts, debug or info messages...). Therefore, radare supports various string formats:
[0x00000000]> ps?
|Usage: ps[bijqpsuwWxz+] [N] Print String
| ps print string
| ps+[j] print libc++ std::string (same-endian, ascii, zero-terminated)
| psb print strings in current block
| psi print string inside curseek
| psj print string in JSON format
| psp[j] print pascal string
| psq alias for pqs
| pss print string in screen (wrap width)
| psu[zj] print utf16 unicode (json)
| psw[j] print 16bit wide string
| psW[j] print 32bit wide string
| psx show string with escaped chars
| psz[j] print zero-terminated string
Most strings are zero-terminated. Below there is an example using the debugger to continue the execution of a program until it executes the 'open' syscall. When we recover the control over the process, we get the arguments passed to the syscall, pointed by %ebx. In the case of the 'open' call, it is a zero terminated string which we can inspect using psz.
[0x4A13B8C0]> dcs open
0x4a14fc24 syscall(5) open ( 0x4a151c91 0x00000000 0x00000000 ) = 0xffffffda
[0x4A13B8C0]> dr
eax 0xffffffda esi 0xffffffff eip 0x4a14fc24
ebx 0x4a151c91 edi 0x4a151be1 oeax 0x00000005
ecx 0x00000000 esp 0xbfbedb1c eflags 0x200246
edx 0x00000000 ebp 0xbfbedbb0 cPaZstIdor0 (PZI)
[0x4A13B8C0]>
[0x4A13B8C0]> psz @ 0x4a151c91
/etc/ld.so.cache
Print Memory Contents
It is also possible to print various packed data types using the pf command:
[0xB7F08810]> pf xxS @ rsp
0x7fff0d29da30 = 0x00000001
0x7fff0d29da34 = 0x00000000
0x7fff0d29da38 = 0x7fff0d29da38 -> 0x0d29f7ee /bin/ls
This can be used to look at the arguments passed to a function. To achieve this, simply pass a 'format memory string' as an argument to pf, and temporally change the current seek position/offset using @. It is also possible to define arrays of structures with pf. To do this, prefix the format string with a numeric value. You can also define a name for each field of the structure by appending them as a space-separated arguments list.
[0x4A13B8C0]> pf 2*xw pointer type @ esp
0x00404888 [0] {
pointer :
(*0xffffffff8949ed31) type : 0x00404888 = 0x8949ed31
0x00404890 = 0x48e2
}
0x00404892 [1] {
(*0x50f0e483) pointer : 0x00404892 = 0x50f0e483
type : 0x0040489a = 0x2440
}
A practical example for using pf on a binary of a GStreamer plugin:
$ radare2 /usr/lib/gstreamer-1.0/libgstflv.so
[0x00006020]> aa; pdf @ sym.gst_plugin_flv_get_desc
[x] Analyze all flags starting with sym. and entry0 (aa)
sym.gst_plugin_flv_get_desc ();
[...]
0x00013830 488d0549db0000 lea rax, section..data.rel.ro ; 0x21380
0x00013837 c3 ret
[0x00006020]> s section..data.rel.ro
[0x00021380]> pf ii*z*zp*z*z*z*z*z*z major minor name desc init version license source package origin release_datetime
major : 0x00021380 = 1
minor : 0x00021384 = 18
name : (*0x19cf2)0x00021388 = "flv"
desc : (*0x1b358)0x00021390 = "FLV muxing and demuxing plugin"
init : 0x00021398 = (qword)0x0000000000013460
version : (*0x19cae)0x000213a0 = "1.18.2"
license : (*0x19ce1)0x000213a8 = "LGPL"
source : (*0x19cd0)0x000213b0 = "gst-plugins-good"
package : (*0x1b378)0x000213b8 = "GStreamer Good Plugins (Arch Linux)"
origin : (*0x19cb5)0x000213c0 = "https://www.archlinux.org/"
release_datetime : (*0x19cf6)0x000213c8 = "2020-12-06"
Disassembly
The pd command is used to disassemble code. It accepts a numeric value to specify how many instructions should be disassembled. The pD command is similar but instead of a number of instructions, it decompiles a given number of bytes.
d: disassembly N opcodes count of opcodesD: asm.arch disassembler bsize bytes
[0x00404888]> pd 1
;-- entry0:
0x00404888 31ed xor ebp, ebp
Selecting Target Architecture
The architecture flavor for the disassembler is defined by the asm.arch eval variable. You can use e asm.arch=?? to list all available architectures.
[0x00005310]> e asm.arch=??
_dAe _8_16 6502 LGPL3 6502/NES/C64/Tamagotchi/T-1000 CPU
_dAe _8 8051 PD 8051 Intel CPU
_dA_ _16_32 arc GPL3 Argonaut RISC Core
a___ _16_32_64 arm.as LGPL3 as ARM Assembler (use ARM_AS environment)
adAe _16_32_64 arm BSD Capstone ARM disassembler
_dA_ _16_32_64 arm.gnu GPL3 Acorn RISC Machine CPU
_d__ _16_32 arm.winedbg LGPL2 WineDBG's ARM disassembler
adAe _8_16 avr GPL AVR Atmel
adAe _16_32_64 bf LGPL3 Brainfuck
_dA_ _32 chip8 LGPL3 Chip8 disassembler
_dA_ _16 cr16 LGPL3 cr16 disassembly plugin
_dA_ _32 cris GPL3 Axis Communications 32-bit embedded processor
adA_ _32_64 dalvik LGPL3 AndroidVM Dalvik
ad__ _16 dcpu16 PD Mojang's DCPU-16
_dA_ _32_64 ebc LGPL3 EFI Bytecode
adAe _16 gb LGPL3 GameBoy(TM) (z80-like)
_dAe _16 h8300 LGPL3 H8/300 disassembly plugin
_dAe _32 hexagon LGPL3 Qualcomm Hexagon (QDSP6) V6
_d__ _32 hppa GPL3 HP PA-RISC
_dAe _0 i4004 LGPL3 Intel 4004 microprocessor
_dA_ _8 i8080 BSD Intel 8080 CPU
adA_ _32 java Apache Java bytecode
_d__ _32 lanai GPL3 LANAI
...
Configuring the Disassembler
There are multiple options which can be used to configure the output of the disassembler. All these options are described in e? asm.
[0x00005310]> e? asm.
asm.anal: Analyze code and refs while disassembling (see anal.strings)
asm.arch: Set the arch to be used by asm
asm.assembler: Set the plugin name to use when assembling
asm.bbline: Show empty line after every basic block
asm.bits: Word size in bits at assembler
asm.bytes: Display the bytes of each instruction
asm.bytespace: Separate hexadecimal bytes with a whitespace
asm.calls: Show callee function related info as comments in disasm
asm.capitalize: Use camelcase at disassembly
asm.cmt.col: Column to align comments
asm.cmt.flgrefs: Show comment flags associated to branch reference
asm.cmt.fold: Fold comments, toggle with Vz
...
Currently there are 136 asm. configuration variables so we do not list them all.
Disassembly Syntax
The asm.syntax variable is used to change the flavor of the assembly syntax used by a disassembler engine. To switch between Intel and AT&T representations:
e asm.syntax = intel
e asm.syntax = att
You can also check asm.pseudo, which is an experimental pseudocode view,
and asm.esil which outputs ESIL ('Evaluable Strings Intermediate Language'). ESIL's goal is to have a human-readable representation of every opcode semantics. Such representations can be evaluated (interpreted) to emulate effects of individual instructions.
Print hashes
To calculate a checksum of current block when running radare2, use the ph command. Pass an algorithm name to it as a parameter. An example session:
$ radare2 /bin/ls
[0x08049790]> bf entry0
[0x08049790]> ph md5
d2994c75adaa58392f953a448de5fba7
You can use all hashing algorithms supported by rahash2:
[0x00000000]> ph?
md5
sha1
sha256
sha384
sha512
md4
xor
xorpair
parity
entropy
hamdist
pcprint
mod255
xxhash
adler32
luhn
crc8smbus
crc15can
crc16
crc16hdlc
crc16usb
crc16citt
crc24
crc32
crc32c
crc32ecma267
crc32bzip2
crc32d
crc32mpeg2
crc32posix
crc32q
crc32jamcrc
crc32xfer
crc64
crc64ecma
crc64we
crc64xz
crc64iso
The ph command accepts an optional numeric argument to specify length of byte range to be hashed, instead of default block size. For example:
[0x08049A80]> ph md5 32
9b9012b00ef7a94b5824105b7aaad83b
[0x08049A80]> ph md5 64
a71b087d8166c99869c9781e2edcf183
[0x08049A80]> ph md5 1024
a933cc94cd705f09a41ecc80c0041def
Flags
Flags are conceptually similar to bookmarks. They associate a name with a given offset in a file. Flags can be grouped into 'flag spaces'. A flag space is a namespace for flags, grouping together flags of similar characteristics or type. Examples for flag spaces: sections, registers, symbols.
To create a flag:
[0x4A13B8C0]> f flag_name @ offset
You can remove a flag by appending the - character to command. Most commands accept - as argument-prefix as an indication to delete something.
[0x4A13B8C0]> f-flag_name
To switch between or create new flagspaces use the fs command:
[0x00005310]> fs?
|Usage: fs [*] [+-][flagspace|addr] # Manage flagspaces
| fs display flagspaces
| fs* display flagspaces as r2 commands
| fsj display flagspaces in JSON
| fs * select all flagspaces
| fs flagspace select flagspace or create if it doesn't exist
| fs-flagspace remove flagspace
| fs-* remove all flagspaces
| fs+foo push previous flagspace and set
| fs- pop to the previous flagspace
| fs-. remove the current flagspace
| fsq list flagspaces in quiet mode
| fsm [addr] move flags at given address to the current flagspace
| fss display flagspaces stack
| fss* display flagspaces stack in r2 commands
| fssj display flagspaces stack in JSON
| fsr newname rename selected flagspace
[0x00005310]> fs
0 439 * strings
1 17 * symbols
2 54 * sections
3 20 * segments
4 115 * relocs
5 109 * imports
[0x00005310]>
Here there are some command examples:
[0x4A13B8C0]> fs symbols ; select only flags in symbols flagspace
[0x4A13B8C0]> f ; list only flags in symbols flagspace
[0x4A13B8C0]> fs * ; select all flagspaces
[0x4A13B8C0]> f myflag ; create a new flag called 'myflag'
[0x4A13B8C0]> f-myflag ; delete the flag called 'myflag'
You can rename flags with fr.
Local flags
Every flag name should be unique for addressing reasons. But it is quite a common need
to have the flags, for example inside the functions, with simple and ubiquitous names like loop or return. For this purpose you can use so called "local" flags, which are tied to the function where they reside. It is possible to add them using f. command:
[0x00003a04]> pd 10
| 0x00003a04 48c705c9cc21. mov qword [0x002206d8], 0xffffffffffffffff ;
[0x2206d8:8]=0
| 0x00003a0f c60522cc2100. mov byte [0x00220638], 0 ; [0x220638:1]=0
| 0x00003a16 83f802 cmp eax, 2
| .-< 0x00003a19 0f84880d0000 je 0x47a7
| | 0x00003a1f 83f803 cmp eax, 3
| .--< 0x00003a22 740e je 0x3a32
| || 0x00003a24 83e801 sub eax, 1
|.---< 0x00003a27 0f84ed080000 je 0x431a
|||| 0x00003a2d e8fef8ffff call sym.imp.abort ; void abort(void)
|||| ; CODE XREF from main (0x3a22)
||`--> 0x00003a32 be07000000 mov esi, 7
[0x00003a04]> f. localflag @ 0x3a32
[0x00003a04]> f.
0x00003a32 localflag [main + 210]
[0x00003a04]> pd 10
| 0x00003a04 48c705c9cc21. mov qword [0x002206d8], 0xffffffffffffffff ;
[0x2206d8:8]=0
| 0x00003a0f c60522cc2100. mov byte [0x00220638], 0 ; [0x220638:1]=0
| 0x00003a16 83f802 cmp eax, 2
| .-< 0x00003a19 0f84880d0000 je 0x47a7
| | 0x00003a1f 83f803 cmp eax, 3
| .--< 0x00003a22 740e je 0x3a32 ; main.localflag
| || 0x00003a24 83e801 sub eax, 1
|.---< 0x00003a27 0f84ed080000 je 0x431a
|||| 0x00003a2d e8fef8ffff call sym.imp.abort ; void abort(void)
|||| ; CODE XREF from main (0x3a22)
||`--> .localflag:
|||| ; CODE XREF from main (0x3a22)
||`--> 0x00003a32 be07000000 mov esi, 7
[0x00003a04]>
Flag Zones
radare2 offers flag zones, which lets you label different offsets on the scrollbar, for making it easier to navigate through large binaries. You can set a flag zone on the current seek using:
[0x00003a04]> fz flag-zone-name
Set scr.scrollbar=1 and go to the Visual mode, to see your flag zone appear on the scrollbar on the right end of the window.
See fz? for more information.
RTables and the comma operator (',')
The comma operator (,) exposes Radare2's RTables API in the shell. It provides a flexible way to load, query, filter and export tabular data produced by Radare2 commands (functions, symbols, flags, xrefs, sections, headers, etc.). The , command and its suffix operators let you build compact oneliners to manipulate large datasets interactively.
Why use RTables?
- Unified table view for heterogeneous data (symbols, flags, functions, imports, etc.).
- Powerful filtering and projection using concise suffix expressions.
- Easy import/export to CSV, JSON, SQL and other formats for scripting and reporting.
- Compose commands and filters in a single shell pipeline for quick analysis.
Basic usage
Run ,? in the r2 shell to see the full help. Common forms:
,— show the current table, [query]— filter and print the current table (non-destructive),. file.csv— load table from CSV file,,— print current table in CSV,-— reset current table,j— print table in JSON,h col1 col2— define header column names and types,r 1 2 foo— add a row using the given format
Example: open the help inside r2
[0x00000000]> ,?
Usage: ,[,.-/*jhr] [file] # load table data
| , display table
| , [table-query] filter and print table. See ,? for more details
| ,. file.csv load table from CSV file (comma dot)
| ,, print table in csv format (comma comma)
| ,- reset table
| ,/? query/filter current table (non-destructive)
| ,*>$foo print table as r2 commands
| ,j print table in json format
| ,h xxd foo bar cow define header column names and types
| ,r 1 2 foo adds a row using the given format string
Suffix operators and filters
Suffixes are used to query, sort, slice and format table output. They are concise and designed for one-liners. Examples of useful suffixes:
c/sort/inc— sort rows by given column name (increasing)c/sortlen/inc— sort rows by string lengthc/cols/c1/c2— show only selected columnsc/gt/0x800— rows where col > 0x800c/lt/0x800— rows where col < 0x800c/eq/0x800— rows where col == 0x800c/ne/0x800— rows where col != 0x800*/uniq— get the first row of each group where col0 is unique*/head/10,*/tail/10— take first/last N rows*/skip/10— skip the first N rows*/page/1/10— pagination: page 1 of size 10c/str/warn— grep rows matching substring "warn" in the columnc/nostr/warn— inverse ofstrc/strlen/3— rows where strlen(col) == 3c/minlen/3, c/maxlen/3— length comparisonsc/sum— sum of numeric column values
Output formatters:
:r2,:csv,:tsv,:json,:html,:sql,:fancy,:simple— control how results are stringified and exported.:header/:quiet— show/hide header row
These operators can be combined. For example, sorting and taking the top results:
# sort functions by number of xrefs (descending) and take the first 10
> afl,xref/sort/dec,any/head/10
Practical examples
- List flags in JSON format
[0x100000960]> f,:json
[{"size":8,"space":"registers","name":"x0"}, ...]
- Pretty symbols listing (fancy table output)
[0x100000960]> is,:fancy
# (prints a nicely formatted table with columns like nth, paddr, vaddr, bind, type, size, name...)
- Export table as r2 commands (useful for scripting):
,*>$foo # prints the table as a series of r2 commands, storing into variable $foo
- Load a CSV file into a table and filter columns
,. mydata.csv # load CSV
, c/cols/name/addr # show only name and addr columns
Tips and recipes
- Use
,jor:jsonwhen piping to external tools (jq, python scripts). - Combine
c/colswithc/sortand*/headto quickly find top items. - Use
,hto define column names/types when constructing tables manually. - Reset the table with
,-if you want to start a fresh context. - When in doubt, run
,?to discover all available suffixes and formatters.
When to use comma vs other commands
Use the comma operator when you need to reason about sets of rows and perform ad-hoc queries: aggregations, sorting, filtering and export. For single-value queries or low-volume output you may prefer the individual commands (afl, is, f, etc.), but the power of , shows when dealing with larger lists and programmatic post-processing.
Further reading
- See
,?in the r2 shell for live help and the latest suffix names and semantics. - Inspect RTables source or API if you need to extend or script complex export formats.
Writing Data
Radare can manipulate a loaded binary file in many ways. You can resize the file, move and copy/paste bytes, insert new bytes (shifting data to the end of the block or file), or simply overwrite bytes. New data may be given as a wide-string, assembler instructions, or the data may be read in from another file.
Resize the file using the r command. It accepts a numeric argument. A positive value sets a new size for the file. A negative one will truncate the file to the current seek position minus N bytes.
r 1024 ; resize the file to 1024 bytes
r -10 @ 33 ; strip 10 bytes at offset 33
Write bytes using the w command. It accepts multiple input formats like inline assembly, endian-friendly dwords, files, hexpair files, wide strings:
[0x00404888]> w?
Usage: w[x] [str] [<file] [<<EOF] [@addr]
| w[1248][+-][n] increment/decrement byte,word..
| w foobar write string 'foobar'
| w0 [len] write 'len' bytes with value 0x00
| w6[de] base64/hex write base64 [d]ecoded or [e]ncoded string
| wa[?] push ebp write opcode, separated by ';' (use '"' around the command)
| waf f.asm assemble file and write bytes
| waF f.asm assemble file and write bytes and show 'wx' op with hexpair bytes of assembled code
| wao[?] op modify opcode (change conditional of jump. nop, etc)
| wA[?] r 0 alter/modify opcode at current seek (see wA?)
| wb 011001 write bits in bit big endian (see pb)
| wB[-]0xVALUE set or unset bits with given value
| wc list all write changes
| wc[?][jir+-*?] write cache undo/commit/reset/list (io.cache)
| wd [off] [n] duplicate N bytes from offset at current seek (memcpy) (see y?)
| we[?] [nNsxX] [arg] extend write operations (insert instead of replace)
| wf[fs] -|file write contents of file at current offset
| wh r2 whereis/which shell command
| wm f0ff set binary mask hexpair to be used as cyclic write mask
| wo[?] hex write in block with operation. 'wo?' fmi
| wp[?] -|file apply radare patch file. See wp? fmi
| wr 10 write 10 random bytes
| ws pstring write 1 byte for length and then the string
| wt[f][?] file [sz] write to file (from current seek, blocksize or sz bytes)
| wts host:port [sz] send data to remote host:port via tcp://
| ww foobar write wide string 'f\x00o\x00o\x00b\x00a\x00r\x00'
| wx[?][fs] 9090 write two intel nops (from wxfile or wxseek)
| wv[?] eip+34 write 32-64 bit value honoring cfg.bigendian
| wz string write zero terminated string (like w + \x00)
Some examples:
[0x00000000]> wx 123456 @ 0x8048300
[0x00000000]> wv 0x8048123 @ 0x8049100
[0x00000000]> wa jmp 0x8048320
Write Over
The wo command (write over) has many subcommands, each combines the existing data with the new data using
an operator. The command is applied to the current block. Supported operators include XOR, ADD, SUB...
[0x4A13B8C0]> wo?
|Usage: wo[asmdxoArl24] [hexpairs] @ addr[:bsize]
|Example:
| wox 0x90 ; xor cur block with 0x90
| wox 90 ; xor cur block with 0x90
| wox 0x0203 ; xor cur block with 0203
| woa 02 03 ; add [0203][0203][...] to curblk
| woe 02 03 ; create sequence from 2 to 255 with step 3
|Supported operations:
| wow == write looped value (alias for 'wb')
| woa += addition
| wos -= subtraction
| wom *= multiply
| wod /= divide
| wox ^= xor
| woo |= or
| woA &= and
| woR random bytes (alias for 'wr $b')
| wor >>= shift right
| wol <<= shift left
| wo2 2= 2 byte endian swap
| wo4 4= 4 byte endian swap
It is possible to implement cipher-algorithms using radare core primitives and wo. A sample session performing xor(90) + add(01, 02):
[0x7fcd6a891630]> px
- offset - 0 1 2 3 4 5 6 7 8 9 A B C D E F
0x7fcd6a891630 4889 e7e8 6839 0000 4989 c48b 05ef 1622
0x7fcd6a891640 005a 488d 24c4 29c2 5248 89d6 4989 e548
0x7fcd6a891650 83e4 f048 8b3d 061a 2200 498d 4cd5 1049
0x7fcd6a891660 8d55 0831 ede8 06e2 0000 488d 15cf e600
[0x7fcd6a891630]> wox 90
[0x7fcd6a891630]> px
- offset - 0 1 2 3 4 5 6 7 8 9 A B C D E F
0x7fcd6a891630 d819 7778 d919 541b 90ca d81d c2d8 1946
0x7fcd6a891640 1374 60d8 b290 d91d 1dc5 98a1 9090 d81d
0x7fcd6a891650 90dc 197c 9f8f 1490 d81d 95d9 9f8f 1490
0x7fcd6a891660 13d7 9491 9f8f 1490 13ff 9491 9f8f 1490
[0x7fcd6a891630]> woa 01 02
[0x7fcd6a891630]> px
- offset - 0 1 2 3 4 5 6 7 8 9 A B C D E F
0x7fcd6a891630 d91b 787a 91cc d91f 1476 61da 1ec7 99a3
0x7fcd6a891640 91de 1a7e d91f 96db 14d9 9593 1401 9593
0x7fcd6a891650 c4da 1a6d e89a d959 9192 9159 1cb1 d959
0x7fcd6a891660 9192 79cb 81da 1652 81da 1456 a252 7c77
Rapatches
Human friendly text format to apply patches to binary files.
Patch format
Those patches must be written in files and the syntax looks like the following:
^# -> comments
. -> execute command
! -> execute command
OFFSET { code block }
OFFSET "string"
OFFSET 01020304
OFFSET : assembly
+ {code}|"str"|0210|: asm
Rapatch Example
This script will run the ?e .. command in r2 and then write the string 'Hello' at 0x200 offset
# rapatch example
:?e hello world
0x200 "Hello"
Applying rapatches
$ r2 -P rapatch.txt target-program.txt
Or for scripted patching like patch(1):
$ r2 -w -q -P rapatch.txt target-program.txt
Zoom
The zoom is a print mode that allows you to get a global view of the whole file or a memory map on a single screen. In this mode, each byte represents file_size/block_size bytes of the file. Use the pz command, or just use Z in the visual mode to toggle the zoom mode.
The cursor can be used to scroll faster through the zoom out view. Pressing z again will zoom-in at the cursor position.
[0x004048c5]> pz?
|Usage: pz [len] print zoomed blocks (filesize/N)
| e zoom.maxsz max size of block
| e zoom.from start address
| e zoom.to end address
| e zoom.byte specify how to calculate each byte
| pzp number of printable chars
| pzf count of flags in block
| pzs strings in range
| pz0 number of bytes with value '0'
| pzF number of bytes with value 0xFF
| pze calculate entropy and expand to 0-255 range
| pzh head (first byte value); This is the default mode
Let's see some examples:
[0x08049790]> e zoom.byte=h
[0x08049790]> pz // or default pzh
0x00000000 7f00 0000 e200 0000 146e 6f74 0300 0000
0x00000010 0000 0000 0068 2102 00ff 2024 e8f0 007a
0x00000020 8c00 18c2 ffff 0080 4421 41c4 1500 5dff
0x00000030 ff10 0018 0fc8 031a 000c 8484 e970 8648
0x00000040 d68b 3148 348b 03a0 8b0f c200 5d25 7074
0x00000050 7500 00e1 ffe8 58fe 4dc4 00e0 dbc8 b885
[0x08049790]> e zoom.byte=p
[0x08049790]> pz // or pzp
0x00000000 2f47 0609 070a 0917 1e9e a4bd 2a1b 2c27
0x00000010 322d 5671 8788 8182 5679 7568 82a2 7d89
0x00000020 8173 7f7b 727a 9588 a07b 5c7d 8daf 836d
0x00000030 b167 6192 a67d 8aa2 6246 856e 8c9b 999f
0x00000040 a774 96c3 b1a4 6c8e a07c 6a8f 8983 6a62
0x00000050 7d66 625f 7ea4 7ea6 b4b6 8b57 a19f 71a2
[0x08049790]> eval zoom.byte = flags
[0x08049790]> pz // or pzf
0x00406e65 48d0 80f9 360f 8745 ffff ffeb ae66 0f1f
0x00406e75 4400 0083 f801 0f85 3fff ffff 410f b600
0x00406e85 3c78 0f87 6301 0000 0fb6 c8ff 24cd 0026
0x00406e95 4100 660f 1f84 0000 0000 0084 c074 043c
0x00406ea5 3a75 18b8 0500 0000 83f8 060f 95c0 e9cd
0x00406eb5 feff ff0f 1f84 0000 0000 0041 8801 4983
0x00406ec5 c001 4983 c201 4983 c101 e9ec feff ff0f
[0x08049790]> e zoom.byte=F
[0x08049790]> pO // or pzF
0x00000000 0000 0000 0000 0000 0000 0000 0000 0000
0x00000010 0000 2b5c 5757 3a14 331f 1b23 0315 1d18
0x00000020 222a 2330 2b31 2e2a 1714 200d 1512 383d
0x00000030 1e1a 181b 0a10 1a21 2a36 281e 1d1c 0e11
0x00000040 1b2a 2f22 2229 181e 231e 181c 1913 262b
0x00000050 2b30 4741 422f 382a 1e22 0f17 0f10 3913
You can limit zooming to a range of bytes instead of the whole bytespace. Change zoom.from and zoom.to eval variables:
[0x00003a04]> e? zoom.
zoom.byte: Zoom callback to calculate each byte (See pz? for help)
zoom.from: Zoom start address
zoom.in: Specify boundaries for zoom
zoom.maxsz: Zoom max size of block
zoom.to: Zoom end address
[0x00003a04]> e zoom.
zoom.byte = h
zoom.from = 0
zoom.in = io.map
zoom.maxsz = 512
zoom.to = 0
Yank/Paste
Radare2 has an internal clipboard to save and write portions of memory loaded from the current io layer.
This clipboard can be manipulated with the y command.
The two basic operations are
- copy (yank)
- paste
The yank operation will read N bytes (specified by the argument) into the clipboard. We can later use the yy command to paste what we read before into a file.
You can yank/paste bytes in visual mode selecting them with the cursor mode (Vc) and then using the y and Y key bindings which are aliases for y and yy commands of the command-line interface.
[0x00000000]> y?
Usage: y[ptxy] [len] [[@]addr] # See wd? for memcpy, same as 'yf'.
| y! open cfg.editor to edit the clipboard
| y 16 0x200 copy 16 bytes into clipboard from 0x200
| y 16 @ 0x200 copy 16 bytes into clipboard from 0x200
| y 16 copy 16 bytes into clipboard
| y show yank buffer information (srcoff len bytes)
| y* print in r2 commands what's been yanked
| yf 64 0x200 copy file 64 bytes from 0x200 from file
| yfa file copy copy all bytes from file (opens w/ io)
| yfx 10203040 yank from hexpairs (same as ywx)
| yj print in JSON commands what's been yanked
| yp print contents of clipboard
| yq print contents of clipboard in hexpairs
| ys print contents of clipboard as string
| yt 64 0x200 copy 64 bytes from current seek to 0x200
| ytf file dump the clipboard to given file
| yw hello world yank from string
| ywx 10203040 yank from hexpairs (same as yfx)
| yx print contents of clipboard in hexadecimal
| yy 0x3344 paste clipboard
| yz [len] copy nul-terminated string (up to blocksize) into clipboard
Sample session:
[0x00000000]> s 0x100 ; seek at 0x100
[0x00000100]> y 100 ; yanks 100 bytes from here
[0x00000200]> s 0x200 ; seek 0x200
[0x00000200]> yy ; pastes 100 bytes
You can perform a yank and paste in a single line by just using the yt command (yank-to). The syntax is as follows:
[0x4A13B8C0]> x
offset 0 1 2 3 4 5 6 7 8 9 A B 0123456789AB
0x4A13B8C0, 89e0 e839 0700 0089 c7e8 e2ff ...9........
0x4A13B8CC, ffff 81c3 eea6 0100 8b83 08ff ............
0x4A13B8D8, ffff 5a8d 2484 29c2 ..Z.$.).
[0x4A13B8C0]> yt 8 0x4A13B8CC @ 0x4A13B8C0
[0x4A13B8C0]> x
offset 0 1 2 3 4 5 6 7 8 9 A B 0123456789AB
0x4A13B8C0, 89e0 e839 0700 0089 c7e8 e2ff ...9........
0x4A13B8CC, 89e0 e839 0700 0089 8b83 08ff ...9........
0x4A13B8D8, ffff 5a8d 2484 29c2 ..Z.$.).
Comparing Bytes
For most generic reverse engineering tasks like finding the differences between two binary files, which bytes has changed, find differences in the graphs of the code analysis results, and other diffing operations you can just use radiff2:
$ radiff2 -h
Inside r2, the functionalities exposed by radiff2 are available with the c command.
c (short for "compare") allows you to compare arrays of bytes from different sources. The command accepts input in a number of formats and then compares it against values found at current seek position.
[0x00404888]> c?
Usage: c[?dfx] [argument] # Compare
| c [string] Compare a plain with escaped chars string
| c* [string] Same as above, but printing r2 commands instead
| c1 [addr] Compare 8 bits from current offset
| c2 [value] Compare a word from a math expression
| c4 [value] Compare a doubleword from a math expression
| c8 [value] Compare a quadword from a math expression
| cat [file] Show contents of file (see pwd, ls)
| cc [at] Compares in two hexdump columns of block size
| ccc [at] Same as above, but only showing different lines
| ccd [at] Compares in two disasm columns of block size
| ccdd [at] Compares decompiler output (e cmd.pdc=pdg|pdd)
| cf [file] Compare contents of file at current seek
| cg[?] [o] [file] Graphdiff current file and [file]
| cu[?] [addr] @at Compare memory hexdumps of $$ and dst in unified diff
| cud [addr] @at Unified diff disasm from $$ and given address
| cv[1248] [hexpairs] @at Compare 1,2,4,8-byte (silent return in $?)
| cV[1248] [addr] @at Compare 1,2,4,8-byte address contents (silent, return in $?)
| cw[?] [us?] [...] Compare memory watchers
| cx [hexpair] Compare hexpair string (use '.' as nibble wildcard)
| cx* [hexpair] Compare hexpair string (output r2 commands)
| cX [addr] Like 'cc' but using hexdiff output
| cd [dir] chdir
| cl|cls|clear Clear screen, (clear0 to goto 0, 0 only)
To compare memory contents at current seek position against a given string of values, use cx:
[0x08048000]> p8 4
7f 45 4c 46
[0x08048000]> cx 7f 45 90 46
Compare 3/4 equal bytes
0x00000002 (byte=03) 90 ' ' -> 4c 'L'
[0x08048000]>
Another subcommand of the c command is cc which stands for "compare code".
To compare a byte sequence with a sequence in memory:
[0x4A13B8C0]> cc 0x39e8e089 @ 0x4A13B8C0
To compare contents of two functions specified by their names:
[0x08049A80]> cc sym.main2 @ sym.main
c8 compares a quadword from the current seek (in the example below, 0x00000000) against a math expression:
[0x00000000]> c8 4
Compare 1/8 equal bytes (0%)
0x00000000 (byte=01) 7f ' ' -> 04 ' '
0x00000001 (byte=02) 45 'E' -> 00 ' '
0x00000002 (byte=03) 4c 'L' -> 00 ' '
The number parameter can, of course, be math expressions which use flag names and anything allowed in an expression:
[0x00000000]> cx 7f469046
Compare 2/4 equal bytes
0x00000001 (byte=02) 45 'E' -> 46 'F'
0x00000002 (byte=03) 4c 'L' -> 90 ' '
You can use the compare command to find differences between a current block and a file previously dumped to a disk:
$ r2 /bin/true
[0x08049A80]> s 0
[0x08048000]> cf /bin/true
Compare 512/512 equal bytes
Comparison Watchers
Watchers are used to record memory at 2 different points in time, then report if and how it changed.
[0x00000000]> cw?
Usage: cw [args] Manage compare watchers; See if and how memory changes
| cw?? Show more info about watchers
| cw addr sz cmd Add a compare watcher
| cw[*qj] [addr] Show compare watchers (*=r2 commands, q=quiet)
| cwd [addr] Delete watcher
| cwr [addr] Revert watcher
| cwu [addr] Update watcher
Basic watcher usage
First, create one with cw addr sz cmd. This will record sz bytes at addr.
The command is stored and used to print the memory when shown.
# Create a watcher at 0x0 of size 4 using p8 as the command
[0x00000000]> cw 0 4 p8
To record the second state, use cwu. Now, when you run cw, the watcher will
report if the bytes changed and run the command given at creation with the size
and address. When an address is an optional argument, the command will apply
to all watchers if you don't pass one.
# Introduce a change to the block of data we're watching
[0x00000000]> wx 11223344
# Update all watchers
[0x00000000]> cwu
# Show changes
[0x00000000]> cw
0x00000000 modified
11223344
You may overwrite any watcher by creating another at the same address. This will discard the existing watcher completely.
# Overwrite our existing watcher to display a bistream instead of
# hexpairs, and make the watched area larger
[0x00000000]> cw 0 8 pB
# Check that it's no longer "modified" as this is a new watcher
[0x00000000]> cw
0x00000000
0001000100100010001100110100010000000000000000000000000000000000
Reverting State
When you create a watcher, the data read from memory is marked as "new".
Updating the watcher with cwu will mark this data as "old", and then read the
"new" data.
cwr will mark the current "old" state as being "new", letting you reuse it as
your new base state when updating with cwu. Any existing "new" state from
running cwu previously is lost in this process. Showing a watcher without
updating will still run the command, but it will not report changes.
# Create a basic watcher
[0x00000000]> cw 0 4 p8
[0x00000000]> cw
0x00000000
00000000
# Modify the memory and update the watcher
[0x00000000]> wx 11223344
[0x00000000]> cwu
# Watcher reports modification
# The "new" state is 11223344, and the "old" state is 00000000
[0x00000000]> cw
0x00000000 modified
11223344
# Revert the watcher
[0x00000000]> cwr
# The "new" state is 00000000 again, and there is no "old" state
# The watcher reports no change since it is no longer up-to-date
[0x00000000]> cw
0x00000000
11223344
Overlapping areas
Watched memory areas may overlap with no ill effects, but may have unexpected results if you update some but not others.
# Create a watcher that watches 512 bytes starting at 0
[0x00000000]> cw 0 0x200 p8
# Create a watcher that watches 16 bytes starting at 0x100
[0x00000000]> cw 0x100 0x10 p8
# Modify memory watched by both watchers
[0x00000000]> wx 11223344 @ 0x100
# Watchers aren't updated, so they don't report a change
[0x00000000]> cw*
cw 0x00000000 512 p8
cw 0x00000100 16 p8
# Update only the watcher at 0x100
[0x00000000]> cwu 0x100
# Since only one watcher was updated, the other can't
# report the change
[0x00000000]> cw*
cw 0x00000000 512 p8
cw 0x00000100 16 p8 # differs
Watching for code modification
Here is an example of using a disassembly command to watch code being modified.
# Write an initial binary blob for the example
[0x00000000]> wx 5053595a
# Use pD since it counts by bytes
[0x00000000]> cw 0 4 pD
# Watcher prints disassembly
[0x00000000]> cw
0x00000000
0x00000000 50 push rax
0x00000001 53 push rbx
0x00000002 59 pop rcx
0x00000003 5a pop rdx
# Modify the code
[0x00000000]> wx 585b5152
[0x00000000]> cwu
# Watcher prints different disassembly and reports a change
[0x00000000]> cw
0x00000000 modified
0x00000000 58 pop rax
0x00000001 5b pop rbx
0x00000002 51 push rcx
0x00000003 52 push rdx
SDB
SDB stands for String DataBase. It's a simple key-value database that only operates with strings created by pancake. It is used in many parts of r2 to have a disk and in-memory database which is small and fast to manage using it as a hashtable on steroids.
SDB is a simple string key/value database based on djb’s cdb disk storage and supports JSON and arrays introspection.
There’s also the sdbtypes: a vala library that implements several data structures on top of an sdb or a memcache instance.
SDB supports:
- namespaces (multiple sdb paths)
- atomic database sync (never corrupted)
- bindings for vala, luvit, newlisp and nodejs
- commandline frontend for sdb databases
- memcache client and server with sdb backend
- arrays support (syntax sugar)
- json parser/getter
Usage example
Let's create a database!
$ sdb d hello=world
$ sdb d hello
world
Using arrays:
$ sdb - '[]list=1,2' '[0]list' '[0]list=foo' '[]list' '[+1]list=bar'
1
foo
2
foo
bar
2
Let's play with json:
$ sdb d g='{"foo":1,"bar":{"cow":3}}'
$ sdb d g?bar.cow
3
$ sdb - user='{"id":123}' user?id=99 user?id
99
Using the command line without any disk database:
$ sdb - foo=bar foo a=3 +a -a
bar
4
3
$ sdb -
foo=bar
foo
bar
a=3
+a
4
-a
3
Remove the database
$ rm -f d
So what ?
So, you can now do this inside your radare2 sessions!
Let's take a simple binary, and check what is already sdbized.
$ cat test.c
int main(){
puts("Hello world\n");
}
$ gcc test.c -o test
$ r2 -A ./test
[0x08048320]> k **
bin
anal
syscall
debug
[0x08048320]> k bin/**
fd.6
[0x08048320]> k bin/fd.6/*
archs=0:0:x86:32
The file corresponding to the sixth file descriptor is a x86_32 binary.
[0x08048320]> k anal/meta/*
meta.s.0x80484d0=12,SGVsbG8gd29ybGQ=
[...]
[0x08048320]> ?b64- SGVsbG8gd29ybGQ=
Hello world
Strings are stored encoded in base64.
More Examples
List namespaces
k **
List sub-namespaces
k anal/**
List keys
k *
k anal/*
Set a key
k foo=bar
Get the value of a key
k foo
List all syscalls
k syscall/*~^0x
List all comments
k anal/meta/*~.C.
Show a comment at given offset:
k %anal/meta/[1]meta.C.0x100005000
Visual Mode
The visual mode is a more user-friendly interface alternative to radare2's command-line prompt. It allows easy navigation, has a cursor mode for selecting bytes, and offers numerous key bindings to simplify debugger use.
To enter visual mode, use V command. To exit from it back to command line, press q.
Navigation
Navigation can be done using HJKL or arrow keys and PgUp/PgDown keys. It also understands usual Home/End keys.
Like in Vim the movements can be repeated by preceding the navigation key with the number, for
example 5j will move down for 5 lines, or 2l will move 2 characters right.
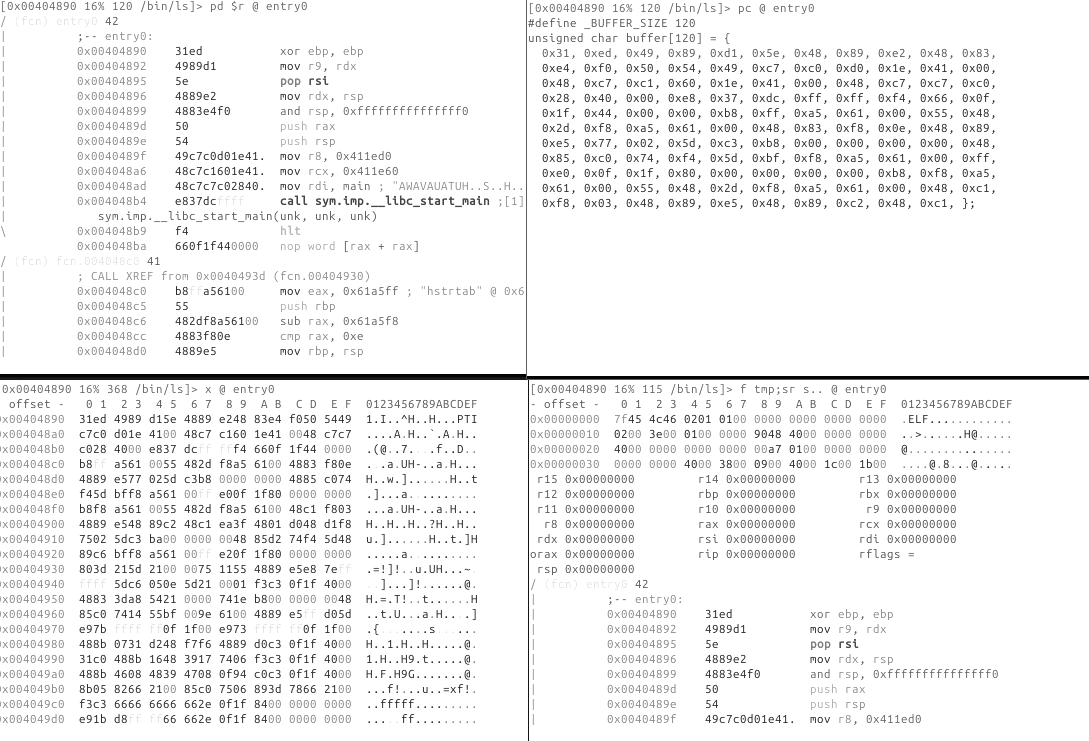
Print Modes, a.k.a. Panels
The Visual mode uses "print modes" which are basically different panels that you can rotate. By default those are:
Hexdump panel -> Disassembly panel -> Debugger panel -> Hexadecimal words dump panel -> Hex-less hexdump panel -> Op analysis color map panel -> Annotated hexdump panel -> Hexdump panel -> [...]
Notice that the top of the panel contains the command which is used, for example for the disassembly panel:
[0x00404890 16% 120 /bin/ls]> pd $r @ entry0
Getting Help
To see help on all key bindings defined for visual mode, press ?:
Visual mode help:
? show this help
?? show the user-friendly hud
% in cursor mode finds matching pair, or toggle autoblocksz
@ redraw screen every 1s (multi-user view)
^ seek to the beginning of the function
! enter into the visual panels mode
_ enter the flag/comment/functions/.. hud (same as VF_)
= set cmd.vprompt (top row)
| set cmd.cprompt (right column)
. seek to program counter
\ toggle visual split mode
" toggle the column mode (uses pC..)
/ in cursor mode search in current block
:cmd run radare command
;[-]cmt add/remove comment
0 seek to beginning of current function
[1-9] follow jmp/call identified by shortcut (like ;[1])
,file add a link to the text file
/*+-[] change block size, [] = resize hex.cols
</> seek aligned to block size (seek cursor in cursor mode)
a/A (a)ssemble code, visual (A)ssembler
b browse symbols, flags, configurations, classes, ...
B toggle breakpoint
c/C toggle (c)ursor and (C)olors
d[f?] define function, data, code, ..
D enter visual diff mode (set diff.from/to
e edit eval configuration variables
f/F set/unset or browse flags. f- to unset, F to browse, ..
gG go seek to begin and end of file (0-$s)
hjkl move around (or HJKL) (left-down-up-right)
i insert hex or string (in hexdump) use tab to toggle
mK/'K mark/go to Key (any key)
M walk the mounted filesystems
n/N seek next/prev function/flag/hit (scr.nkey)
g go/seek to given offset
O toggle asm.pseudo and asm.esil
p/P rotate print modes (hex, disasm, debug, words, buf)
q back to radare shell
r refresh screen / in cursor mode browse comments
R randomize color palette (ecr)
sS step / step over
t browse types
T enter textlog chat console (TT)
uU undo/redo seek
v visual function/vars code analysis menu
V (V)iew graph using cmd.graph (agv?)
wW seek cursor to next/prev word
xX show xrefs/refs of current function from/to data/code
yY copy and paste selection
z fold/unfold comments in disassembly
Z toggle zoom mode
Enter follow address of jump/call
Function Keys: (See 'e key.'), defaults to:
F2 toggle breakpoint
F4 run to cursor
F7 single step
F8 step over
F9 continue
Visual Disassembly
The visual disassembler mode in radare2 is accessed by pressing 'p' after entering the V command. This mode displays the disassembled code in a structured format, making it easier to read and navigate through the program's instructions.
In this view, users can scroll through the code, examine function calls, and identify control flow structures. The layout includes address information, machine code, and human-readable assembly instructions. This presentation helps in understanding the program's logic and behavior.
The visual disassembler mode also offers various keybindings for quick actions such as jumping to specific addresses, adding comments, or setting breakpoints.
In other words, it's like using the pd command from the shell but in an interactive way.
For example, you can press the spacebar key to toggle between the control-flow-graph and linear disassembly listing. Or press the numeric comments ;[1] in the jump/reference hints next to the instructions to quickly jump there.
Navigation
Move within the Disassembly using arrow keys or hjkl. Use g to seek directly to a flag or an offset, type it when requested by the prompt: [offset]>.
Follow a jump or a call using the number of your keyboard [0-9] and the number on the right in disassembly to follow a call or a jump. In this example typing 1 on the keyboard would follow the call to sym.imp.__libc_start_main and therefore, seek at the offset of this symbol.
0x00404894 e857dcffff call sym.imp.__libc_start_main ;[1]
Seek back to the previous location using u, U will allow you to redo the seek.
Cursor mode
Remember that, to be able to actually edit files loaded in radare2, you have to start it with the -w option. Otherwise a file is opened in read-only mode.
Pressing lowercase c toggles the cursor mode. When this mode is active, the currently selected byte (or byte range) is highlighted.
The cursor is used to select a range of bytes or simply to point to a byte. You can use the cursor to create a named flag at specific location. To do so, seek to the required position, then press f and enter a name for a flag.
If the file was opened in write mode using the -w flag or the o+ command, you can also use the cursor to overwrite a selected range with new values. To do so, select a range of bytes (with HJKL and SHIFT key pressed), then press i and enter the hexpair values for the new data. The data will be repeated as needed to fill the range selected. For example:
<select 10 bytes in visual mode using SHIFT+HJKL>
<press 'i' and then enter '12 34'>
The 10 bytes you have selected will be changed to "12 34 12 34 12 ...".
The Visual Assembler is a feature that provides a live-preview while you type in new instructions to patch
into the disassembly. To use it, seek or place the cursor at the wanted location and hit the 'A' key. To provide multiple instructions, separate them with semicolons, ;.
XREF
When radare2 has discovered a XREF during the analysis, it will show you the information in the Visual Disassembly using XREF tag:
; DATA XREF from 0x00402e0e (unk)
str.David_MacKenzie:
To see where this string is called, press x, if you want to jump to the location where the data is used then press the corresponding number [0-9] on your keyboard. (This functionality is similar to axt)
X corresponds to the reverse operation aka axf.
Function Argument display
To enable this view use this config var e dbg.funcarg = true
Add a comment
To add a comment press ;.
Type other commands
Quickly type commands using :.
Search
/: allows highlighting of strings in the current display.
:cmd allows you to use one of the "/?" commands that perform more specialized searches.
The HUDS
The "UserFriendly HUD"
The "UserFriendly HUD" can be accessed using the ?? key-combination. This HUD acts as an interactive Cheat Sheet that one can use to more easily find and execute commands. This HUD is particularly useful for new-comers. For experienced users, the other HUDS which are more activity-specific may be more useful.
The "flag/comment/functions/.. HUD"
This HUD can be displayed using the _ key, it shows a list of all the flags defined and lets you jump to them. Using the keyboard you can quickly filter the list down to a flag that contains a specific pattern.
Hud input mode can be closed using ^C. It will also exit when backspace is pressed when the user input string is empty.
Tweaking the Disassembly
The disassembly's look-and-feel is controlled using the "asm.* configuration keys, which can be
changed using the e command. All configuration keys can also be edited through the Visual Configuration Editor.
Visual Configuration Editor
This HUD can be accessed using the e key in visual mode. The editor allows you to easily examine and change radare2's configuration. For example, if you want to change something about the disassembly display, select asm from the list, navigate to the item you wish to modify it, then select it by hitting Enter.
If the item is a boolean variable, it will toggle, otherwise you will be prompted to provide a new value.
Example switch to pseudo disassembly:

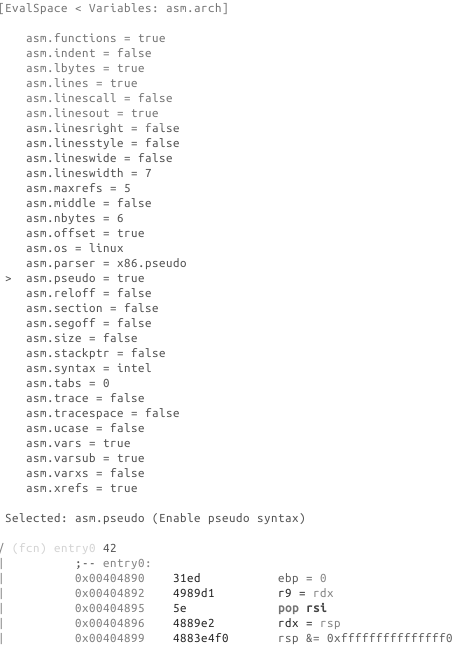
Following are some example of eval variable related to disassembly.
Examples
asm.arch: Change Architecture && asm.bits: Word size in bits at assembler
You can view the list of all arch using e asm.arch=?
> e asm.arch = dalvik
0x00404870 31ed4989 cmp-long v237, v73, v137
0x00404874 d15e4889 rsub-int v14, v5, 0x8948
0x00404878 e24883e4 ushr-int/lit8 v72, v131, 0xe4
0x0040487c f0505449c7c0 +invoke-object-init-range {}, method+18772 ;[0]
0x00404882 90244100 add-int v36, v65, v0
> e asm.bits = 16
0000:4870 31ed xor bp, bp
0000:4872 49 dec cx
0000:4873 89d1 mov cx, dx
0000:4875 5e pop si
0000:4876 48 dec ax
0000:4877 89e2 mov dx, sp
This latest operation can also be done using & in Visual mode.
asm.pseudo: Enable pseudo syntax
> e asm.pseudo = true
0x00404870 31ed ebp = 0
0x00404872 4989d1 r9 = rdx
0x00404875 5e pop rsi
0x00404876 4889e2 rdx = rsp
0x00404879 4883e4f0 rsp &= 0xfffffffffffffff0
asm.syntax: Select assembly syntax (intel, att, masm...)
> e asm.syntax = att
0x00404870 31ed xor %ebp, %ebp
0x00404872 4989d1 mov %rdx, %r9
0x00404875 5e pop %rsi
0x00404876 4889e2 mov %rsp, %rdx
0x00404879 4883e4f0 and $0xfffffffffffffff0, %rsp
asm.describe: Show opcode description
> e asm.describe = true
0x00404870 xor ebp, ebp ; logical exclusive or
0x00404872 mov r9, rdx ; moves data from src to dst
0x00404875 pop rsi ; pops last element of stack and stores the result in argument
0x00404876 mov rdx, rsp ; moves data from src to dst
0x00404879 and rsp, -0xf ; binary and operation between src and dst, stores result on dst
Visual Assembler
You can use Visual Mode to assemble code pressing the A key inside the Visual mode (or just type VA from the shell). Note that the cursor mode also plays well with the visual assembler, use it to point to the instruction that you want to patch insted of just scrolling up and down changing the seek.
For example let's replace the push by a jmp:
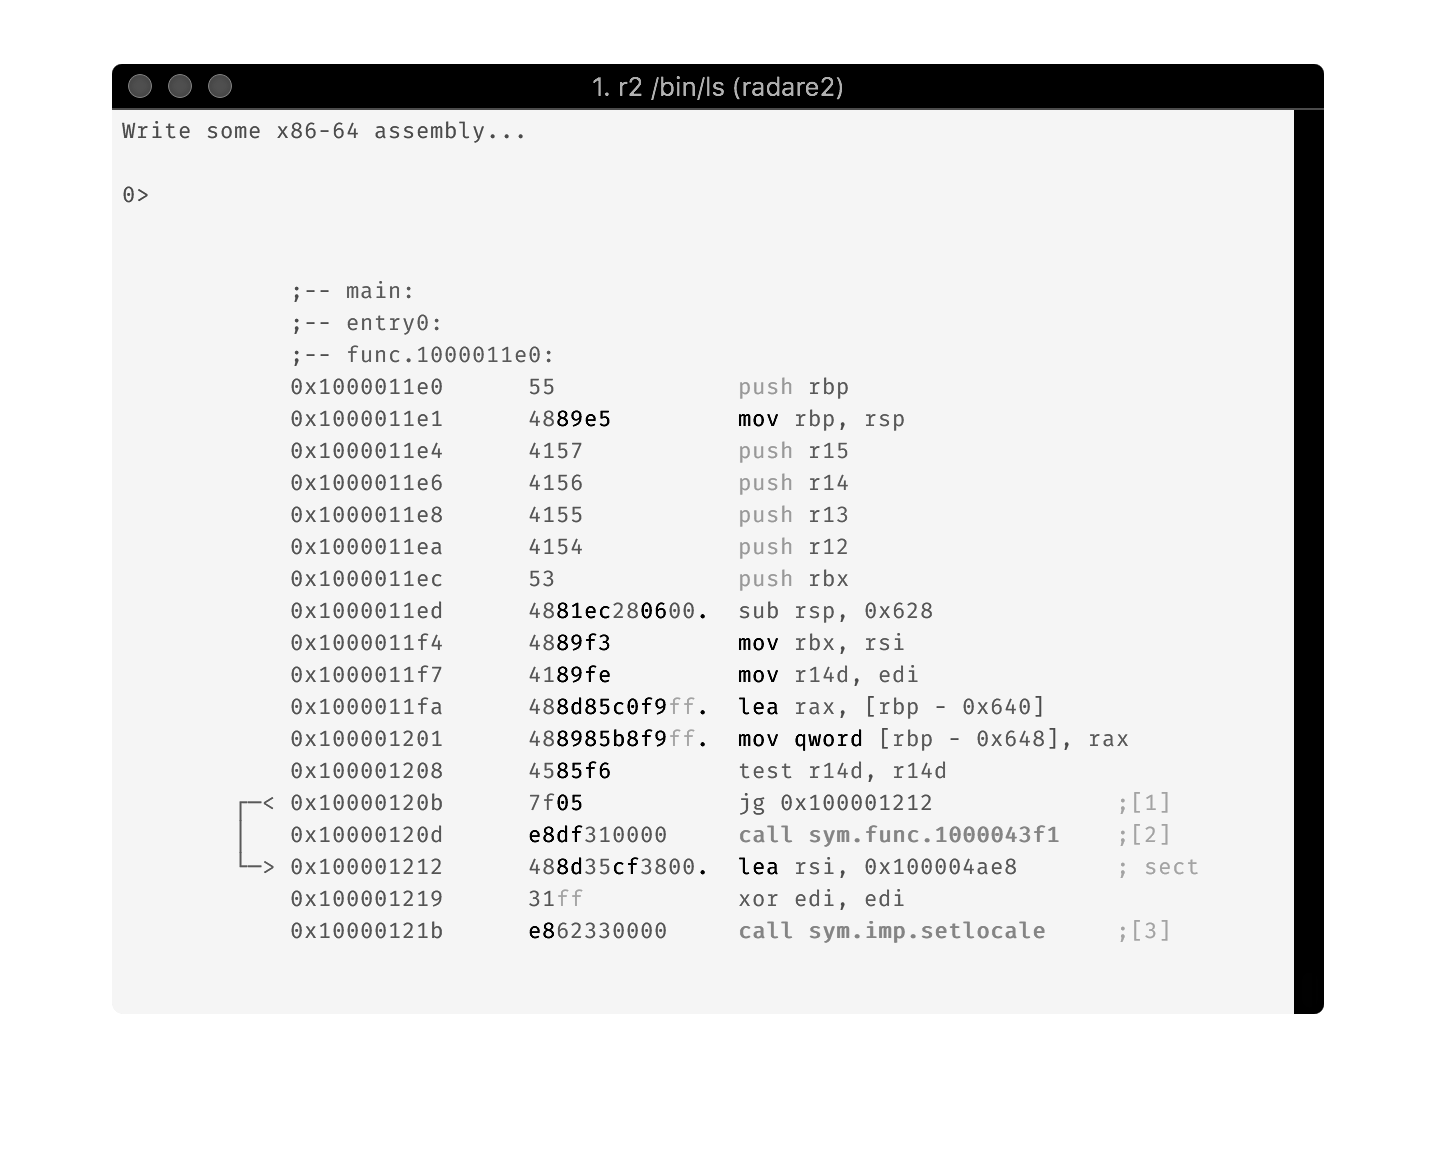
Notice the preview of the disassembly and arrows:
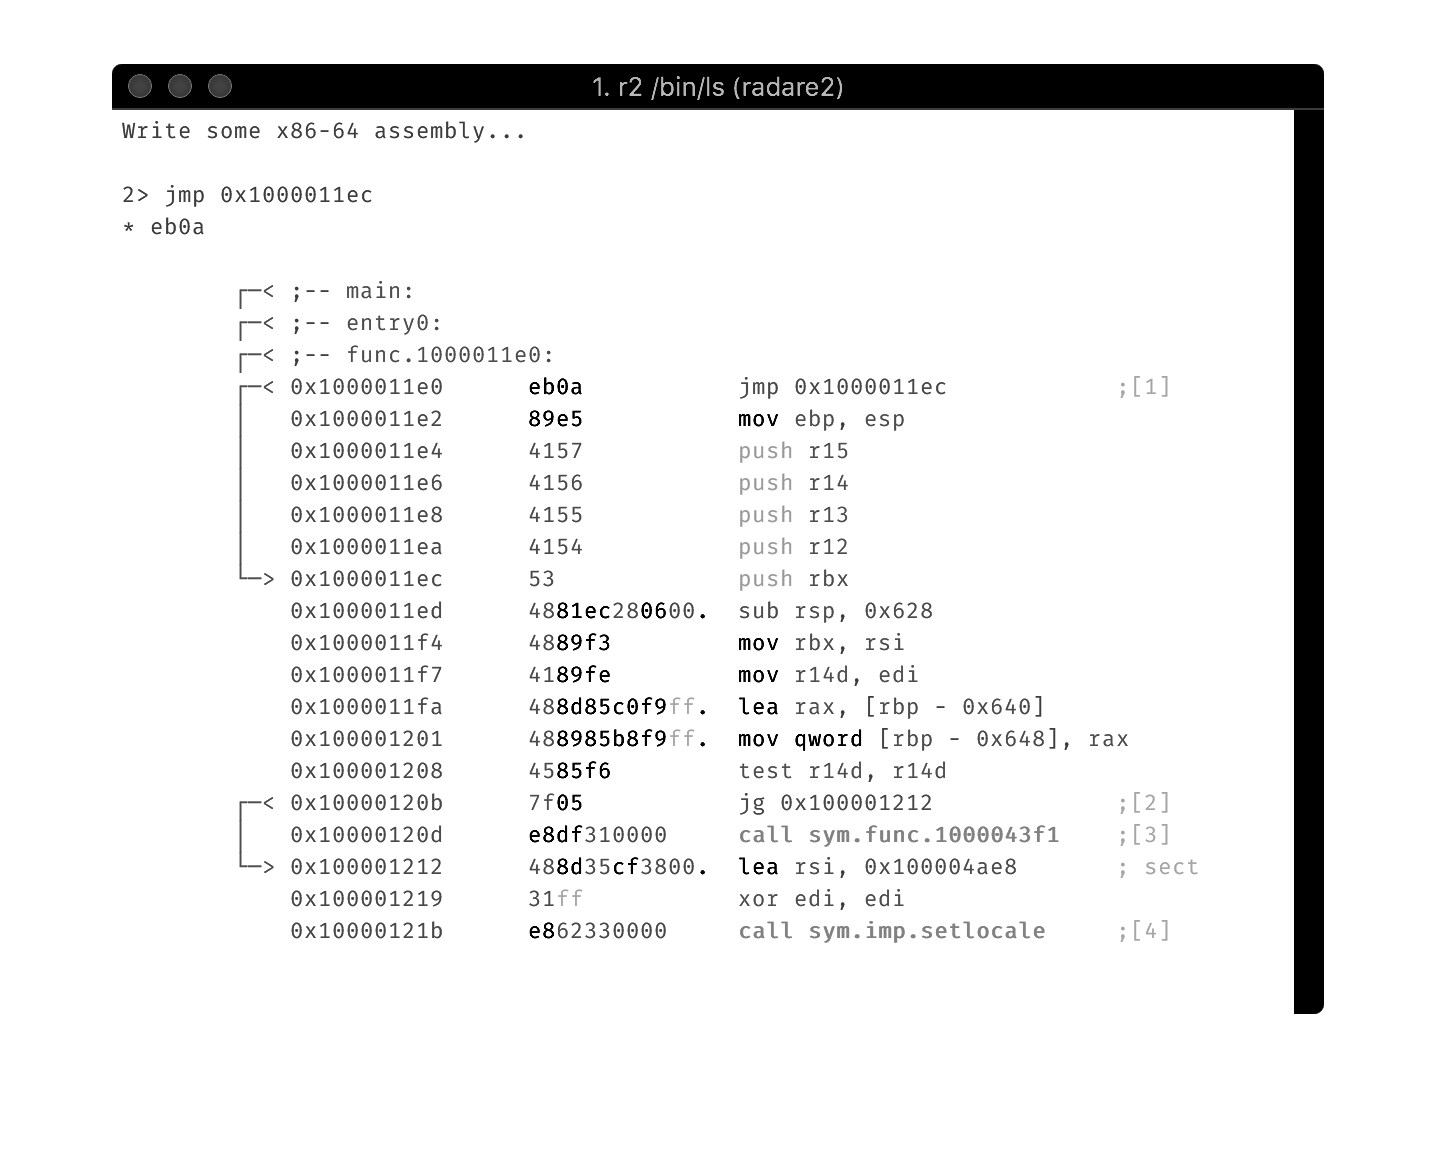
In order to patch the file you must open it in read-write mode (r2 -w), but if you are inside radare2, you can reopen the file in rw mode with oo+.
You can also use the cache mode: e io.cache = true and wc?.
Note that when you are debugging, patching the memory won't modify the files in disk.
Visual Configuration Editor
Ve or e in visual mode allows you to edit radare2 configuration visually.
For example, if you want to change the assembly display just select asm in the list and choose your assembly display flavor.
Example switch to pseudo disassembly:
Visual Menus
There are a couple of keystrokes in Visual Mode that will lead to some menus with useful actions in a very accessible way. These are some of them:
- Edit bits and decompose an instruction (Vd1)
- Change function signature (vvs)
- Rename current function (vdr)
- Set the current offset as string (Vds)
- Change base of the immediate in current instruction (Vdi)
- Vbc - browse classes
Vv visual analysis
This visual mode can be used to navigate through the program like in the visual disassembly view, but having some extra visual modes to follow references, etc
[0x00000000]> Vv
.-- functions ----- pdr ---------------------------------.
| (a)nalyze (-)delete (x)xrefs (X)refs (j/k) next/prev |
| (r)ename (c)alls (d)efine (Tab)disasm (_) hud |
| (d)efine (v)ars (?)help (:)shell (q) quit |
| (s)ignature |
'--------------------------------------------------------'
Note that all those actions can be done through the Vd menu, as well as the commandline, and it is probably that most of these actions will end up being moved into the Vd for simplicity reasons and compatibility with Visual Mode and Visual Panels.
Ve visual config
The e command is used to change any configuration option inside radare2, the visual mode have a visual version so you can use it to change settings interactively.
Note that you can also press the R key to quickly rotate between different the available color themes.
Vd as in define
The Vd menu can be used to redefine information in the current function or instruction quickly.
This is the list of actions:
[0x00000000]> Vd
[Vd]- Define current block as:
$ define flag size
1 edit bits
> small integer (shift right by 1)
a assembly
b as byte (1 byte)
B define half word (16 bit, 2 byte size)
c as code (unset any data / string / format) in here
C define flag color (fc)
d set as data
e end of function
E esil debugger (aev)
f analyze function
F format
h define hint (for half-word, see 'B')
i (ahi) immediate base (b(in), o(ct), d(ec), h(ex), s(tr))
I (ahi1) immediate base (b(in), o(ct), d(ec), h(ex), s(tr))
j merge down (join this and next functions)
k merge up (join this and previous function)
h define anal hint
m manpage for current call
n rename flag or variable referenced by the instruction in cursor
N edit function signature (afs!)
o opcode string
r rename function
s set string
S set strings in current block
t set opcode type via aht hints (call, nop, jump, ...)
u undefine metadata here
v rename variable at offset that matches some hex digits
x find xrefs to current address (./r)
X find cross references /r
w set as 32bit word
W set as 64bit word
q quit menu
z zone flag
d can be used to change the type of data of the current block, several basic types/structures are available as well as more advanced one using pf template:
d → ...
0x004048f7 48c1e83f shr rax, 0x3f
d → b
0x004048f7 .byte 0x48
d → B
0x004048f7 .word 0xc148
d → d
0x004048f7 hex length=165 delta=0
0x004048f7 48c1 e83f 4801 c648 d1fe 7415 b800 0000
...
To improve code readability you can change how radare2 presents numerical values in disassembly, by default most of disassembly display numerical value as hexadecimal. Sometimes you would like to view it as a decimal, binary or even custom defined constant. To change value format you can use d following by i then choose what base to work in, this is the equivalent to ahi:
d → i → ...
0x004048f7 48c1e83f shr rax, 0x3f
d → i → 10
0x004048f7 48c1e83f shr rax, 63
d → i → 2
0x004048f7 48c1e83f shr rax, '?'
Panels
Concept
Visual Panels is characterized by the following core functionalities:
- Split Screen
- Display multiple screens such as Symbols, Registers, Stack, as well as custom panels
- Menu will cover all those commonly used commands for you so that you don't have to memorize any of them
CUI met some useful GUI as the menu, that is Visual Panels.
Panels can be accessed by using v or by using ! from the visual mode.
Overview
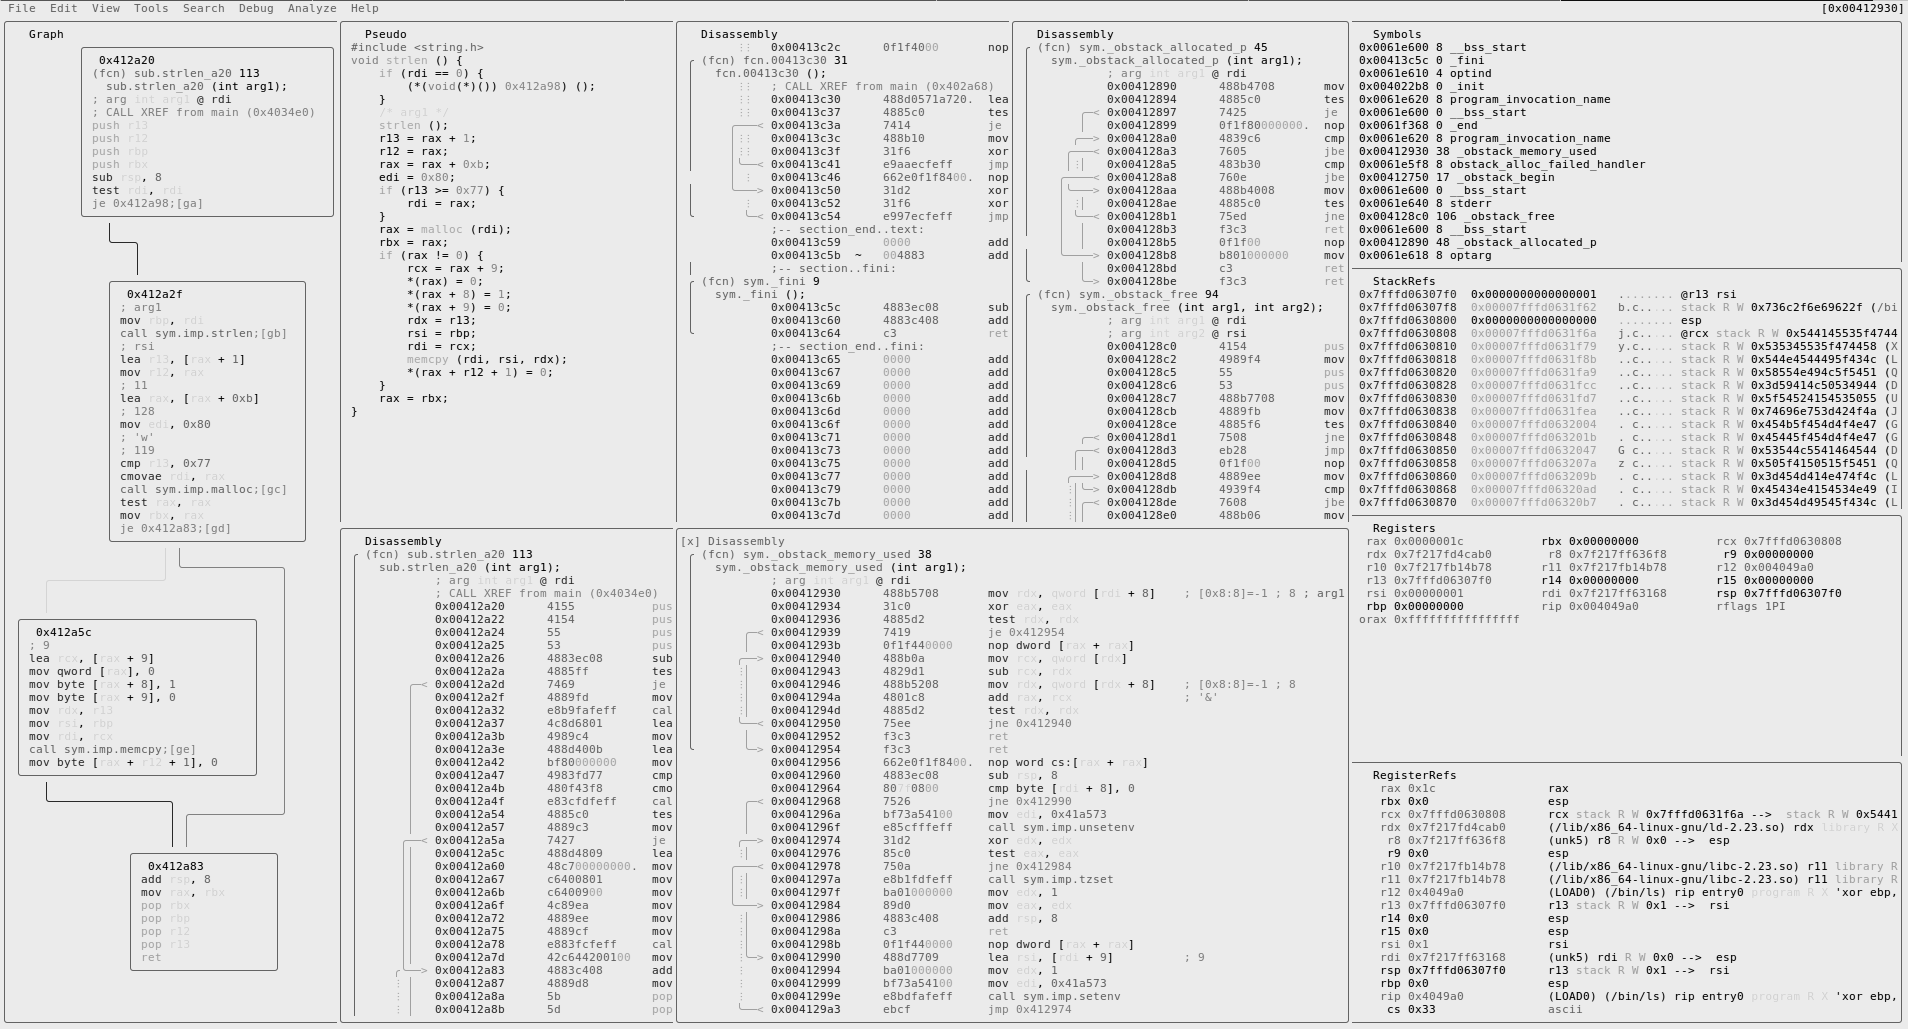
Commands
|Visual Ascii Art Panels:
| | split the current panel vertically
| - split the current panel horizontally
| : run r2 command in prompt
| ; add/remove comment
| _ start the hud input mode
| \ show the user-friendly hud
| ? show this help
| ! run r2048 game
| . seek to PC or entrypoint
| * show decompiler in the current panel
| " create a panel from the list and replace the current one
| / highlight the keyword
| ( toggle snow
| & toggle cache
| [1-9] follow jmp/call identified by shortcut (like ;[1])
| ' ' (space) toggle graph / panels
| tab go to the next panel
| Enter start Zoom mode
| a toggle auto update for decompiler
| b browse symbols, flags, configurations, classes, ...
| c toggle cursor
| C toggle color
| d define in the current address. Same as Vd
| D show disassembly in the current panel
| e change title and command of current panel
| f set/add filter keywords
| F remove all the filters
| g go/seek to given offset
| G go/seek to highlight
| i insert hex
| hjkl move around (left-down-up-right)
| HJKL move around (left-down-up-right) by page
| m select the menu panel
| M open new custom frame
| n/N seek next/prev function/flag/hit (scr.nkey)
| p/P rotate panel layout
| q quit, or close a tab
| Q close all the tabs and quit
| r toggle callhints/jmphints/leahints
| R randomize color palette (ecr)
| s/S step in / step over
| t/T tab prompt / close a tab
| u/U undo / redo seek
| w start Window mode
| V go to the graph mode
| xX show xrefs/refs of current function from/to data/code
| z swap current panel with the first one
Basic Usage
Use tab to move around the panels until you get to the targeted panel. Then, use hjkl, just like in vim, to scroll the panel you are currently on.
Use S and s to step over/in, and all the panels should be updated dynamically while you are debugging.
Either in the Registers or Stack panels, you can edit the values by inserting hex. This will be explained later.
While hitting tab can help you moving between panels, it is highly recommended to use m to open the menu.
As usual, you can use hjkl to move around the menu and will find tons of useful stuff there.
You can also press " to quickly browse through the different options View offers and change the contents of the selected panel.
Split Screen
| is for the vertical and - is for the horizontal split. You can delete any panel by pressing X.
Split panels can be resized from Window Mode, which is accessed with w.
Window Mode Commands
|Panels Window mode help:
| ? show this help
| ?? show the user-friendly hud
| Enter start Zoom mode
| c toggle cursor
| hjkl move around (left-down-up-right)
| JK resize panels vertically
| HL resize panels horizontally
| q quit Window mode
Edit Values
Either in the Register or Stack panel, you can edit the values. Use c to activate cursor mode and you can move the cursor by pressing hjkl, as usual. Then, hit i, just like the insert mode of vim, to insert a value.
Tabs
Visual Panels also offer tabs to quickly access multiple forms of information easily. Press t to enter Tab Mode. All the tabs numbers will be visible in the top right corner.
By default you will have one tab and you can press t to create a new tab with the same panels and T to create a new panel from scratch.
For traversing through the tabs, you can type in the tab number while in Tab Mode.
And pressing - deletes the tab you are in.
Saving layouts
You can save your custom layout of your visual panels either by picking the option 'Save Layout' from the File menu of the menu bar or by running:
v= test
Where test is the name with which you'd like to save it.
You can open a saved layout by passing the name as the parameter to v:
v test
More about that can be found under v?.
Searching
The radare2 search engine is based on work done by esteve, plus multiple features implemented on top of it. It supports multiple keyword searches, binary masks, and hexadecimal values. It automatically creates flags for search hit locations to ease future referencing.
Searching is accessed with / command.
[0x00000000]> /?
|Usage: /[!bf] [arg]Search stuff (see 'e??search' for options)
|Use io.va for searching in non virtual addressing spaces
| / foo\x00 search for string 'foo\0'
| /j foo\x00 search for string 'foo\0' (json output)
| /! ff search for first occurrence not matching, command modifier
| /!x 00 inverse hexa search (find first byte != 0x00)
| /+ /bin/sh construct the string with chunks
| // repeat last search
| /a jmp eax assemble opcode and search its bytes
| /A jmp find analyzed instructions of this type (/A? for help)
| /b search backwards, command modifier, followed by other command
| /B search recognized RBin headers
| /c jmp [esp] search for asm code matching the given string
| /ce rsp,rbp search for esil expressions matching
| /C[ar] search for crypto materials
| /d 101112 search for a deltified sequence of bytes
| /e /E.F/i match regular expression
| /E esil-expr offset matching given esil expressions %%= here
| /f search forwards, command modifier, followed by other command
| /F file [off] [sz] search contents of file with offset and size
| /g[g] [from] find all graph paths A to B (/gg follow jumps, see search.count and
anal.depth)
| /h[t] [hash] [len] find block matching this hash. See ph
| /i foo search for string 'foo' ignoring case
| /m magicfile search for matching magic file (use blocksize)
| /M search for known filesystems and mount them automatically
| /o [n] show offset of n instructions backward
| /O [n] same as /o, but with a different fallback if anal cannot be used
| /p patternsize search for pattern of given size
| /P patternsize search similar blocks
| /r[erwx][?] sym.printf analyze opcode reference an offset (/re for esil)
| /g[?RCJ] [op;op] search for ROP/COP/JOP gadgets matching given opstr
| /s search for all syscalls in a region (EXPERIMENTAL)
| /v[1248] value look for an `cfg.bigendian` 32bit value
| /V[1248] min max look for an `cfg.bigendian` 32bit value in range
| /w foo search for wide string 'f\0o\0o\0'
| /wi foo search for wide string ignoring case 'f\0o\0o\0'
| /x ff..33 search for hex string ignoring some nibbles
| /x ff0033 search for hex string
| /x ff43:ffd0 search for hexpair with mask
| /z min max search for strings of given size
Because everything is treated as a file in radare2, it does not matter whether you search in a socket, a remote device, in process memory, or a file.
Note that '/*' is not a command - it starts a multiline comment. Type '*/' to end the comment after it's opened.
Basic Search
A basic search for a plain text string in a file would be something like:
$ r2 -q -c "/ lib" /bin/ls
Searching 3 bytes from 0x00400000 to 0x0041ae08: 6c 69 62
hits: 9
0x00400239 hit0_0 "lib64/ld-linux-x86-64.so.2"
0x00400f19 hit0_1 "libselinux.so.1"
0x00400fae hit0_2 "librt.so.1"
0x00400fc7 hit0_3 "libacl.so.1"
0x00401004 hit0_4 "libc.so.6"
0x004013ce hit0_5 "libc_start_main"
0x00416542 hit0_6 "libs/"
0x00417160 hit0_7 "lib/xstrtol.c"
0x00417578 hit0_8 "lib"
As can be seen from the output above, radare2 generates a "hit" flag for every entry found. You can then use the ps command to see the strings stored at the offsets marked by the flags in this group, and they will have names of the form hit0_<index>:
[0x00404888]> / ls
...
[0x00404888]> ps @ hit0_0
lseek
You can search for wide-char strings (e.g., unicode letters) using the /w command:
[0x00000000]> /w Hello
0 results found.
To perform a case-insensitive search for strings use /i:
[0x0040488f]> /i Stallman
Searching 8 bytes from 0x00400238 to 0x0040488f: 53 74 61 6c 6c 6d 61 6e
[# ]hits: 004138 < 0x0040488f hits = 0
It is possible to specify hexadecimal escape sequences in the search string by prepending them with \x:
[0x00000000]> / \x7FELF
if, instead, you are searching for a string of hexadecimal values, you're probably better of using the /x command:
[0x00000000]> /x 7F454C46
If you want to mask some nibble during the search you can use the symbol . to allow any nibble value to match:
[0x00407354]> /x 80..80
0x0040d4b6 hit3_0 800080
0x0040d4c8 hit3_1 808080
0x004058a6 hit3_2 80fb80
You may not know some bit values of your hexadecimal pattern. Thus you may use a bit mask on your pattern. Each bit set to one in the mask indicates to search the bit value in the pattern. A bit set to zero in the mask indicates that the value of a matching value can be 0 or 1:
[0x00407354]> /x 808080:ff80ff
0x0040d4c8 hit4_0 808080
0x0040d7b0 hit4_1 808080
0x004058a6 hit4_2 80fb80
You can notice that the command /x 808080:ff00ff is equivalent to the command /x 80..80.
Once the search is done, the results are stored in the searches flag space.
[0x00000000]> fs
0 0 . strings
1 0 . symbols
2 6 . searches
[0x00000000]> f
0x00000135 512 hit0_0
0x00000b71 512 hit0_1
0x00000bad 512 hit0_2
0x00000bdd 512 hit0_3
0x00000bfb 512 hit0_4
0x00000f2a 512 hit0_5
To remove "hit" flags after you do not need them anymore, use the f- hit* command.
Often, during long search sessions, you will need to launch the latest search more than once. You can use the // command to repeat the last search.
[0x00000f2a]> // ; repeat last search
Search Options
The radare2 search engine can be configured through several configuration variables, modifiable with the e command.
e cmd.hit = x ; radare2 command to execute on every search hit
e search.distance = 0 ; search string distance
e search.in = [foo] ; specify search boundaries. Supported values are listed under e search.in=??
e search.align = 4 ; only show search results aligned by specified boundary.
e search.from = 0 ; start address
e search.to = 0 ; end address
e search.asmstr = 0 ; search for string instead of assembly
e search.flags = true ; if enabled, create flags on hits
The search.align variable is used to limit valid search hits to certain alignment. For example, with e search.align=4 you will see only hits found at 4-bytes aligned offsets.
The search.flags boolean variable instructs the search engine to flag hits so that they can be referenced later. If a currently running search is interrupted with Ctrl-C keyboard sequence, current search position is flagged with search_stop.
The search.in variable specifies search boundaries. To search entire memory, use e search.in = dbg.maps. The default value is dbg.map.
Options are controlled by the search. variables.
[0x00000000]> e??search
search.align: only catch aligned search hits
search.chunk: chunk size for /+ (default size is asm.bits/8
search.contiguous: accept contiguous/adjacent search hits
search.distance: search string distance
search.esilcombo: stop search after N consecutive hits
search.flags: all search results are flagged, otherwise only printed
search.from: search start address
search.in: specify search boundaries
search.kwidx: store last search index count
search.maxhits: maximum number of hits (0: no limit)
search.overlap: look for overlapped search hits
search.prefix: prefix name in search hits label
search.show: show search results
search.to: search end address
search.verbose: make the output of search commands verbose
Perhaps the most important search variable is search.in - it controls where
your search is occurring. If you aren't finding hits you expect, check this
variable first. Note the difference between map and maps - map will only
search the map that you are currently in, while maps will search all memory
maps, with options to narrow the search by permissions.
[0x00000000]> e search.in=?
raw
block
bin.section
bin.sections
bin.sections.rwx
bin.sections.r
bin.sections.rw
bin.sections.rx
bin.sections.wx
bin.sections.x
io.map
io.maps
io.maps.rwx
io.maps.r
io.maps.rw
io.maps.rx
io.maps.wx
io.maps.x
dbg.stack
dbg.heap
dbg.map
dbg.maps
dbg.maps.rwx
dbg.maps.r
dbg.maps.rw
dbg.maps.rx
dbg.maps.wx
dbg.maps.x
anal.fcn
anal.bb
Pattern Search
Pattern Matching Search
The /p command allows you to apply repeated pattern searches on IO backend storage. It is possible to identify repeated byte sequences without explicitly specifying them. The only command's parameter sets minimum detectable pattern length.
Here is an example:
[0x00000000]> /p 10
This command output will show different patterns found and how many times each of them is encountered.
It is possible to search patterns with a known difference between consecutive bytes with /d command. For example, the command to search all the patterns with the first and second bytes having the first bit which differs and the second and third bytes with the second bit which differs is:
[0x00000000]> /d 0102
Searching 2 bytes in [0x0-0x400]
hits: 2
0x00000118 hit2_0 9a9b9d
0x00000202 hit2_1 a4a5a7
Magic Pattern Search
The /m command allows to search for known magic patterns helping to discover hidden filesystem, archives or other known file formats:
[0x00000000]> /m
-- 0 120eb
0x00000000 0 hit0_0 JPEG image , JFIF standard
0x00009f64 0 hit0_1 ZIP Zip archive data, at least v2.0 to extract
0x000120d5 0 hit0_2 End of Zip archive
Those magic patterns a defined according to the file command's magic pattern format. By default radare2 uses all the patterns files in the folder libr/magic/d/default/. Searching with all the pattern files may be long but it is possible to use a single file given as argument:
[0x00000000]> /m ./libr/magic/d/default/archive
-- 0 120eb
0x00009f64 0 hit0_0 ZIP Zip archive data, at least v2.0 to extract
0x000120d5 0 hit0_1 End of Zip archive
It also allows to defined and search with custom pattern files.
Search Automation
The cmd.hit configuration variable is used to define a radare2 command to be executed when a matching entry is found by the search engine. If you want to run several commands, separate them with ;. Alternatively, you can arrange them in a separate script, and then invoke it as a whole with . script-file-name command.
For example:
[0x00404888]> e cmd.hit = p8 8
[0x00404888]> / lib
Searching 3 bytes from 0x00400000 to 0x0041ae08: 6c 69 62
hits: 9
0x00400239 hit4_0 "lib64/ld-linux-x86-64.so.2"
31ed4989d15e4889
0x00400f19 hit4_1 "libselinux.so.1"
31ed4989d15e4889
0x00400fae hit4_2 "librt.so.1"
31ed4989d15e4889
0x00400fc7 hit4_3 "libacl.so.1"
31ed4989d15e4889
0x00401004 hit4_4 "libc.so.6"
31ed4989d15e4889
0x004013ce hit4_5 "libc_start_main"
31ed4989d15e4889
0x00416542 hit4_6 "libs/"
31ed4989d15e4889
0x00417160 hit4_7 "lib/xstrtol.c"
31ed4989d15e4889
0x00417578 hit4_8 "lib"
31ed4989d15e4889
Searching Backwards
Sometimes you want to find a keyword backwards. This is, before the current offset, to do this you can seek back and search forward by adding some search.from/to restrictions, or use the /b command.
[0x100001200]> / nop
0x100004b15 hit0_0 .STUWabcdefghiklmnopqrstuvwxbin/ls.
0x100004f50 hit0_1 .STUWabcdefghiklmnopqrstuwx1] [file .
[0x100001200]> /b nop
[0x100001200]> s 0x100004f50p
[0x100004f50]> /b nop
0x100004b15 hit2_0 .STUWabcdefghiklmnopqrstuvwxbin/ls.
[0x100004f50]>
Note that /b is doing the same as /, but backward, so what if we want to use /x backward? We can use /bx, and the same goes for other search subcommands:
[0x100001200]> /x 90
0x100001a23 hit1_0 90
0x10000248f hit1_1 90
0x1000027b2 hit1_2 90
0x100002b2e hit1_3 90
0x1000032b8 hit1_4 90
0x100003454 hit1_5 90
0x100003468 hit1_6 90
0x10000355b hit1_7 90
0x100003647 hit1_8 90
0x1000037ac hit1_9 90
0x10000389c hit1_10 90
0x100003c5c hit1_11 90
[0x100001200]> /bx 90
[0x100001200]> s 0x10000355b
[0x10000355b]> /bx 90
0x100003468 hit3_0 90
0x100003454 hit3_1 90
0x1000032b8 hit3_2 90
0x100002b2e hit3_3 90
0x1000027b2 hit3_4 90
0x10000248f hit3_5 90
0x100001a23 hit3_6 90
[0x10000355b]>
Assembler Search
If you want to search for a certain assembler opcodes, you can use /a commands.
The command /ad/ jmp [esp] searches for the specified category of assembly mnemonic:
[0x00404888]> /ad/ jmp qword [rdx]
f hit_0 @ 0x0040e50d # 2: jmp qword [rdx]
f hit_1 @ 0x00418dbb # 2: jmp qword [rdx]
f hit_2 @ 0x00418fcb # 3: jmp qword [rdx]
f hit_3 @ 0x004196ab # 6: jmp qword [rdx]
f hit_4 @ 0x00419bf3 # 3: jmp qword [rdx]
f hit_5 @ 0x00419c1b # 3: jmp qword [rdx]
f hit_6 @ 0x00419c43 # 3: jmp qword [rdx]
The command /a jmp eax assembles a string to machine code, and then searches for the resulting bytes:
[0x00404888]> /a jmp eax
hits: 1
0x004048e7 hit3_0 ffe00f1f8000000000b8
ROP Gadgets
The /g command searches for gadgets: short instruction sequences ending in a control-flow transfer that can be chained together to build exploits. Historically this was the /R command, but it has been renamed to /g and the old form now just prints a hint:
[0x00000000]> /R pop
ERROR: /R is now known as /g
The grammar is the same as before. You pass a list of opcode substrings separated by semicolons, and radare2 scans the search range for terminator instructions (return, indirect call or indirect jump), then walks back up to gadget.len instructions from each terminator to collect every sequence whose disassembly matches the given filters in order:
[0x00000000]> /g pop;ret
0x00000000 4889e5 mov rbp, rsp
0x00000003 8b4508 mov eax, dword [rbp + 8]
0x00000006 31c9 xor ecx, ecx
0x00000008 5d pop rbp
0x00000009 c3 ret
...
An empty filter (/g) lists every gadget found within gadget.len instructions of a terminator. Output modes follow the usual conventions: /gj for JSON, /gq for a quiet address size listing, and /g* for radare2 commands suitable for piping back in.
Gadget Families
Until recently the only gadget terminator radare2 considered was ret. The new /g engine generalizes this with three sibling commands that change the terminator type:
| Command | Terminator | Acronym |
|---|---|---|
/gR | return instructions | ROP (Return-Oriented Programming) |
/gC | call instructions | COP (Call-Oriented Programming) |
/gJ | jump instructions | JOP (Jump-Oriented Programming) |
/g | any of the three | (combined) |
All four accept the same opcode-grep syntax and the same /jq* output modifiers, so /gJj jmp lists JOP gadgets as JSON.
Configuration Variables
The behavior of the gadget search is controlled by a group of gadget.* evars. The defaults are conservative; enable the rest as the analysis demands:
[0x00000000]> e?? gadget.
gadget.comments: display comments in gadget search output
gadget.cond: include conditional jump, calls and returns in gadget search
gadget.db: categorize gadgets in sdb
gadget.esil: use ESIL to resolve and classify conditional gadgets
gadget.len: maximum gadget length
gadget.sdb: cache results in sdb (experimental)
gadget.subchains: display every length gadget from gadget.len=X to 2 in /gl
gadget.len(default5) caps how many instructions can precede the terminator. Increase it to find longer chains, decrease it when you only care about the tail.gadget.condwidens the terminator set to include conditional returns, calls and jumps (cret,ccall,cjmp). Useful on ARM/Thumb and on x86 binaries where the only available pivots areje/jne.gadget.esilruns the ESIL emulator on each candidate to evaluate side effects and the branch condition. It enables the richer classification described below.gadget.db(on by default) andgadget.sdbpush results into SDB namespaces so they can be queried with/gkwithout re-running the search.gadget.subchainsmakes the quiet (/gq) output emit every prefix of a hit, fromgadget.leninstructions down to 2, instead of just the longest match.gadget.commentsinterleaves any user-defined comments on the gadget's addresses into the listing.
Classification
When /g finishes it tags each hit with a set of classes. The JSON form makes them explicit:
[0x00000000]> /gj pop;ret
[{"opcodes":[...,{"opcode":"pop rbp"},{"opcode":"ret"}],
"retaddr":9,"size":10,
"classes":["ret","mov","ldconst","logic"]}, ...]
The class set captures both the terminator family and the primitive operations the gadget performs on the way to it:
| Class | Meaning |
|---|---|
ret | gadget ends in a return |
jop | gadget ends in an indirect/computed jump |
cop | gadget ends in an indirect/computed call |
syscall | gadget contains a syscall/swi instruction |
signal | gadget triggers a signal-like trap (int, ud2, ...) |
pivot | gadget modifies the stack pointer (useful for stack pivoting) |
memread | gadget reads from memory |
memwrite | gadget writes to memory |
rww | gadget can be used as a "read-what-where" primitive |
www | gadget can be used as a "write-what-where" primitive |
mov | gadget moves data between registers |
ldconst | gadget loads a constant into a register |
arithm | gadget performs arithmetic (add, sub, mul, div) |
logic | gadget performs bitwise logic (and, or, xor) |
shift | gadget performs a shift or rotate |
cmp | gadget performs a comparison |
cond.always | (gadget.esil) the conditional terminator is always taken |
cond.controlled | (gadget.esil) the condition depends on attacker-controlled registers |
The first three (ret, jop, cop) overlap with the family commands above. The cond.* classes are only set when gadget.esil=true, since they require evaluating the branch under symbolic register values to decide whether the path is forced, dead, or attacker-influenceable.
A handful of legacy classes (nop, mov, const, arithm, arithm_ct) are still produced by the older rop classifier and stored in the rop SDB namespace for backwards compatibility.
Querying Stored Gadgets with /gk
Whenever gadget.db is enabled, every gadget the search finds is indexed in the gadget SDB namespace, keyed by class. The /gk command queries that index without re-walking the file:
[0x00000000]> /gk?
Usage: /gk query stored gadgets
| /gk [ret|jop|cop|syscall|pivot|memread|memwrite|www] show gadgets
| /gk [rww|signal|mov|ldconst|arithm|logic|shift|cmp] show primitive classes
| /gk [cond.always|cond.controlled] show ESIL-classified conditional gadgets
| /gk [nop|mov|const|arithm|arithm_ct] show legacy rop classes
| /gkj json output
| /gkq list Gadgets offsets
A typical workflow looks like this. Run a wide search once, then narrow the results by class:
[0x00000000]> e gadget.esil=true
[0x00000000]> /g
... (collects every gadget under gadget.len) ...
[0x00000000]> /gk ret
ret.0x00000000=0xa ret
ret.0x00000001=0x9 ret
ret.0x00000002=0x8 ret
ret.0x00000005=0x5 ret
[0x00000000]> /gk memwrite
memwrite.0x00000002=0x8 memwrite
memwrite.0x00000005=0x5 memwrite
The value column is size class, where size is the gadget length in bytes. /gkj returns the same information as a JSON array of {address, size, type, effect} objects, and /gkq lists just the addresses, ready to be fed into a loop with @@=.
A Complete Example
Combining everything, here is a session that locates write-what-where ROP gadgets in a binary, considering both regular returns and conditional ones, with ESIL-based reachability:
[0x00000000]> e gadget.len=6
[0x00000000]> e gadget.cond=true
[0x00000000]> e gadget.esil=true
[0x00000000]> /g
[0x00000000]> /gk www
[0x00000000]> /gk cond.controlled
The first /g populates the SDB; the two /gk queries then enumerate write-what-where primitives and any conditional terminators whose taken/not-taken state can be steered by controlling the input registers.
Searching for Cryptography materials
Searching expanded keys
radare2 is capable of finding expanded keys with /ca command for AES and SM4 block ciphers. It searches from current seek position up to the search.distance limit, or until end of file is reached. You can interrupt current search by pressing Ctrl-C. For example, to look for AES keys in a memory dump:
[0x00000000]> /ca aes
Searching 40 bytes in [0x0-0x1ab]
hits: 1
0x000000fb hit0_0 6920e299a5202a6d656e636869746f2a
For AES, the output length gives you the size of the AES key used: 128, 192 or 256 bits. If you are simply looking for plaintext AES keys in your binary, /ca will not find them they must have been expanded by the key expansion algorithm.
Searching private keys and certificates
/cr command implements the search of private keys (RSA and ECC). /cd command implements a similar feature to search certificates.
[0x00000000]> /cr
Searching 11 bytes in [0x0-0x15a]
hits: 2
0x000000fa hit1_0 302e020100300506032b657004220420fb3d588296fed5694ff7049eafb74490bf4bc6467ee11a08...
Entropy analysis
p=e might give some hints if high entropy sections are found trying to cover up a hardcoded secret.
There is the possibility to delimit entropy sections for later use with \s command:
[0x00000000]> b
0x100
[0x00000000]> b 4096
[0x00000000]> /s
0x00100000 - 0x00101000 ~ 5.556094
0x014e2c88 - 0x014e3c88 ~ 0.000000
0x01434374 - 0x01435374 ~ 6.332087
0x01435374 - 0x0144c374 ~ 3.664636
0x0144c374 - 0x0144d374 ~ 1.664368
0x0144d374 - 0x0144f374 ~ 4.229199
0x0144f374 - 0x01451374 ~ 2.000000
(...)
[0x00000000]> /s*
f entropy_section_0 0x00001000 0x00100000
f entropy_section_1 0x00001000 0x014e2c88
f entropy_section_2 0x00001000 0x01434374
f entropy_section_3 0x00017000 0x01435374
f entropy_section_4 0x00001000 0x0144c374
f entropy_section_5 0x00002000 0x0144d374
f entropy_section_6 0x00002000 0x0144f374
The blocksize is increased to 4096 bytes from the default 100 bytes so that the entropy search /s can work on reasonably sized chunks for entropy analysis. The sections flags can be applied with the dot operator, ./s* and then looped through px 32 @@ entropy*.
Searching data matching hash digest
Sometimes it is useful to search if some data blocks in a binary match a given digest. The command /h implement such feature. For example running the following command:
[0x00000000]> /h sha256 83264abaf298b9238ca63cb2fd9ff0f41a7a1520ee2a17c56df459fc806de1d6 512
INFO: Searching sha256 for 512 byte length
INFO: Search in range 0x00000000 and 0x00000284
INFO: Carving 132 blocks:
INFO: Found at 0x64
f hash.sha256.83264abaf298b9238ca63cb2fd9ff0f41a7a1520ee2a17c56df459fc806de1d6 = 0x64
Launches a search of 512-bytes blocks of data in the binary which SHA256 hash would results in the digest 83264abaf298b9238ca63cb2fd9ff0f41a7a1520ee2a17c56df459fc806de1d6. If a digest is found, the offset of its location is printed.
Disassembling
Disassembling in radare is just a way to represent an array of bytes. It is handled as a special print mode within p command.
In the old times, when the radare core was smaller, the disassembler was handled by an external rsc file. That is, radare first dumped current block into a file, and then simply called objdump configured to disassemble for Intel, ARM or other supported architectures.
It was a working and unix friendly solution, but it was inefficient as it repeated the same expensive actions over and over, because there were no caches. As a result, scrolling was terribly slow.
So there was a need to create a generic disassembler library to support multiple plugins for different architectures. We can list the current loaded plugins with
$ rasm2 -L
Or from inside radare2:
> e asm.arch=??
This was many years before capstone appeared. So r2 was using udis86 and olly disassemblers, many gnu (from binutils).
Nowadays, the disassembler support is one of the basic features of radare. It now has many options, endianness, including target architecture flavor and disassembler variants, among other things.
To see the disassembly, use the pd command. It accepts a numeric argument to specify how many opcodes of current block you want to see. Most of the commands in radare consider the current block size as the default limit for data input. If you want to disassemble more bytes, set a new block size using the b command.
[0x00000000]> b 100 ; set block size to 100
[0x00000000]> pd ; disassemble 100 bytes
[0x00000000]> pd 3 ; disassemble 3 opcodes
[0x00000000]> pD 30 ; disassemble 30 bytes
The pD command works like pd but accepts the number of input bytes as its argument, instead of the number of opcodes.
The "pseudo" syntax may be somewhat easier for a human to understand than the default assembler notations. But it can become annoying if you read lots of code. To play with it:
[0x00405e1c]> e asm.pseudo = true
[0x00405e1c]> pd 3
; JMP XREF from 0x00405dfa (fcn.00404531)
0x00405e1c 488b9424a80. rdx = [rsp+0x2a8]
0x00405e24 64483314252. rdx ^= [fs:0x28]
0x00405e2d 4889d8 rax = rbx
[0x00405e1c]> e asm.syntax = intel
[0x00405e1c]> pd 3
; JMP XREF from 0x00405dfa (fcn.00404531)
0x00405e1c 488b9424a80. mov rdx, [rsp+0x2a8]
0x00405e24 64483314252. xor rdx, [fs:0x28]
0x00405e2d 4889d8 mov rax, rbx
[0x00405e1c]> e asm.syntax=att
[0x00405e1c]> pd 3
; JMP XREF from 0x00405dfa (fcn.00404531)
0x00405e1c 488b9424a80. mov 0x2a8(%rsp), %rdx
0x00405e24 64483314252. xor %fs:0x28, %rdx
0x00405e2d 4889d8 mov %rbx, %rax
Decompilation
Radare2, as a tool that focus on extensibility and flexibility provides support for many decompilers.
For historical reasons the decompilers in r2 has been allocated as pd subcommands.
pdd- r2decpdg- r2ghidra- ...
By default only the pdc pseudodecompiler is shipped within radare2, but you can install any other via r2pm, the standard package manager for radare2.
Most decompilers implement all the common subcommands that modify the output:
- pdgo/pddo/pdco -> show offset of instruction associated with each line
- pdga/pdda/pdca -> show two column disasm vs decompilation
- pdgj/pddj/pdcj -> json output to use decompiler info from other tools
PseudoDecompiler
By combining ESIL emulation, asm.pseudo disassembly and some extra reference processing and function signature, comments and metadata; the pdc command provides a quick way to read a function in a higher level representation. It is not really implementing any control flow improvement (like switch, if/else, for/while). Also, no code optimizations or garbage logic is removed.
You may find it's output quite verbose and noisy, but handy and fast, and that serves like a good source to feed language models.
Another benefit of pdc is that it is available for ALL architectures supported by r2.
[0x100003a48]> pdc
int sym.func.100003a48 (int x0, int x1) {
x8 = [x0 + 0x60] // arg1
x8 = [x8 + 0x60]
x9 = [x1 + 0x60] // arg2
x9 = [x9 + 0x60]
(a, b) = compare (x8, x9)
if (a <= b) goto loc_0x100003a68 // likely
goto loc_0x100003a60;
loc_0x100003a68:
if (a >= b) goto loc_0x100003a74 // likely
goto loc_0x100003a6c;
loc_0x100003a74:
x8 = x1 + 0x68 // arg2
x1 = x0 + 0x68 // arg1
x0 = x8
return sym.imp.strcoll("", "")
loc_0x100003a60:
w0 = 1
return x0;
}
[0x100003a48]>
r2dec
This decompiler is available via r2pm and is sits after the pdd command. It provides control flow analysis and some code cleanup which makes it easier for the reader to understand what is going on.
This plugin can be configured with the e r2dec. variables:
[0x00000000]> e??r2dec.
r2dec.asm: if true, shows pseudo next to the assembly.
r2dec.blocks: if true, shows only scopes blocks.
r2dec.casts: if false, hides all casts in the pseudo code.
r2dec.debug: do not catch exceptions in r2dec.
r2dec.highlight: highlights the current address.
r2dec.paddr: if true, all xrefs uses physical addresses compare.
r2dec.slow: load all the data before to avoid multirequests to r2.
r2dec.xrefs: if true, shows all xrefs in the pseudo code.
[0x00000000]>
In this example we show how pdda works, displaying the two columns:
[0x100003a48]> pdda
; assembly | /* r2dec pseudo code output */
| /* /bin/ls @ 0x100003a48 */
| #include <stdint.h>
|
; (fcn) sym.func.100003a48 () | uint32_t func_100003a48 (int64_t arg1, int64_t arg2) {
| x0 = arg1;
| x1 = arg2;
0x100003a48 ldr x8, [x0, 0x60] | x8 = *((x0 + 0x60));
0x100003a4c ldr x8, [x8, 0x60] | x8 = *((x8 + 0x60));
0x100003a50 ldr x9, [x1, 0x60] | x9 = *((x1 + 0x60));
0x100003a54 ldr x9, [x9, 0x60] | x9 = *((x9 + 0x60));
0x100003a58 cmp x8, x9 |
| if (x8 > x9) {
0x100003a5c b.le 0x100003a68 |
0x100003a60 mov w0, 1 | w0 = 1;
0x100003a64 ret | return w0;
| }
| if (x8 < x9) {
0x100003a68 b.ge 0x100003a74 |
0x100003a6c mov w0, -1 | w0 = -1;
0x100003a70 ret | return w0;
| }
0x100003a74 add x8, x1, 0x68 | x8 = x1 + 0x68;
0x100003a78 add x1, x0, 0x68 | x1 = x0 + 0x68;
0x100003a7c mov x0, x8 | x0 = x8;
0x100003a80 b 0x1000077c8 | return void (*0x1000077c8)() ();
| }
[0x100003a48]>
R2Ghidra
The Ghidra tool ships a decompiler as a separate program (written in C++ instead of Java), for r2 purposes the logic from this tool has been massaged to work as a native plugin so it doesn't require the java runtime to work.
Note that the quality of the decompilation of r2ghidra compared to ghidra is not the same, because r2ghidra is not providing the same analysis results that Ghidra would provide, and some other metadata differs, which causes the engine to behave different and probably miss quite a lot of details when handling structures and other complex features.
The plugin can be configured with the e r2ghidra. variables:
[0x00000000]> e??r2ghidra.
r2ghidra.casts: Show type casts where needed
r2ghidra.cmt.cpp: C++ comment style
r2ghidra.cmt.indent: Comment indent
r2ghidra.indent: Indent increment
r2ghidra.lang: Custom Sleigh ID to override auto-detection (e.g. x86:LE:32:default)
r2ghidra.linelen: Max line length
r2ghidra.maximplref: Maximum number of references to an expression before showing an explicit variable.
r2ghidra.rawptr: Show unknown globals as raw addresses instead of variables
r2ghidra.roprop: Propagate read-only constants (0,1,2,3,4)
r2ghidra.sleighhome: SLEIGHHOME
r2ghidra.timeout: Run decompilation in a separate process and kill it after a specific time
r2ghidra.vars: Honor local variable / argument analysis from r2 (may cause segfaults if enabled)
r2ghidra.verbose: Show verbose warning messages while decompiling
[0x00000000]>
In this example we see how pdgo works, displaying the
[0x100003a48]> pdgo
0x100003a48 |ulong sym.func.100003a48(int64_t param_1, int64_t param_2) {
| ulong uVar1;
| int64_t iVar2;
| int64_t iVar3;
|
0x100003a4c | iVar2 = *(*(param_1 + 0x60) + 0x60);
0x100003a54 | iVar3 = *(*(param_2 + 0x60) + 0x60);
0x100003a5c | if (iVar2 != iVar3 && iVar3 <= iVar2) {
0x100003a64 | return 1;
| }
0x100003a68 | if (iVar2 < iVar3) {
0x100003a70 | return 0xffffffff;
| }
0x1000077d4 | uVar1 = (**(segment.__DATA_CONST + 0x1f0))(param_2 + 0x68, param_1 + 0x68);
0x1000077d4 | return uVar1;
|}
[0x100003a48]>
Other
There's support for many other decompilers in radare2, but those are not documented in this book yet, feel free to submit your details, here's the list:
- r2jadx -> java/dalvik decompilation
- ctags -> use source ctags to show the source from disasm
- retdec -> available as a plugin and uses the
pde - pickledec -> decompiler for Python pickle blobs
- radeco -> experimental and abandoned esil based decompiler written in Rust
- r2snow -> snowman's decompiler only for intel architectures
- pdq -> r2papi-based decompiler on top of esil and the r2js runtime
Adding Metadata to Disassembly
The typical work involved in reversing binary files makes powerful annotation capabilities essential. Radare offers multiple ways to store and retrieve such metadata.
By following common basic UNIX principles, it is easy to write a small utility in a scripting language which uses objdump, otool or any other existing utility to obtain information from a binary and to import it into radare. For example, take a look at idc2r.py shipped with radare2ida. To use it, invoke it as idc2r.py file.idc > file.r2. It reads an IDC file exported from an IDA Pro database and produces an r2 script containing the same comments, names of functions and other data. You can import the resulting 'file.r2' by using the dot . command of radare:
[0x00000000]> . file.r2
The . command is used to interpret Radare commands from external sources, including files and program output. For example, to omit generation of an intermediate file and import the script directly you can use this combination:
[0x00000000]> .!idc2r.py < file.idc
Please keep in mind that importing IDA Pro metadata from IDC dump is deprecated mechanism and might
not work in the future. The recommended way to do it - use python-idb-based ida2r2.py which
opens IDB files directly without IDA Pro installed.
The C command is used to manage comments and data conversions. You can define a range of program's bytes to be interpreted as either code, binary data or string. It is also possible to execute external code at every specified flag location in order to fetch some metadata, such as a comment, from an external file or database.
There are many different metadata manipulation commands, here is the glimpse of all of them:
[0x00404cc0]> C?
| Usage: C[-LCvsdfm*?][*?] [...] # Metadata management
| C list meta info in human friendly form
| C* list meta info in r2 commands
| C*. list meta info of current offset in r2 commands
| C- [len] [[@]addr] delete metadata at given address range
| C. list meta info of current offset in human friendly form
| CC! [@addr] edit comment with $EDITOR
| CC[?] [-] [comment-text] [@addr] add/remove comment
| CC.[addr] show comment in current address
| CCa[-at]|[at] [text] [@addr] add/remove comment at given address
| CCu [comment-text] [@addr] add unique comment
| CF[sz] [fcn-sign..] [@addr] function signature
| CL[-][*] [file:line] [addr] show or add 'code line' information (bininfo)
| CS[-][space] manage meta-spaces to filter comments, etc..
| C[Cthsdmf] list comments/types/hidden/strings/data/magic/formatted in human friendly form
| C[Cthsdmf]* list comments/types/hidden/strings/data/magic/formatted in r2 commands
| Cd[-] [size] [repeat] [@addr] hexdump data array (Cd 4 10 == dword [10])
| Cd. [@addr] show size of data at current address
| Cf[?][-] [sz] [0|cnt][fmt] [a0 a1...] [@addr] format memory (see pf?)
| Ch[-] [size] [@addr] hide data
| Cm[-] [sz] [fmt..] [@addr] magic parse (see pm?)
| Cs[?] [-] [size] [@addr] add string
| Ct[?] [-] [comment-text] [@addr] add/remove type analysis comment
| Ct.[@addr] show comment at current or specified address
| Cv[bsr][?] add comments to args
| Cz[@addr] add string (see Cs?)
Simply to add the comment to a particular line/address you can use Ca command:
[0x00000000]> CCa 0x0000002 this guy seems legit
[0x00000000]> pd 2
0x00000000 0000 add [rax], al
; this guy seems legit
0x00000002 0000 add [rax], al
The C? family of commands lets you mark a range as one of several kinds of types. Three basic types are: code (disassembly is done using asm.arch), data (an array of data elements) or string. Use the Cs command to define a string, use the Cd command for defining an array of data elements, and use the Cf command to define more complex data structures like structs.
Annotating data types is most easily done in visual mode, using the "d" key, short for "data type change". First, use the cursor to select a range of bytes (press c key to toggle cursor mode and use HJKL keys to expand selection), then press 'd' to get a menu of possible actions/types. For example, to mark the range as a string, use the 's' option from the menu. You can achieve the same result from the shell using the Cs command:
[0x00000000]> f string_foo @ 0x800
[0x00000000]> Cs 10 @ string_foo
The Cf command is used to define a memory format string (the same syntax used by the pf command). Here's an example:
[0x7fd9f13ae630]> Cf 16 2xi foo bar
[0x7fd9f13ae630]> pd
;-- rip:
0x7fd9f13ae630 format 2xi foo bar {
0x7fd9f13ae630 [0] {
foo : 0x7fd9f13ae630 = 0xe8e78948
bar : 0x7fd9f13ae634 = 14696
}
0x7fd9f13ae638 [1] {
foo : 0x7fd9f13ae638 = 0x8bc48949
bar : 0x7fd9f13ae63c = 571928325
}
} 16
0x7fd9f13ae633 e868390000 call 0x7fd9f13b1fa0
0x7fd9f13ae638 4989c4 mov r12, rax
The [sz] argument to Cf is used to define how many bytes the struct should take up in the disassembly, and is completely independent from the size of the data structure defined by the format string. This may seem confusing, but has several uses. For example, you may want to see the formatted structure displayed in the disassembly, but still have those locations be visible as offsets and with raw bytes. Sometimes, you find large structures, but only identified a few fields, or only interested in specific fields. Then, you can tell r2 to display only those fields, using the format string and using 'skip' fields, and also have the disassembly continue after the entire structure, by giving it full size using the sz argument.
Using Cf, it's easy to define complex structures with simple oneliners. See pf? for more information.
Remember that all these C commands can also be accessed from the visual mode by pressing the d (data conversion) key.
Note that unlike t commands Cf doesn't change analysis results. It is only
a visual boon.
Sometimes just adding a single line of comments is not enough, in this case radare2 allows you to
create a link for a particular text file. You can use it with CC, command or by pressing , key in
the visual mode. This will open an $EDITOR to create a new file, or if filename does exist, just
will create a link. It will be shown in the disassembly comments:
[0x00003af7 11% 290 /bin/ls]> pd $r @ main+55 # 0x3af7
|0x00003af7 call sym.imp.setlocale ;[1] ; ,(locale-help.txt) ; char *setlocale(int category, const char *locale)
|0x00003afc lea rsi, str.usr_share_locale ; 0x179cc ; "/usr/share/locale"
|0x00003b03 lea rdi, [0x000179b2] ; "coreutils"
|0x00003b0a call sym.imp.bindtextdomain ;[2] ; char *bindtextdomain(char *domainname, char *dirname)
Note ,(locale-help.txt) appeared in the comments, if we press , again in the visual mode, it
will open the file. Using this mechanism we can create a long descriptions of some particular places
in disassembly, link datasheets or related articles.
Architectures
This chapter covers architecture specific topics.
Even though most examples in the radare2 book are showing Intel x86 code, radare2 supports an extensive list of computer architectures. The concepts of radare2 apply to all architectures, but there are a few differences in the configuration and usage.
Here's a list of the list of some of the currently supported architectures by radare2, you can get this list by running rasm2 -L. But from inside radare2 it's also possible to list the arch plugins using the La command, or the -a? one.
_de 8 6502 LGPL3 6502/NES analysis plugin
_de 8 6502.cs LGPL3 Capstone mos65xx analysis plugin
ade 8 16 8051 LGPL3 8051 CPU code analysis plugin
_de 64 alpha GPL ALPHA architecture plugin
_de 32 amd29k BSD AMD 29k decoder
a__ 16 32 64 any.as LGPL3 Uses system gnu/clang 'as' assembler (by pancake)
a__ 8 16 32 64 any.vasm MIT Use -a arm.vasm, 6502.vasm, 6809, c16x, jagrisc, m68k, pdp11, ppc, qnice, tr3200, vidcore, x86, z80 (by http://sun.hasenbraten.de/vasm/ (r2pm -ci vasm))
_de 48 arc LGPL3 ARC code analysis plugin (by pancake)
a__ 16 32 64 arm.nz LGPL3 custom thumb, arm32 and arm64 assembler (by pancake)
_de 16 32 64 arm BSD Capstone ARM analyzer
_de 16 32 64 arm.gnu LGPL3 ARM code analysis plugin (asm.cpu=wd for winedbg disassembler)
_de 64 arm.v35 BSD Vector35 ARM analyzer
ade 8 16 avr LGPL3 AVR code analysis plugin
ade 32 bf LGPL3 brainfuck code analysis plugin
ade 32 bpf.mr LGPLv3 Classic BPF analysis plugin
_de 32 64 bpf BSD Capstone BPF plugin (by terorie, aemmitt)
_de 32 chip8 LGPL3 CHIP8 analysis plugin (by maijin)
_de 16 cr16 LGPL3 Compact RISC processor
_de 32 cris LGPL3 Axis Communications 32-bit embedded processor
_de 32 dalvik LGPL3 Dalvik (Android VM) bytecode analysis plugin
_de 32 dis MIT Inferno Dis VM disassembler
_de 32 64 ebc LGPL3 EFI Bytecode architecture (by Fedor Sakharov)
ade 32 evm BSD EthereumVM plugin
ade 16 gb LGPL3 Gameboy CPU code analysis plugin
_de 16 h8300 LGPL3 H8300 code analysis plugin
_de 16 hppa GPL3 HP PA-RISC
ade 4 i4004 LGPL3 i4004 decoder plugin (by pancake, condret)
_de 16 i8080 LGPL3 I8080 CPU code arch plugin
ade 32 java Apache Java bytecode analysis plugin
_de 16 jdh8 LGPL3 jdh-8 toy architecture
_de 64 kvx unknown Kalray VLIW core
_de 32 lanai GPL3 Myricom's LANAI based on GNU binutils
_de 8 lh5801 LGPL3 SHARP LH5801 disassembler
_de 32 lm32 BSD disassembly plugin for Lattice Micro 32 ISA (by Felix Held)
_de 64 loongarch LGPL3 loongson loongarch code analysis plugin
ade 32 lua MIT LUA Bytecode arch plugin (by pancake)
_de 16 32 m680x BSD Capstone M680X analysis plugin
_de 32 m68k BSD Capstone M68K analyzer
_de 32 m68k.gnu GPL3 Binutils 2.36 based m68k disassembler (by pancake)
_de 32 mcore LGPL3 MCore analysis plugin
_de 16 32 64 mcs96 LGPL3 Intel MCS96 microcontroller, also known as 8xC196 or 80196 (by condret)
ade 16 32 64 mips BSD Capstone MIPS analyzer
_de 32 mips.gnu LGPL3 MIPS code analysis plugin
_de 16 msp430 LGPL3 TI MSP430 code analysis plugin
_de 32 nds32 GPL3 Binutils based nds32 disassembler (by Edoardo Mantovani)
_de 32 nios2 LGPL3 NIOS II code analysis plugin
_de 8 16 32 64 null LGPL3 Fallback/Null arch plugin
_de 32 or1k LGPL3 OpenRISC 1000
_de 16 pdp11 GPL3 PDP-11 (by pancake)
_de 8 pic LGPL3 PIC analysis plugin
ade 8 pickle BSD Python Pickle Machine Disassembler
_de 32 64 ppc BSD Capstone (+vle+ps) PowerPC disassembler
_de 32 64 ppc.gnu LGPL3 PowerPC analysis plugin
_de 32 propeller LGPL3 Parallax propeller code analysis plugin
_de 32 pyc LGPL3 Python bytecode analysis plugin
ade 32 64 riscv GPL RISC-V analysis plugin (by pancake)
_de 32 64 riscv.cs BSD RISC-V analysis plugin
_de 32 rsp LGPL3 RSP code analysis plugin
_de 32 64 s390 BSD Capstone SystemZ microanalysis (by pancake)
_de 32 64 s390.gnu BSD SystemZ S390 from binutils
_de 32 sh LGPL3 SH-4 code analysis plugin
_de 32 sh.cs BSD Capstone SH analysis
_de 4 sm5xx BSD Sharp SM 5XX family MCUs
_de 8 16 snes LGPL3 SNES analysis plugin (by pancake)
_de 32 64 sparc BSD Capstone SPARC analysis
_de 32 64 sparc.gnu GPL3 Scalable Processor Architecture
_de 32 tms320 LGPLv3 TMS320 DSP family (c54x,c55x,c55x+,c64x)
_de 32 tricore LGPL3 TRICORE analysis plugin
_de 32 tricore.cs BSD Capstone TriCore analysis
_de 32 v810 LGPL3 V810 code analysis plugin
ade 32 v850 MIT V850 code analysis plugin
_de 32 vax GPL VAX code analysis plugin
ade 64 wasm LGPL3 WebAssembly analysis plugin
_de 32 ws LGPL3 Space, tab and linefeed analysis plugin
_de 16 32 64 x86 BSD Capstone X86 analysis
a__ 16 32 64 x86.nasm LGPL3 X86 nasm assembler
a__ 16 32 64 x86.nz LGPL3 x86 handmade assembler (by pancake)
_de 16 xap LGPL3 XAP code analysis plugin (by pancake)
_de 32 xcore BSD Capstone XCORE analysis
_de 32 xtensa LGPL3 Xtensa disassembler
ade 16 z80 GPL Z80 CPU code analysis plugin
Using r2 with 8051
Features
- Disassembler
- Assembler
- Emulation (esil)
- Basic address space mapping
Untested
- Debugger
Missing
- Full emulation of memory-mapped registers
- Memory banking for address spaces > 64K
- Advanced analysis like local variables, function parameters ..
- More predefined CPU models
r2 configuration
Set architecture to 8051:
$ r2 -a 8051
Set cpu to desired model:
e asm.cpu = ?
After changing the cpu model, run 'aei' to initialize/reset the registers and mapped memory. For example:
e asm.cpu = 8051-generic
aei
Address spaces and memory mapping
Pseudo-registers are used to control how r2 emulates the multiple address spaces of the 8051. The registers hold the base address where the 8051 memory area is located in r2 address space.
| register | address space | comment |
|---|---|---|
| _code | CODE | Program memory. Typically located at 0. |
| _idata | IDATA | 256 bytes of internal RAM. |
| _sfr | SFR | 128 bytes for special function registers. _sfr is the base address. Registers start at_sfr+0x80. |
| _xdata | XDATA | 64K of external RAM. |
| _pdata | PDATA, XREG | MSB of address of 256-byte page in XDATA accessed with 'movx @Ri' op codes. |
The registers are initialized based on the selected CPU. See command 'e asm.cpu=?'.
The registers can be viewed and modified with the 'ar' command. When modifying the pseudo-registers or updating 'asm.cpu', memory will be (re)allocated automatically when the analyzer is invoked the next time (e.g. during 'aei'). Use the 'om' command to see the list of allocated memory blocks.
[0x00000000]> e asm.cpu=8051.generic
[0x00000000]> aei
[0x00000000]> om
4 fd: 6 +0x00000000 0x00000000 - 0x0000ffff -rwx
3 fd: 5 +0x00000000 0x20000000 - 0x2000ffff -rw- xdata
2 fd: 4 +0x00000000 0x10000180 - 0x100001ff -rw- sfr
1 fd: 3 +0x00000000 0x10000000 - 0x100000ff -rw- idata
Analysis and emulation rely on the address mapping. Setup the pseudo-registers before running analysis, or rerun analysis after updating pseudo-registers.
Address spaces can overlap in r2 memory. This allows emulating 8051 variants that mirror IDATA and SFR into XDATA, or have shared XDATA and CODE address spaces.
For example, the CC2430 from Texas Instruments maps SFR to 0xDF80 and IDATA to 0xFF00 in XDATA memory space. In r2 this can be setup with:
ar _sfr = _xdata + 0xdf00
ar _idata = _xdata + 0xff00
For overlapping areas, r2 will prioritize smaller memory blocks over larger ones. For example, if IDATA is mapped into XDATA, all r2 operations will use IDATA in the overlapping addresses. If you want to use XDATA instead, you can delete the offending map with the command 'om-'. See 'om?'for more information.
For using emulation with overlapping code and RAM spaces, the r2 memory holding the firmware must allow write access. This is best achieved with the command 'omf 4 rwx', with 4 being the id of the firmware file's IO map entry. See 'om?' for more information.
Some 8051 variants use memory banking to address memory spaces larger than 64K. Currently, memory banking is not supported by r2.
Tips & tricks
Use pseudo-registers in r2 commands to calculate addresses. For example:
Hex dump of all special function registers:
px @ _sfr
Write a value to a location in external RAM
wx deadbeef @ _xdata + 0x1234
Set a flag for a variable stored at 0x20 in internal RAM:
f sym.secret @ _idata + 0x20
Adding support for new 8051 variants
Follow these steps to add support for new 8051 variants to r2.
- Clone latest version of radare2
- In '/libr/anal/p/anal_8051.c' add a new entry to array 'cpu_models[]' to define a name and a memory mapping. The name of the last entry in array must be NULL
- In 'libr/asm/p/asm_8051.c' append entry with the same name to '.cpus' attribute
- Compile, test your addition, and submit a pull request
Analysis
Radare2 has a very rich set of commands and configuration options to perform data and code analysis,
to extract useful information from a binary, like pointers, string references,
basic blocks, opcode data, jump targets, cross references and much more.
These operations are handled by the a (analyze) command family:
|Usage: a[abdefFghoprxstc] [...]
| aa[?] analyze all (fcns + bbs) (aa0 to avoid sub renaming)
| a8 [hexpairs] analyze bytes
| ab[b] [addr] analyze block at given address
| abb [len] analyze N basic blocks in [len] (section.size by default)
| abt [addr] find paths in the bb function graph from current offset to given address
| ac [cycles] analyze which op could be executed in [cycles]
| ad[?] analyze data trampoline (wip)
| ad [from] [to] analyze data pointers to (from-to)
| ae[?] [expr] analyze opcode eval expression (see ao)
| af[?] analyze Functions
| aF same as above, but using anal.depth=1
| ag[?] [options] draw graphs in various formats
| ah[?] analysis hints (force opcode size, ...)
| ai [addr] address information (show perms, stack, heap, ...)
| an [name] [@addr] show/rename/create whatever flag/function is used at addr
| ao[?] [len] analyze Opcodes (or emulate it)
| aO[?] [len] Analyze N instructions in M bytes
| ap find prelude for current offset
| ar[?] like 'dr' but for the esil vm. (registers)
| as[?] [num] analyze syscall using dbg.reg
| av[?] [.] show vtables
| ax[?] manage refs/xrefs (see also afx?)
In fact, a namespace is one of the biggest in radare2 tool and allows to control
very different parts of the analysis:
- Code flow analysis
- Data references analysis
- Using loaded symbols
- Managing different type of graphs, like CFG and call graph
- Manage variables
- Manage types
- Emulation using ESIL VM
- Opcode introspection
- Objects information, like virtual tables
Code Analysis
Code analysis is the process of finding patterns, combining information from different sources and process the disassembly of the program in multiple ways in order to understand and extract more details of the logic behind the code.
Radare2 has many different code analysis techniques implemented under different commands and configuration options, and it's important to understand what they do and how that affects in the final results before going for the default-standard aaaaa way because on some cases this can be too slow or just produce false positive results.
As long as the whole functionalities of r2 are available with the API as well as using commands. This gives you the ability to implement your own analysis loops using any programming language, even with r2 oneliners, shellscripts, or analysis or core native plugins.
The analysis will show up the internal data structures to identify basic blocks, function trees and to extract opcode-level information.
The most common radare2 analysis command sequence is aa, which stands for "analyze all". That all is referring to all symbols and entry-points. If your binary is stripped you will need to use other commands like aaa, aab, aar, aac or so.
Take some time to understand what each command does and the results after running them to find the best one for your needs.
[0x08048440]> aa
[0x08048440]> pdf @ main
; DATA XREF from 0x08048457 (entry0)
/ (fcn) fcn.08048648 141
| ;-- main:
| 0x08048648 8d4c2404 lea ecx, [esp+0x4]
| 0x0804864c 83e4f0 and esp, 0xfffffff0
| 0x0804864f ff71fc push dword [ecx-0x4]
| 0x08048652 55 push ebp
| ; CODE (CALL) XREF from 0x08048734 (fcn.080486e5)
| 0x08048653 89e5 mov ebp, esp
| 0x08048655 83ec28 sub esp, 0x28
| 0x08048658 894df4 mov [ebp-0xc], ecx
| 0x0804865b 895df8 mov [ebp-0x8], ebx
| 0x0804865e 8975fc mov [ebp-0x4], esi
| 0x08048661 8b19 mov ebx, [ecx]
| 0x08048663 8b7104 mov esi, [ecx+0x4]
| 0x08048666 c744240c000. mov dword [esp+0xc], 0x0
| 0x0804866e c7442408010. mov dword [esp+0x8], 0x1 ; 0x00000001
| 0x08048676 c7442404000. mov dword [esp+0x4], 0x0
| 0x0804867e c7042400000. mov dword [esp], 0x0
| 0x08048685 e852fdffff call sym..imp.ptrace
| sym..imp.ptrace(unk, unk)
| 0x0804868a 85c0 test eax, eax
| ,=< 0x0804868c 7911 jns 0x804869f
| | 0x0804868e c70424cf870. mov dword [esp], str.Don_tuseadebuguer_ ; 0x080487cf
| | 0x08048695 e882fdffff call sym..imp.puts
| | sym..imp.puts()
| | 0x0804869a e80dfdffff call sym..imp.abort
| | sym..imp.abort()
| `-> 0x0804869f 83fb02 cmp ebx, 0x2
|,==< 0x080486a2 7411 je 0x80486b5
|| 0x080486a4 c704240c880. mov dword [esp], str.Youmustgiveapasswordforusethisprogram_ ; 0x0804880c
|| 0x080486ab e86cfdffff call sym..imp.puts
|| sym..imp.puts()
|| 0x080486b0 e8f7fcffff call sym..imp.abort
|| sym..imp.abort()
|`--> 0x080486b5 8b4604 mov eax, [esi+0x4]
| 0x080486b8 890424 mov [esp], eax
| 0x080486bb e8e5feffff call fcn.080485a5
| fcn.080485a5() ; fcn.080484c6+223
| 0x080486c0 b800000000 mov eax, 0x0
| 0x080486c5 8b4df4 mov ecx, [ebp-0xc]
| 0x080486c8 8b5df8 mov ebx, [ebp-0x8]
| 0x080486cb 8b75fc mov esi, [ebp-0x4]
| 0x080486ce 89ec mov esp, ebp
| 0x080486d0 5d pop ebp
| 0x080486d1 8d61fc lea esp, [ecx-0x4]
\ 0x080486d4 c3 ret
In this example, we analyze the whole file (aa) and then print disassembly of the main() function (pdf).
The aa command belongs to the family of auto analysis commands and performs only the most basic
auto analysis steps. In radare2 there are many different types of the auto analysis commands with a
different analysis depth, including partial emulation: aa, aaa, aab, aaaa, ...
There is also a mapping of those commands to the r2 CLI options: r2 -A, r2 -AA, and so on.
It is a common sense that completely automated analysis can produce non sequitur results, thus
radare2 provides separate commands for the particular stages of the analysis allowing fine-grained
control of the analysis process. Moreover, there is a treasure trove of configuration variables
for controlling the analysis outcomes. You can find them in anal.* and emu.*
cfg variables' namespaces.
Analyze functions
One of the most important "basic" analysis commands is the set of af subcommands. af means
"analyze function". Using this command you can either allow automatic analysis of the particular
function or perform completely manual one.
[0x00000000]> af?
Usage: af
| af ([name]) ([addr]) analyze functions (start at addr or $$)
| afr ([name]) ([addr]) analyze functions recursively
| af+ addr name [type] [diff] hand craft a function (requires afb+)
| af- [addr] clean all function analysis data (or function at addr)
| afa analyze function arguments in a call (afal honors dbg.funcarg)
| afb+ fcnA bbA sz [j] [f] ([t]( [d])) add bb to function @ fcnaddr
| afb[?] [addr] List basic blocks of given function
| afbF([0|1]) Toggle the basic-block 'folded' attribute
| afB 16 set current function as thumb (change asm.bits)
| afC[lc] ([addr])@[addr] calculate the Cycles (afC) or Cyclomatic Complexity (afCc)
| afc[?] type @[addr] set calling convention for function
| afd[addr] show function + delta for given offset
| afF[1|0|] fold/unfold/toggle
| afi [addr|fcn.name] show function(s) information (verbose afl)
| afj [tableaddr] [count] analyze function jumptable
| afl[?] [ls*] [fcn name] list functions (addr, size, bbs, name) (see afll)
| afm name merge two functions
| afM name print functions map
| afn[?] name [addr] rename name for function at address (change flag too)
| afna suggest automatic name for current offset
| afo[?j] [fcn.name] show address for the function name or current offset
| afs[!] ([fcnsign]) get/set function signature at current address (afs! uses cfg.editor)
| afS[stack_size] set stack frame size for function at current address
| afsr [function_name] [new_type] change type for given function
| aft[?] type matching, type propagation
| afu addr resize and analyze function from current address until addr
| afv[absrx]? manipulate args, registers and variables in function
| afx list function references
You can use afl to list the functions found by the analysis.
There are a lot of useful commands under afl such as aflj, which lists the function in JSON format and aflm, which lists the functions in the syntax found in makefiles.
There's also afl=, which displays ASCII-art bars with function ranges.
You can find the rest of them under afl?.
Some of the most challenging tasks while performing a function analysis are merge, crop and resize.
As with other analysis commands you have two modes: semi-automatic and manual.
For the semi-automatic, you can use afm <function name> to merge the current function with
the one specified by name as an argument, aff to readjust the function after analysis changes or function edits,
afu <address> to do the resize and analysis of the current function until the specified address.
Apart from those semi-automatic ways to edit/analyze the function, you can hand craft it in the manual mode with af+ command and edit basic blocks of it using afb commands.
Before changing the basic blocks of the function it is recommended to check the already presented ones:
[0x00003ac0]> afb
0x00003ac0 0x00003b7f 01:001A 191 f 0x00003b7f
0x00003b7f 0x00003b84 00:0000 5 j 0x00003b92 f 0x00003b84
0x00003b84 0x00003b8d 00:0000 9 f 0x00003b8d
0x00003b8d 0x00003b92 00:0000 5
0x00003b92 0x00003ba8 01:0030 22 j 0x00003ba8
0x00003ba8 0x00003bf9 00:0000 81
Hand craft function
Before we start, let's prepare a binary file first. Write in example.c:
int code_block()
{
int result = 0;
for(int i = 0; i < 10; ++i)
result += 1;
return result;
}
then compile with gcc -c example.c -m32 -O0 -fno-pie, and open the object file example.o with radare2.
Since we haven't analyzed it yet, the pdf command will not print out the disassembly here:
$ r2 example.o
[0x08000034]> pdf
p: Cannot find function at 0x08000034
[0x08000034]> pd
;-- section..text:
;-- .text:
;-- code_block:
;-- eip:
0x08000034 55 push ebp ; [01] -r-x section size 41 named .text
0x08000035 89e5 mov ebp, esp
0x08000037 83ec10 sub esp, 0x10
0x0800003a c745f8000000. mov dword [ebp - 8], 0
0x08000041 c745fc000000. mov dword [ebp - 4], 0
,=< 0x08000048 eb08 jmp 0x8000052
.--> 0x0800004a 8345f801 add dword [ebp - 8], 1
:| 0x0800004e 8345fc01 add dword [ebp - 4], 1
:`-> 0x08000052 837dfc09 cmp dword [ebp - 4], 9
`==< 0x08000056 7ef2 jle 0x800004a
0x08000058 8b45f8 mov eax, dword [ebp - 8]
0x0800005b c9 leave
0x0800005c c3 ret
our goal is to handcraft a function with the following structure
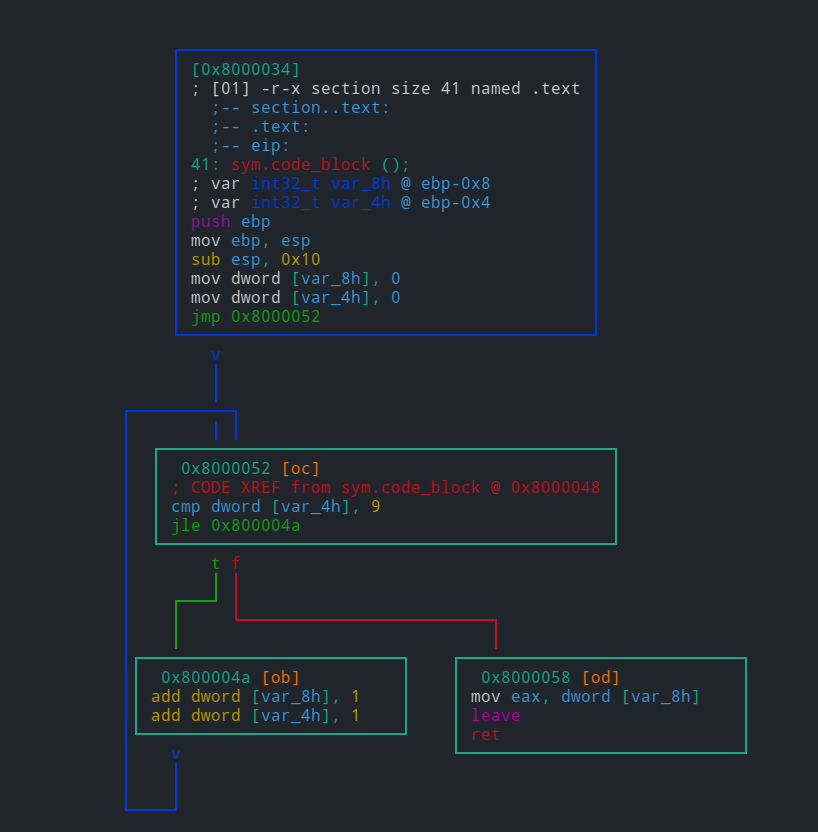
create a function at 0x8000034 named code_block:
[0x8000034]> af+ 0x8000034 code_block
In most cases, we use jump or call instructions as code block boundaries. so the range of first block is from 0x08000034 push ebp to 0x08000048 jmp 0x8000052.
use afb+ command to add it.
[0x08000034]> afb+ code_block 0x8000034 0x800004a-0x8000034 0x8000052
note that the basic syntax of afb+ is afb+ function_address block_address block_size [jump] [fail]. the final instruction of this block points to a new address(jmp 0x8000052), thus we add the address of jump target (0x8000052) to reflect the jump info.
the next block (0x08000052 ~ 0x08000056) is more likeyly an if conditional statement which has two branches. It will jump to 0x800004a if jle-less or equal, otherwise (the fail condition) jump to next instruction -- 0x08000058.:
[0x08000034]> afb+ code_block 0x8000052 0x8000058-0x8000052 0x800004a 0x8000058
follow the control flow and create the remaining two blocks (two branches) :
[0x08000034]> afb+ code_block 0x800004a 0x8000052-0x800004a 0x8000052
[0x08000034]> afb+ code_block 0x8000058 0x800005d-0x8000058
check our work:
[0x08000034]> afb
0x08000034 0x0800004a 00:0000 22 j 0x08000052
0x0800004a 0x08000052 00:0000 8 j 0x08000052
0x08000052 0x08000058 00:0000 6 j 0x0800004a f 0x08000058
0x08000058 0x0800005d 00:0000 5
[0x08000034]> VV
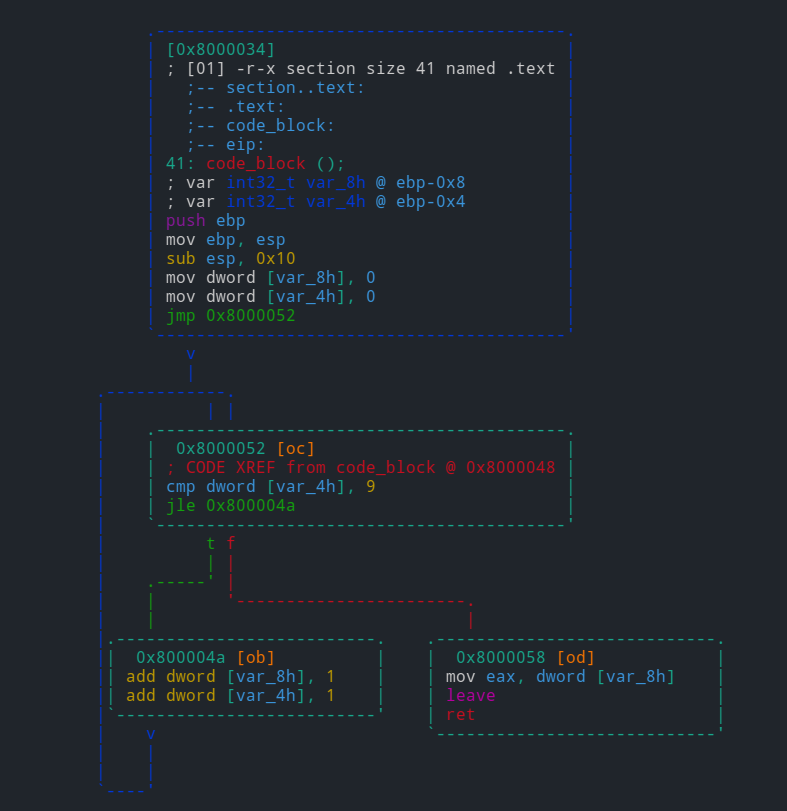
There are two very important commands for this: afc and afB. The latter is a must-know command for some platforms like ARM. It provides a way to change the "bitness" of the particular function. Basically, allowing to select between ARM and Thumb modes.
afc on the other side, allows to manually specify function calling convention. You can find more information on its usage in calling_conventions.
Recursive analysis
There are 5 important program wide half-automated analysis commands:
aab- perform basic-block analysis ("Nucleus" algorithm)aac- analyze function calls from one (selected or current function)aaf- analyze all function callsaar- analyze data referencesaad- analyze pointers to pointers references
Those are only generic semi-automated reference searching algorithms. Radare2 provides a
wide choice of manual references' creation of any kind. For this fine-grained control
you can use ax commands.
Usage: ax[?d-l*] # see also 'afx?'
| ax list refs
| ax* output radare commands
| ax addr [at] add code ref pointing to addr (from curseek)
| ax- [at] clean all refs/refs from addr
| ax-* clean all refs/refs
| axc addr [at] add generic code ref
| axC addr [at] add code call ref
| axg [addr] show xrefs graph to reach current function
| axg* [addr] show xrefs graph to given address, use .axg*;aggv
| axgj [addr] show xrefs graph to reach current function in json format
| axd addr [at] add data ref
| axq list refs in quiet/human-readable format
| axj list refs in json format
| axF [flg-glob] find data/code references of flags
| axm addr [at] copy data/code references pointing to addr to also point to curseek (or at)
| axt [addr] find data/code references to this address
| axf [addr] find data/code references from this address
| axv [addr] list local variables read-write-exec references
| ax. [addr] find data/code references from and to this address
| axff[j] [addr] find data/code references from this function
| axs addr [at] add string ref
The most commonly used ax commands are axt and axf, especially as a part of various r2pipe
scripts. Lets say we see the string in the data or a code section and want to find all places
it was referenced from, we should use axt:
[0x0001783a]> pd 2
;-- str.02x:
; STRING XREF from 0x00005de0 (sub.strlen_d50)
; CODE XREF from 0x00017838 (str.._s_s_s + 7)
0x0001783a .string "%%%02x" ; len=7
;-- str.src_ls.c:
; STRING XREF from 0x0000541b (sub.free_b04)
; STRING XREF from 0x0000543a (sub.__assert_fail_41f + 27)
; STRING XREF from 0x00005459 (sub.__assert_fail_41f + 58)
; STRING XREF from 0x00005f9e (sub._setjmp_e30)
; CODE XREF from 0x0001783f (str.02x + 5)
0x00017841 .string "src/ls.c" ; len=9
[0x0001783a]> axt
sub.strlen_d50 0x5de0 [STRING] lea rcx, str.02x
(nofunc) 0x17838 [CODE] jae str.02x
There are also some useful commands under axt. Use axtg to generate radare2 commands which will help you to create graphs according to the XREFs.
[0x08048320]> s main
[0x080483e0]> axtg
agn 0x8048337 "entry0 + 23"
agn 0x80483e0 "main"
age 0x8048337 0x80483e0
Use axt* to split the radare2 commands and set flags on those corresponding XREFs.
Also under ax is axg, which finds the path between two points in the file by showing an XREFs graph to reach the location or function. For example:
:> axg sym.imp.printf
- 0x08048a5c fcn 0x08048a5c sym.imp.printf
- 0x080483e5 fcn 0x080483e0 main
- 0x080483e0 fcn 0x080483e0 main
- 0x08048337 fcn 0x08048320 entry0
- 0x08048425 fcn 0x080483e0 main
Use axg* to generate radare2 commands which will help you to create graphs using agn and age commands, according to the XREFs.
Apart from predefined algorithms to identify functions there is a way to specify
a function prelude with a configuration option anal.prelude. For example, like
e anal.prelude = 0x554889e5 which means
push rbp
mov rbp, rsp
on x86_64 platform. It should be specified before any analysis commands.
Configuration
Radare2 allows to change the behavior of almost any analysis stages or commands. There are different kinds of the configuration options:
- Flow control
- Basic blocks control
- References control
- IO/Ranges
- Jump tables analysis control
- Platform/target specific options
Control flow configuration
Two most commonly used options for changing the behavior of control flow analysis in radare2 are
anal.hasnext and anal.jmp.after. The first one allows forcing radare2 to continue the analysis
after the end of the function, even if the next chunk of the code wasn't called anywhere, thus
analyzing all of the available functions. The latter one allows forcing radare2 to continue
the analysis even after unconditional jumps.
In addition to those we can also set anal.jmp.indir to follow the indirect jumps, continuing analysis;
anal.pushret to analyze push ...; ret sequence as a jump; anal.nopskip to skip the NOP
sequences at a function beginning.
For now, radare2 also allows you to change the maximum basic block size with anal.bb.maxsize option
. The default value just works in most use cases, but it's useful to increase that for example when
dealing with obfuscated code. Beware that some of basic blocks
control options may disappear in the future in favor of more automated ways to set those.
For some unusual binaries or targets, there is an option anal.in=? that will only analyze executable
regions by default, but you can force a different section or specify different boundaries. Radare2
doesn't try to analyze data sections as a code by default. But in some cases - malware, packed binaries,
binaries for embedded systems, it is often a case. Thus - this option.
Reference control
The most crucial options that change the analysis results drastically. Sometimes some can be disabled to save the time and memory when analyzing big binaries.
anal.jmp.ref- to allow references creation for unconditional jumpsanal.jmp.cref- same, but for conditional jumpsanal.datarefs- to follow the data references in codeanal.refstr- search for strings in data referencesanal.strings- search for strings and creating references
Note that strings references control is disabled by default because it increases the analysis time.
Analysis ranges
There are a few options for this:
anal.limits- enables the range limits for analysis operationsanal.from- starting address of the limit rangeanal.to- the corresponding end of the limit rangeanal.in- specify search boundaries for analysis. You can set it toio.maps,io.sections.exec,dbg.mapsand many more. For example:- To analyze a specific memory map with
anal.fromandanal.to, setanal.in = dbg.maps. - To analyze in the boundaries set by
anal.fromandanal.to, setanal.in=range. - To analyze in the current mapped segment or section, you can put
anal.in=bin.segmentoranal.in=bin.section, respectively. - To analyze in the current memory map, specify
anal.in=dbg.map. - To analyze in the stack or heap, you can set
anal.in=dbg.stackoranal.in=dbg.heap. - To analyze in the current function or basic block, you can specify
anal.in=anal.fcnoranal.in=anal.bb.
- To analyze a specific memory map with
Please see e anal.in=?? for the complete list.
Jump tables
Jump tables are one of the trickiest targets in binary reverse engineering. There are hundreds
of different types, the end result depending on the compiler/linker and LTO stages of optimization.
Thus radare2 allows enabling some experimental jump tables detection algorithms using anal.jmp.tbl
option. Eventually, algorithms moved into the default analysis loops once they start to work on
every supported platform/target/testcase.
Two more options can affect the jump tables analysis results too:
anal.jmp.indir- follow the indirect jumps, some jump tables rely on themanal.datarefs- follow the data references, some jump tables use those
Platform specific controls
There are two common problems when analyzing embedded targets: ARM/Thumb detection and MIPS GP
value. In case of ARM binaries radare2 supports some auto-detection of ARM/Thumb mode switches, but
beware that it uses partial ESIL emulation, thus slowing the analysis process. If you will not
like the results, particular functions' mode can be overridden with afB command.
The MIPS GP problem is even trickier. It is a basic knowledge that GP value can be different not only
for the whole program, but also for some functions. To partially solve that there are options
anal.gp and anal.gpfixed. The first one sets the GP value for the whole program or particular
function. The latter allows to "constantify" the GP value if some code is willing to change its
value, always resetting it if the case. Those are heavily experimental and might be changed in the
future in favor of more automated analysis.
Visuals
One of the easiest way to see and check the changes of the analysis commands and variables
is to perform a scrolling in a Vv special visual mode, allowing functions preview:
When we want to check how analysis changes affect the result in the case of big functions, we can
use minimap instead, allowing to see a bigger flow graph on the same screen size. To get into
the minimap mode type VV then press p twice:
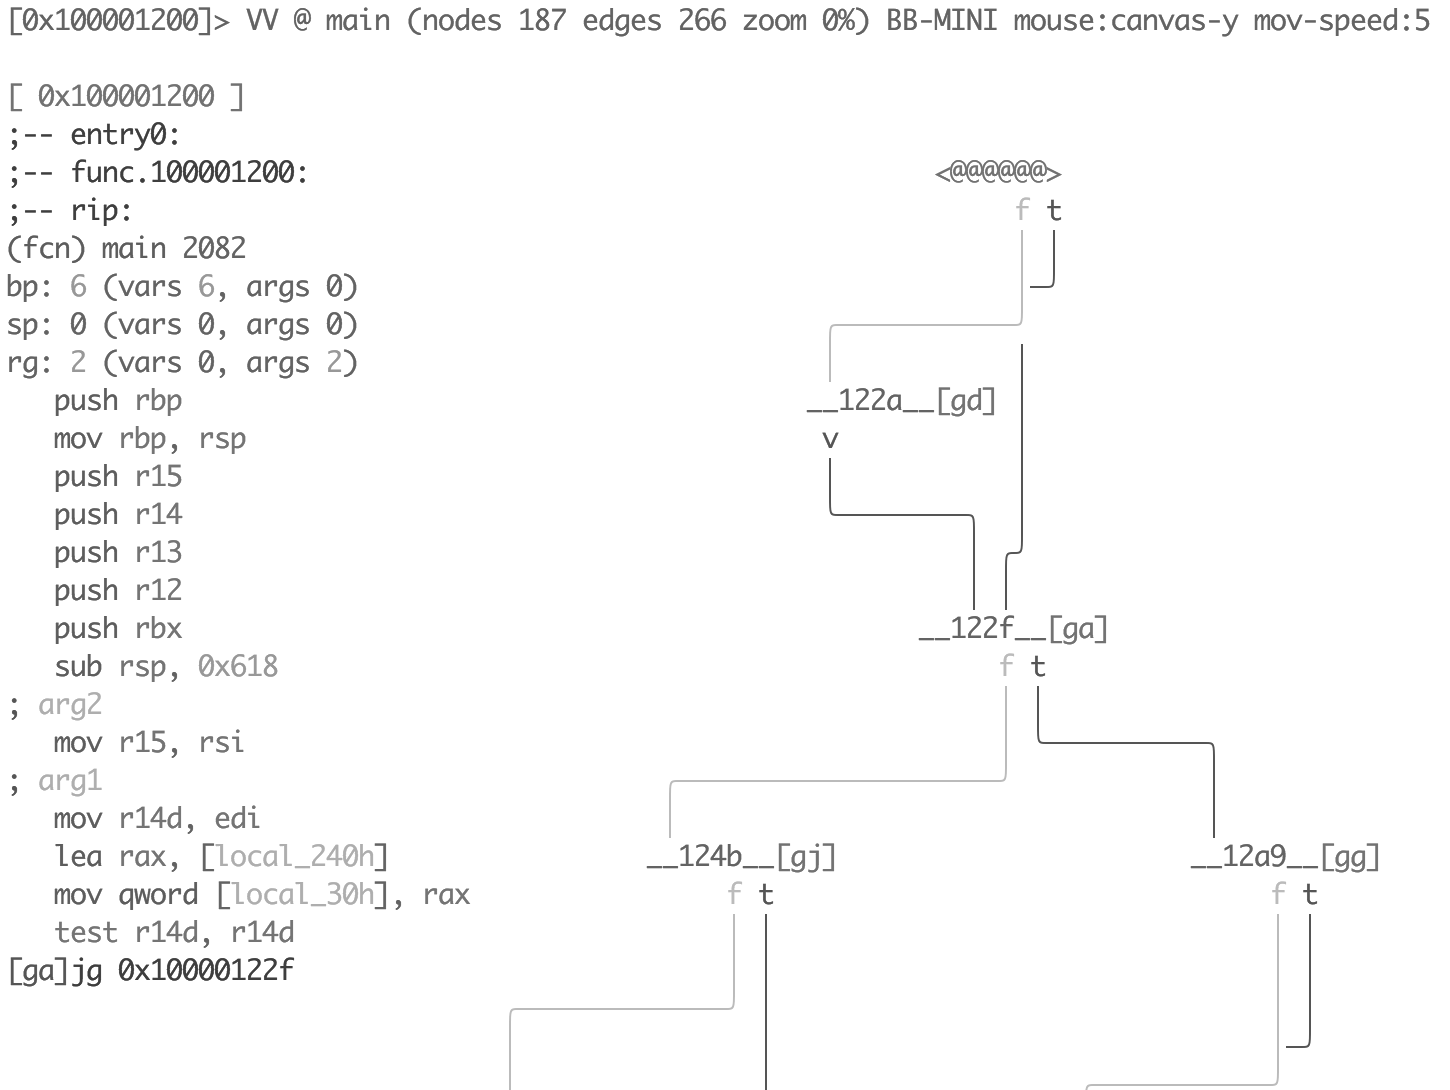
This mode allows you to see the disassembly of each node separately, just navigate between them using Tab key.
Analysis hints
It is not an uncommon case that analysis results are not perfect even after you tried every single
configuration option. This is where the "analysis hints" radare2 mechanism comes in. It allows
to override some basic opcode or meta-information properties, or even to rewrite the whole opcode
string. These commands are located under ah namespace:
Usage: ah[lba-] Analysis Hints
| ah? show this help
| ah? offset show hint of given offset
| ah list hints in human-readable format
| ah. list hints in human-readable format from current offset
| ah- remove all hints
| ah- offset [size] remove hints at given offset
| ah* offset list hints in radare commands format
| aha ppc @ 0x42 force arch ppc for all addrs >= 0x42 or until the next hint
| aha 0 @ 0x84 disable the effect of arch hints for all addrs >= 0x84 or until the next hint
| ahb 16 @ 0x42 force 16bit for all addrs >= 0x42 or until the next hint
| ahb 0 @ 0x84 disable the effect of bits hints for all addrs >= 0x84 or until the next hint
| ahc 0x804804 override call/jump address
| ahd foo a0,33 replace opcode string
| ahe 3,eax,+= set vm analysis string
| ahf 0x804840 override fallback address for call
| ahF 0x10 set stackframe size at current offset
| ahh 0x804840 highlight this address offset in disasm
| ahi[?] 10 define numeric base for immediates (2, 8, 10, 10u, 16, i, p, S, s)
| ahj list hints in JSON
| aho call change opcode type (see aho?) (deprecated, moved to "ahd")
| ahp addr set pointer hint
| ahr val set hint for return value of a function
| ahs 4 set opcode size=4
| ahS jz set asm.syntax=jz for this opcode
| aht [?] <type> Mark immediate as a type offset (deprecated, moved to "aho")
| ahv val change opcode's val field (useful to set jmptbl sizes in jmp rax)
One of the most common cases is to set a particular numeric base for immediates:
[0x00003d54]> ahi?
Usage: ahi [2|8|10|10u|16|bodhipSs] [@ offset] Define numeric base
| ahi <base> set numeric base (2, 8, 10, 16)
| ahi 10|d set base to signed decimal (10), sign bit should depend on receiver size
| ahi 10u|du set base to unsigned decimal (11)
| ahi b set base to binary (2)
| ahi o set base to octal (8)
| ahi h set base to hexadecimal (16)
| ahi i set base to IP address (32)
| ahi p set base to htons(port) (3)
| ahi S set base to syscall (80)
| ahi s set base to string (1)
[0x00003d54]> pd 2
0x00003d54 0583000000 add eax, 0x83
0x00003d59 3d13010000 cmp eax, 0x113
[0x00003d54]> ahi d
[0x00003d54]> pd 2
0x00003d54 0583000000 add eax, 131
0x00003d59 3d13010000 cmp eax, 0x113
[0x00003d54]> ahi b
[0x00003d54]> pd 2
0x00003d54 0583000000 add eax, 10000011b
0x00003d59 3d13010000 cmp eax, 0x113
It is notable that some analysis stages or commands add the internal analysis hints,
which can be checked with ah command:
[0x00003d54]> ah
0x00003d54 - 0x00003d54 => immbase=2
[0x00003d54]> ah*
ahi 2 @ 0x3d54
Sometimes we need to override jump or call address, for example in case of tricky
relocation, which is unknown for radare2, thus we can change the value manually.
The current analysis information about a particular opcode can be checked with ao command.
We can use ahc command for performing such a change:
[0x00003cee]> pd 2
0x00003cee e83d080100 call sub.__errno_location_530
0x00003cf3 85c0 test eax, eax
[0x00003cee]> ao
address: 0x3cee
opcode: call 0x14530
mnemonic: call
prefix: 0
id: 56
bytes: e83d080100
refptr: 0
size: 5
sign: false
type: call
cycles: 3
esil: 83248,rip,8,rsp,-=,rsp,=[],rip,=
jump: 0x00014530
direction: exec
fail: 0x00003cf3
stack: null
family: cpu
stackop: null
[0x00003cee]> ahc 0x5382
[0x00003cee]> pd 2
0x00003cee e83d080100 call sub.__errno_location_530
0x00003cf3 85c0 test eax, eax
[0x00003cee]> ao
address: 0x3cee
opcode: call 0x14530
mnemonic: call
prefix: 0
id: 56
bytes: e83d080100
refptr: 0
size: 5
sign: false
type: call
cycles: 3
esil: 83248,rip,8,rsp,-=,rsp,=[],rip,=
jump: 0x00005382
direction: exec
fail: 0x00003cf3
stack: null
family: cpu
stackop: null
[0x00003cee]> ah
0x00003cee - 0x00003cee => jump: 0x5382
As you can see, despite the unchanged disassembly view the jump address in opcode was changed
(jump option).
If anything of the previously described didn't help, you can simply override shown disassembly with anything you like:
[0x00003d54]> pd 2
0x00003d54 0583000000 add eax, 10000011b
0x00003d59 3d13010000 cmp eax, 0x113
[0x00003d54]> "ahd myopcode bla, foo"
[0x00003d54]> pd 2
0x00003d54 myopcode bla, foo
0x00003d55 830000 add dword [rax], 0
Managing variables
Radare2 allows managing local variables, no matter their location, stack or registers.
The variables' auto analysis is enabled by default but can be disabled with anal.vars
configuration option.
The main variables commands are located in afv namespace:
Usage: afv [rbs]
| afv* output r2 command to add args/locals to flagspace
| afv-([name]) remove all or given var
| afv= list function variables and arguments with disasm refs
| afva analyze function arguments/locals
| afvb[?] manipulate bp based arguments/locals
| afvd name output r2 command for displaying the value of args/locals in the debugger
| afvf show BP relative stackframe variables
| afvn [new_name] ([old_name]) rename argument/local
| afvr[?] manipulate register based arguments
| afvR [varname] list addresses where vars are accessed (READ)
| afvs[?] manipulate sp based arguments/locals
| afvt [name] [new_type] change type for given argument/local
| afvW [varname] list addresses where vars are accessed (WRITE)
| afvx show function variable xrefs (same as afvR+afvW)
afvr, afvb and afvs commands are uniform but allow manipulation of
register-based arguments and variables, BP/FP-based arguments and variables,
and SP-based arguments and variables respectively.
If we check the help for afvr we will get the way two others commands works too:
|Usage: afvr [reg] [type] [name]
| afvr list register based arguments
| afvr* same as afvr but in r2 commands
| afvr [reg] [name] ([type]) define register arguments
| afvrj return list of register arguments in JSON format
| afvr- [name] delete register arguments at the given index
| afvrg [reg] [addr] define argument get reference
| afvrs [reg] [addr] define argument set reference
Like many other things variables detection is performed by radare2 automatically, but results
can be changed with those arguments/variables control commands. This kind of analysis
relies heavily on preloaded function prototypes and the calling-convention, thus loading symbols
can improve it. Moreover, after changing something we can rerun variables analysis with
afva command. Quite often variables analysis is accompanied with
types analysis, see afta command.
The most important aspect of reverse engineering - naming things. Of course, you can rename
variable too, affecting all places it was referenced. This can be achieved with afvn for
any type of argument or variable. Or you can simply remove the variable or argument with
afv- command.
As mentioned before the analysis loop relies heavily on types information while performing
variables analysis stages. Thus comes next very important command - afvt, which
allows you to change the type of variable:
[0x00003b92]> afvs
var int local_8h @ rsp+0x8
var int local_10h @ rsp+0x10
var int local_28h @ rsp+0x28
var int local_30h @ rsp+0x30
var int local_32h @ rsp+0x32
var int local_38h @ rsp+0x38
var int local_45h @ rsp+0x45
var int local_46h @ rsp+0x46
var int local_47h @ rsp+0x47
var int local_48h @ rsp+0x48
[0x00003b92]> afvt local_10h char*
[0x00003b92]> afvs
var int local_8h @ rsp+0x8
var char* local_10h @ rsp+0x10
var int local_28h @ rsp+0x28
var int local_30h @ rsp+0x30
var int local_32h @ rsp+0x32
var int local_38h @ rsp+0x38
var int local_45h @ rsp+0x45
var int local_46h @ rsp+0x46
var int local_47h @ rsp+0x47
var int local_48h @ rsp+0x48
Less commonly used feature, which is still under heavy development - distinction between
variables being read and written. You can list those being read with afvR command and those
being written with afvW command. Both commands provide a list of the places those operations
are performed:
[0x00003b92]> afvR
local_48h 0x48ee
local_30h 0x3c93,0x520b,0x52ea,0x532c,0x5400,0x3cfb
local_10h 0x4b53,0x5225,0x53bd,0x50cc
local_8h 0x4d40,0x4d99,0x5221,0x53b9,0x50c8,0x4620
local_28h 0x503a,0x51d8,0x51fa,0x52d3,0x531b
local_38h
local_45h 0x50a1
local_47h
local_46h
local_32h 0x3cb1
[0x00003b92]> afvW
local_48h 0x3adf
local_30h 0x3d3e,0x4868,0x5030
local_10h 0x3d0e,0x5035
local_8h 0x3d13,0x4d39,0x5025
local_28h 0x4d00,0x52dc,0x53af,0x5060,0x507a,0x508b
local_38h 0x486d
local_45h 0x5014,0x5068
local_47h 0x501b
local_46h 0x5083
local_32h
[0x00003b92]>
Type inference
The type inference for local variables and arguments is well integrated with the command afta.
Let's see an example of this with a simple hello_world binary
[0x000007aa]> pdf
| ;-- main:
/ (fcn) sym.main 157
| sym.main ();
| ; var int local_20h @ rbp-0x20
| ; var int local_1ch @ rbp-0x1c
| ; var int local_18h @ rbp-0x18
| ; var int local_10h @ rbp-0x10
| ; var int local_8h @ rbp-0x8
| ; DATA XREF from entry0 (0x6bd)
| 0x000007aa push rbp
| 0x000007ab mov rbp, rsp
| 0x000007ae sub rsp, 0x20
| 0x000007b2 lea rax, str.Hello ; 0x8d4 ; "Hello"
| 0x000007b9 mov qword [local_18h], rax
| 0x000007bd lea rax, str.r2_folks ; 0x8da ; " r2-folks"
| 0x000007c4 mov qword [local_10h], rax
| 0x000007c8 mov rax, qword [local_18h]
| 0x000007cc mov rdi, rax
| 0x000007cf call sym.imp.strlen ; size_t strlen(const char *s)
- After applying
afta
[0x000007aa]> afta
[0x000007aa]> pdf
| ;-- main:
| ;-- rip:
/ (fcn) sym.main 157
| sym.main ();
| ; var size_t local_20h @ rbp-0x20
| ; var size_t size @ rbp-0x1c
| ; var char *src @ rbp-0x18
| ; var char *s2 @ rbp-0x10
| ; var char *dest @ rbp-0x8
| ; DATA XREF from entry0 (0x6bd)
| 0x000007aa push rbp
| 0x000007ab mov rbp, rsp
| 0x000007ae sub rsp, 0x20
| 0x000007b2 lea rax, str.Hello ; 0x8d4 ; "Hello"
| 0x000007b9 mov qword [src], rax
| 0x000007bd lea rax, str.r2_folks ; 0x8da ; " r2-folks"
| 0x000007c4 mov qword [s2], rax
| 0x000007c8 mov rax, qword [src]
| 0x000007cc mov rdi, rax ; const char *s
| 0x000007cf call sym.imp.strlen ; size_t strlen(const char *s)
It also extracts type information from format strings like printf ("fmt : %s , %u , %d", ...), the format specifications are extracted from anal/d/spec.sdb
You could create a new profile for specifying a set of format chars depending on different libraries/operating systems/programming languages like this :
win=spec
spec.win.u32=unsigned int
Then change your default specification to newly created one using this config variable e anal.spec = win
For more information about primitive and user-defined types support in radare2 refer to types chapter.
Types
Radare2 supports the C-syntax data types description.
Those types are parsed by a C11-compatible parser and stored in
the internal SDB, thus are introspectable with k command.
Most of the related commands are located in t namespace:
[0x00000000]> t?
| Usage: t # cparse types commands
| t List all loaded types
| tj List all loaded types as json
| t <type> Show type in 'pf' syntax
| t* List types info in r2 commands
| t- <name> Delete types by its name
| t-* Remove all types
| tail [filename] Output the last part of files
| tc [type.name] List all/given types in C output format
| te[?] List all loaded enums
| td[?] <string> Load types from string
| tf List all loaded functions signatures
| tk <sdb-query> Perform sdb query
| tl[?] Show/Link type to an address
| tn[?] [-][addr] manage noreturn function attributes and marks
| to - Open cfg.editor to load types
| to <path> Load types from C header file
| toe [type.name] Open cfg.editor to edit types
| tos <path> Load types from parsed Sdb database
| tp <type> [addr|varname] cast data at <address> to <type> and print it (XXX: type can contain spaces)
| tpv <type> @ [value] Show offset formatted for given type
| tpx <type> <hexpairs> Show value for type with specified byte sequence (XXX: type can contain spaces)
| ts[?] Print loaded struct types
| tu[?] Print loaded union types
| tx[f?] Type xrefs
| tt[?] List all loaded typedefs
Note that the basic (atomic) types are not those from C standard -
not char, _Bool, or short. Because those types can be different
from one platform to another, radare2 uses definite types like as
int8_t or uint64_t and will convert int to int32_t or int64_t
depending on the binary or debuggee platform/compiler.
Basic types can be listed using t command. For the structured types
you need to use ts, for unions use tu and for enums — te.
[0x00000000]> t
char
char *
double
float
gid_t
int
int16_t
int32_t
int64_t
int8_t
long
long long
pid_t
short
size_t
uid_t
uint16_t
uint32_t
uint64_t
uint8_t
unsigned char
unsigned int
unsigned short
void *
Loading types
There are three easy ways to define a new type:
- Directly from the string using
tdcommand - From the file using
to <filename>command - Open an
$EDITORto type the definitions in place usingto -
[0x00000000]> "td struct foo {char* a; int b;}"
[0x00000000]> cat ~/radare2-regressions/bins/headers/s3.h
struct S1 {
int x[3];
int y[4];
int z;
};
[0x00000000]> to ~/radare2-regressions/bins/headers/s3.h
[0x00000000]> ts
foo
S1
Also note there is a config option to specify include directories for types parsing
[0x00000000]> e? dir.types
dir.types: Default path to look for cparse type files
[0x00000000]> e dir.types
/usr/include
Printing types
Notice below we have used ts command, which basically converts
the C type description (or to be precise it's SDB representation)
into the sequence of pf commands. See more about print format.
The tp command uses the pf string to print all the members of type at the current offset/given address:
[0x00000000]> "td struct foo {char* a; int b;}"
[0x00000000]> wx 68656c6c6f000c000000
[0x00000000]> wz world @ 0x00000010 ; wx 17 @ 0x00000016
[0x00000000]> px
[0x00000000]> ts foo
pf zd a b
[0x00000000]> tp foo
a : 0x00000000 = "hello"
b : 0x00000006 = 12
[0x00000000]> tp foo @ 0x00000010
a : 0x00000010 = "world"
b : 0x00000016 = 23
Also, you could fill your own data into the struct and print it using tpx command
[0x00000000]> tpx foo 414243440010000000
a : 0x00000000 = "ABCD"
b : 0x00000005 = 16
Linking Types
The tp command just performs a temporary cast. But if we want to link some address or variable
with the chosen type, we can use tl command to store the relationship in SDB.
[0x000051c0]> tl S1 = 0x51cf
[0x000051c0]> tll
(S1)
x : 0x000051cf = [ 2315619660, 1207959810, 34803085 ]
y : 0x000051db = [ 2370306049, 4293315645, 3860201471, 4093649307 ]
z : 0x000051eb = 4464399
Moreover, the link will be shown in the disassembly output or visual mode:
[0x000051c0 15% 300 /bin/ls]> pd $r @ entry0
;-- entry0:
0x000051c0 xor ebp, ebp
0x000051c2 mov r9, rdx
0x000051c5 pop rsi
0x000051c6 mov rdx, rsp
0x000051c9 and rsp, 0xfffffffffffffff0
0x000051cd push rax
0x000051ce push rsp
(S1)
x : 0x000051cf = [ 2315619660, 1207959810, 34803085 ]
y : 0x000051db = [ 2370306049, 4293315645, 3860201471, 4093649307 ]
z : 0x000051eb = 4464399
0x000051f0 lea rdi, loc._edata ; 0x21f248
0x000051f7 push rbp
0x000051f8 lea rax, loc._edata ; 0x21f248
0x000051ff cmp rax, rdi
0x00005202 mov rbp, rsp
Once the struct is linked, radare2 tries to propagate structure offset in the function at current offset, to run this analysis on whole program or at any targeted functions after all structs are linked you have aat command:
[0x00000000]> aa?
| aat [fcn] Analyze all/given function to convert immediate to linked structure offsets (see tl?)
Note sometimes the emulation may not be accurate, for example as below :
|0x000006da push rbp
|0x000006db mov rbp, rsp
|0x000006de sub rsp, 0x10
|0x000006e2 mov edi, 0x20 ; "@"
|0x000006e7 call sym.imp.malloc ; void *malloc(size_t size)
|0x000006ec mov qword [local_8h], rax
|0x000006f0 mov rax, qword [local_8h]
The return value of malloc may differ between two emulations, so you have to set the hint for return value manually using ahr command, so run tl or aat command after setting up the return value hint.
[0x000006da]> ah?
| ahr val set hint for return value of a function
Structure Immediates
There is one more important aspect of using types in radare2 - using aht you
can change the immediate in the opcode to the structure offset.
Lets see a simple example of [R]SI-relative addressing
[0x000052f0]> pd 1
0x000052f0 mov rax, qword [rsi + 8] ; [0x8:8]=0
Here 8 - is some offset in the memory, where rsi probably holds
some structure pointer. Imagine that we have the following structures
[0x000052f0]> "td struct ms { char b[8]; int member1; int member2; };"
[0x000052f0]> "td struct ms1 { uint64_t a; int member1; };"
[0x000052f0]> "td struct ms2 { uint16_t a; int64_t b; int member1; };"
Now we need to set the proper structure member offset instead of 8 in this instruction.
At first, we need to list available types matching this offset:
[0x000052f0]> ahts 8
ms.member1
ms1.member1
Note, that ms2 is not listed, because it has no members with offset 8.
After listing available options we can link it to the chosen offset at
the current address:
[0x000052f0]> aht ms1.member1
[0x000052f0]> pd 1
0x000052f0 488b4608 mov rax, qword [rsi + ms1.member1] ; [0x8:8]=0
Managing enums
- Printing all fields in enum using
tecommand
[0x00000000]> "td enum Foo {COW=1,BAR=2};"
[0x00000000]> te Foo
COW = 0x1
BAR = 0x2
- Finding matching enum member for given bitfield and vice-versa
[0x00000000]> te Foo 0x1
COW
[0x00000000]> teb Foo COW
0x1
Internal representation
To see the internal representation of the types you can use tk command:
[0x000051c0]> tk~S1
S1=struct
struct.S1=x,y,z
struct.S1.x=int32_t,0,3
struct.S1.x.meta=4
struct.S1.y=int32_t,12,4
struct.S1.y.meta=4
struct.S1.z=int32_t,28,0
struct.S1.z.meta=0
[0x000051c0]>
Defining primitive types requires an understanding of basic pf formats,
you can find the whole list of format specifier in pf??:
-----------------------------------------------------
| format | explanation |
|---------------------------------------------------|
| b | byte (unsigned) |
| c | char (signed byte) |
| d | 0x%%08x hexadecimal value (4 bytes) |
| f | float value (4 bytes) |
| i | %%i integer value (4 bytes) |
| o | 0x%%08o octal value (4 byte) |
| p | pointer reference (2, 4 or 8 bytes) |
| q | quadword (8 bytes) |
| s | 32bit pointer to string (4 bytes) |
| S | 64bit pointer to string (8 bytes) |
| t | UNIX timestamp (4 bytes) |
| T | show Ten first bytes of buffer |
| u | uleb128 (variable length) |
| w | word (2 bytes unsigned short in hex) |
| x | 0x%%08x hex value and flag (fd @ addr) |
| X | show formatted hexpairs |
| z | \0 terminated string |
| Z | \0 terminated wide string |
-----------------------------------------------------
there are basically 3 mandatory keys for defining basic data types:
X=type
type.X=format_specifier
type.X.size=size_in_bits
For example, let's define UNIT, according to Microsoft documentation
UINT is just equivalent of standard C unsigned int (or uint32_t in terms of TCC engine).
It will be defined as:
UINT=type
type.UINT=d
type.UINT.size=32
Now there is an optional entry:
X.type.pointto=Y
This one may only be used in case of pointer type.X=p, one good example is LPFILETIME definition,
it is a pointer to _FILETIME which happens to be a structure.
Assuming that we are targeting only 32-bit windows machine, it will be defined as the following:
LPFILETIME=type
type.LPFILETIME=p
type.LPFILETIME.size=32
type.LPFILETIME.pointto=_FILETIME
This last field is not mandatory because sometimes the data structure internals will be proprietary, and we will not have a clean representation for it.
There is also one more optional entry:
type.UINT.meta=4
This entry is for integration with C parser and carries the type class information: integer size, signed/unsigned, etc.
Structures
Those are the basic keys for structs (with just two elements):
X=struct
struct.X=a,b
struct.X.a=a_type,a_offset,a_number_of_elements
struct.X.b=b_type,b_offset,b_number_of_elements
The first line is used to define a structure called X, the second line
defines the elements of X as comma separated values. After that, we just define each element info.
For example. we can have a struct like this one:
struct _FILETIME {
DWORD dwLowDateTime;
DWORD dwHighDateTime;
}
assuming we have DWORD defined, the struct will look like this
_FILETIME=struct
struct._FILETIME=dwLowDateTime,dwHighDateTime
struct._FILETIME.dwLowDateTime=DWORD,0,0
struct._FILETIME.dwHighDateTime=DWORD,4,0
Note that the number of elements field is used in case of arrays only to identify how many elements are in arrays, other than that it is zero by default.
Unions
Unions are defined exactly like structs the only difference is that you will replace the word struct with the word union.
Function prototypes
Function prototypes representation is the most detail oriented and the most important one of them all. Actually, this is the one used directly for type matching
X=func
func.X.args=NumberOfArgs
func.x.arg0=Arg_type,arg_name
.
.
.
func.X.ret=Return_type
func.X.cc=calling_convention
It should be self-explanatory. Let's do strncasecmp as an example for x86 arch for Linux machines. According to man pages, strncasecmp is defined as the following:
int strcasecmp(const char *s1, const char *s2, size_t n);
When converting it into its sdb representation it will look like the following:
strcasecmp=func
func.strcasecmp.args=3
func.strcasecmp.arg0=char *,s1
func.strcasecmp.arg1=char *,s2
func.strcasecmp.arg2=size_t,n
func.strcasecmp.ret=int
func.strcasecmp.cc=cdecl
Note that the .cc part is optional and if it didn't exist the default calling-convention for your target architecture will be used instead.
There is one extra optional key
func.x.noreturn=true/false
This key is used to mark functions that will not return once called, such as exit and _exit.
Calling Conventions
Radare2 uses calling conventions to help in identifying function formal arguments and return types. It is used also as a guide for basic function prototype and type propagation.
[0x00000000]> afc?
|Usage: afc[agl?]
| afc convention Manually set calling convention for current function
| afc Show Calling convention for the Current function
| afc=([cctype]) Select or show default calling convention
| afcr[j] Show register usage for the current function
| afca Analyse function for finding the current calling convention
| afcf[j] [name] Prints return type function(arg1, arg2...), see afij
| afck List SDB details of call loaded calling conventions
| afcl List all available calling conventions
| afco path Open Calling Convention sdb profile from given path
| afcR Register telescoping using the calling conventions order
[0x00000000]>
- To list all available calling conventions for current architecture using
afclcommand
[0x00000000]> afcl
amd64
ms
- To display function prototype of standard library functions you have
afcfcommand
[0x00000000]> afcf printf
int printf(const char *format)
[0x00000000]> afcf fgets
char *fgets(char *s, int size, FILE *stream)
All this information is loaded via sdb under /libr/anal/d/cc-[arch]-[bits].sdb
default.cc=amd64
ms=cc
cc.ms.name=ms
cc.ms.arg1=rcx
cc.ms.arg2=rdx
cc.ms.arg3=r8
cc.ms.arg3=r9
cc.ms.argn=stack
cc.ms.ret=rax
cc.x.argi=rax is used to set the ith argument of this calling convention to register name rax
cc.x.argn=stack means that all the arguments (or the rest of them in case there was argi for any i as counting number) will be stored in stack from left to right
cc.x.argn=stack_rev same as cc.x.argn=stack except for it means argument are passed right to left
Virtual Tables
There is a basic support of virtual tables parsing (RTTI and others).
The most important thing before you start to perform such kind of analysis
is to check if the anal.cpp.abi option is set correctly, and change if needed.
All commands to work with virtual tables are located in the av namespace.
Currently, the support is very basic, allowing you only to inspect
parsed tables.
|Usage: av[?jr*] C++ vtables and RTTI
| av search for vtables in data sections and show results
| avj like av, but as json
| av* like av, but as r2 commands
| avr[j@addr] try to parse RTTI at vtable addr (see anal.cpp.abi)
| avra[j] search for vtables and try to parse RTTI at each of them
The main commands here are av and avr. av lists all virtual tables
found when r2 opened the file. If you are not happy with the result
you may want to try to parse virtual table at a particular address with
avr command. avra performs the search and parsing of all virtual
tables in the binary, like r2 does during the file opening.
Syscalls
Radare2 allows manual search for assembly code looking like a syscall operation.
For example on ARM platform usually they are represented by the svc instruction,
on the others can be a different instructions, e.g. syscall on x86 PC.
[0x0001ece0]> /ad/ svc
...
0x000187c2 # 2: svc 0x76
0x000189ea # 2: svc 0xa9
0x00018a0e # 2: svc 0x82
...
Syscalls detection is driven by asm.os, asm.bits, and asm.arch. Be sure
to setup those configuration options accordingly. You can use asl command
to check if syscalls' support is set up properly and as you expect.
The command lists syscalls supported for your platform.
[0x0001ece0]> asl
...
sd_softdevice_enable = 0x80.16
sd_softdevice_disable = 0x80.17
sd_softdevice_is_enabled = 0x80.18
...
If you setup ESIL stack with aei or aeim, you can use /as command to search
the addresses where particular syscalls were found and list them.
[0x0001ece0]> aei
[0x0001ece0]> /as
0x000187c2 sd_ble_gap_disconnect
0x000189ea sd_ble_gatts_sys_attr_set
0x00018a0e sd_ble_gap_sec_info_reply
...
To reduce searching time it is possible to restrict the searching range for only executable segments or sections with /as @e:search.in=io.maps.x
Using the ESIL emulation radare2 can print syscall arguments in the disassembly output. To enable the linear (but very rough) emulation use asm.emu configuration variable:
[0x0001ece0]> e asm.emu=true
[0x0001ece0]> s 0x000187c2
[0x000187c2]> pdf~svc
0x000187c2 svc 0x76 ; 118 = sd_ble_gap_disconnect
[0x000187c2]>
In case of executing aae (or aaaa which calls aae) command radare2 will push found syscalls to a special syscall. flagspace, which can be useful for automation purpose:
[0x000187c2]> fs
0 0 * imports
1 0 * symbols
2 1523 * functions
3 420 * strings
4 183 * syscalls
[0x000187c2]> f~syscall
...
0x000187c2 1 syscall.sd_ble_gap_disconnect.0
0x000189ea 1 syscall.sd_ble_gatts_sys_attr_set
0x00018a0e 1 syscall.sd_ble_gap_sec_info_reply
...
It also can be interactively navigated through within HUD mode (V_)
0> syscall.sd_ble_gap_disconnect
- 0x000187b2 syscall.sd_ble_gap_disconnect
0x000187c2 syscall.sd_ble_gap_disconnect.0
0x00018a16 syscall.sd_ble_gap_disconnect.1
0x00018b32 syscall.sd_ble_gap_disconnect.2
0x0002ac36 syscall.sd_ble_gap_disconnect.3
When debugging in radare2, you can use dcs to continue execution until the next syscall. You can also run dcs* to trace all syscalls.
[0xf7fb9120]> dcs*
Running child until syscalls:-1
child stopped with signal 133
--> SN 0xf7fd3d5b syscall 45 brk (0xffffffda)
child stopped with signal 133
--> SN 0xf7fd28f3 syscall 384 arch_prctl (0xffffffda 0x3001)
child stopped with signal 133
--> SN 0xf7fc81b2 syscall 33 access (0xffffffda 0xf7fd8bf1)
child stopped with signal 133
radare2 also has a syscall name to syscall number utility. You can return the syscall name of a given syscall number or vice versa, without leaving the shell.
[0x08048436]> asl 1
exit
[0x08048436]> asl write
4
[0x08048436]> ask write
0x80,4,3,iZi
See as? for more information about the utility.
Signatures
Radare2 has its own format of the signatures, allowing to both load/apply and
create them on the fly. They are available under the z command namespace:
[0x00000000]> z?
Usage: z[*j-aof/cs] [args] # Manage zignatures
| z show zignatures
| z. find matching zignatures in current offset
| zb[?][n=5] search for best match
| z* show zignatures in radare format
| zq show zignatures in quiet mode
| zj show zignatures in json format
| zk show zignatures in sdb format
| z-zignature delete zignature
| z-* delete all zignatures
| za[?] add zignature
| zg generate zignatures (alias for zaF)
| zo[?] manage zignature files
| zf[?] manage FLIRT signatures
| z/[?] search zignatures
| zc[?] compare current zignspace zignatures with another one
| zs[?] manage zignspaces
| zi show zignatures matching information
To load the created signature file you need to load it from SDB file using zo command or
from the compressed SDB file using zoz command.
To create signature you need to make function first, then you can create it from the function:
$ r2 /bin/ls
[0x000051c0]> aaa # this creates functions, including 'entry0'
[0x000051c0]> zaf entry0 entry
[0x000051c0]> z
entry:
bytes: 31ed4989d15e4889e24883e4f050544c............48............48............ff..........f4
graph: cc=1 nbbs=1 edges=0 ebbs=1
offset: 0x000051c0
[0x000051c0]>
As you can see it made a new signature with a name entry from a function entry0.
You can show it in JSON format too, which can be useful for scripting:
[0x000051c0]> zj~{}
[
{
"name": "entry",
"bytes": "31ed4989d15e4889e24883e4f050544c............48............48............ff..........f4",
"graph": {
"cc": "1",
"nbbs": "1",
"edges": "0",
"ebbs": "1"
},
"offset": 20928,
"refs": [
]
}
]
[0x000051c0]>
To remove it just run z-entry.
If you want, instead, to save all created signatures, you need to save it into the SDB file using command zos myentry.
Then we can apply them. Lets open a file again:
$ r2 /bin/ls
-- Log On. Hack In. Go Anywhere. Get Everything.
[0x000051c0]> zo myentry
[0x000051c0]> z
entry:
bytes: 31ed4989d15e4889e24883e4f050544c............48............48............ff..........f4
graph: cc=1 nbbs=1 edges=0 ebbs=1
offset: 0x000051c0
[0x000051c0]>
This means that the signatures were successfully loaded from the file myentry and now we can
search matching functions:
[0x000051c0]> z.
[+] searching 0x000051c0 - 0x000052c0
[+] searching function metrics
hits: 1
[0x000051c0]>
Note that z. command just checks the signatures against the current address.
To search signatures across the all file we need to do a bit different thing.
There is an important moment though, if we just run it "as is" - it wont find anything:
[0x000051c0]> z/
[+] searching 0x0021dfd0 - 0x002203e8
[+] searching function metrics
hits: 0
[0x000051c0]>
Note the searching address - this is because we need to adjust the searching range first:
[0x000051c0]> e search.in=io.section
[0x000051c0]> z/
[+] searching 0x000038b0 - 0x00015898
[+] searching function metrics
hits: 1
[0x000051c0]>
We are setting the search mode to io.section (it was file by default) to search in the current
section (assuming we are currently in the .text section of course).
Now we can check, what radare2 found for us:
[0x000051c0]> pd 5
;-- entry0:
;-- sign.bytes.entry_0:
0x000051c0 31ed xor ebp, ebp
0x000051c2 4989d1 mov r9, rdx
0x000051c5 5e pop rsi
0x000051c6 4889e2 mov rdx, rsp
0x000051c9 4883e4f0 and rsp, 0xfffffffffffffff0
[0x000051c0]>
Here we can see the comment of entry0, which is taken from the ELF parsing, but also the
sign.bytes.entry_0, which is exactly the result of matching signature.
Signatures configuration stored in the zign. config vars' namespace:
[0x000051c0]> e? zign.
zign.autoload: Autoload all zignatures located in ~/.local/share/radare2/zigns
zign.bytes: Use bytes patterns for matching
zign.diff.bthresh: Threshold for diffing zign bytes [0, 1] (see zc?)
zign.diff.gthresh: Threshold for diffing zign graphs [0, 1] (see zc?)
zign.graph: Use graph metrics for matching
zign.hash: Use Hash for matching
zign.maxsz: Maximum zignature length
zign.mincc: Minimum cyclomatic complexity for matching
zign.minsz: Minimum zignature length for matching
zign.offset: Use original offset for matching
zign.prefix: Default prefix for zignatures matches
zign.refs: Use references for matching
zign.threshold: Minimum similarity required for inclusion in zb output
zign.types: Use types for matching
[0x000051c0]>
Finding Best Matches zb
Often you know the signature should exist somewhere in a binary but z/ and
z. still fail. This is often due to very minor differences between the
signature and the function. Maybe the compiler switched two instructions, or
your signature is not for the correct function version. In these situations the
zb commands can still help point you in the right direction by listing near
matches.
[0x000040a0]> zb?
Usage: zb[r?] [args] # search for closest matching signatures
| zb [n] find n closest matching zignatures to function at current offset
| zbr zigname [n] search for n most similar functions to zigname
The zb (zign best) command will show the top 5 closest signatures to a
function. Each will contain a score between 1.0 and 0.0.
[0x0041e390]> s sym.fclose
[0x0040fc10]> zb
0.96032 0.92400 B 0.99664 G sym.fclose
0.65971 0.35600 B 0.96342 G sym._nl_expand_alias
0.65770 0.37800 B 0.93740 G sym.fdopen
0.65112 0.35000 B 0.95225 G sym.__run_exit_handlers
0.62532 0.34800 B 0.90264 G sym.__cxa_finalize
In the above example, zb correctly associated the sym.fclose signature to
the current function. The z/ and z. command would have failed to match here
since both the Byte and Graph scores are less then 1.0. A 30% separation
between the first and second place results is also a good indication of a
correct match.
The zbr (zign best reverse) accepts a zignature name and attempts to find the
closet matching functions. Use an analysis command, like aa to find functions
first.
[0x00401b20]> aa
[x] Analyze all flags starting with sym. and entry0 (aa)
[0x00401b20]> zo ./libc.sdb
[0x00401b20]> zbr sym.__libc_malloc 10
0.94873 0.89800 B 0.99946 G sym.malloc
0.65245 0.40600 B 0.89891 G sym._mid_memalign
0.59470 0.38600 B 0.80341 G sym._IO_flush_all_lockp
0.59200 0.28200 B 0.90201 G sym._IO_file_underflow
0.57802 0.30400 B 0.85204 G sym.__libc_realloc
0.57094 0.35200 B 0.78988 G sym.__calloc
0.56785 0.34000 B 0.79570 G sym._IO_un_link.part.0
0.56358 0.36200 B 0.76516 G sym._IO_cleanup
0.56064 0.26000 B 0.86127 G sym.intel_check_word.constprop.0
0.55726 0.28400 B 0.83051 G sym.linear_search_fdes
Graph
Understanding the structure and flow of a program is crucial. While linear disassembly and text-based analysis have their place, graphs provide a powerful visual representation that can significantly enhance your understanding of complex code.
Radare2's graph capabilities offer a multifaceted approach to visualizing various aspects of a program's code structures:
-
Control Flow Graphs (CFG): Visualize the logical flow between basic blocks within a function, making it easier to identify loops, conditional branches, and execution paths.
-
Call Graphs: Map out the relationships between functions, showing which functions call others and how data potentially flows between them.
-
String Reference Graphs: Illustrate where and how strings are used throughout the program, often providing valuable insights into the program's functionality.
These graphical representations serve multiple purposes:
- Quickly identify complex structures and patterns that might be missed in text-based analysis.
- Facilitate easier navigation through large codebases.
- Aid in understanding the overall architecture and design of the program.
- Assist in locating potential vulnerabilities or points of interest for further investigation.
In the following sections, we'll explore the various graph commands available in radare2, demonstrating how to generate, navigate, and interpret these visual aids to supercharge your reverse engineering workflow.
Let's dive into the world of radare2 graphs and unlock new dimensions in your analysis!
Commands
Radare2 supports various types of graph available through commands starting with ag:
[0x00005000]> ag?
Usage: ag<graphtype><format> [addr]
Graph commands:
| aga[format] data references graph
| agA[format] global data references graph
| agc[format] function callgraph
| agC[format] global callgraph
| agd[format] [fcn addr] diff graph
| agf[format] basic blocks function graph
| agi[format] imports graph
| agr[format] references graph
| agR[format] global references graph
| agx[format] cross references graph
| agg[format] custom graph
| agt[format] tree map graph
| ag- clear the custom graph
| agn[?] title body add a node to the custom graph
| age[?] title1 title2 add an edge to the custom graph
Output formats:
| <blank> ascii art
| * r2 commands
| b braile art rendering (agfb)
| d graphviz dot
| g graph Modelling Language (gml)
| j json ('J' for formatted disassembly)
| k sdb key-value
| m mermaid
| t tiny ascii art
| v interactive ascii art
| w [path] write to path or display graph image (see graph.gv.format)
Graph Output Formats
The structure of the commands is as follows: ag <graph type> <output format>.
For example, agid displays the imports graph in dot format, while aggj
outputs the custom graph in JSON format.
Here's a short description for every output format available:
Ascii Art
Command: agf
Displays the graph directly to stdout using ASCII art to represent blocks and edges.
Warning: displaying large graphs directly to stdout might prove to be computationally expensive and will make r2 not responsive for some time. In case of doubt, prefer using the interactive view (explained below).
Interactive Ascii Art
Command: agfv
Displays the ASCII graph in an interactive view similar to VV which allows to move the screen, zoom in or out, ...
Tiny Ascii Art
Command: agft
Displays the ASCII graph directly to stdout in tiny mode (which is the same as reaching the maximum zoom out level in the interactive view).
Graphviz dot
Command: agfd
Prints the dot source code representing the graph, which can be interpreted by programs such as graphviz or online viewers like this
JSON
Command: agfj
Prints a JSON string representing the graph.
-
In case of the
fformat (basic blocks of function), it will have detailed information about the function and will also contain the disassembly of the function (useJformat for the formatted disassembly). -
In all other cases, it will only have basic information about the nodes of the graph (id, title, body, and edges).
Graph Modelling Language
Command: agfg
Prints the GML source code representing the graph, which can be interpreted by programs such as yEd
SDB key-value
Command: agfk
Prints key-value strings representing the graph that was stored by sdb (radare2's string database).
Mermaid
Command: agfm
Prints a Mermaid diagram representing the graph, which can be embedded and rendered directly in markdown environments that support Mermaid, such as GitHub, mkdocs or web-based viewers.
Create your own graph
Commands: agn and age for nodes and edges, agg to render
Prints r2 commands that recreate the desired graph. The commands to construct the graph are agn [title] [body] to add a node and age [title1] [title2] to add an edge.
The [body] field can be expressed in base64 to include special formatting (such as newlines).
To easily execute the printed commands, it is possible to prepend a dot to the command (.agf*).
This is a sample r2 script to create a graph using commands:
[0x00000000]> e scr.utf8=0
[0x00000000]> agn foo
[0x00000000]> agn bar
[0x00000000]> agn cow
[0x00000000]> age foo bar
[0x00000000]> age foo cow
[0x00000000]> agg
.--------------------.
| foo |
`--------------------'
t f
| |
.--------------' |
| '--------.
| |
.--------------------. .--------------------.
| bar | | cow |
`--------------------' `--------------------'
[0x00000000]>
Web / image
Command: agfw
Radare2 will convert the graph to dot format, use the dot program to convert it to a .gif image and then try to find an already installed viewer on your system (xdg-open, open, ...) and display the graph there.
The output image extension can be set with the graph.extension config variable. Available extensions are png, jpg, gif, pdf, ps.
Note: for particularly large graphs, the most recommended extension is svg as it will produce images of much smaller size
If graph.web config variable is enabled, radare2 will try to display the graph using the browser (this feature is experimental and unfinished, and
disabled by default.)
Emulation
Understanding the distinction between static analysis and dynamic analysis is crucial in reverse engineering. radare2 uses two different kind of instruction information to perform static analysis:
- OpType, Instruction Family plus other static details
- ESIL expression associated
Radare2 employs its own intermediate language and virtual machine, known as ESIL, for partial emulation (or imprecise full emulation).
Radare2's ESIL supports partial emulation across all platforms by evaluating those expressions.
Use Cases
There are many use cases for ESIL in radare2, not just bare code emulation:
- Resolve indirect branches
- Determine the likelity of a branch
- Search memory addresses matching complex nested conditionals
- Find out computed pointer references (
aaeor/re) - Execution of a function portion
- Simulate behaviour of syscalls and imports
- r2wars (let's play!)
To view the ESIL representation of your program, use the ao~esil command or enable the asm.esil configuration variable. This will let you verify how the code is uplifted from assembly to ESIL and understand better how that works internally.
[0x00001660]> pdf
. (fcn) fcn.00001660 40
| fcn.00001660 ();
| ; CALL XREF from 0x00001713 (entry2.fini)
| 0x00001660 lea rdi, obj.__progname ; 0x207220
| 0x00001667 push rbp
| 0x00001668 lea rax, obj.__progname ; 0x207220
| 0x0000166f cmp rax, rdi
| 0x00001672 mov rbp, rsp
| .-< 0x00001675 je 0x1690
| | 0x00001677 mov rax, qword [reloc._ITM_deregisterTMCloneTable] ; [0x206fd8:8]=0
| | 0x0000167e test rax, rax
|.--< 0x00001681 je 0x1690
||| 0x00001683 pop rbp
||| 0x00001684 jmp rax
|``-> 0x00001690 pop rbp
` 0x00001691 ret
[0x00001660]> e asm.esil=true
[0x00001660]> pdf
. (fcn) fcn.00001660 40
| fcn.00001660 ();
| ; CALL XREF from 0x00001713 (entry2.fini)
| 0x00001660 0x205bb9,rip,+,rdi,=
| 0x00001667 rbp,8,rsp,-=,rsp,=[8]
| 0x00001668 0x205bb1,rip,+,rax,=
| 0x0000166f rdi,rax,==,$z,zf,=,$b64,cf,=,$p,pf,=,$s,sf,=,$o,of,=
| 0x00001672 rsp,rbp,=
| .-< 0x00001675 zf,?{,5776,rip,=,}
| | 0x00001677 0x20595a,rip,+,[8],rax,=
| | 0x0000167e 0,rax,rax,&,==,$z,zf,=,$p,pf,=,$s,sf,=,$0,cf,=,$0,of,=
|.--< 0x00001681 zf,?{,5776,rip,=,}
||| 0x00001683 rsp,[8],rbp,=,8,rsp,+=
||| 0x00001684 rax,rip,=
|``-> 0x00001690 rsp,[8],rbp,=,8,rsp,+=
` 0x00001691 rsp,[8],rip,=,8,rsp,+=
Commands
To manually set up imprecise ESIL emulation, run the following sequence of commands:
aeito initialize the ESIL VMaeimto initialize ESIL VM memory (stack)aeipto set the initial ESIL VM IP (instruction pointer)- a sequence of
aercommands to set the initial register values.
While performing emulation, please remember that the ESIL VM cannot emulate external calls system calls, nor SIMD instructions. Thus, the most common scenario is to emulate only a small chunk of code like encryption, decryption, unpacking, or a calculation.
After successfully setting up the ESIL VM, we can interact with it like a normal debugging session. The command interface for the ESIL VM is almost identical to the debugging interface:
aesto step (orskey in visual mode)aesito step over function callsaesu <address>to step until some specified addressaesue <ESIL expression>to step until some specified ESIL expression is metaecto continue until break (Ctrl-C). This one is rarely used due to the omnipresence of external calls
In visual mode, all of the debugging hotkeys will also work in ESIL emulation mode.
In addition to normal emulation, it's also possible to record and replay sessions:
aetsto list all current ESIL R&R sessionsaets+to create a new oneaesbto step back in the current ESIL R&R session
You can read more about this operation mode in the Reverse Debugging chapter.
Options
The emulation can be triggered at analysis, runtime or at will with full manual control, in other words, the user can decide what and how to use ESIL.
To change some of the behaviours of the emulation engine in radare2 you can use the following options:
[0x00000000]> e??esil.
- esil.addr.size: maximum address size in accessed by the ESIL VM
- esil.breakoninvalid: break esil execution when instruction is invalid
- esil.dfg.mapinfo: use mapinfo for esil dfg
- esil.dfg.maps: set ro maps for esil dfg
- esil.exectrap: trap when executing code in non-executable memory
- esil.fillstack: initialize ESIL stack with (random, debruijn, sequence, zeros, ...)
- esil.gotolimit: maximum number of gotos per ESIL expression
- esil.iotrap: invalid read or writes produce a trap exception
- esil.maxsteps: If !=0 defines the maximum amount of steps to perform on aesu/aec/..
- esil.mdev.range: specify a range of memory to be handled by cmd.esil.mdev
- esil.nonull: prevent memory read, memory write at null pointer
- esil.prestep: step before esil evaluation in
decommands - esil.romem: set memory as read-only for ESIL
- esil.stack.addr: set stack address in ESIL VM
- esil.stack.depth: number of elements that can be pushed on the esilstack
- esil.stack.pattern: specify fill pattern to initialize the stack (0, w, d, i)
- esil.stack.size: set stack size in ESIL VM
- esil.stats: statistics from ESIL emulation stored in sdb
- esil.timeout: a timeout (in seconds) for when we should give up emulating
- esil.verbose: show ESIL verbose level (0, 1, 2)
Problems
There are several situations where emulation will not work as expected or solve your problems. It is important to understand those situations to avoid undesired surprises and know how to workaround them.
- Path explossion (too many execution or unknown paths to follow)
- Incorrect stack size or contents (aeim)
- Thread local storage (custom segments or memory layouts) not defined
- Unimplemented instructions (Use ahe to set analysis hints)
- Undefined behaviour (analy
- Custom Ops (requires esil plugins)
- Don't go into Syscall / Imports implementations
Introduction to ESIL
ESIL stands for 'Evaluable Strings Intermediate Language'. It aims to describe a Forth-like representation for every target CPU opcode semantics. ESIL representations can be evaluated (interpreted) in order to emulate individual instructions. Each command of an ESIL expression is separated by a comma. Its virtual machine can be described as this:
while ((word=haveCommand())) {
if (word.isOperator()) {
esilOperators[word](esil);
} else {
esil.push (word);
}
nextCommand();
}
As we can see ESIL uses a stack-based interpreter similar to what is commonly used for calculators. You have two categories of inputs: values and operators. A value simply gets pushed on the stack, an operator then pops values (its arguments if you will) off the stack, performs its operation and pushes its results (if any) back on. We can think of ESIL as a post-fix notation of the operations we want to do.
So let's see an example:
4,esp,-=,ebp,esp,=[4]
Can you guess what this is? If we take this post-fix notation and transform it back to in-fix we get
esp -= 4
4bytes(dword) [esp] = ebp
We can see that this corresponds to the x86 instruction push ebp! Isn't that cool?
The aim is to be able to express most of the common operations performed by CPUs, like binary arithmetic operations, memory loads and stores, processing syscalls. This way if we can transform the instructions to ESIL we can see what a program does while it is running even for the most cryptic architectures you definitely don't have a device to debug on for.
Using ESIL
r2's visual mode is great to inspect the ESIL evaluations.
There are 3 environment variables that are important for watching what a program does:
[0x00000000]> e emu.str = true
asm.emu tells r2 if you want ESIL information to be displayed. If it is set to true, you will see comments appear to the right of your disassembly that tell you how the contents of registers and memory addresses are changed by the current instruction. For example, if you have an instruction that subtracts a value from a register it tells you what the value was before and what it becomes after. This is super useful so you don't have to sit there yourself and track which value goes where.
One problem with this is that it is a lot of information to take in at once and sometimes you simply don't need it. r2 has a nice compromise for this. That is what the emu.str variable is for (asm.emustr on <= 2.2). Instead of this super verbose output with every register value, this only adds really useful information to the output, e.g., strings that are found at addresses a program uses or whether a jump is likely to be taken or not.
The third important variable is asm.esil. This switches your disassembly to no longer show you the actual disassembled instructions, but instead now shows you corresponding ESIL expressions that describe what the instruction does.
So if you want to take a look at how instructions are expressed in ESIL simply set "asm.esil" to true.
[0x00000000]> e asm.esil = true
In visual mode you can also toggle this by simply typing O.
ESIL Commands
- "ae" : Evaluate ESIL expression.
[0x00000000]> "ae 1,1,+"
0x2
[0x00000000]>
- "aes" : ESIL Step.
[0x00000000]> aes
[0x00000000]>10aes
- "aeso" : ESIL Step Over.
[0x00000000]> aeso
[0x00000000]>10aeso
- "aesu" : ESIL Step Until.
[0x00001000]> aesu 0x1035
ADDR BREAK
[0x00001019]>
- "ar" : Show/modify ESIL registry.
[0x00001ec7]> ar r_00 = 0x1035
[0x00001ec7]> ar r_00
0x00001035
[0x00001019]>
ESIL Instruction Set
Here is the complete instruction set used by the ESIL VM:
| ESIL Opcode | Operands | Name | Operation | example |
|---|---|---|---|---|
| TRAP | src | Trap | Trap signal | |
| $ | src | Interrupt | interrupt | 0x80,$ |
| () | src | Syscall | syscall | rax,() |
| $$ | src | Instruction address | Get address of current instruction stack=instruction address | |
| == | src,dst | Compare | stack = (dst == src) ; update_eflags(dst - src) | |
| < | src,dst | Smaller (signed comparison) | stack = (dst < src) ; update_eflags(dst - src) | [0x0000000]> "ae 1,5,<" 0x0 > "ae 5,5" 0x0" |
| <= | src,dst | Smaller or Equal (signed comparison) | stack = (dst <= src) ; update_eflags(dst - src) | [0x0000000]> "ae 1,5,<" 0x0 > "ae 5,5" 0x1" |
| > | src,dst | Bigger (signed comparison) | stack = (dst > src) ; update_eflags(dst - src) | > "ae 1,5,>" 0x1 > "ae 5,5,>" 0x0 |
| >= | src,dst | Bigger or Equal (signed comparison) | stack = (dst >= src) ; update_eflags(dst - src) | > "ae 1,5,>=" 0x1 > "ae 5,5,>=" 0x1 |
| << | src,dst | Shift Left | stack = dst << src | > "ae 1,1,<<" 0x2 > "ae 2,1,<<" 0x4 |
| >> | src,dst | Shift Right | stack = dst >> src | > "ae 1,4,>>" 0x2 > "ae 2,4,>>" 0x1 |
| <<< | src,dst | Rotate Left | stack=dst ROL src | > "ae 31,1,<<<" 0x80000000 > "ae 32,1,<<<" 0x1 |
| >>> | src,dst | Rotate Right | stack=dst ROR src | > "ae 1,1,>>>" 0x80000000 > "ae 32,1,>>>" 0x1 |
| & | src,dst | AND | stack = dst & src | > "ae 1,1,&" 0x1 > "ae 1,0,&" 0x0 > "ae 0,1,&" 0x0 > "ae 0,0,&" 0x0 |
| | | src,dst | OR | stack = dst | src | > "ae 1,1,|" 0x1 > "ae 1,0,|" 0x1 > "ae 0,1,|" 0x1 > "ae 0,0,|" 0x0 |
| ^ | src,dst | XOR | stack = dst ^src | > "ae 1,1,^" 0x0 > "ae 1,0,^" 0x1 > "ae 0,1,^" 0x1 > "ae 0,0,^" 0x0 |
| + | src,dst | ADD | stack = dst + src | > "ae 3,4,+" 0x7 > "ae 5,5,+" 0xa |
| - | src,dst | SUB | stack = dst - src | > "ae 3,4,-" 0x1 > "ae 5,5,-" 0x0 > "ae 4,3,-" 0xffffffffffffffff |
| * | src,dst | MUL | stack = dst * src | > "ae 3,4,*" 0xc > "ae 5,5,*" 0x19 |
| / | src,dst | DIV | stack = dst / src | > "ae 2,4,/" 0x2 > "ae 5,5,/" 0x1 > "ae 5,9,/" 0x1 |
| % | src,dst | MOD | stack = dst % src | > "ae 2,4,%" 0x0 > "ae 5,5,%" 0x0 > "ae 5,9,%" 0x4 |
| ~ | bits,src | SIGNEXT | stack = src sign extended | > "ae 8,0x80,~" 0xffffffffffffff80 |
| ~/ | src,dst | SIGNED DIV | stack = dst / src (signed) | > "ae 2,-4,~/" 0xfffffffffffffffe |
| ~% | src,dst | SIGNED MOD | stack = dst % src (signed) | > "ae 2,-5,~%" 0xffffffffffffffff |
| ! | src | NEG | stack = !!!src | > "ae 1,!" 0x0 > "ae 4,!" 0x0 > "ae 0,!" 0x1 |
| ++ | src | INC | stack = src++ | > ar r_00=0;ar r_00 0x00000000 > "ae r_00,++" 0x1 > ar r_00 0x00000000 > "ae 1,++" 0x2 |
| -- | src | DEC | stack = src-- | > ar r_00=5;ar r_00 0x00000005 > "ae r_00,--" 0x4 > ar r_00 0x00000005 > "ae 5,--" 0x4 |
| = | src,reg | EQU | reg = src | > "ae 3,r_00,=" > aer r_00 0x00000003 > "ae r_00,r_01,=" > aer r_01 0x00000003 |
| := | src,reg | weak EQU | reg = src without side effects | > "ae 3,r_00,:=" > aer r_00 0x00000003 > "ae r_00,r_01,:=" > aer r_01 0x00000003 |
| += | src,reg | ADD eq | reg = reg + src | > ar r_01=5;ar r_00=0;ar r_00 0x00000000 > "ae r_01,r_00,+=" > ar r_00 0x00000005 > "ae 5,r_00,+=" > ar r_00 0x0000000a |
| -= | src,reg | SUB eq | reg = reg - src | > "ae r_01,r_00,-=" > ar r_00 0x00000004 > "ae 3,r_00,-=" > ar r_00 0x00000001 |
| *= | src,reg | MUL eq | reg = reg * src | > ar r_01=3;ar r_00=5;ar r_00 0x00000005 > "ae r_01,r_00,*=" > ar r_00 0x0000000f > "ae 2,r_00,*=" > ar r_00 0x0000001e |
| /= | src,reg | DIV eq | reg = reg / src | > ar r_01=3;ar r_00=6;ar r_00 0x00000006 > "ae r_01,r_00,/=" > ar r_00 0x00000002 > "ae 1,r_00,/=" > ar r_00 0x00000002 |
| %= | src,reg | MOD eq | reg = reg % src | > ar r_01=3;ar r_00=7;ar r_00 0x00000007 > "ae r_01,r_00,%=" > ar r_00 0x00000001 > ar r_00=9;ar r_00 0x00000009 > "ae 5,r_00,%=" > ar r_00 0x00000004 |
| <<= | src,reg | Shift Left eq | reg = reg << src | > ar r_00=1;ar r_01=1;ar r_01 0x00000001 > "ae r_00,r_01,<<=" > ar r_01 0x00000002 > "ae 2,r_01,<<=" > ar r_01 0x00000008 |
| >>= | src,reg | Shift Right eq | reg = reg << src | > ar r_00=1;ar r_01=8;ar r_01 0x00000008 > "ae r_00,r_01,>>=" > ar r_01 0x00000004 > "ae 2,r_01,>>=" > ar r_01 0x00000001 |
| &= | src,reg | AND eq | reg = reg & src | > ar r_00=2;ar r_01=6;ar r_01 0x00000006 > "ae r_00,r_01,&=" > ar r_01 0x00000002 > "ae 2,r_01,&=" > ar r_01 0x00000002 > "ae 1,r_01,&=" > ar r_01 0x00000000 |
| |= | src,reg | OR eq | reg = reg | src | > ar r_00=2;ar r_01=1;ar r_01 0x00000001 > "ae r_00,r_01,|=" > ar r_01 0x00000003 > "ae 4,r_01,|=" > ar r_01 0x00000007 |
| ^= | src,reg | XOR eq | reg = reg ^ src | > ar r_00=2;ar r_01=0xab;ar r_01 0x000000ab > "ae r_00,r_01,^=" > ar r_01 0x000000a9 > "ae 2,r_01,^=" > ar r_01 0x000000ab |
| ++= | reg | INC eq | reg = reg + 1 | > ar r_00=4;ar r_00 0x00000004 > "ae r_00,++=" > ar r_00 0x00000005 |
| --= | reg | DEC eq | reg = reg - 1 | > ar r_00=4;ar r_00 0x00000004 > "ae r_00,--=" > ar r_00 0x00000003 |
| != | reg | NOT eq | reg = !reg | > ar r_00=4;ar r_00 0x00000004 > "ae r_00,!=" > ar r_00 0x00000000 > "ae r_00,!=" > ar r_00 0x00000001 |
| --- | --- | --- | --- | ---------------------------------------------- |
| =[] =[*] =[1] =[2] =[4] =[8] | src,dst | poke | *dst=src | > "ae 0xdeadbeef,0x10000,=[4]," > pxw 4@0x10000 0x00010000 0xdeadbeef .... > "ae 0x0,0x10000,=[4]," > pxw 4@0x10000 0x00010000 0x00000000 |
| [] [*] [1] [2] [4] [8] | src | peek | stack=*src | > w test@0x10000 > "ae 0x10000,[4]," 0x74736574 > ar r_00=0x10000 > "ae r_00,[4]," 0x74736574 |
| |=[] |=[1] |=[2] |=[4] |=[8] | reg | name | code | > > |
| SWAP | Swap | Swap two top elements | SWAP | |
| DUP | Duplicate | Duplicate top element in stack | DUP | |
| NUM | Numeric | If top element is a reference (register name, label, etc), dereference it and push its real value | NUM | |
| CLEAR | Clear | Clear stack | CLEAR | |
| BREAK | Break | Stops ESIL emulation | BREAK | |
| GOTO | n | Goto | Jumps to Nth ESIL word | GOTO 5 |
| TODO | To Do | Stops execution (reason: ESIL expression not completed) | TODO |
ESIL Flags
ESIL VM provides by default a set of helper operations for calculating flags.
They fulfill their purpose by comparing the old and the new value of the dst operand of the last performed eq-operation.
On every eq-operation (e.g. =) ESIL saves the old and new value of the dst operand.
Note, that there also exist weak eq operations (e.g. :=), which do not affect flag operations.
The == operation affects flag operations, despite not being an eq operation.
Flag operations are prefixed with $ character.
z - zero flag, only set if the result of an operation is 0
b - borrow, this requires to specify from which bit (example: 4,$b - checks if borrow from bit 4)
c - carry, same like above (example: 7,$c - checks if carry from bit 7)
o - overflow
p - parity
r - regsize ( asm.bits/8 )
s - sign
ds - delay slot state
jt - jump target
js - jump target set
Syntax and Commands
A target opcode is translated into a comma separated list of ESIL expressions.
xor eax, eax -> 0,eax,=,1,zf,=
Memory access is defined by brackets operation:
mov eax, [0x80480] -> 0x80480,[],eax,=
Default operand size is determined by size of operation destination.
movb $0, 0x80480 -> 0,0x80480,=[1]
The ? operator uses the value of its argument to decide whether to evaluate the expression in curly braces.
- Is the value zero? -> Skip it.
- Is the value non-zero? -> Evaluate it.
cmp eax, 123 -> 123,eax,==,$z,zf,=
jz eax -> zf,?{,eax,eip,=,}
If you want to run several expressions under a conditional, put them in curly braces:
zf,?{,eip,esp,=[],eax,eip,=,$r,esp,-=,}
Whitespaces, newlines and other chars are ignored. So the first thing when processing a ESIL program is to remove spaces:
esil = r_str_replace (esil, " ", "", R_TRUE);
Syscalls need special treatment. They are indicated by '$' at the beginning of an expression. You can pass an optional numeric value to specify a number of syscall. An ESIL emulator must handle syscalls. See (r_esil_syscall).
Arguments Order for Non-associative Operations
As discussed on IRC, the current implementation works like this:
a,b,- b - a
a,b,/= b /= a
This approach is more readable, but it is less stack-friendly.
Special Instructions
NOPs are represented as empty strings. As it was said previously, interrupts are marked by '$' command. For example, '0x80,$'. It delegates emulation from the ESIL machine to a callback which implements interrupt handler for a specific OS/kernel/platform.
Traps are implemented with the TRAP command. They are used to throw exceptions for invalid instructions, division by zero, memory read error, or any other needed by specific architectures.
Quick Analysis
Here is a list of some quick checks to retrieve information from an ESIL string. Relevant information will be probably found in the first expression of the list.
indexOf('[') -> have memory references
indexOf("=[") -> write in memory
indexOf("pc,=") -> modifies program counter (branch, jump, call)
indexOf("sp,=") -> modifies the stack (what if we found sp+= or sp-=?)
indexOf("=") -> retrieve src and dst
indexOf(":") -> unknown esil, raw opcode ahead
indexOf("$") -> accesses internal esil vm flags ex: $z
indexOf("$") -> syscall ex: 1,$
indexOf("TRAP") -> can trap
indexOf('++') -> has iterator
indexOf('--') -> count to zero
indexOf("?{") -> conditional
equalsTo("") -> empty string, aka nop (wrong, if we append pc+=x)
Common operations:
- Check dstreg
- Check srcreg
- Get destinaion
- Is jump
- Is conditional
- Evaluate
- Is syscall
CPU Flags
CPU flags are usually defined as single bit registers in the RReg profile. They are sometimes found under the 'flg' register type.
Variables
Properties of the VM variables:
-
They have no predefined bit width. This way it should be easy to extend them to 128, 256 and 512 bits later, e.g. for MMX, SSE, AVX, Neon SIMD.
-
There can be unbound number of variables. It is done for SSA-form compatibility.
-
Register names have no specific syntax. They are just strings.
-
Numbers can be specified in any base supported by RNum (dec, hex, oct, binary ...).
-
Each ESIL backend should have an associated RReg profile to describe the ESIL register specs.
Bit Arrays
What to do with them? What about bit arithmetics if use variables instead of registers?
Arithmetics
- ADD ("+")
- MUL ("*")
- SUB ("-")
- DIV ("/")
- MOD ("%")
Bit Arithmetics
- AND "&"
- OR "|"
- XOR "^"
- SHL "<<"
- SHR ">>"
- ROL "<<<"
- ROR ">>>"
- NEG "!"
Floating Point Unit Support
At the moment of this writing, ESIL does not yet support FPU. But you can implement support for unsupported instructions using r2pipe. Eventually we will get proper support for multimedia and floating point.
Handling x86 REP Prefix in ESIL
ESIL specifies that the parsing control-flow commands must be uppercase. Bear in mind that some architectures have uppercase register names. The corresponding register profile should take care not to reuse any of the following:
3,SKIP - skip N instructions. used to make relative forward GOTOs
3,GOTO - goto instruction 3
LOOP - alias for 0,GOTO
BREAK - stop evaluating the expression
STACK - dump stack contents to screen
CLEAR - clear stack
Usage Example
rep cmpsb
cx,!,?{,BREAK,},esi,[1],edi,[1],==,?{,BREAK,},esi,++,edi,++,cx,--,0,GOTO
Unimplemented/Unhandled Instructions
Those are expressed with the 'TODO' command. They act as a 'BREAK', but displays a warning message describing that an instruction is not implemented and will not be emulated. For example:
fmulp ST(1), ST(0) => TODO,fmulp ST(1),ST(0)
ESIL Disassembly Example
[0x1000010f8]> e asm.esil=true
[0x1000010f8]> pd $r @ entry0
0x1000010f8 55 8,rsp,-=,rbp,rsp,=[8]
0x1000010f9 4889e5 rsp,rbp,=
0x1000010fc 4883c768 104,rdi,+=
0x100001100 4883c668 104,rsi,+=
0x100001104 5d rsp,[8],rbp,=,8,rsp,+=
0x100001105 e950350000 0x465a,rip,= ;[1]
0x10000110a 55 8,rsp,-=,rbp,rsp,=[8]
0x10000110b 4889e5 rsp,rbp,=
0x10000110e 488d4668 rsi,104,+,rax,=
0x100001112 488d7768 rdi,104,+,rsi,=
0x100001116 4889c7 rax,rdi,=
0x100001119 5d rsp,[8],rbp,=,8,rsp,+=
0x10000111a e93b350000 0x465a,rip,= ;[1]
0x10000111f 55 8,rsp,-=,rbp,rsp,=[8]
0x100001120 4889e5 rsp,rbp,=
0x100001123 488b4f60 rdi,96,+,[8],rcx,=
0x100001127 4c8b4130 rcx,48,+,[8],r8,=
0x10000112b 488b5660 rsi,96,+,[8],rdx,=
0x10000112f b801000000 1,eax,=
0x100001134 4c394230 rdx,48,+,[8],r8,==,cz,?=
0x100001138 7f1a sf,of,!,^,zf,!,&,?{,0x1154,rip,=,} ;[2]
0x10000113a 7d07 of,!,sf,^,?{,0x1143,rip,} ;[3]
0x10000113c b8ffffffff 0xffffffff,eax,= ; 0xffffffff
0x100001141 eb11 0x1154,rip,= ;[2]
0x100001143 488b4938 rcx,56,+,[8],rcx,=
0x100001147 48394a38 rdx,56,+,[8],rcx,==,cz,?=
Introspection
To ease ESIL parsing we should have a way to express introspection expressions to extract the data that we want. For example, we may want to get the target address of a jump. The parser for ESIL expressions should offer an API to make it possible to extract information by analyzing the expressions easily.
> ao~esil,opcode
opcode: jmp 0x10000465a
esil: 0x10000465a,rip,=
We need a way to retrieve the numeric value of 'rip'. This is a very simple example, but there are more complex, like conditional ones. We need expressions to be able to get:
- opcode type
- destination of a jump
- condition depends on
- all regs modified (write)
- all regs accessed (read)
API HOOKS
It is important for emulation to be able to setup hooks in the parser, so we can extend it to implement analysis without having to change it again and again. That is, every time an operation is about to be executed, a user hook is called. It can be used for example to determine if RIP is going to change, or if the instruction updates the stack.
Later, we can split that callback into several ones to have an event-based analysis API that may be extended in JavaScript like this:
esil.on('regset', function(){..
esil.on('syscall', function(){esil.regset('rip'
For the API, see the functions hook_flag_read(), hook_execute() and hook_mem_read(). A callback should return true or 1 if you want to override the action that it takes. For example, to deny memory reads in a region, or voiding memory writes, effectively making it read-only.
Return false or 0 if you want to trace ESIL expression parsing.
Other operations require bindings to external functionalities to work. In this case, r_ref and r_io. This must be defined when initializing the ESIL VM.
-
Io Get/Set
Out ax, 44 44,ax,:ou -
Selectors (cs,ds,gs...)
Mov eax, ds:[ebp+8] Ebp,8,+,:ds,eax,=
ESIL Pins
ESIL pins are a powerful feature in radare2 that let you hook into the ESIL (Evaluable Strings Intermediate Language) emulation process. Instead of executing the standard ESIL expressions at specific addresses, you can run custom radare2 commands. This is particularly useful for implementing complex behaviors that ESIL alone can't handle, such as simulating system calls, logging execution, or faking function returns.
When the ESIL virtual machine reaches a pinned address, it executes the associated commands instead of the original ESIL code. Pins are essentially named hooks tied to memory addresses.
Configuration
The cmd.esil.pin configuration variable defines the default command that runs whenever any pin is triggered. For example, setting it to ?e will echo the pin name when hit. Individual pins can override this default with their own commands.
The commands executed can change the value of any register, memory state or even execute system programs.
To set a pin, use the aep command followed by the pin name and address:
$ r2 -a arm -b64 -
[0x00000000]> e cmd.esil.pin=?e im a pin
[0x00000000]> aep mypin=?e my pin
[0x00000000]> aep mypin @ 0
[0x00000000]> aep fallback @ 4
[0x00000000]> aes
my pin
[0x00000000]> aes
im a pin
[0x00000000]>
Note that the first step over the address 0 prints "my pin" because the pin name have a command associated, the second step at address 4 prints 'im a pin' because ther'es no esil pin named "fallback" so it runs the command defined in the cmd.esil.pin variable.
Soft and Hard Pins
ESIL pins can be categorized into soft and hard pins based on their naming prefix and execution context.
Soft Pins
Soft pins are prefixed with soft. (e.g., soft.ret0). They are designed for use during disassembly and analysis, particularly in asm.emu mode, where they provide inline annotations and hints in the disassembly listing. Soft pins execute during disassembly loops to enhance readability without affecting the emulation state.
In the radare2 source code (libr/anal/pin.c), soft pins are explicitly skipped during ESIL emulation stepping to prevent interference with the simulation process.
Hard Pins
Hard pins do not have the soft. prefix (e.g., ret0, memcpy). They are executed during full ESIL emulation, such as when using the aes command. Hard pins can modify registers, memory, or execution flow, making them suitable for simulating complex behaviors like system calls or function returns.
The distinction ensures that soft pins offer disassembly-time annotations without emulation interference, while hard pins enable dynamic simulation during stepping.
Default ESIL Pins
radare2 comes with several built-in pins for common operations:
[0x00000000]> aep
"aep ret0=dr R0=0;aexa ret"
"aep memcpy=wf `dr?A1` `dr?A2` @ `dr?A0`;aexa ret"
"aep strlen=dr R0=`pszl@r:A0`;aexa ret"
"aep puts=psz@r:A0; aexa ret"
[0x00000000]>
These provide basic implementations for return values, memory copying, string length calculation, and printing.
Practical Examples
Let's explore some real-world scenarios where ESIL pins shine.
Simulating Function Returns
Suppose you're emulating a function that should return 0. Instead of letting ESIL handle the return logic, you can pin a command to set the return value and continue emulation:
[0x00000000]> aep ret0=dr R0=0;aexa ret
This pin sets register R0 to 0 and continues execution after the return.
Memory Operations
For functions like memcpy, you might want to simulate the memory copy without executing the actual ESIL:
[0x00000000]> aep memcpy=wf `dr?A1` `dr?A2` @ `dr?A0`;aexa ret
This writes data from one location to another and then returns.
String Operations
Pins can help with string functions. For strlen, calculate the string length and set the return value:
[0x00000000]> aep strlen=dr R0=`pszl@r:A0`;aexa ret
For puts, print the string and return:
[0x00000000]> aep puts=psz@r:A0; aexa ret
Logging Traces in Emulation
Use pins to log when certain addresses are reached:
[0x00000000]> aep log=?e Reached interesting function at $$
This will print a message whenever the pin is hit, showing the current program counter.
Conditional Execution
You can create pins that only trigger under certain conditions by combining with ESIL expressions or r2 commands.
Managing Pins
To list all pins:
[0x00000000]> aep
To remove a specific pin:
[0x00000000]> aep- 0x1000
Or remove all pins:
[0x00000000]> aep-*
Check if there's a pin at the current address:
[0x00000000]> aep.
Pins appear in disassembly as [aep: name], making it easy to spot where they've been set.
ESIL Traps
ESIL traps are a mechanism in radare2 to handle exceptional conditions during symbolic execution and emulation. They simulate hardware exceptions, software interrupts, and error conditions that can occur when evaluating ESIL expressions. Traps allow you to detect and respond to issues like invalid memory accesses, division by zero, or execution in non-executable regions, enhancing the robustness of your analysis and emulation workflows.
When a trap is triggered, ESIL can execute custom commands, log events, or halt execution, providing valuable feedback for debugging, security analysis, and automated testing.
Configuration
ESIL traps are controlled through several configuration variables that determine when traps are enabled and what happens when they occur:
esil.iotrap: Enables traps for invalid I/O operations, such as reading or writing to unmapped memory.esil.exectrap: Enables traps for execution attempts in non-executable memory regions.esil.traprevert: When set, reverts the entire ESIL expression on trap instead of just the program counter.cmd.esil.trap: Defines the command to execute when a trap is triggered. For example,?e trap detectedwill print a message with trap details.
These settings allow fine-tuned control over trap behavior, letting you focus on specific types of errors or automate responses.
Trap Types
radare2 defines several trap types, each representing a different kind of exceptional condition:
R_ANAL_TRAP_NONE(0): No trap condition.R_ANAL_TRAP_UNHANDLED(1): Unhandled interrupt or exception.R_ANAL_TRAP_BREAKPOINT(2): Simulated breakpoint, often triggered by the$$operation.R_ANAL_TRAP_DIVBYZERO(3): Division by zero in mathematical operations.R_ANAL_TRAP_WRITE_ERR(4): Attempt to write to invalid memory.R_ANAL_TRAP_READ_ERR(5): Attempt to read from invalid memory or alignment error.R_ANAL_TRAP_EXEC_ERR(6): Execution in non-executable memory.R_ANAL_TRAP_INVALID(7): Invalid instruction or operation.R_ANAL_TRAP_UNALIGNED(8): Unaligned memory access.R_ANAL_TRAP_TODO(9): Unimplemented operation.R_ANAL_TRAP_HALT(10): Execution halt.
Each trap type provides specific information about the error, helping you diagnose issues in emulated code.
Trigger Mechanisms
Traps can be triggered in several ways:
- Explicit TRAP operation: The
TRAPESIL opcode pops the trap type and code from the stack, sets the trap state, and invokes the handler. - Hardware simulation: The
$$operation simulates interrupts, commonly used for breakpoints (with code 3). - Automatic detection: ESIL automatically detects conditions like invalid memory accesses (when
iotrapis enabled), execution in non-executable regions (whenexectrapis enabled), division by zero, unaligned accesses, and malformed instructions.
These mechanisms ensure comprehensive coverage of potential runtime errors during emulation.
Handler Execution
When a trap occurs, the following sequence takes place:
- The trap type and associated code are stored in the ESIL state.
- If
cmd.esil.trapis configured, the specified command is executed, receiving the trap type and code as arguments. - Depending on the configuration and trap type, emulation may continue, halt, or revert.
- Logs are generated for debugging purposes, providing insights into the trap event.
This process allows for flexible responses, from simple logging to complex state modifications.
Usage in radare2
ESIL traps are invaluable across various radare2 workflows:
Debugging and Analysis
Traps help identify problematic code paths. Enable I/O traps to catch memory violations or execution traps to prevent emulation in data regions. This is particularly useful for reverse engineering binaries with anti-analysis protections.
Automation and Scripting
Configure cmd.esil.trap to run custom radare2 commands on traps, such as saving state, modifying registers, or triggering external scripts. This enables automated fuzzing and symbolic execution workflows.
Security Analysis
Traps assist in exploit detection by identifying attempts to execute code in non-executable memory, invalid memory accesses, or other exploitable conditions. They enhance vulnerability hunting and ROP chain validation.
Practical Examples
Here are some common scenarios demonstrating ESIL traps in action:
Basic Trap Configuration
Set up a trap handler to print trap information:
[0x00000000]> e cmd.esil.trap=?e trap type %d code %d
[0x00000000]> ae 2,1,TRAP
trap type 1 code 2
Enabling Memory Protection
Enable traps for invalid I/O operations:
[0x00000000]> e esil.iotrap=true
[0x00000000]> e cmd.esil.trap=?e memory violation detected
Simulating Breakpoints
Use the $$ operation to simulate a hardware breakpoint:
[0x00000000]> ae 3,$$,TRAP
Execution Traps
Prevent emulation in non-executable regions:
[0x00000000]> e esil.exectrap=true
[0x00000000]> aes
These examples illustrate how traps can be integrated into your analysis routine to catch errors and provide feedback during emulation.
Emulation in the Analysis Loop
Aside from manual emulation, automatic emulation is also possible in the analysis loop.
For example, the aaaa command performs the ESIL emulation stage, among others.
To disable or enable ESIL analysis, set the anal.esil configuration variable.
Furthermore, emu.write allows the ESIL VM to modify memory. However, enabling it
might be quite dangerous, especially when analyzing malware. Regardless, it is
still sometimes required, particularly when deobfuscating or unpacking code. To
show the emulation process, you can set asm.emu variable which will show
calculated register and memory values as comments in the disassembly:
[0x00001660]> e asm.emu=true
[0x00001660]> pdf
. (fcn) fcn.00001660 40
| fcn.00001660 ();
| ; CALL XREF from 0x00001713 (entry2.fini)
| 0x00001660 lea rdi, obj.__progname ; 0x207220 ; rdi=0x207220 -> 0x464c457f
| 0x00001667 push rbp ; rsp=0xfffffffffffffff8
| 0x00001668 lea rax, obj.__progname ; 0x207220 ; rax=0x207220 -> 0x464c457f
| 0x0000166f cmp rax, rdi ; zf=0x1 -> 0x2464c45 ; cf=0x0 ; pf=0x1 -> 0x2464c45 ; sf=0x0 ; of=0x0
| 0x00001672 mov rbp, rsp ; rbp=0xfffffffffffffff8
| .-< 0x00001675 je 0x1690 ; rip=0x1690 -> 0x1f0fc35d ; likely
| | 0x00001677 mov rax, qword [reloc._ITM_deregisterTMCloneTable] ; [0x206fd8:8]=0 ; rax=0x0
| | 0x0000167e test rax, rax ; zf=0x1 -> 0x2464c45 ; pf=0x1 -> 0x2464c45 ; sf=0x0 ; cf=0x0 ; of=0x0
|.--< 0x00001681 je 0x1690 ; rip=0x1690 -> 0x1f0fc35d ; likely
||| 0x00001683 pop rbp ; rbp=0xffffffffffffffff -> 0x4c457fff ; rsp=0x0
||| 0x00001684 jmp rax ; rip=0x0 ..
|``-> 0x00001690 pop rbp ; rbp=0x10102464c457f ; rsp=0x8 -> 0x464c457f
` 0x00001691 ret ; rip=0x0 ; rsp=0x10 -> 0x3e0003
Note the comments containing likely, which indicate conditional jumps likely to be taken by ESIL emulation.
Apart from the basic ESIL VM setup, you can change its behavior with other options located in the emu. and esil. configuration namespaces.
Debugging with ESIL
The debugger APIs can be configured to use different backends, to communicate with a local or remote GDB server, use the native debugger, a specific virtualization or emulation engine like Unicorn or BOCHS, but there's also an ESIL backend.
[0x00000000]> dL
0 --- bf LGPL3
1 --- bochs LGPL3
2 --- esil LGPL3
3 --- evm LGPL3
4 --- gdb LGPL3
5 --- io MIT
6 dbg native LGPL3
7 --- null MIT
8 --- qnx LGPL3
9 --- rap LGPL3
[0x00000000]> dL esil
[0x00000000]>
After this command, you can use any of the d sub-commands to change register values, step or skip instructions, set breakpoints, etc. but using the internal emulation logic of ESIL.
Scripting
Scripting is a big part of using radare2. It's really important to get good at using radare2 commands. The better you know these commands, the more you can do with the tool. You'll be able to work faster and figure out tougher problems.
Spending time to learn the commands will pay off in the long run. But commands are just a portion of the capabilities of the shell, these can be modifier, combined or processed when used with some special characters similar to the posix shell, like pipes, filters, redirections, etc
r2pipe is the main way to use radare2 from other programming languages. It lets you control radare2 from languages like Python, Javascript or even Rust. This is great for making your own tools that work with radare2. You can write scripts to do things automatically, which saves a lot of time. r2pipe opens up a lot of possibilities for using radare2 in new ways.
radare2 also has some built-in ways to run scripts. There's r2js, which lets you run JavaScript right inside radare2. This is useful for quick scripts (and plugins) when you don't want to use external dependencies.
There's also rlang, which lets you use radare2's inner workings from different programming languages. These features help you customize radare2 and make it do exactly what you need. You can extend radare2's abilities and create your own add-ons.
Shell
As mentioned before many commands can be executed in sequence by using ; the semicolon operator.
[0x00404800]> pd 1 ; ao 1
0x00404800 b827e66100 mov eax, 0x61e627 ; "tab"
address: 0x404800
opcode: mov eax, 0x61e627
prefix: 0
bytes: b827e66100
ptr: 0x0061e627
refptr: 0
size: 5
type: mov
esil: 6415911,rax,=
stack: null
family: cpu
[0x00404800]>
It simply runs the second command after finishing the first one, like in a posix shell.
The second important way to sequence the commands is with a simple pipe |:
ao | grep address
Note, the | pipe only can pipe output of r2 commands to external (shell) commands, like system programs or builtin shell commands.
There is a similar way to sequence r2 commands, using the backtick operator `command`. The quoted part will undergo command substitution and the output will be used as an argument of the command line.
For example, we want to see a few bytes of the memory at the address referred to by the 'mov eax, addr' instruction. We can do that without jumping to it, using a sequence of commands:
[0x00404800]> pd 1
0x00404800 b827e66100 mov eax, 0x61e627 ; "tab"
[0x00404800]> ao
address: 0x404800
opcode: mov eax, 0x61e627
prefix: 0
bytes: b827e66100
ptr: 0x0061e627
refptr: 0
size: 5
type: mov
esil: 6415911,rax,=
stack: null
family: cpu
[0x00404800]> ao~ptr[1]
0x0061e627
0
[0x00404800]> px 10 @ `ao~ptr[1]`
- offset - 0 1 2 3 4 5 6 7 8 9 A B C D E F 0123456789ABCDEF
0x0061e627 7461 6200 2e69 6e74 6572 tab..inter
[0x00404800]>
And of course it's possible to redirect the output of an r2 command into a file, using the > and >>
commands
[0x00404800]> px 10 @ `ao~ptr[1]` > example.txt
[0x00404800]> px 10 @ `ao~ptr[1]` >> example.txt
Radare2 also provides quite a few Unix type file processing commands like head, tail, cat, grep and many more. One such command is Uniq, which can be used to filter a file to display only non-duplicate content. So to make a new file with only unique strings, you can do:
[0x00404800]> uniq file > uniq_file
Other than stdout, you can specify other file descriptors to be redirected like in the posix shell:
[0x00404800]> aaa 2> /dev/null
The head command can be used to see the first N number of lines in the file, similarly tail command allows the last N number of lines to be seen.
[0x00404800]> head 3 foodtypes.txt
Proteins
Fats
Carbohydrates
[0x00404800]> tail 2 foodtypes.txt
Probiotics
Water
Similarly, sorting the content is also possible with the sort command. A typical example could be:
[0x00404800]> cat foods.txt
Lentils
Avocado
Brown rice
Chia seeds
Spinach
Almonds
Blueberries
Broccoli
Sauerkraut
Cucumber
[0x00404800]> sort foods.txt
Almonds
Avocado
Blueberries
Broccoli
Brown rice
Chia seeds
Cucumber
Lentils
Sauerkraut
Spinach
The ?$? command describes several helpful variables you can use to do similar actions even more
easily, like the $v "immediate value" variable, or the $m opcode memory reference variable.
r2js
Radare2 ships the QuickJS ES6/javascript runtime by default starting on versions 5.8.x, having a complete and standard programming language brings a lot of possibilities and ease
As long as javascript is a also a common target language for transpilation from many other languages it is possible to use this runtime for other programming languages, not just Javascript.
TypeScript is probably the primary choice because it is very well integrated with Visual Studio Code (or Vim, Helix, ..) offering autocompletion and other facilities for developing your scripts.
But it is also possible to use Nim, C (via Emscripten), Vlang, and many other languages.
Scripts
You can run r2js scripts like you do with any other script:
- Using the
-iflag on the system shell when launching r2. - With the
.command inside the radare2 shell.
The rlang plugin will be selected depending on the file extension. In this case the qjs rlang plugin handles the .r2.js extension.
For example:
$ r2 -i foo.r2.js /bin/ls
If you want to go back to the shell after running the script use the -q flag:
$ r2 -qi foo.r2.js /bin/ls
The REPL
To enter the r2js repl you can use the -j command or flag.
0$ r2 -j
QuickJS - Type "\h" for help
[r2js]>
Same command/flag works in the r2 shell too:
[0x00000000]> -j
QuickJS - Type "\h" for help
[r2js]>
In this repl (read-eval-print-loop) shell you can run javascript statements, like the ones you would use in NodeJS.
The <tab> key can be used to autocomplete expressions.
R2Pipe.r2js
The rlang plugin exposes the classic r2.cmd interface to interact with radare2. This means that you can run a command and get the output in response.
R2Papi.r2js
The R2Papi apis are also embedded inside the r2, this means that you can use the high level / idiomatic APIs too.
If the global r2pipe instance is available through the r2 object. The R2Papi one is available as R.
This is an example:
var r2 = new R2Pipe();
var R = new R2Papi(r2);
R2FridaCompile
Frida-tools ship a TypeScript compiler that targets ESM and generates a single file containing all the js compiled files from a TypeScript project.
Radare2 supports the same esm-blob file format used by Frida, and if you don't want to depend on Python you can also use the native one distributed with the r2frida plugin named r2frida-compile.
For example:
$ r2frida-compile -o foo.r2.js foo.ts
$ r2 -qi foo.r2.js -
TypeScript
The easiest way to run typescript programs inside radare2 is by using r2frida-compile, but you can also use the standard tsc.
Loops
One of the most common task in automation is looping through something, there are multiple ways to do this in radare2.
We can loop over flags:
@@ flagname-regex
For example, we want to see function information with afi command:
[0x004047d6]> afi
#
offset: 0x004047d0
name: entry0
size: 42
realsz: 42
stackframe: 0
call-convention: amd64
cyclomatic-complexity: 1
bits: 64
type: fcn [NEW]
num-bbs: 1
edges: 0
end-bbs: 1
call-refs: 0x00402450 C
data-refs: 0x004136c0 0x00413660 0x004027e0
code-xrefs:
data-xrefs:
locals:0
args: 0
diff: type: new
[0x004047d6]>
Now let's say, for example, that we'd like see a particular field from this output for all functions found by analysis. We can do that with a loop over all function flags (whose names begin with fcn.):
[0x004047d6]> fs functions
[0x004047d6]> afi @@ fcn.* ~name
This command will extract the name field from the afi output of every flag with a name
matching the regexp fcn.*.
There are also a predefined loop called @@f, which runs your command on every functions found by r2:
[0x004047d6]> afi @@f ~name
We can also loop over a list of offsets, using the following syntax:
@@=1 2 3 ... N
For example, say we want to see the opcode information for 2 offsets: the current one, and at current + 2:
[0x004047d6]> ao @@=$$ $$+2
address: 0x4047d6
opcode: mov rdx, rsp
prefix: 0
bytes: 4889e2
refptr: 0
size: 3
type: mov
esil: rsp,rdx,=
stack: null
family: cpu
address: 0x4047d8
opcode: loop 0x404822
prefix: 0
bytes: e248
refptr: 0
size: 2
type: cjmp
esil: 1,rcx,-=,rcx,?{,4212770,rip,=,}
jump: 0x00404822
fail: 0x004047da
stack: null
cond: al
family: cpu
[0x004047d6]>
Note we're using the $$ variable which evaluates to the current offset. Also note
that $$+2 is evaluated before looping, so we can use the simple arithmetic expressions.
A third way to loop is by having the offsets be loaded from a file. This file should contain one offset per line.
[0x004047d0]> ?v $$ > offsets.txt
[0x004047d0]> ?v $$+2 >> offsets.txt
[0x004047d0]> !cat offsets.txt
4047d0
4047d2
[0x004047d0]> pi 1 @@.offsets.txt
xor ebp, ebp
mov r9, rdx
radare2 also offers various foreach constructs for looping. One of the most useful is for looping through all the instructions of a function:
[0x004047d0]> pdf
/ (fcn) entry0 42
|; UNKNOWN XREF from 0x00400018 (unk)
|; DATA XREF from 0x004064bf (sub.strlen_460)
|; DATA XREF from 0x00406511 (sub.strlen_460)
|; DATA XREF from 0x0040b080 (unk)
|; DATA XREF from 0x0040b0ef (unk)
|0x004047d0 xor ebp, ebp
|0x004047d2 mov r9, rdx
|0x004047d5 pop rsi
|0x004047d6 mov rdx, rsp
|0x004047d9 and rsp, 0xfffffffffffffff0
|0x004047dd push rax
|0x004047de push rsp
|0x004047df mov r8, 0x4136c0
|0x004047e6 mov rcx, 0x413660 ; "AWA..AVI..AUI..ATL.%.. "
0A..AVI..AUI.
|0x004047ed mov rdi, main ; "AWAVAUATUH..S..H...." @
0
|0x004047f4 call sym.imp.__libc_start_main
\0x004047f9 hlt
[0x004047d0]> pi 1 @@i
mov r9, rdx
pop rsi
mov rdx, rsp
and rsp, 0xfffffffffffffff0
push rax
push rsp
mov r8, 0x4136c0
mov rcx, 0x413660
mov rdi, main
call sym.imp.__libc_start_main
hlt
In this example the command pi 1 runs over all the instructions in the current function (entry0).
There are other options too (not complete list, check @@? for more information):
@@k sdbquery- iterate over all offsets returned by that sdbquery@@t- iterate over on all threads (see dp)@@b- iterate over all basic blocks of current function (see afb)@@f- iterate over all functions (see aflq)
The last kind of looping lets you loop through predefined iterator types:
- symbols
- imports
- registers
- threads
- comments
- functions
- flags
This is done using the @@@ command. The previous example of listing information about functions can also be done using the @@@ command:
[0x004047d6]> afi @@@ functions ~name
This will extract name field from afi output and will output a huge list of
function names. We can choose only the second column, to remove the redundant name: on every line:
[0x004047d6]> afi @@@ functions ~name[1]
Beware, @@@ is not compatible with JSON commands.
Macros
Apart from simple sequencing and looping, radare2 allows to write simple macros, using this construction:
[0x00404800]> (qwe; pd 4; ao)
This will define a macro called 'qwe' which runs sequentially first 'pd 4' then 'ao'.
Calling the macro using syntax .(macro) is simple:
[0x00404800]> (qwe; pd 4; ao)
[0x00404800]> .(qwe)
0x00404800 mov eax, 0x61e627 ; "tab"
0x00404805 push rbp
0x00404806 sub rax, section_end.LOAD1
0x0040480c mov rbp, rsp
address: 0x404800
opcode: mov eax, 0x61e627
prefix: 0
bytes: b827e66100
ptr: 0x0061e627
refptr: 0
size: 5
type: mov
esil: 6415911,rax,=
stack: null
family: cpu
[0x00404800]>
To list available macroses simply call (*:
[0x00404800]> (*
(qwe ; pd 4; ao)
And if want to remove some macro, just add '-' before the name:
[0x00404800]> (-qwe)
Macro 'qwe' removed.
[0x00404800]>
Moreover, it's possible to create a macro that takes arguments, which comes in handy in some simple scripting situations. To create a macro that takes arguments you simply add them to macro definition.
[0x00404800]
[0x004047d0]> (foo x y; pd $0; s +$1)
[0x004047d0]> .(foo 5 6)
;-- entry0:
0x004047d0 xor ebp, ebp
0x004047d2 mov r9, rdx
0x004047d5 pop rsi
0x004047d6 mov rdx, rsp
0x004047d9 and rsp, 0xfffffffffffffff0
[0x004047d6]>
As you can see, the arguments are named by index, starting from 0: $0, $1, ...
Aliases
The command to create, manage and run command aliases is the $. This is also the prefix used for aliases files, this chapter will dig
- Variable (like flags)
- Commands (simplest macros)
- Files (in-memory virtual files)
You can find some interesting details and examples by checking the help message:
[0x100003a84]> $?
Usage: $alias[=cmd] [args...] Alias commands and data (See ?$? for help on $variables)
| $ list all defined aliases
| $* list all defined aliases and their values, with unprintable characters escaped
| $** same as above, but if an alias contains unprintable characters, b64 encode it
| $foo:=123 alias for 'f foo=123'
| $foo-=4 alias for 'f foo-=4'
| $foo+=4 alias for 'f foo+=4'
| $foo alias for 's foo' (note that command aliases can override flag resolution)
| $dis=base64:AAA= alias $dis to the raw bytes from decoding this base64 string
| $dis=$hello world alias $dis to the string after '$'
| $dis=$hello\\nworld\\0a string aliases accept double-backslash and hex escaping
| $dis=- edit $dis in cfg.editor (use single-backslashes for escaping)
| $dis=af alias $dis to the af command
| "$dis=af;pdf" alias $dis to run af, then pdf. you must quote the whole command.
| $test=. /tmp/test.js create command - rlangpipe script
| $dis= undefine alias
| $dis execute a defined command alias, or print a data alias with unprintable characters escaped
| $dis? show commands aliased by $dis
[0x100003a84]>
Command Aliases
The general usage of the feature is: $alias=cmd
[0x00404800]> $disas=pdf
The above command will create an alias disas for pdf. The following command prints the disassembly of the main function.
[0x00404800]> $disas @ main
Apart from commands, you can also alias a text to be printed, when called.
[0x00404800]> $my_alias=$test input
[0x00404800]> $my_alias
test input
To undefine alias, use $alias=:
[0x00404800]> $pmore='b 300;px'
[0x00404800]> $
$pmore
[0x00404800]> $pmore=
[0x00404800]> $
A single $ in the above will list all defined aliases. It's also possible check the aliased command of an alias:
[0x00404800]> $pmore?
b 200; px
Can we create an alias contains alias ? The answer is yes:
[0x00404800]> $pStart='s 0x0;$pmore'
[0x00404800]> $pStart
- offset - 0 1 2 3 4 5 6 7 8 9 A B C D E F 0123456789ABCDEF
0x00000000 7f45 4c46 0201 0100 0000 0000 0000 0000 .ELF............
0x00000010 0300 3e00 0100 0000 1014 0000 0000 0000 ..>.............
0x00000020 4000 0000 0000 0000 5031 0000 0000 0000 @.......P1......
0x00000030 0000 0000 4000 3800 0d00 4000 1e00 1d00 ....@.8...@.....
0x00000040 0600 0000 0400 0000 4000 0000 0000 0000 ........@.......
0x00000050 4000 0000 0000 0000 4000 0000 0000 0000 @.......@.......
0x00000060 d802 0000 0000 0000 d802 0000 0000 0000 ................
0x00000070 0800 0000 0000 0000 0300 0000 0400 0000 ................
0x00000080 1803 0000 0000 0000 1803 0000 0000 0000 ................
0x00000090 1803 0000 0000 0000 1c00 0000 0000 0000 ................
0x000000a0 1c00 0000 0000 0000 0100 0000 0000 0000 ................
0x000000b0 0100 0000 0400 0000 0000 0000 0000 0000 ................
0x000000c0 0000 0000 0000 0000 ........
[0x00000000]>
File Aliases
If a file accessed from the repl starts with the dollar sign it will be treated as a virtual one that lives in memory only for the current session of radare2. They are handy when you don't want to depend on the filesystem to create or read files. For example in webassembly environments or other sandboxed executions.
[0x00000000]> echo hello > $world
[0x00000000]> cat $world
hello
[0x00000000]>
[0x00000000]> $
$world
[0x00000000]> $world
hello
[0x00000000]> rm $world
[0x00000000]> $
[0x00000000]>
Variable Aliases
This is a short syntax for accessing and modifying flags, use them as numeric variables.
[0x00000000]> $foo:=4
[0x00000000]> s foo
[0x00000004]> $foo+=4
[0x00000004]> s foo
[0x00000008]>
R2pipe
The r2pipe api was initially designed for NodeJS in order to support reusing the web's r2.js API from the commandline. The r2pipe module permits interacting with r2 instances in different methods:
- spawn pipes (r2 -0)
- http queries (cloud friendly)
- tcp socket (r2 -c)
pipe spawn async http tcp rap json
nodejs x x x x x - x
python x x - x x x x
swift x x x x - - x
dotnet x x x x - - -
haskell x x - x - - x
java - x - x - - -
golang x x - - - - x
ruby x x - - - - x
rust x x - - - - x
vala - x x - - - -
erlang x x - - - - -
newlisp x - - - - - -
dlang x - - - - - x
perl x - - - - - -
Examples
Here there are some examples about scripting with r2pipe in different languages
Python
$ pip install r2pipe
import r2pipe
r2 = r2pipe.open("/bin/ls")
r2.cmd('aa')
print(r2.cmd("afl"))
print(r2.cmdj("aflj")) # evaluates JSONs and returns an object
NodeJS
Use this command to install the r2pipe bindings
$ npm install r2pipe
Here's a sample hello world
const r2pipe = require('r2pipe');
r2pipe.open('/bin/ls', (err, res) => {
if (err) {
throw err;
}
r2.cmd ('af @ entry0', function (o) {
r2.cmd ("pdf @ entry0", function (o) {
console.log (o);
r.quit ()
});
});
});
Checkout the GIT repository for more examples and details.
https://github.com/radareorg/radare2-r2pipe/blob/master/nodejs/r2pipe/README.md
Go
$ r2pm -i r2pipe-go
https://github.com/radare/r2pipe-go
package main
import (
"fmt"
"github.com/radare/r2pipe-go"
)
func main() {
r2p, err := r2pipe.NewPipe("/bin/ls")
if err != nil {
panic(err)
}
defer r2p.Close()
buf1, err := r2p.Cmd("?E Hello World")
if err != nil {
panic(err)
}
fmt.Println(buf1)
}
Rust
$ cat Cargo.toml
...
[dependencies]
r2pipe = "*"
#[macro_use] extern crate r2pipe; use r2pipe::R2Pipe; fn main() { let mut r2p = open_pipe!(Some("/bin/ls")).unwrap(); println!("{:?}", r2p.cmd("?e Hello World")); let json = r2p.cmdj("ij").unwrap(); println!("{}", serde_json::to_string_pretty(&json).unwrap()); println!("ARCH {}", json["bin"]["arch"]); r2p.close(); }
Ruby
$ gem install r2pipe
require 'r2pipe'
puts 'r2pipe ruby api demo'
puts '===================='
r2p = R2Pipe.new '/bin/ls'
puts r2p.cmd 'pi 5'
puts r2p.cmd 'pij 1'
puts r2p.json(r2p.cmd 'pij 1')
puts r2p.cmd 'px 64'
r2p.quit
Perl
#!/usr/bin/perl
use R2::Pipe;
use strict;
my $r = R2::Pipe->new ("/bin/ls");
print $r->cmd ("pd 5")."\n";
print $r->cmd ("px 64")."\n";
$r->quit ();
Erlang
#!/usr/bin/env escript
%% -*- erlang -*-
%%! -smp enable
%% -sname hr
-mode(compile).
-export([main/1]).
main(_Args) ->
%% adding r2pipe to modulepath, set it to your r2pipe_erl location
R2pipePATH = filename:dirname(escript:script_name()) ++ "/ebin",
true = code:add_pathz(R2pipePATH),
%% initializing the link with r2
H = r2pipe:init(lpipe),
%% all work goes here
io:format("~s", [r2pipe:cmd(H, "i")]).
Haskell
import R2pipe
import qualified Data.ByteString.Lazy as L
showMainFunction ctx = do
cmd ctx "s main"
L.putStr =<< cmd ctx "pD `fl $$`"
main = do
-- Run r2 locally
open "/bin/ls" >>= showMainFunction
-- Connect to r2 via HTTP (e.g. if "r2 -qc=h /bin/ls" is running)
open "http://127.0.0.1:9090" >>= showMainFunction
Dotnet
using System;
using System.Collections.Generic;
using System.Diagnostics;
using System.Linq;
using System.Text;
using System.Threading.Tasks;
using r2pipe;
namespace LocalExample {
class Program {
static void Main(string[] args) {
#if __MonoCS__
using(IR2Pipe pipe = new R2Pipe("/bin/ls")) {
#else
using (IR2Pipe pipe = new R2Pipe(@"C:\Windows\notepad.exe",
@"C:\radare2\radare2.exe")) {
#endif
Console.WriteLine("Hello r2! " + pipe.RunCommand("?V"));
Task<string> async = pipe.RunCommandAsync("?V");
Console.WriteLine("Hello async r2!" + async.Result);
QueuedR2Pipe qr2 = new QueuedR2Pipe(pipe);
qr2.Enqueue(new R2Command("x", (string result) => {
Console.WriteLine("Result of x:\n {0}", result); }));
qr2.Enqueue(new R2Command("pi 10", (string result) => {
Console.WriteLine("Result of pi 10:\n {0}", result); }));
qr2.ExecuteCommands();
}
}
}
}
Java
import org.radare.r2pipe.R2Pipe;
public class Test {
public static void main (String[] args) {
try {
R2Pipe r2p = new R2Pipe ("/bin/ls");
// new R2Pipe ("http://cloud.rada.re/cmd/", true);
System.out.println (r2p.cmd ("pd 10"));
System.out.println (r2p.cmd ("px 32"));
r2p.quit();
} catch (Exception e) {
System.err.println (e);
}
}
}
Swift
if let r2p = R2Pipe(url:nil) {
r2p.cmd ("?V", closure:{
(str:String?) in
if let s = str {
print ("Version: \(s)");
exit (0);
} else {
debugPrint ("R2PIPE. Error");
exit (1);
}
});
NSRunLoop.currentRunLoop().run();
} else {
print ("Needs to run from r2")
}
Vala
public static int main (string[] args) {
MainLoop loop = new MainLoop ();
var r2p = new R2Pipe ("/bin/ls");
r2p.cmd ("pi 4", (x) => {
stdout.printf ("Disassembly:\n%s\n", x);
r2p.cmd ("ie", (x) => {
stdout.printf ("Entrypoint:\n%s\n", x);
r2p.cmd ("q");
});
});
ChildWatch.add (r2p.child_pid, (pid, status) => {
Process.close_pid (pid);
loop.quit ();
});
loop.run ();
return 0;
}
NewLisp
(load "r2pipe.lsp")
(println "pd 3:\n" (r2pipe:cmd "pd 3"))
(exit)
Dlang
import std.stdio;
import r2pipe;
void main() {
auto r2 = r2pipe.open ();
writeln ("Hello "~ r2.cmd("?e World"));
writeln ("Hello "~ r2.cmd("?e Works"));
string uri = r2.cmdj("ij")["core"]["uri"].str;
writeln ("Uri: ",uri);
}
R2Pipe2
The original r2pipe protocol is very simple, this have some advantages, but also some inconvieniences and limitations.
The 2nd version aims to address these problems by extending the r2 shell with a new command: {.
Sounds funny? Probably yes, but it works and keeps the things simple and powerful.
The new { command (introduced in r2-5.9.x) permits to enter a JSON object right into the r2 shell, the output of the command will be another json containing not just the output of the command executed, but also some extra information that was missing in the previous version.
- Command output
- Return value
- Return code
- Error reason
- Log messages
As long as the JSON object can be easily extended in the future more
R2pipe2 Example
The { object takes the mandatory "cmd" parameter, but can also handle two more fields:
- json: output of the command inlined as json in the resulting object
- trim: remove trailing spaces in the output of the command
Let's check the help:
[0x00000000]> {?
Usage: {"cmd":"...","json":false,"trim":true} # `cmd` is required
[0x00000000]>
For example:
[0x00000000]> '{"cmd":"?e hello"}
{"res":"hello\n","error":false,"value":256,"code":0,"code":0}
[0x00000000]>
R2pipe2 APIs
As you can imagine, the new { command can be used directly from an r2.callj command. But r2pipe2 Python, TypeScript and R2JS implementations expose the r2.cmd2 and r2.cmd2j functions to abstract this.
Debugger
Debuggers are implemented as IO plugins. Therefore, radare can handle different URI types for spawning, attaching and controlling processes. The complete list of IO plugins can be viewed with r2 -L. Those that have "d" in the first column ("rwd") support debugging. For example:
r_d debug Debug a program or pid. dbg:///bin/ls, dbg://1388 (LGPL3)
rwd gdb Attach to gdbserver, 'qemu -s', gdb://localhost:1234 (LGPL3)
There are different backends for many target architectures and operating systems, e.g., GNU/Linux, Windows, MacOS X, (Net,Free,Open)BSD and Solaris.
Process memory is treated as a plain file. All mapped memory pages of a debugged program and its libraries can be read and interpreted as code or data structures.
Communication between radare and the debugger IO layer is wrapped into system() calls, which accept a string as an argument, and executes it as a command. An answer is then buffered in the output console, its contents can be additionally processed by a script. Access to the IO system is achieved with =!. Most IO plugins provide help with =!? or =!help. For example:
$ r2 -d /bin/ls
...
[0x7fc15afa3cc0]> =!help
Usage: =!cmd args
=!ptrace - use ptrace io
=!mem - use /proc/pid/mem io if possible
=!pid - show targeted pid
=!pid <#> - select new pid
In general, debugger commands are portable between architectures and operating systems. Still, as radare tries to support the same functionality for all target architectures and operating systems, certain things have to be handled separately. They include injecting shellcodes and handling exceptions. For example, in MIPS targets there is no hardware-supported single-stepping feature. In this case, radare2 provides its own implementation for single-step by using a mix of code analysis and software breakpoints.
To get basic help for the debugger, type 'd?':
Usage: d # Debug commands
| db[?] Breakpoints commands
| dbt[?] Display backtrace based on dbg.btdepth and dbg.btalgo
| dc[?] Continue execution
| dd[?] File descriptors (!fd in r1)
| de[-sc] [perm] [rm] [e] Debug with ESIL (see de?)
| dg <file> Generate a core-file (WIP)
| dH [handler] Transplant process to a new handler
| di[?] Show debugger backend information (See dh)
| dk[?] List, send, get, set, signal handlers of child
| dL[?] List or set debugger handler
| dm[?] Show memory maps
| do[?] Open process (reload, alias for 'oo')
| doo[args] Reopen in debug mode with args (alias for 'ood')
| doof[file] Reopen in debug mode from file (alias for 'oodf')
| doc Close debug session
| dp[?] List, attach to process or thread id
| dr[?] Cpu registers
| ds[?] Step, over, source line
| dt[?] Display instruction traces
| dw <pid> Block prompt until pid dies
| dx[?] Inject and run code on target process (See gs)
To restart your debugging session, you can type oo or oo+, depending on desired behavior.
oo reopen current file (kill+fork in debugger)
oo+ reopen current file in read-write
Getting Started
Small session in radare2 debugger
-
r2 -d /bin/ls: Opens radare2 with file/bin/lsin debugger mode using the radare2 native debugger, but does not run the program. You’ll see a prompt (radare2) - all examples are from this prompt. -
db flag: place a breakpoint at flag, where flag can be either an address or a function name -
db - flag: remove the breakpoint at flag, where flag can be either an address or a function name -
db: show list of breakpoint -
dc: run the program -
dr: Show registers state -
drr: Show registers references (telescoping) (like peda) -
ds: Step into instruction -
dso: Step over instruction -
dbt: Display backtrace -
dm: Show memory maps -
dk <signal>: Send KILL signal to child -
ood: reopen in debug mode -
ood arg1 arg2: reopen in debug mode with arg1 and arg2
Migration from IDA, GDB or WinDBG
This chapter aims to ease that migration process for users coming from debuggers like IDA Pro, LLDB, GDB, or WinDBG. We'll explore how common debugging workflows and commands map between these tools and radare2, highlighting both similarities and key differences.
How to run the program using the debugger
r2 -d /bin/ls - start in debugger mode => [video]
How do I attach/detach to running process ? (gdb -p)
r2 -d <pid> - attach to process
r2 ptrace://pid - same as above, but only for io (not debugger backend hooked)
[0x7fff6ad90028]> o-225 - close fd=225 (listed in o~[1]:0)
r2 -D gdb gdb://localhost:1234 - attach to gdbserver
How to set args/environment variable/load a specific libraries for the debugging session of radare
Use rarun2 (libpath=$PWD:/tmp/lib, arg2=hello, setenv=FOO=BAR ...) see rarun2 -h / man rarun2
How to script radare2 ?
r2 -i <scriptfile> ... - run a script after loading the file => demo video
r2 -I <scriptfile> ... - run a script before loading the file
r2 -c $@ | awk $@ - run through awk to get asm from function
[0x80480423]> . scriptfile - interpret this file => ascii video
[0x80480423]> #!c - enter C repl (see #! to list all available RLang plugins) => [video], everything have to be done in a oneliner or a .c file must be passed as an argument.
To get #!python and much more, just build radare2-bindings
How to list Source code as in gdb list ?
CL @ sym.main - though the feature is highly experimental
Reference Commands
| Command | IDA Pro | radare2 | r2 (visual mode) | GDB | WinDbg |
|---|---|---|---|---|---|
| Analysis | |||||
| Analysis of everything | Automatically launched when opening a binary | aaa or -A (aaaa or -AA for even experimental analysis) | N/A | N/A | N/A |
| Navigation | |||||
| xref to | x | axt | x | N/A | N/A |
| xref from | ctrl + j | axf | X | N/A | N/A |
| xref to graph | ? | agt [offset] | ? | N/A | N/A |
| xref from graph | ? | agf [offset] | ? | N/A | N/A |
| list functions | alt + 1 | afl;is | t | N/A | N/A |
| listing | alt + 2 | pdf | p | N/A | N/A |
| hex mode | alt + 3 | pxa | P | N/A | N/A |
| imports | alt + 6 | ii | :ii | N/A | N/A |
| exports | alt + 7 | is~FUNC | ? | N/A | N/A |
| follow jmp/call | enter | s offset | enter or 0-9 | N/A | N/A |
| undo seek | esc | s- | u | N/A | N/A |
| redo seek | ctrl+enter | s+ | U | N/A | N/A |
| show graph | space | agv | V | N/A | N/A |
| Edit | |||||
| rename | n | afn | dr | N/A | N/A |
| graph view | space | agv | V | N/A | N/A |
| define as data | d | Cd [size] | dd,db,dw,dW | N/A | N/A |
| define as code | c | C- [size] | d- or du | N/A | N/A |
| define as undefined | u | C- [size] | d- or du | N/A | N/A |
| define as string | A | Cs [size] | ds | N/A | N/A |
| define as struct | Alt+Q | Cf [size] | dF | N/A | N/A |
| Debugger | |||||
| Start Process / Continue execution | F9 | dc | F9 | r and c | g |
| Terminate Process | Ctrl+F2 | dk 9 | ? | kill | q |
| Detach | ? | o- | ? | detach | |
| step into | F7 | ds | s | s (step) / si (stepi) | t |
| step into 4 instructions | ? | ds 4 | F7 | si 4 | t 4 |
| step over | F8 | dso | S | n (next) / ni (nexti) | p |
| step until a specific address | ? | dsu <addr> | ? | until <addr> | g <addr> |
| Run until return | Ctrl+F7 | dcr | ? | finish | gu |
| Run until cursor | F4 | #249 | #249 | N/A | N/A |
| Show Backtrace | ? | dbt | ? | bt | |
| display Register | On register Windows | dr all | Shown in Visual mode | info registers (i r) | r |
| display eax | On register Windows | dr?eax | Shown in Visual mode | info registers eax (i r eax) | r rax |
| display old state of all registers | ? | dro | ? | ? | ? |
| display function addr + N | ? | afi $$ - display function information of current offset ($$) | ? | ? | ? |
| display frame state | ? | pxw rbp-rsp@rsp | ? | i f | ? |
| How to step until condition is true | ? | dsi | ? | ? | ? |
| Update a register value | ? | dr rip=0x456 | ? | set $rip=0x456 | r rip=456 |
| Disassembly | |||||
| disassembly forward | N/A | pd | Vp | disas | uf, u |
| disassembly N instructions | N/A | pd X | Vp | x/<N>i | u <addr> LX |
| disassembly N (backward) | N/A | pd -X | Vp | disas <a-o> <a> | ub |
| Information on the bin | |||||
| Sections/regions | Menu sections | iS or S (append j for json) | N/A | maint info sections | !address |
| Load symbol file | |||||
| Sections/regions | pdb menu | asm.dwarf.file, pdb.XX | N/A | add-symbol-file | r |
| BackTrace | |||||
| Stack Trace | N/A | dbt | N/A | bt | k |
| Stack Trace in Json | N/A | dbtj | N/A | ||
| Partial Backtrace (innermost) | N/A | dbt (dbg.btdepth dbg.btalgo) | N/A | bt <N> | k <N> |
| Partial Backtrace (outermost) | N/A | dbt (dbg.btdepth dbg.btalgo) | N/A | bt -<N> | |
| Stacktrace for all threads | N/A | dbt@t | N/A | thread apply all bt | ~* k |
| Breakpoints | |||||
| Breakpoint list | Ctrl+Alt+B | db | ? | info breakpoints | bl |
| add breakpoint | F2 | db [offset] | F2 | break | bp |
| Threads | |||||
| Switch to thread | Thread menu | dp | N/A | thread <N> | ~<N>s |
| Frames | |||||
| Frame Numbers | N/A | ? | N/A | any bt command | kn |
| Select Frame | N/A | ? | N/A | frame | .frame |
| Parameters/Locals | |||||
| Display parameters | N/A | afv | N/A | info args | dv /t /i /V |
| Display parameters | N/A | afv | N/A | info locals | dv /t /i /V |
| Display parameters/locals in json | N/A | afvj | N/A | info locals | dv /t /i /V |
| list addresses where vars are accessed(R/W) | N/A | afvR/afvW | N/A | ? | ? |
| Project Related | |||||
| open project | Po [file] | ? | |||
| save project | automatic | Ps [file] | ? | ||
| show project informations | Pi [file] | ? | |||
| Miscellaneous | |||||
| Dump byte char array | N/A | pc? (json, C, char, etc.) | Vpppp | x/<N>bc | db |
| options | option menu | e? | e | ||
| search | search menu | /? | Select the zone with the cursor c then / | s |
Equivalent of "set-follow-fork-mode" gdb command
This can be done using 2 commands:
dcf- until a fork happen- Then use
dpto select the process to debug.
Common features
- r2 accepts FLIRT signatures
- r2 can connect to GDB, LLVM and WinDbg
- r2 can write/patch in place
- r2 have fortunes and [s]easter eggs[/s]balls of steel
- r2 can do basic loading of ELF core files from the box and MDMP (Windows minidumps)
Registers
The registers are part of a user area stored in the context structure used by the scheduler. This structure can be manipulated to get and set the values of those registers, and, for example, on Intel hosts, it is possible to directly manipulate DR0-DR7 hardware registers to set hardware breakpoints.
There are different commands to get values of registers. For the General Purpose ones use:
[0x4A13B8C0]> dr
r15 = 0x00000000
r14 = 0x00000000
r13 = 0x00000000
r12 = 0x00000000
rbp = 0x00000000
rbx = 0x00000000
r11 = 0x00000000
r10 = 0x00000000
r9 = 0x00000000
r8 = 0x00000000
rax = 0x00000000
rcx = 0x00000000
rdx = 0x00000000
rsi = 0x00000000
rdi = 0x00000000
oeax = 0x0000003b
rip = 0x7f20bf5df630
rsp = 0x7fff515923c0
[0x7f0f2dbae630]> dr rip ; get value of 'rip'
0x7f0f2dbae630
[0x4A13B8C0]> dr rip = esp ; set 'rip' as esp
Interaction between a plugin and the core is done by commands returning radare instructions. This is used, for example, to set flags in the core to set values of registers.
[0x7f0f2dbae630]> dr* ; Appending '*' will show radare commands
f r15 1 0x0
f r14 1 0x0
f r13 1 0x0
f r12 1 0x0
f rbp 1 0x0
f rbx 1 0x0
f r11 1 0x0
f r10 1 0x0
f r9 1 0x0
f r8 1 0x0
f rax 1 0x0
f rcx 1 0x0
f rdx 1 0x0
f rsi 1 0x0
f rdi 1 0x0
f oeax 1 0x3b
f rip 1 0x7fff73557940
f rflags 1 0x200
f rsp 1 0x7fff73557940
[0x4A13B8C0]> .dr* ; include common register values in flags
An old copy of registers is stored all the time to keep track of the changes done during execution of a program being analyzed. This old copy can be accessed with oregs.
[0x7f1fab84c630]> dro
r15 = 0x00000000
r14 = 0x00000000
r13 = 0x00000000
r12 = 0x00000000
rbp = 0x00000000
rbx = 0x00000000
r11 = 0x00000000
r10 = 0x00000000
r9 = 0x00000000
r8 = 0x00000000
rax = 0x00000000
rcx = 0x00000000
rdx = 0x00000000
rsi = 0x00000000
rdi = 0x00000000
oeax = 0x0000003b
rip = 0x7f1fab84c630
rflags = 0x00000200
rsp = 0x7fff386b5080
Current state of registers
[0x7f1fab84c630]> dr
r15 = 0x00000000
r14 = 0x00000000
r13 = 0x00000000
r12 = 0x00000000
rbp = 0x00000000
rbx = 0x00000000
r11 = 0x00000000
r10 = 0x00000000
r9 = 0x00000000
r8 = 0x00000000
rax = 0x00000000
rcx = 0x00000000
rdx = 0x00000000
rsi = 0x00000000
rdi = 0x7fff386b5080
oeax = 0xffffffffffffffff
rip = 0x7f1fab84c633
rflags = 0x00000202
rsp = 0x7fff386b5080
Values stored in eax, oeax and eip have changed.
To store and restore register values you can just dump the output of 'dr*' command to disk and then re-interpret it again:
[0x4A13B8C0]> dr* > regs.saved ; save registers
[0x4A13B8C0]> drp regs.saved ; restore
EFLAGS can be similarly altered. E.g., setting selected flags:
[0x4A13B8C0]> dr eflags = pst
[0x4A13B8C0]> dr eflags = azsti
You can get a string which represents latest changes of registers using drd command (diff registers):
[0x4A13B8C0]> drd
oeax = 0x0000003b was 0x00000000 delta 59
rip = 0x7f00e71282d0 was 0x00000000 delta -418217264
rflags = 0x00000200 was 0x00000000 delta 512
rsp = 0x7fffe85a09c0 was 0x00000000 delta -396752448
Register Profiles
The way register values are transferred from kernel to userland (or via network when using gdb or other debuggers) it's usually done through a linear memory buffer and an associated register profile which is in charge to describe the name, location, size and other attributes to interpret that buffer.
Usually not all registers are transferred in the same buffer, this is because there are register groups or families, like floating pointer, general purpose, privileged ones..
In the case of GDB, XML format is choosen to describe all this information, in radare2 we use our own space/tab separated document which can be dumped or changed at any time with the drp and arp commands (note one is for debugging sessions, and the other will be used for the static esil emulation).
Radare2 is able to parse the gdb xml register profile and generate one in the radare2 syntax when connecting to unknown targets that support those commands.
Reading The Profile
Let's check how the x86-16 (real mode) register profile looks like by typing the following command:
$ r2 -a x86 -b 16 -qc arp --
=PC ip
=SP sp
=BP bp
=R0 ax
=A0 ax
=A1 bx
=A2 cx
=A3 dx
=A4 si
=A5 di
=SN ah
=TR fs
gpr ip .16 48 0
gpr ax .16 24 0
gpr ah .8 25 0
gpr al .8 24 0
gpr bx .16 0 0
gpr bh .8 1 0
gpr bl .8 0 0
gpr cx .16 4 0
gpr ch .8 5 0
gpr cl .8 4 0
gpr dx .16 8 0
gpr dh .8 9 0
gpr dl .8 8 0
gpr sp .16 60 0
gpr bp .16 20 0
gpr si .16 12 0
gpr di .16 16 0
seg cs .16 52 0
seg ss .16 54 0
seg ds .16 56 0
seg es .16 58 0
gpr flags .16 56 0
flg cf .1 .448 0
flg pf .1 .449 0
flg af .1 .450 0
flg zf .1 .451 0
flg sf .1 .452 0
flg tf .1 .453 0
flg if .1 .454 0
flg df .1 .455 0
flg of .1 .456 0
flg rf .1 .457 0
Custom Register Profiles
Register profiles are usually 'static', in the sense that users won't need to modify them because they are designed to work well with the selected debugger backend or the esil implementation for the given architecture. But sometimes, you may want to add support for a new target or fix a bug, add temporary registers, experiment with it, ..
These are the commands you must use to dump the current register profile to a file, edit it and then load it again:
drp > profile.txt
vim profile.txt
drp profile.txt
Understanding Each Row
The format for this file is quite easy, but somehow tricky as it's not self-documented and there's no scheme like in XML or JSON. That's probably something that can be improved at some point, but for simplicity reasons it was made like this.
Register Naming and Aliases
Note that in radare2, all registers are lowercase words that can't contain dots or spaces. This is important because that's how they are identified as flags in the disassembly as well as in the reg profile and makes it more readable for the users when inspecting the disassembly listings.
Some flavours use the percentage % sign before the name to indicate its nature. But that's not our style. So let's move on.
If the row starts with a equality = sign it's indicating that the line will be used to define an alias. Register aliases must be two uppercase letters. This is for parsing performance reasons, but also helps quickly identifying them when using those in the shell.
=PC ip
This line means that everytime we try to pick the "PC" register, it will be redirected to point to the one named ip. This way radare2 is able to work across multiple architectures having a generic way to refer to each of them.
Alias Register
The register aliases are used for a variety of actions in radare2, so the code analysis, calling conventions, syscall scanning and so on will be affected by those.
- PC : Program Counter
- SP : Stack Pointer
- BP : Base Pointer (delta for the stack frame with SP)
- R0 : First Register used to return values
- R1 : Second Register (used for tuples or 64bit values on 32bit systems)
- A0 : First argument passed to a syscall
- A1 : Second argument..
- A2 : Third argument..
- A3 : Fourth argument..
- SN : Register used Syscall Number
- TR : Thread Local Storage Register
Register Groups
As mentioned earlier the registers can be grouped and classified depending on the uses for proper displaying them as well as the debugger backend pulling them back from the source.
These are the group names, as you will notice, all of them have 3 lowercase letters:
- gpr : General Purpose Registers
- flg : Status Flags
- seg : Segment Registers
- fpu : Floating Pointer Registers
- vec : Vector Registers
- pri : Privileged Registers
Column Meanings
The following lines will look like this:
..
gpr r2 .32 8 0
gpr r3 .32 12 0
...
Anyway, let's focus on the meaning of each column:
- gpr: Register Group
- r2, r3: Register Names
- .32 : Register Size
- 8, 12 : Offset inside the buffer
- 0 : Packing Size
Few notes here:
- These columns are separated by tabs or spaces
- Lines starting with
#are ignored - Register names must start with a lowercase letter and have no dots
- Sizes or offsets starting with a dot
.are represented in bits instead of bytes
The Packing size is used to define the syllab size of each register word for vector registers.
Endianness
Values can be stored and represented in different endianness when working in local or remote instances with the debugger.
The way this information is represented in the reg profile is with a line starting with ^. The next letter will tell the register profile the endianness to use which can be big, little or middle.
You can find an usage example for this feature in the register profile for the native debugger for s390x architecture.
Memory Maps
The ability to understand and manipulate the memory maps of a debugged program is important for many different Reverse Engineering tasks. radare2 offers a rich set of commands to handle memory maps in the binary. This includes listing the memory maps of the currently debugged binary, removing memory maps, handling loaded libraries and more.
First, let's see the help message for dm, the command which is responsible for handling memory maps:
[0x55f2104cf620]> dm?
Usage: dm # Memory maps commands
| dm List memory maps of target process
| dm address size Allocate <size> bytes at <address> (anywhere if address is -1) in child process
| dm= List memory maps of target process (ascii-art bars)
| dm. Show map name of current address
| dm* List memmaps in radare commands
| dm- address Deallocate memory map of <address>
| dmd[a] [file] Dump current (all) debug map region to a file (from-to.dmp) (see Sd)
| dmh[?] Show map of heap
| dmi [addr|libname] [symname] List symbols of target lib
| dmi* [addr|libname] [symname] List symbols of target lib in radare commands
| dmi. List closest symbol to the current address
| dmiv Show address of given symbol for given lib
| dmj List memmaps in JSON format
| dml <file> Load contents of file into the current map region
| dmm[?][j*] List modules (libraries, binaries loaded in memory)
| dmp[?] <address> <size> <perms> Change page at <address> with <size>, protection <perms> (perm)
| dms[?] <id> <mapaddr> Take memory snapshot
| dms- <id> <mapaddr> Restore memory snapshot
| dmS [addr|libname] [sectname] List sections of target lib
| dmS* [addr|libname] [sectname] List sections of target lib in radare commands
| dmL address size Allocate <size> bytes at <address> and promote to huge page
In this chapter, we'll go over some of the most useful subcommands of dm using simple examples. For the following examples, we'll use a simple helloworld program for Linux but it'll be the same for every binary.
First things first - open a program in debugging mode:
$ r2 -d helloworld
Process with PID 20304 started...
= attach 20304 20304
bin.baddr 0x56136b475000
Using 0x56136b475000
asm.bits 64
[0x7f133f022fb0]>
Note that we passed "helloworld" to radare2 without "./". radare2 will try to find this program in the current directory and then in $PATH, even if no "./" is passed. This is contradictory with UNIX systems, but makes the behaviour consistent for windows users
Let's use dm to print the memory maps of the binary we've just opened:
[0x7f133f022fb0]> dm
0x0000563a0113a000 - usr 4K s r-x /tmp/helloworld /tmp/helloworld ; map.tmp_helloworld.r_x
0x0000563a0133a000 - usr 8K s rw- /tmp/helloworld /tmp/helloworld ; map.tmp_helloworld.rw
0x00007f133f022000 * usr 148K s r-x /usr/lib/ld-2.27.so /usr/lib/ld-2.27.so ; map.usr_lib_ld_2.27.so.r_x
0x00007f133f246000 - usr 8K s rw- /usr/lib/ld-2.27.so /usr/lib/ld-2.27.so ; map.usr_lib_ld_2.27.so.rw
0x00007f133f248000 - usr 4K s rw- unk0 unk0 ; map.unk0.rw
0x00007fffd25ce000 - usr 132K s rw- [stack] [stack] ; map.stack_.rw
0x00007fffd25f6000 - usr 12K s r-- [vvar] [vvar] ; map.vvar_.r
0x00007fffd25f9000 - usr 8K s r-x [vdso] [vdso] ; map.vdso_.r_x
0xffffffffff600000 - usr 4K s r-x [vsyscall] [vsyscall] ; map.vsyscall_.r_x
For those of you who prefer a more visual way, you can use dm= to see the memory maps using an ASCII-art bars. This will be handy when you want to see how these maps are located in the memory.
If you want to know the memory-map you are currently in, use dm.:
[0x7f133f022fb0]> dm.
0x00007f947eed9000 # 0x00007f947eefe000 * usr 148K s r-x /usr/lib/ld-2.27.so /usr/lib/ld-2.27.so ; map.usr_lib_ld_2.27.so.r_x
Using dmm we can "List modules (libraries, binaries loaded in memory)", this is quite a handy command to see which modules were loaded.
[0x7fa80a19dfb0]> dmm
0x55ca23a4a000 /tmp/helloworld
0x7fa80a19d000 /usr/lib/ld-2.27.so
Note that the output of
dmsubcommands, anddmmspecifically, might be different in various systems and different binaries.
We can see that along with our helloworld binary itself, another library was loaded which is ld-2.27.so. We don't see libc yet and this is because radare2 breaks before libc is loaded to memory. Let's use dcu (debug continue until) to execute our program until the entry point of the program, which radare flags as entry0.
[0x7fa80a19dfb0]> dcu entry0
Continue until 0x55ca23a4a520 using 1 bpsize
hit breakpoint at: 55ca23a4a518
[0x55ca23a4a520]> dmm
0x55ca23a4a000 /tmp/helloworld
0x7fa809de1000 /usr/lib/libc-2.27.so
0x7fa80a19d000 /usr/lib/ld-2.27.so
Now we can see that libc-2.27.so was loaded as well, great!
Speaking of libc, a popular task for binary exploitation is to find the address of a specific symbol in a library. With this information in hand, you can build, for example, an exploit which uses ROP. This can be achieved using the dmi command. So if we want, for example, to find the address of system() in the loaded libc, we can simply execute the following command:
[0x55ca23a4a520]> dmi libc system
514 0x00000000 0x7fa809de1000 LOCAL FILE 0 system.c
515 0x00043750 0x7fa809e24750 LOCAL FUNC 1221 do_system
4468 0x001285a0 0x7fa809f095a0 LOCAL FUNC 100 svcerr_systemerr
5841 0x001285a0 0x7fa809f095a0 LOCAL FUNC 100 svcerr_systemerr
6427 0x00043d10 0x7fa809e24d10 WEAK FUNC 45 system
7094 0x00043d10 0x7fa809e24d10 GLBAL FUNC 45 system
7480 0x001285a0 0x7fa809f095a0 GLBAL FUNC 100 svcerr_systemerr
Similar to the dm. command, with dmi. you can see the closest symbol to the current address.
Another useful command is to list the sections of a specific library. In the following example we'll list the sections of ld-2.27.so:
[0x55a7ebf09520]> dmS ld-2.27
[Sections]
00 0x00000000 0 0x00000000 0 ---- ld-2.27.so.
01 0x000001c8 36 0x4652d1c8 36 -r-- ld-2.27.so..note.gnu.build_id
02 0x000001f0 352 0x4652d1f0 352 -r-- ld-2.27.so..hash
03 0x00000350 412 0x4652d350 412 -r-- ld-2.27.so..gnu.hash
04 0x000004f0 816 0x4652d4f0 816 -r-- ld-2.27.so..dynsym
05 0x00000820 548 0x4652d820 548 -r-- ld-2.27.so..dynstr
06 0x00000a44 68 0x4652da44 68 -r-- ld-2.27.so..gnu.version
07 0x00000a88 164 0x4652da88 164 -r-- ld-2.27.so..gnu.version_d
08 0x00000b30 1152 0x4652db30 1152 -r-- ld-2.27.so..rela.dyn
09 0x00000fb0 11497 0x4652dfb0 11497 -r-x ld-2.27.so..text
10 0x0001d0e0 17760 0x4654a0e0 17760 -r-- ld-2.27.so..rodata
11 0x00021640 1716 0x4654e640 1716 -r-- ld-2.27.so..eh_frame_hdr
12 0x00021cf8 9876 0x4654ecf8 9876 -r-- ld-2.27.so..eh_frame
13 0x00024660 2020 0x46751660 2020 -rw- ld-2.27.so..data.rel.ro
14 0x00024e48 336 0x46751e48 336 -rw- ld-2.27.so..dynamic
15 0x00024f98 96 0x46751f98 96 -rw- ld-2.27.so..got
16 0x00025000 3960 0x46752000 3960 -rw- ld-2.27.so..data
17 0x00025f78 0 0x46752f80 376 -rw- ld-2.27.so..bss
18 0x00025f78 17 0x00000000 17 ---- ld-2.27.so..comment
19 0x00025fa0 63 0x00000000 63 ---- ld-2.27.so..gnu.warning.llseek
20 0x00025fe0 13272 0x00000000 13272 ---- ld-2.27.so..symtab
21 0x000293b8 7101 0x00000000 7101 ---- ld-2.27.so..strtab
22 0x0002af75 215 0x00000000 215 ---- ld-2.27.so..shstrtab
Heap
radare2's dm subcommands can also display a map of the heap which is useful for those who are interested in inspecting the heap and its content. Simply execute dmh to show a map of the heap:
[0x7fae46236ca6]> dmh
Malloc chunk @ 0x55a7ecbce250 [size: 0x411][allocated]
Top chunk @ 0x55a7ecbce660 - [brk_start: 0x55a7ecbce000, brk_end: 0x55a7ecbef000]
You can also see a graph layout of the heap:
[0x7fae46236ca6]> dmhg
Heap Layout
.------------------------------------.
| Malloc chunk @ 0x55a7ecbce000 |
| size: 0x251 |
| fd: 0x0, bk: 0x0 |
`------------------------------------'
|
.---'
|
|
.---------------------------------------------.
| Malloc chunk @ 0x55a7ecbce250 |
| size: 0x411 |
| fd: 0x57202c6f6c6c6548, bk: 0xa21646c726f |
`---------------------------------------------'
|
.---'
|
|
.----------------------------------------------------.
| Top chunk @ 0x55a7ecbce660 |
| [brk_start:0x55a7ecbce000, brk_end:0x55a7ecbef000] |
`----------------------------------------------------'
Another heap commands can be found under dmh, check dmh? for the full list.
[0x00000000]> dmh?
|Usage: dmh # Memory map heap
| dmh List chunks in heap segment
| dmh [malloc_state] List heap chunks of a particular arena
| dmha List all malloc_state instances in application
| dmhb Display all parsed Double linked list of main_arena's bins instance
| dmhb [bin_num|bin_num:malloc_state] Display parsed double linked list of bins instance from a particular arena
| dmhbg [bin_num] Display double linked list graph of main_arena's bin [Under developemnt]
| dmhc @[chunk_addr] Display malloc_chunk struct for a given malloc chunk
| dmhf Display all parsed fastbins of main_arena's fastbinY instance
| dmhf [fastbin_num|fastbin_num:malloc_state] Display parsed single linked list in fastbinY instance from a particular arena
| dmhg Display heap graph of heap segment
| dmhg [malloc_state] Display heap graph of a particular arena
| dmhi @[malloc_state]Display heap_info structure/structures for a given arena
| dmhm List all elements of struct malloc_state of main thread (main_arena)
| dmhm [malloc_state] List all malloc_state instance of a particular arena
| dmht Display all parsed thead cache bins of main_arena's tcache instance
| dmh? Show map heap help
To print safe-linked lists (glibc >= 2.32) with demangled pointers, the variable dbg.glibc.demangle must be true.
Signals
You can send signals to the target process, or change the behaviour of the the debugger and signal handler associated with the dk command.
[0x00000000]> dk?
Usage: dk Signal commands
| dk list all signal handlers of child process
| dk <signal> send KILL signal to child
| dk <signal>=1 set signal handler for <signal> in child
| dk?<signal> name/signum resolver
| dko[?] <signal> reset skip or cont options for given signal
| dko <signal> [|skip|cont] on signal SKIP handler or CONT into
| dkj list all signal handlers in JSON
[0x00000000]>
To change the behaviour of the r2 debugger when the target process receives a specific signal use the dko command. Note that radare2 handles signals in a portable way, so the Windows exceptions will be used instead of the signal unix syscalls.
These are the list of signals with their associated numbers:
[0x00000000]> dk
32 SIGRTMIN 30 SIGPWR 14 SIGALRM 31 SIGSYS 15 SIGTERM 16 SIGSTKFLT
17 SIGCHLD 10 SIGUSR1 11 SIGSEGV 12 SIGUSR2 13 SIGPIPE 18 SIGCONT
19 SIGSTOP 27 SIGPROF 26 SIGVTALRM 25 SIGXFSZ 24 SIGXCPU 23 SIGURG
22 SIGTTOU 5 SIGTRAP 21 SIGTTIN 4 SIGILL 20 SIGTSTP 7 SIGBUS 6 SIGABRT
1 SIGHUP 3 SIGQUIT 2 SIGINT 29 SIGLOST 28 SIGWINCH 9 SIGKILL 8 SIGFPE
Files
The radare2 debugger allows the user to list and manipulate the file descriptors from the target process.
This is a useful feature, which is not found in other debuggers, the functionality is similar to the lsof command line tool, but have extra subcommands to change the seek, close or duplicate them.
So, at any time in the debugging session you can replace the stdio file descriptors to use network sockets created by r2, or replace a network socket connection to hijack it.
This functionality is also available in r2frida by using the dd command prefixed with a backslash. In r2 you may want to see the output of dd? for proper details.
[0x00000000]> dd?
Usage: dd Manage file descriptors for child process (* to show r2 commands)
| dd[*] list file descriptors
| dd[*] <file|addr> open file as read-only (r--); addr = use as char* for path
| dd+[*] <file|addr> open/create file as read-write (rw-); addr = use as char* for path
| dd-[*] <fd> close fd
| ddt[*] close terminal fd (alias for `dd- 0`)
| dds[*] <fd> [offset] seek fd to offset (no offset = seek to beginning)
| ddd[*] <oldfd> <newfd> copy oldfd to newfd with dup2
| ddf[*] <addr> create pipe and write fds to (int[2])addr
| ddr[*] <fd> <addr> <size> read bytes from fd into (char*)addr
| ddw[*] <fd> <addr> <size> write bytes from (const char*)addr to fd
[0x00000000]>
Tweaking descriptors
The dd command will use ragg2 internally to compile a shellcode that is then injected into the target process to manipulate the file descriptors.
For example if we want to open a file we can use this:
dd /bin/ls
We can also close that file with: dd-4
Reverse Debugging
Radare2 has reverse debugger, that can seek the program counter backward. (e.g. reverse-next, reverse-continue in gdb) Firstly you need to save program state at the point that you want to start recording. The syntax for recording is:
[0x004028a0]> dts+
You can use dts commands for recording and managing program states.
After recording the states, you can seek pc back and forth to any points after saved address.
So after recording, you can try single step back:
[0x004028a0]> 2dso
[0x004028a0]> dr rip
0x004028ae
[0x004028a0]> dsb
continue until 0x004028a2
hit breakpoint at: 4028a2
[0x004028a0]> dr rip
0x004028a2
When you run dsb, reverse debugger restore previous recorded state and execute program from it
until desired point.
Or you can also try continue back:
[0x004028a0]> db 0x004028a2
[0x004028a0]> 10dso
[0x004028a0]> dr rip
0x004028b9
[0x004028a0]> dcb
[0x004028a0]> dr rip
0x004028a2
dcb seeks program counter until hit the latest breakpoint.
So once set a breakpoint, you can back to it any time.
You can see current recorded program states using dts:
[0x004028a0]> dts
session: 0 at:0x004028a0 ""
session: 1 at:0x004028c2 ""
NOTE: Program records can be saved at any moments. These are diff style format that save only different memory area from previous. It saves memory space rather than entire dump.
And also can add comment:
[0x004028c2]> dtsC 0 program start
[0x004028c2]> dtsC 1 decryption start
[0x004028c2]> dts
session: 0 at:0x004028a0 "program start"
session: 1 at:0x004028c2 "decryption start"
You can leave notes for each records to keep in your mind.
dsb and dcb commands restore the program state from latest record if there are
many records.
Program records can exported to file and of course import it. Export/Import records to/from file:
[0x004028c2]> dtst records_for_test
Session saved in records_for_test.session and dump in records_for_test.dump
[0x004028c2]> dtsf records_for_test
session: 0, 0x4028a0 diffs: 0
session: 1, 0x4028c2 diffs: 0
Moreover, you can do reverse debugging in ESIL mode.
In ESIL mode, program state can be managed by aets commands.
[0x00404870]> aets+
And step back by aesb:
[0x00404870]> aer rip
0x00404870
[0x00404870]> 5aeso
[0x00404870]> aer rip
0x0040487d
[0x00404870]> aesb
[0x00404870]> aer rip
0x00404879
In addition to the native reverse debugging capabilities in radare2, it's also possible to
use gdb's remote protocol to reverse debug a target gdbserver that supports it.
=!dsb and =!dcb are available as dsb and dcb replacementments for this purpose,
see remote gdb's documentation for more information.
Windows Messages
On Windows, you can use dbW while debugging to set a breakpoint for the message handler of a specific window.
Get a list of the current process windows with dW :
[0x7ffe885c1164]> dW
.----------------------------------------------------.
| Handle | PID | TID | Class Name |
)----------------------------------------------------(
| 0x0023038e | 9432 | 22432 | MSCTFIME UI |
| 0x0029049e | 9432 | 22432 | IME |
| 0x002c048a | 9432 | 22432 | Edit |
| 0x000d0474 | 9432 | 22432 | msctls_statusbar32 |
| 0x00070bd6 | 9432 | 22432 | Notepad |
`----------------------------------------------------'
Set the breakpoint with a message type, together with either the window class name or its handle:
[0x7ffe885c1164]> dbW WM_KEYDOWN Edit
Breakpoint set.
Or
[0x7ffe885c1164]> dbW WM_KEYDOWN 0x002c048a
Breakpoint set.
If you aren't sure which window you should put a breakpoint on, use dWi to identify it with your mouse:
[0x7ffe885c1164]> dWi
Move cursor to the window to be identified. Ready? y
Try to get the child? y
.--------------------------------------------.
| Handle | PID | TID | Class Name |
)--------------------------------------------(
| 0x002c048a | 9432 | 22432 | Edit |
`--------------------------------------------'
Remote Access Capabilities
Radare can be run locally, or it can be started as a server process which is controlled by a local radare2 process. This is possible because everything uses radare's IO subsystem which abstracts access to system(), cmd() and all basic IO operations so to work over a network.
Help for commands useful for remote access to radare:
[0x00405a04]> =?
Usage: =[:!+-=ghH] [...] # connect with other instances of r2
remote commands:
| = list all open connections
| =<[fd] cmd send output of local command to remote fd
| =[fd] cmd exec cmd at remote 'fd' (last open is default one)
| =! cmd run command via r_io_system
| =+ [proto://]host:port connect to remote host:port (*rap://, raps://, tcp://, udp://, http://)
| =-[fd] remove all hosts or host 'fd'
| ==[fd] open remote session with host 'fd', 'q' to quit
| =!= disable remote cmd mode
| !=! enable remote cmd mode
servers:
| .:9000 start the tcp server (echo x|nc ::1 9090 or curl ::1:9090/cmd/x)
| =:port start the rap server (o rap://9999)
| =g[?] start the gdbserver
| =h[?] start the http webserver
| =H[?] start the http webserver (and launch the web browser)
other:
| =&:port start rap server in background (same as '&_=h')
| =:host:port cmd run 'cmd' command on remote server
examples:
| =+tcp://localhost:9090/ connect to: r2 -c.:9090 ./bin
| =+rap://localhost:9090/ connect to: r2 rap://:9090
| =+http://localhost:9090/cmd/ connect to: r2 -c'=h 9090' bin
| o rap://:9090/ start the rap server on tcp port 9090
You can learn radare2 remote capabilities by displaying the list of supported IO plugins: radare2 -L.
A little example should make this clearer. A typical remote session might look like this:
At the remote host1:
$ radare2 rap://:1234
At the remote host2:
$ radare2 rap://:1234
At localhost:
$ radare2 -
Add hosts
[0x004048c5]> =+ rap://<host1>:1234//bin/ls
Connected to: <host1> at port 1234
waiting... ok
[0x004048c5]> =
0 - rap://<host1>:1234//bin/ls
You can open remote files in debug mode (or using any IO plugin) specifying URI when adding hosts:
[0x004048c5]> =+ =+ rap://<host2>:1234/dbg:///bin/ls
Connected to: <host2> at port 1234
waiting... ok
0 - rap://<host1>:1234//bin/ls
1 - rap://<host2>:1234/dbg:///bin/ls
To execute commands on host1:
[0x004048c5]> =0 px
[0x004048c5]> = s 0x666
To open a session with host2:
[0x004048c5]> ==1
fd:6> pi 1
...
fd:6> q
To remove hosts (and close connections):
[0x004048c5]> =-
You can also redirect radare output to a TCP or UDP server (such as nc -l). First, Add the server with '=+ tcp://' or '=+ udp://', then you can redirect the output of a command to be sent to the server:
[0x004048c5]> =+ tcp://<host>:<port>/
Connected to: <host> at port <port>
5 - tcp://<host>:<port>/
[0x004048c5]> =<5 cmd...
The =< command will send the output from the execution of cmd to the remote connection number N (or the last one used if no id specified).
Debugging with gdbserver
radare2 allows remote debugging over the gdb remote protocol. So you can run a gdbserver and connect to it with radare2 for remote debugging. The syntax for connecting is:
$ r2 -d gdb://<host>:<port>
Note that the following command does the same, r2 will use the debug plugin specified by the uri if found.
$ r2 -D gdb gdb://<host>:<port>
The debug plugin can be changed at runtime using the dL or Ld commands.
Or if the gdbserver is running in extended mode, you can attach to a process on the host with:
$ r2 -d gdb://<host>:<port>/<pid>
It is also possible to start debugging after analyzing a file using the doof command
which rebases the current session's data after opening gdb
[0x00404870]> doof gdb://<host>:<port>/<pid>
After connecting, you can use the standard r2 debug commands as normal.
radare2 does not yet load symbols from gdbserver, so it needs the binary to
be locally present to load symbols from it. In case symbols are not loaded even
if the binary is present, you can try specifying the path with e dbg.exe.path:
$ r2 -e dbg.exe.path=<path> -d gdb://<host>:<port>
If symbols are loaded at an incorrect base address, you can try specifying
the base address too with e bin.baddr:
$ r2 -e bin.baddr=<baddr> -e dbg.exe.path=<path> -d gdb://<host>:<port>
Usually the gdbserver reports the maximum packet size it supports. Otherwise, radare2 resorts to sensible defaults. But you can specify the maximum packet size with the environment variable R2_GDB_PKTSZ. You can also check and set the max packet size during a session with the IO system, :.
$ export R2_GDB_PKTSZ=512
$ r2 -d gdb://<host>:<port>
= attach <pid> <tid>
Assuming filepath <path/to/exe>
[0x7ff659d9fcc0]> :pktsz
packet size: 512 bytes
[0x7ff659d9fcc0]> :pktsz 64
[0x7ff659d9fcc0]> :pktsz
packet size: 64 bytes
The gdb IO system provides useful commands which might not fit into any standard radare2 commands. You can get a list of these commands with :?. (Remember, : accesses the underlying IO plugin's system()).
[0x7ff659d9fcc0]> :?
Usage: :cmd args
:pid - show targeted pid
:pkt s - send packet 's'
:monitor cmd - hex-encode monitor command and pass to target interpreter
:rd - show reverse debugging availability
:dsb - step backwards
:dcb - continue backwards
:detach [pid] - detach from remote/detach specific pid
:inv.reg - invalidate reg cache
:pktsz - get max packet size used
:pktsz bytes - set max. packet size as 'bytes' bytes
:exec_file [pid] - get file which was executed for current/specified pid
Note that :dsb and :dcb are only available in special gdbserver implementations such as Mozilla's rr, the default gdbserver doesn't include remote reverse debugging support.
Use :rd to print the currently available reverse debugging capabilities.
If you are interested in debugging radare2's interaction with gdbserver you can use :monitor set remote-debug 1 to turn on logging of gdb's remote protocol packets in gdbserver's console and :monitor set debug 1 to show general debug messages from gdbserver in it's console. You can also increase log level using e log.level=5 and
monitor GDB client/server messages on radare2's side.
radare2 also provides its own gdbserver implementation:
$ r2 -
[0x00000000]> =g?
|Usage: =[g] [...] # gdb server
| gdbserver:
| =g port file [args] listen on 'port' debugging 'file' using gdbserver
So you can start it as:
$ r2 -
[0x00000000]> =g 8000 /bin/radare2 -
And then connect to it like you would to any gdbserver. For example, with radare2:
$ r2 -d gdb://localhost:8000
WinDBG Kernel-mode Debugging (KD)
The WinDBG KD interface support for r2 allows you to attach to VM running Windows and debug its kernel over a serial port or network.
It is also possible to use the remote GDB interface to connect and debug Windows kernels without depending on Windows capabilities.
Bear in mind that WinDBG KD support is still work-in-progress, and this is just an initial implementation which will get better in time.
Setting Up KD on Windows
For a complete walkthrough, refer to Microsoft's documentation.
Serial Port
Enable KD over a serial port on Windows Vista and higher like this:
bcdedit /debug on
bcdedit /dbgsettings serial debugport:1 baudrate:115200
Or like this for Windows XP:
- Open boot.ini and add /debug /debugport=COM1 /baudrate=115200:
[boot loader]
timeout=30
default=multi(0)disk(0)rdisk(0)partition(1)\WINDOWS
[operating systems]
multi(0)disk(0)rdisk(0)partition(1)\WINDOWS="Debugging with Cable" /fastdetect /debug /debugport=COM1 /baudrate=57600
In case of VMWare
Virtual Machine Settings -> Add -> Serial Port
Device Status:
[v] Connect at power on
Connection:
[v] Use socket (named pipe)
[_/tmp/winkd.pipe________]
From: Server To: Virtual Machine
Configure the VirtualBox Machine like this:
Preferences -> Serial Ports -> Port 1
[v] Enable Serial Port
Port Number: [_COM1_______[v]]
Port Mode: [_Host_Pipe__[v]]
[v] Create Pipe
Port/File Path: [_/tmp/winkd.pipe____]
Or just spawn the VM with qemu like this:
$ qemu-system-x86_64 -chardev socket,id=serial0,\
path=/tmp/winkd.pipe,nowait,server \
-serial chardev:serial0 -hda Windows7-VM.vdi
Network
Enable KD over network (KDNet) on Windows 7 or later likes this:
bcdedit /debug on
bcdedit /dbgsettings net hostip:w.x.y.z port:n
Starting from Windows 8 there is no way to enforce debugging for every boot, but it is possible to always show the advanced boot options, which allows to enable kernel debugging:
bcedit /set {globalsettings} advancedoptions true
Connecting to KD interface on r2
Serial Port
Radare2 will use the winkd io plugin to connect to a socket file
created by virtualbox or qemu. Also, the winkd debugger plugin and
we should specify the x86-32 too. (32 and 64 bit debugging is supported)
$ r2 -a x86 -b 32 -D winkd winkd:///tmp/winkd.pipe
On Windows you should run the following line:
$ radare2 -D winkd winkd://\\.\pipe\com_1
Network
$ r2 -a x86 -b 32 -d winkd://<hostip>:<port>:w.x.y.z
Using KD
When connecting to a KD interface, r2 will send a breakin packet to interrupt the target and we will get stuck here:
[0x828997b8]> pd 20
;-- eip:
0x828997b8 cc int3
0x828997b9 c20400 ret 4
0x828997bc cc int3
0x828997bd 90 nop
0x828997be c3 ret
0x828997bf 90 nop
In order to skip that trap we will need to change eip and run 'dc' twice:
dr eip=eip+1
dc
dr eip=eip+1
dc
Now the Windows VM will be interactive again. We will need to kill r2 and attach again to get back to control the kernel.
In addition, the dp command can be used to list all processes, and
dpa or dp= to attach to the process. This will display the base
address of the process in the physical memory layout.
WinDBG Backend for Windows (DbgEng)
On Windows, radare2 can use DbgEng.dll as a debugging backend,
allowing it to make use of WinDBG's capabilities, supporting dump files,
local and remote user and kernel mode debugging.
You can use the debugging DLLs included on Windows or get the latest version from Microsoft's download page (recommended).
You cannot use DLLs from the Microsoft Store's
WinDbg Previewapp folder directly as they are not marked as executable for normal users.radare2 will try to load
dbgeng.dllfrom the_NT_DEBUGGER_EXTENSION_PATHenvironment variable before using Windows' default library search path.
Using the plugin
To use the windbg plugin, pass the same command-line options as you would for WinDBG or kd (see Microsoft's documentation), quoting/escaping when necessary:
> r2 -d "windbg://-remote tcp:server=Server,port=Socket"
> r2 -d "windbg://MyProgram.exe \"my arg\""
> r2 -d "windbg://-k net:port=<n>,key=<MyKey>"
> r2 -d "windbg://-z MyDumpFile.dmp"
You can then debug normally (see d? command) or interact with the backend shell directly with the =! command:
[0x7ffcac9fcea0]> dcu 0x0007ffc98f42190
Continue until 0x7ffc98f42190 using 1 bpsize
ModLoad: 00007ffc`ab6b0000 00007ffc`ab6e0000 C:\WINDOWS\System32\IMM32.DLL
Breakpoint 1 hit
hit breakpoint at: 0x7ffc98f42190
[0x7fffcf232190]> =!k4
Child-SP RetAddr Call Site
00000033`73b1f618 00007ff6`c67a861d r_main!r_main_radare2
00000033`73b1f620 00007ff6`c67d0019 radare2!main+0x8d
00000033`73b1f720 00007ff6`c67cfebe radare2!invoke_main+0x39
00000033`73b1f770 00007ff6`c67cfd7e radare2!__scrt_common_main_seh+0x12e
Plugins
radare2 is implemented on top of a bunch of libraries, almost every of those libraries support plugins to extend the capabilities of the library or add support for different targets.
This section aims to explain what are the plugins, how to write them and use them
Most Famous Plugins
All of them can be installed via r2pm.
- r2frida - Frida and radare2 better together
- r2ghidra - use the Ghidra decompiler from radare2
- r2dec - a decompiler written in JS for r2
- r2yara - loading, scanning and creating Yara rules
- r2renef - use the Renef instrumentation tool from radare2
Skeletons
See r2skel
$ ls libr/*/p | grep : | awk -F / '{ print $2 }'
anal # analysis plugins
asm # assembler/disassembler plugins
bin # binary format parsing plugins
bp # breakpoint plugins
core # core plugins (implement new commands)
crypto # encrypt/decrypt/hash/...
debug # debugger backends
egg # shellcode encoders, etc
fs # filesystems and partition tables
io # io plugins
lang # embedded scripting languages
parse # disassembler parsing plugins
reg # arch register logic
Listing plugins
Some r2 tools have the -L flag to list all the plugins associated to the functionality.
rasm2 -L # list asm plugins
r2 -L # list io plugins
rabin2 -L # list bin plugins
rahash2 -L # list hash/crypto/encoding plugins
There are more plugins in r2land, we can list them from inside r2, and this is
done by using the L suffix.
Those are some of the commands:
L # list core plugins
iL # list bin plugins
dL # list debug plugins
mL # list fs plugins
ph # print support hash algorithms
You can use the ? as value to get the possible values in the associated eval vars.
e asm.arch=? # list assembler/disassembler plugins
e anal.arch=? # list analysis plugins
Notes
Note there are some inconsistencies that most likely will be fixed in the future radare2 versions.
IO plugins
All access to files, network, debugger and all input/output in general is wrapped by an IO abstraction layer that allows radare to treat all data as if it were just a file.
IO plugins are the ones used to wrap the open, read, write and 'system' on virtual file systems. You can make radare understand anything as a plain file. E.g. a socket connection, a remote radare session, a file, a process, a device, a gdb session.
So, when radare reads a block of bytes, it is the task of an IO plugin to get these bytes from any place and put them into internal buffer. An IO plugin is chosen by a file's URI to be opened. Some examples:
- Debugging URIs
$ r2 dbg:///bin/ls
$ r2 pid://1927
- Remote sessions
$ r2 rap://:1234
$ r2 rap://<host>:1234//bin/ls
- Virtual buffers
$ r2 malloc://512
shortcut for
$ r2 -
You can get a list of the radare IO plugins by typing radare2 -L:
$ r2 -L
rw_ ar Open ar/lib files [ar|lib]://[file//path] (LGPL3)
rw_ bfdbg BrainFuck Debugger (bfdbg://path/to/file) (LGPL3)
rwd bochs Attach to a BOCHS debugger (LGPL3)
r_d debug Native debugger (dbg:///bin/ls dbg://1388 pidof:// waitfor://) (LGPL3) v0.2.0 pancake
rw_ default open local files using def_mmap:// (LGPL3)
rwd gdb Attach to gdbserver, 'qemu -s', gdb://localhost:1234 (LGPL3)
rw_ gprobe open gprobe connection using gprobe:// (LGPL3)
rw_ gzip read/write gzipped files (LGPL3)
rw_ http http get (http://rada.re/) (LGPL3)
rw_ ihex Intel HEX file (ihex://eeproms.hex) (LGPL)
r__ mach mach debug io (unsupported in this platform) (LGPL)
rw_ malloc memory allocation (malloc://1024 hex://cd8090) (LGPL3)
rw_ mmap open file using mmap:// (LGPL3)
rw_ null null-plugin (null://23) (LGPL3)
rw_ procpid /proc/pid/mem io (LGPL3)
rwd ptrace ptrace and /proc/pid/mem (if available) io (LGPL3)
rwd qnx Attach to QNX pdebug instance, qnx://host:1234 (LGPL3)
rw_ r2k kernel access API io (r2k://) (LGPL3)
rw_ r2pipe r2pipe io plugin (MIT)
rw_ r2web r2web io client (r2web://cloud.rada.re/cmd/) (LGPL3)
rw_ rap radare network protocol (rap://:port rap://host:port/file) (LGPL3)
rw_ rbuf RBuffer IO plugin: rbuf:// (LGPL)
rw_ self read memory from myself using 'self://' (LGPL3)
rw_ shm shared memory resources (shm://key) (LGPL3)
rw_ sparse sparse buffer allocation (sparse://1024 sparse://) (LGPL3)
rw_ tcp load files via TCP (listen or connect) (LGPL3)
rwd windbg Attach to a KD debugger (windbg://socket) (LGPL3)
rwd winedbg Wine-dbg io and debug.io plugin for r2 (MIT)
rw_ zip Open zip files [apk|ipa|zip|zipall]://[file//path] (BSD)
An example of how to write a plugin is available in this commit.
- Write r2 IO plugin with Makefile (for Linux only)
To write an IO plugin in radare2, in radare2/libr/io/p/, create a file dap.mk. Put there:
OBJ_DAP=io_dap.o
STATIC_OBJ+=${OBJ_DAP}
TARGET_DAP=io_dap.${EXT_SO}
ALL_TARGETS+=${TARGET_DAP}
ifeq (${WITHPIC},0)
LINKFLAGS+=../../util/libr_util.a
LINKFLAGS+=../../io/libr_io.a
else
LINKFLAGS+=-L../../util -lr_util
LINKFLAGS+=-L.. -lr_io
endif
${TARGET_DAP}: ${OBJ_DAP}
${CC} $(call libname,io_dap) ${OBJ_DAP} ${CFLAGS} \
${LINKFLAGS} ${LDFLAGS_LIB} $(LDFLAGS)
Edit the file radare2/libr/io/p/dap.c:
#include <r_userconf.h>
#include <r_io.h>
#include <r_lib.h>
#include <stdio.h>
#include <stdlib.h>
#include <errno.h>
#include "io_dap.h"
#define URI_PREFIX "foo://"
extern RIOPlugin r_io_plugin_dap; // forward declaration
static bool __plugin_open(RIO *io, const char *pathname, bool many) {
return (strncmp(pathname, URI_PREFIX, strlen(URI_PREFIX)) == 0);
}
static RIODesc *__open(RIO *io, const char *pathname, int flags, int mode) {
RIODesc *ret = NULL;
RIOFoo *rio_foo = NULL;
printf("%s\n", __func__);
if (!__plugin_open(io, pathname, 0))
return ret;
return r_io_desc_new (io, &r_io_plugin_dap, pathname, flags, mode, rio_foo);
}
static int __close(RIODesc *fd) {
RIOFoo *rio_foo = NULL;
printf("%s\n", __func__);
if (!fd || !fd->data)
return -1;
rio_foo = fd->data;
// destroy
return true;
}
static ut64 __lseek(RIO *io, RIODesc *fd, ut64 offset, int whence) {
printf("%s, offset: %lx, io->off: %lx\n", __func__, offset, io->off);
if (!fd || !fd->data)
return -1;
switch (whence) {
case SEEK_SET:
io->off = offset;
break;
case SEEK_CUR:
io->off += (int)offset;
break;
case SEEK_END:
io->off = UT64_MAX;
break;
}
return io->off;
}
static int __read(RIO *io, RIODesc *fd, ut8 *buf, int len) {
RIOFoo *rio_foo = NULL;
printf("%s, offset: %lx\n", __func__, io->off);
if (!fd || !fd->data)
return -1;
rio_foo = fd->data;
return 0;
}
static int __write(RIO *io, RIODesc *fd, const ut8 *buf, int len) {
printf("%s\n", __func__);
return 0;
}
static int __getpid(RIODesc *fd) {
RIOFoo *rio_foo = NULL;
printf("%s\n", __func__);
if (!fd || !fd->data)
return -1;
rio_foo = fd->data;
return 0;
}
static int __gettid(RIODesc *fd) {
printf("%s\n", __func__);
return 0;
}
static char *__system(RIO *io, RIODesc *fd, const char *command) {
printf("%s command: %s\n", __func__, command);
// io->cb_printf()
return NULL;
}
RIOPlugin r_io_plugin_dap = {
.name = "dap",
.desc = "IO Foo plugin",
.license = "LGPL",
.check = __plugin_open,
.open = __open,
.close = __close,
.seek = __lseek,
.read = __read,
.write = __write,
.getpid = __getpid,
.system = __system,
.isdbg = true, // # --d flag
};
#ifndef R2_PLUGIN_INCORE
R_API RLibStruct radare_plugin = {
.type = R_LIB_TYPE_IO,
.data = &r_io_plugin_dap,
.version = R2_VERSION
};
#endif
Do not forget to include your definition of r_io_plugin_dap in libr/include/r_io.h:
extern RIOPlugin r_io_plugin_dap;
At last but not least, for the Makefile (not for meson), in dist/plugins-cfg/plugins.def.cfg, add io.dap after io.debug.
2)Write r2 plugin for radare2:
Edit radare2/libr/io/meson.build and in r_io_sources = [... add 'p/io_dap.c',. And in radare2/libr/meson.build, add 'dap' in io_plugins += [.
3)Insert the plugin in radare2
Edit radare2/dist/plugins-cfg/plugins.def.cfg and add io.dap in the list.
4)Add dap.h
Now, if you need to use some data and structures, edit the file radare2/libr/io/p/dap.h for:
#ifndef LIBR_IO_P_IO_DAP_H_
#define LIBR_IO_P_IO_DAP_H_
typedef struct {
int x;
} RIOFoo;
#endif /* LIBR_IO_P_IO_DAP_H_ */
This tutorial is based on this one by Wensel.
Arch Plugins (deprecated pages)
This page contained historical examples showing how to implement separate r_asm (disassembly) plugins. Since the r_asm and r_anal interfaces were merged into the unified r_arch API, these separate examples are obsolete.
For implementing new architectures (disassembly, analysis and ESIL uplift), please:
- Use the r_arch plugin interface (r_asm and r_anal are merged into r_arch).
- Scaffold a project with
r2skeland choose the architecture/plugin template to get a working skeleton. - Check existing r_arch plugins in the main radare2 tree or radare2-extras for reference implementations.
If you need to migrate an old asm/anal plugin, port its logic into an r_arch plugin and use the new r_arch pkg-config flags for compilation.
Analysis plugins (deprecated)
This page previously showed how to write separate r_anal plugins for opcode analysis and ESIL uplift. That separation has been removed: r_anal and r_asm were merged into the r_arch plugin interface.
For new architecture work, please:
- Implement analysis, ESIL uplift and opcode handling inside an r_arch plugin.
- Use
r2skelto scaffold a new plugin project and follow the r_arch template. - Migrate any existing r_anal plugin logic into the corresponding r_arch plugin.
The old examples and Makefile snippets referencing r_anal or r_asm are obsolete and retained here for historical reasons only. Prefer the r_arch approach for all new development.
RBin plugins
To enable virtual addressing
In info add et->has_va = 1; and ptr->srwx with the R_BIN_SCN_MAP; attribute
Create a folder with file format name in libr/bin/format
Makefile:
NAME=bin_nes
R2_PLUGIN_PATH=$(shell r2 -H R2_USER_PLUGINS)
LIBEXT=$(shell r2 -H LIBEXT)
CFLAGS=-g -fPIC $(shell pkg-config --cflags r_bin)
LDFLAGS=-shared $(shell pkg-config --libs r_bin)
OBJS=$(NAME).o
LIB=$(NAME).$(LIBEXT)
all: $(LIB)
clean:
rm -f $(LIB) $(OBJS)
$(LIB): $(OBJS)
$(CC) $(CFLAGS) $(LDFLAGS) $(OBJS) -o $(LIB)
install:
cp -f $(NAME).$(SO_EXT) $(R2_PLUGIN_PATH)
uninstall:
rm -f $(R2_PLUGIN_PATH)/$(NAME).$(SO_EXT)
bin_nes.c:
#include <r_util.h>
#include <r_bin.h>
static bool load_buffer(RBinFile *bf, void **bin_obj, RBuffer *b, ut64 loadaddr, Sdb *sdb) {
ut64 size;
const ut8 *buf = r_buf_data (b, &size);
r_return_val_if_fail (buf, false);
*bin_obj = r_bin_internal_nes_load (buf, size);
return *bin_obj != NULL;
}
static void destroy(RBinFile *bf) {
r_bin_free_all_nes_obj (bf->o->bin_obj);
bf->o->bin_obj = NULL;
}
static bool check_buffer(RBuffer *b) {
if (!buf || length < 4) return false;
return (!memcmp (buf, "\x4E\x45\x53\x1A", 4));
}
static RBinInfo* info(RBinFile *arch) {
RBinInfo \*ret = R_NEW0 (RBinInfo);
if (!ret) return NULL;
if (!arch || !arch->buf) {
free (ret);
return NULL;
}
ret->file = strdup (arch->file);
ret->type = strdup ("ROM");
ret->machine = strdup ("Nintendo NES");
ret->os = strdup ("nes");
ret->arch = strdup ("6502");
ret->bits = 8;
return ret;
}
struct r_bin_plugin_t r_bin_plugin_nes = {
.name = "nes",
.desc = "NES",
.license = "BSD",
.get_sdb = NULL,
.load_buffer = &load_buffer,
.destroy = &destroy,
.check_buffer = &check_buffer,
.baddr = NULL,
.entries = NULL,
.sections = NULL,
.info = &info,
};
#ifndef R2_PLUGIN_INCORE
R_API RLibStruct radare_plugin = {
.type = R_LIB_TYPE_BIN,
.data = &r_bin_plugin_nes,
.version = R2_VERSION
};
#endif
Some Examples
- XBE - https://github.com/radareorg/radare2/pull/972
- COFF - https://github.com/radareorg/radare2/pull/645
- TE - https://github.com/radareorg/radare2/pull/61
- Zimgz - https://github.com/radareorg/radare2/commit/d1351cf836df3e2e63043a6dc728e880316f00eb
- OMF - https://github.com/radareorg/radare2/commit/44fd8b2555a0446ea759901a94c06f20566bbc40
Charset Plugins
- Create a file in
radare2/libr/util/d/yourfile.sdb.txt. The extension .sdb.txt is important. - Edit the file
radare2/libr/util/charset.c. -addextern SdbGperf gperf_latin_1_ISO_8859_1_western_european;. -then add your variable&gperf_latin_1_ISO_8859_1_western_european,instatic const SdbGperf *gperfs[] - Update the Makefile:
radare2/libr/util/Makefile: -AddOBJS+=d/latin_1_ISO_8859_1_western_european.o - Update the Makefile
radare2/libr/util/d/Makefileto add your file name with not .sdb and not .txt inFILES=latin_1_ISO_8859_1_western_european - Update the unit tests of
radare2/test/db/cmd/charset
Congratulation! You can now type the command:
e cfg.charset=latin_1_ISO_8859_1_western_european;
If you have any issue with this tutorial you can check out the example at https://github.com/radareorg/radare2/pull/19627/files.
R2JS Plugins
The javascript runtime embedded in radare2 provides a way to implement different types of plugins.
Check out the r2skel project for more examples, but we will cover the basics now.
(function () {
r2.unload("core", "mycore");
r2.plugin("core", function () {
console.log("==> The 'mycore' plugin has been instantiated. Type 'mycore' to test it");
function coreCall(cmd) {
if (cmd.startsWith("mycore")) {
console.log("Hello From My Core!");
return true;
}
return false;
}
return {
"name": "mycore",
"license": "MIT",
"desc": "simple core plugin in typescript for radare2",
"call": coreCall,
};
});
})();
Some notes on this code:
- The whole code is wrapped inside an anonymous function call, this way we don't polute the global scope.
- Use r2.unload() and r2.plugin() to unload and register new plugins
- Register a plugin by passing the plugin type and a function
- The initialization function returns a object describing it
This code runs inside radare2, this means that it will be fast, and by fast I mean faster than Python, r2pipe and will be closer to the C plugins. Not just for running, but also for loading, because the js runtime is already there, use r2js plugins if possible if you care about performance.
You can find other plugin examples in the examples directory in radare2.
Plugins in Python
At first, to be able to write a plugins in Python for radare2 you need to install
r2lang plugin: r2pm -i rlang-python.
Note - in the following examples there are missing functions of the actual decoding
for the sake of readability!
For this you need to do this:
-
import r2langandfrom r2lang import R(for constants) -
Make a function with 2 subfunctions -
assembleanddisassembleand returning plugin structure - for RAsm plugindef mycpu(a): def assemble(s): return [1, 2, 3, 4] def disassemble(memview, addr): try: opcode = get_opcode(memview) # https://docs.python.org/3/library/stdtypes.html#memoryview opstr = optbl[opcode][1] return [4, opstr] except: return [4, "unknown"] -
This structure should contain a pointers to these 2 functions -
assembleanddisassemblereturn { "name" : "mycpu", "arch" : "mycpu", "bits" : 32, "endian" : R.R_SYS_ENDIAN_LITTLE, "license" : "GPL", "desc" : "MYCPU disasm", "assemble" : assemble, "disassemble" : disassemble, } -
Make a function with 2 subfunctions -
set_reg_profileandopand returning plugin structure - for RAnal plugindef mycpu_anal(a): def set_reg_profile(): profile = "=PC pc\n" + \ "=SP sp\n" + \ "gpr r0 .32 0 0\n" + \ "gpr r1 .32 4 0\n" + \ "gpr r2 .32 8 0\n" + \ "gpr r3 .32 12 0\n" + \ "gpr r4 .32 16 0\n" + \ "gpr r5 .32 20 0\n" + \ "gpr sp .32 24 0\n" + \ "gpr pc .32 28 0\n" return profile def op(memview, pc): analop = { "type" : R.R_ANAL_OP_TYPE_NULL, "cycles" : 0, "stackop" : 0, "stackptr" : 0, "ptr" : -1, "jump" : -1, "addr" : 0, "eob" : False, "esil" : "", } try: opcode = get_opcode(memview) # https://docs.python.org/3/library/stdtypes.html#memoryview esilstr = optbl[opcode][2] if optbl[opcode][0] == "J": # it's jump analop["type"] = R.R_ANAL_OP_TYPE_JMP analop["jump"] = decode_jump(opcode, j_mask) esilstr = jump_esil(esilstr, opcode, j_mask) except: result = analop # Don't forget to return proper instruction size! return [4, result] -
This structure should contain a pointers to these 2 functions -
set_reg_profileandopreturn { "name" : "mycpu", "arch" : "mycpu", "bits" : 32, "license" : "GPL", "desc" : "MYCPU anal", "esil" : 1, "set_reg_profile" : set_reg_profile, "op" : op, } -
(Optional) To add extra information about op sizes and alignment, add a
archinfosubfunction and point to it in the structuredef mycpu_anal(a): def set_reg_profile(): [...] def archinfo(query): if query == R.R_ANAL_ARCHINFO_MIN_OP_SIZE: return 1 if query == R.R_ANAL_ARCHINFO_MAX_OP_SIZE: return 8 if query == R.R_ANAL_ARCHINFO_INV_OP_SIZE: # invalid op size return 2 return 0 def analop(memview, pc): [...] return { "name" : "mycpu", "arch" : "mycpu", "bits" : 32, "license" : "GPL", "desc" : "MYCPU anal", "esil" : 1, "set_reg_profile" : set_reg_profile, "archinfo": archinfo, "op" : op, } -
Register both plugins using
r2lang.plugin("asm")andr2lang.plugin("anal")respectivelyprint("Registering MYCPU disasm plugin...") print(r2lang.plugin("asm", mycpu)) print("Registering MYCPU analysis plugin...") print(r2lang.plugin("anal", mycpu_anal))You can combine everything in one file and load it using
-ioption:$ r2 -I mycpu.py some_file.bin
Or you can load it from the r2 shell: #!python mycpu.py
See also:
Implementing new format plugin in Python
Note - in the following examples there are missing functions of the actual decoding for the sake of readability!
For this you need to do this:
-
import r2lang -
Make a function with subfunctions:
loadload_bytesdestroycheck_bytesbaddrentriessectionsimportsrelocsbinsyminfo
and returning plugin structure - for RAsm plugin
def le_format(a): def load(binf): return [0] def check_bytes(buf): try: if buf[0] == 77 and buf[1] == 90: lx_off, = struct.unpack("<I", buf[0x3c:0x40]) if buf[lx_off] == 76 and buf[lx_off+1] == 88: return [1] return [0] except: return [0]and so on. Please be sure of the parameters for each function and format of returns. Note, that functions
entries,sections,imports,relocsreturns a list of special formed dictionaries - each with a different type. Other functions return just a list of numerical values, even if single element one. There is a special function, which returns information about the file -info:def info(binf): return [{ "type" : "le", "bclass" : "le", "rclass" : "le", "os" : "OS/2", "subsystem" : "CLI", "machine" : "IBM", "arch" : "x86", "has_va" : 0, "bits" : 32, "big_endian" : 0, "dbg_info" : 0, }] -
This structure should contain a pointers to the most important functions like
check_bytes,loadandload_bytes,entries,relocs,imports.return { "name" : "le", "desc" : "OS/2 LE/LX format", "license" : "GPL", "load" : load, "load_bytes" : load_bytes, "destroy" : destroy, "check_bytes" : check_bytes, "baddr" : baddr, "entries" : entries, "sections" : sections, "imports" : imports, "symbols" : symbols, "relocs" : relocs, "binsym" : binsym, "info" : info, } -
Then you need to register it as a file format plugin:
print("Registering OS/2 LE/LX plugin...") print(r2lang.plugin("bin", le_format))
r2ai — AI integration for radare2
r2ai is a family of tools and plugins that bring large language models (LLMs) to radare2. It includes a native C plugin (r2ai-plugin), a javascript decompiler frontend (decai), helper tooling and optional Python/CLI clients. r2ai can run local models (llama/ollama/llamacpp) or talk to remote APIs (OpenAI, Anthropic, Mistral, Gemini, etc.).
This chapter explains how to install r2ai, basic usage from the r2 shell and examples, and how to use decai for decompilation and the auto mode. A short note about r2mcp/model control is included at the end.
Key components
- r2ai-plugin (native C plugin, recommended) — adds the
r2aicommand to r2 - decai (r2js) —
decaicommand focused on AI-assisted decompilation
Installation
Recommended: use the radare2 package manager (r2pm).
- List available r2ai packages:
$ r2pm -s r2ai
r2ai r2ai plugin written in plain C
r2mcp radare2 Model Context Protocol server
decai LLM-based decompiler written in r2js
- Install the recommended native plugin and decai:
$ r2pm -Uci r2ai
$ r2pm -Uci decai
Notes about API keys
If you plan to use remote APIs (OpenAI, Anthropic, Mistral, Gemini, ...), put the key in the corresponding file in your home directory (the r2ai plugin will read these):
- OpenAI: $HOME/.r2ai.openai-key
- Anthropic: $HOME/.r2ai.anthropic-key
- Mistral: $HOME/.r2ai.mistral-key
- Gemini: $HOME/.r2ai.gemini-key
Example:
$ echo "sk-..." > ~/.r2ai.openai-key
$ chmod 600 ~/.r2ai.openai-key
Running r2ai from radare2
Once installed, the r2ai command will be available inside the radare2 shell.
$ r2 -qc "r2ai -a solve this crackme" /path/to/binary
General configuration can be saved via your radare2 config file (for example ~/.radare2rc) using r2ai -e options. Example to set default API and model:
r2ai -e api=anthropic
r2ai -e model=claude-3-7-sonnet-20250219
r2ai -e max_tokens=64000
Basic usage and examples
From inside radare2 (after opening a binary):
- Ask general questions or embed r2 outputs: you can pipe the output of r2 commands to the assistant (r2ai supports embedding the result of r2 commands into the prompt to give context about functions, strings, graphs, etc.).
Example: ask what a function does (pseudo-commands shown):
[0x00400500]> s sym.main ; af
[0x00400500]> r2ai -d Explain what the current function does in two sentences and list the possible vulnerabilities
As long as r2pipe is the main scripting interface for radare2, automating actions that reuse r2ai is as easy as running the r2ai command via r2js or your language of choice, harvest the output and work on that.
Use cases
- Solve crackmes with no interactions
- Improve decompilation output
- Better function signatures and Type propagation
- Quick summary and explanation of unfamiliar functions
- Identify potential vulnerabilities (buffer overflows, format-string bugs, etc.)
- Suggest variable/argument names and produce human-readable documentation
- Assist writing small patches or exploit PoCs
- Help reverse engineers learn and speed up triage
decai — AI-based decompilation
decai is a companion r2js plugin that focuses on decompilation powered by LLMs. It provides a decai command in the r2 shell and can use local models (ollama/llama) or remote APIs.
Install:
$ r2pm -i decai
Basic usage (inside radare2):
[0x00406cac]> decai -h
Usage: decai (-h) ...
decai -H - help setting up r2ai
decai -d [f1 ..] - decompile given functions
decai -dr - decompile function and its called ones (recursive)
decai -dd [..] - same as above, but ignoring cache
decai -dD [query]- decompile current function with given extra query
decai -q [text] - query language model with given text
decai -a [query] - solve query with auto mode
...
Examples
- Decompile the current function:
[0x00406cac]> decai -d
- Decompile recursively (function and callees):
[0x00406cac]> decai -dr
- Run a quick question about a symbol or behavior:
[0x00406cac]> decai -q "Explain what forkpty does in 2 lines"
Configuration and models
-
Use
decai -eto list and modify config values likeapi,model,prompt,lang,hlang(human language),ctxfile, andcache. -
Example to use Ollama and set a model:
[0x00002d30]> decai -e api=ollama
[0x00002d30]> decai -e model=gpt-oss
[0x00002d30]> decai -d
decai also supports an Auto mode that chains queries and uses function-calling style interactions with the model to refine outputs and solve higher-level tasks (for example: find vulnerabilities, produce patches, or generate documentation).
Auto mode
Auto mode allows r2ai/decai to perform multi-step tasks automatically (for example: inspect a function, decompile it, search for issues, propose a patch). With auto mode you can give a high-level instruction and let the tooling attempt to solve it using the available tools and models.
Example (decai auto mode):
[0x00002d30]> decai -a Find buffer overflows and propose a short patch for the current function
Note: Auto mode depends heavily on the model and the chosen API. Always validate the results produced by the model — LLM output can be incorrect or hallucinated.
[0x00002d30]> decai -a solve this crackme
r2mcp - model context protocol
r2mcp is the model context protocol server that permits the use of radare2 with AI agents, the source can be pulled from https://github.com/radareorg/radare2-mcp but it is usually installed via r2pm.
An MCP server acts like a modernized inetd, utilizing JSON-RPC via stdio to present tools with descriptions, enabling AI models to understand and execute these tools automatically in workflows to address user queries effectively.
In Mai, Cursor, Visual Studio, Claude, Kiro, Zed, .. just press CMD+, to get into settings and add the r2mcp server in the config file (claude_desktop_config.json for example)
{
"mcpServers": {
"radare2": {
"command": "r2pm",
"args": ["-r", "r2mcp"]
}
}
}
NOTE to reduce the amount of tools and therefor use less context for the MCP tooling use the -m flag.
$ r2pm -r r2mcp -h
Usage: r2mcp [-flags]
-c [cmd] run those commands before entering the mcp loop
-d [pdc] select a different decompiler (pdc by default)
-h show this help
-m expose minimum amount of tools
-n do not load any plugin or radare2rc
-v show version
$
Troubleshooting and tips
- If the r2ai native plugin is not loaded set the
R2_DEBUG=1environment and check the logs - If the model returns garbage or is too verbose, tune the
prompt/model/max_tokensconfig viar2ai -eordecai -e. - For offline/local usage prefer Ollama or a local llama binary to reduce latency and avoid sending sensitive binaries to third-party APIs.
- Always pin the model and prompt for reproducible results in analysis workflows.
- The
deterministicvariable lowers the temperature andtop_*settings to always get the same output
Debugger plugins
- Adding the debugger registers profile into the shlr/gdb/src/core.c
- Adding the registers profile and architecture support in the libr/debug/p/debug_native.c and libr/debug/p/debug_gdb.c
- Add the code to apply the profiles into the function
r_debug_gdb_attach(RDebug *dbg, int pid)
If you want to add support for the gdb, you can see the register profile in the active gdb session using command maint print registers.
More to come
Some commits related to "Implementing a new architecture"
- Extensa: https://github.com/radareorg/radare2/commit/6f1655c49160fe9a287020537afe0fb8049085d7
- Malbolge: https://github.com/radareorg/radare2/pull/579
- 6502: https://github.com/radareorg/radare2/pull/656
- h8300: https://github.com/radareorg/radare2/pull/664
- GBA: https://github.com/radareorg/radare2/pull/702
- CR16: https://github.com/radareorg/radare2/pull/721/ && 726
- XCore: https://github.com/radareorg/radare2/commit/bb16d1737ca5a471142f16ccfa7d444d2713a54d
- SharpLH5801: https://github.com/neuschaefer/radare2/commit/f4993cca634161ce6f82a64596fce45fe6b818e7
- MSP430: https://github.com/radareorg/radare2/pull/1426
- HP-PA-RISC: https://github.com/radareorg/radare2/commit/f8384feb6ba019b91229adb8fd6e0314b0656f7b
- V810: https://github.com/radareorg/radare2/pull/2899
- TMS320: https://github.com/radareorg/radare2/pull/596
Troubleshooting
It is common to have an issues when you write a plugin, especially if you do this for the first time.
This is why debugging them is very important. The first step for debugging is to set an environment variable when running radare2 instance:
$ R2_DEBUG=yes r2 /bin/ls
Loading /usr/local/lib/radare2/2.2.0-git//bin_xtr_dyldcache.so
Cannot find symbol 'radare_plugin' in library '/usr/local/lib/radare2/2.2.0-git//bin_xtr_dyldcache.so'
Cannot open /usr/local/lib/radare2/2.2.0-git//2.2.0-git
Loading /home/user/.config/radare2/plugins/asm_mips_ks.so
PLUGIN OK 0x55b205ea6070 fcn 0x7f298de08762
Loading /home/user/.config/radare2/plugins/asm_sparc_ks.so
PLUGIN OK 0x55b205ea6070 fcn 0x7f298de08762
Cannot open /home/user/.config/radare2/plugins/pimp
Cannot open /home/user/.config/radare2/plugins/yara
Loading /home/user/.config/radare2/plugins/asm_arm_ks.so
PLUGIN OK 0x55b205ea6070 fcn 0x7f298de08762
Loading /home/user/.config/radare2/plugins/core_yara.so
Module version mismatch /home/user/.config/radare2/plugins/core_yara.so (2.1.0) vs (2.2.0-git)
Loading /home/user/.config/radare2/plugins/asm_ppc_ks.so
PLUGIN OK 0x55b205ea6070 fcn 0x7f298de08762
Loading /home/user/.config/radare2/plugins/lang_python3.so
PLUGIN OK 0x55b205ea5ed0 fcn 0x7f298de08692
Loading /usr/local/lib/radare2/2.2.0-git/bin_xtr_dyldcache.so
Cannot find symbol 'radare_plugin' in library '/usr/local/lib/radare2/2.2.0-git/bin_xtr_dyldcache.so'
Cannot open /usr/local/lib/radare2/2.2.0-git/2.2.0-git
Cannot open directory '/usr/local/lib/radare2-extras/2.2.0-git'
Cannot open directory '/usr/local/lib/radare2-bindings/2.2.0-git'
USER CONFIG loaded from /home/user/.config/radare2/radare2rc
-- In visual mode press 'c' to toggle the cursor mode. Use tab to navigate
[0x00005520]>
Testing the plugin
This plugin is used by rasm2 and r2. You can verify that the plugin is properly loaded with this command:
$ rasm2 -L | grep mycpu
_d mycpu My CPU disassembler (LGPL3)
Let's open an empty file using the 'mycpu' arch and write some random code there.
$ r2 -
-- I endians swap
[0x00000000]> e asm.arch=mycpu
[0x00000000]> woR
[0x00000000]> pd 10
0x00000000 888e mov r8, 14
0x00000002 b2a5 ifnot r10, r5
0x00000004 3f67 ret
0x00000006 7ef6 bl r15, r6
0x00000008 2701 xor r0, 1
0x0000000a 9826 mov r2, 6
0x0000000c 478d xor r8, 13
0x0000000e 6b6b store r6, 11
0x00000010 1382 add r8, r2
0x00000012 7f15 ret
Yay! it works.. and the mandatory oneliner too!
$ r2 -nqamycpu -cwoR -cpd' 10' -
Packaging your plugins
As explained in more detail in the package manager chapter, it is recommended to use our tooling to make your plugin available for everyone.
All the current packages are located in the radare2-pm repository, check some of the already existing ones for inspiration as you will see how easy it's format is:
R2PM_BEGIN
R2PM_GIT "https://github.com/user/mycpu"
R2PM_DESC "[r2-arch] MYCPU disassembler and analyzer plugins"
R2PM_INSTALL() {
${MAKE} clean
${MAKE} all || exit 1
${MAKE} install R2PM_PLUGDIR="${R2PM_PLUGDIR}"
}
R2PM_UNINSTALL() {
rm -f "${R2PM_PLUGDIR}/asm_mycpu."*
rm -f "${R2PM_PLUGDIR}/anal_mycpu."*
}
R2PM_END
Add your package in the /db directory of radare2-pm repository and send a pull request when it's ready to be shared.
$ r2pm -H R2PM_DBDIR
/Users/pancake/.local/share/radare2/r2pm/git/radare2-pm/db
$
r2frida
r2frida is a plugin that merges the capabilities of radare2 and Frida, allowing you to inspect and manipulate running processes. It is useful for dynamic analysis and debugging, leveraging radare2's reverse engineering tools and Frida's dynamic instrumentation.
With r2frida you can use short mnemonic r2 commands instead of having to type long javascript oneliners in the prompt, also those commands are executed inside the target process and are well integrated with radare2, allowing to import all the analysis information from dynamic instrumentation into your static analysis environment.
Some of the most relevant features include:
- Running Frida scripts with :. command
- Executing snippets in C, JavaScript, or TypeScript
- Attaching, spawning, or launching processes locally or remotely
- Listing sections, symbols, classes, methods
- Searching memory, creating hooks, and manipulating file descriptors
- Supporting Dalvik, Java, ObjC, Swift, and C interfaces
Installation
Install r2frida via radare2 package manager:
$ r2pm -ci r2frida
Now you should be able to test if the system session works by running the following command:
$ r2 frida://0
If this is not working try with the R2_DEBUG=1 environment variable set and see if there's any relevant error. Maybe the plugin is not loaded or it was not compiled for the specific version of radare2 that you are using.
The URI handler of r2frida can be quite complex as it allows you to specify different ways to start a process, attaching as well as the communication channel, permitting it to connect though usb, tcp or working with local programs.
First Steps
If there's nothing after the peekaboo (://) you will get introduced into the visual uri maker which let's you select the target device, communication channel, and application/process to attach or spawn to start tracing from it.
$ r2 frida://
You can invoke the help menu via the following command:
$ r2 'frida://?'
r2 frida://[action]/[link]/[device]/[target]
* action = list | apps | attach | spawn | launch
* link = local | usb | remote host:port
* device = '' | host:port | device-id
* target = pid | appname | process-name | program-in-path | abspath
Local:
* frida:// # visual mode to select action+device+program
* frida://? # show this help
* frida://0 # attach to frida-helper (no spawn needed)
* frida:///usr/local/bin/rax2 # abspath to spawn
* frida://rax2 # same as above, considering local/bin is in PATH
* frida://spawn/$(program) # spawn a new process in the current system
* frida://attach/(target) # attach to target PID in current host
USB:
* frida://list/usb// # list processes in the first usb device
* frida://apps/usb// # list apps in the first usb device
* frida://attach/usb//12345 # attach to given pid in the first usb device
* frida://spawn/usb//appname # spawn an app in the first resolved usb device
* frida://launch/usb//appname # spawn+resume an app in the first usb device
Remote:
* frida://attach/remote/10.0.0.3:9999/558 # attach to pid 558 on tcp remote frida-server
Environment: (Use the `%` command to change the environment at runtime)
R2FRIDA_SCRIPTS_DIR=/usr/local/share/r2frida/scripts
R2FRIDA_SCRIPTS_DIR=~/.local/share/radare2/r2frida/scripts
R2FRIDA_SAFE_IO=0|1 # Workaround a Frida bug on Android/thumb
R2FRIDA_DEBUG=0|1 # Used to trace internal r2frida C and JS calls
R2FRIDA_RUNTIME=qjs|v8 # Select the javascript engine to use in the agent side (v8 is default)
R2FRIDA_DEBUG_URI=0|1 # Trace uri parsing code and exit before doing any action
R2FRIDA_COMPILER_DISABLE=0|1 # Disable the new frida typescript compiler (`:. foo.ts`)
R2FRIDA_AGENT_SCRIPT=[file] # path to file of the r2frida agent
ERROR: Cannot open 'frida://?'
Process Info
Basic information about the app and environemnt
The :i commands are useful to check some basic information about the runtime:
[0x100610000]> :i
arch arm
bits 64
os darwin
pid 19347
uid 0
objc false
runtime QJS
swift false
java false
mainLoop false
pageSize 16384
pointerSize 8
modulename arm_hello_ios
modulebase 0x10060c000
codeSigningPolicy optional
isDebuggerAttached false
cwd /private/var/root
[0x100610000]>
Enumerating symbols
Here we can use :is to enumerate the symbols present in the process.
[0x100610000]> :is
0x10060c000 s _mh_execute_header
0x100610000 s main
0x0 u printf
0x0 u sleep
We can also enumerate imports using :ii:
[0x55d13c11061c]> :ii
0x7fa7d2170a4b f r_sys_getenv /home/hex/Tools/radare2/libr/util/libr_util.so
0x7fa7d1fd61e0 f read /usr/lib/x86_64-linux-gnu/libc-2.31.so
0x7fa7d204c230 f strncmp /usr/lib/x86_64-linux-gnu/libc-2.31.so
The same goes for exports using :iE:
[0x100610000]> :iE
0x10060c000 v _mh_execute_header
0x100610000 f main
Enumerating loaded libraries
To view the libraries in memory, we can use :il, and we'll see some basic information such as their base address:
[0x100610000]> :il
0x000000010060c000 0x0000000100614000 arm_hello_ios
0x0000000101154000 0x00000001013fc000 substitute-loader.dylib
0x00000001be229000 0x00000001be22b000 libSystem.B.dylib
0x00000001db8c3000 0x00000001db8c9000 libcache.dylib
Enumerating memory ranges
We can get virtual memory maps using :dm:
[0x1021d8058]> :dm
0x00000001021d4000 - 0x00000001021d8000 r-x /private/var/root/arm_hello_ios
0x00000001021d8000 - 0x00000001021dc000 r-x /private/var/root/arm_hello_ios
0x00000001021dc000 - 0x00000001021e0000 r-- /private/var/root/arm_hello_ios
0x00000001021e0000 - 0x00000001021e4000 r-- /private/var/root/arm_hello_ios
0x00000001021e4000 - 0x0000000102208000 r-- /usr/lib/libsubstrate.dylib
0x00000001022e4000 - 0x00000001022ec000 rw- /usr/lib/libsubstrate.dylib
0x00000001022ec000 - 0x00000001022f0000 r-- /usr/lib/libsubstrate.dylib
And we can get the full ranges using :dmm:
[0x1021d8058]> :dmm
0x00000001021d4000 - 0x00000001021e4000 r-x /private/var/root/arm_hello_ios
0x00000001021e4000 - 0x0000000102328000 rwx /usr/lib/libsubstrate.dylib
0x0000000102328000 - 0x0000000102360000 rwx /usr/lib/libsubstitute.dylib
0x0000000102360000 - 0x00000001024c0000 rwx /usr/lib/dyld
0x0000000102520000 - 0x0000000102ed0000 rwx /usr/lib/substitute-loader.dylib
0x0000000107d00000 - 0x000000018ae40000 rwx /System/Library/Caches/com.apple.dyld/dyld_shared_cache_arm64
Objective-C
iOS and macOS apps are usually made or containing some objc metadata that is important for us to locate the methods of interest
Classes
We can list the ObjC classes in memory using the :icl command:
[0x00000000]> :icl
Obfuscator
Challenge3
Challenge2
Challenge1
AppDelegate
r2renef
r2renef is an IO plugin that merges the capabilities of radare2 and Renef, allowing you to perform powerful static analysis on live Android processes. It bridges radare2's comprehensive reverse engineering toolkit with Renef's dynamic instrumentation engine for ARM64 Android applications.
With r2renef you can use standard radare2 commands like pd, px, pdf,w and s directly on running Android processes. The plugin provides seamless integration between radare2's analysis capabilities and Renef's runtime manipulation features, enabling real-time memory inspection, function hooking, and Lua scripting.
Some of the most relevant features include:
- Live memory analysis: Read/write process memory through radare2
- Full r2 integration: Use
px,pd,pf,wcommands on live processes - Renef commands: Access Renef API with
:prefix commands - Memory operations: Dump and scan memory with
:mdand:ms - Hook support: Load Lua scripts (
l), manage hooks with:hooksand:unhook - Real-time monitoring: Watch hook callbacks with
:watch
Installation
Requirements
- Radare2 (version 5.8.0 or newer)
- Renef running on the Android device
- ARM64 Android device with root access
- ADB (Android Debug Bridge)
Building from Source
Clone the repository and build:
$ git clone https://github.com/ahmeth4n/r2renef
$ cd r2renef
$ make
$ make install
Alternatively, using Meson build system:
$ meson setup build
$ ninja -C build
$ ninja -C build install
Verify Installation
Check that the plugin is loaded:
$ r2 -L | grep renef
rw_ renef Renef IO plugin for radare2
Connecting to a Process
Before using r2renef, ensure Renef is running on your Android device and configure ADB port forwarding:
$ adb forward tcp:1907 localabstract:com.android.internal.os.RuntimeInit;
The URI handler supports two modes:
Spawn a new process:
$ r2 renef://spawn/com.example.app
Attach to running process by PID:
$ r2 renef://attach/12345
First Steps
This chapter covers practical usage of r2renef with detailed command examples and workflows.
Radare2 Commands
Once connected to a process, you can use standard radare2 commands on live memory.
Disassembly
Disassemble at current position:
[0x7f8a1c2b0]> pd 10
0x7f8a1c2b0 fd7bbfa9 stp x29, x30, [sp, -0x10]!
0x7f8a1c2b4 fd030091 mov x29, sp
0x7f8a1c2b8 00000094 bl sym.init_function
0x7f8a1c2bc e00313aa mov x0, x19
0x7f8a1c2c0 fd7bc1a8 ldp x29, x30, [sp], 0x10
0x7f8a1c2c4 c0035fd6 ret
Analyze and disassemble a function:
[0x7f8a1c2b0]> af
[0x7f8a1c2b0]> pdf
Hex Dump
[0x7f8a1c2b0]> px 64
- offset - 0 1 2 3 4 5 6 7 8 9 A B C D E F 0123456789ABCDEF
0x7f8a1c2b0 7f45 4c46 0201 0100 0000 0000 0000 0000 .ELF............
0x7f8a1c2c0 0300 b700 0100 0000 0000 0000 0000 0000 ................
0x7f8a1c2d0 4000 0000 0000 0000 0000 0000 0000 0000 @...............
0x7f8a1c2e0 0000 0000 4000 3800 0900 4000 1e00 1d00 ....@.8...@.....
Seeking
[0x7f8a1c2b0]> s 0x7f8a1c000
[0x7f8a1c000]>
Writing Memory
Write bytes at current position:
[0x7f8a1c2b0]> w 1f2003d5
Renef Commands
All Renef-specific commands use the : prefix.
Listing Applications
Show all installed applications:
[0x7f8a1c2b0]> :la
com.android.settings
com.android.chrome
com.example.app
...
Filter applications by name:
[0x7f8a1c2b0]> :la~chrome
com.android.chrome
Memory Dump
Use Renef's memory dump command:
[0x7f8a1c2b0]> :md 0x78b0a99060 64
Memory at 0x78b0a99060 (64 bytes):
0x78b0a99060: ff ff ff ff ff 44 0e 30 48 0c 1d 10 9e 02 9d 04 |.....D.0H.......|
0x78b0a99070: 0a 02 78 0c 1f 30 48 0e 00 de dd 44 0b 00 00 00 |..x..0H....D....|
0x78b0a99080: 30 00 00 00 5c 0e 00 00 bc b8 01 00 d4 00 00 00 |0...\...........|
0x78b0a99090: 08 6b 92 fc ff ff ff ff ff 44 0e 80 01 48 0c 1d |.k.......D...H..|
Memory Search
Scan memory for hex patterns:
[0x7f8a1c2b0]> :ms 736563726574
[+] Found at 0x7a5c150000 (libexample.so+0x50000)
Execute Lua Code
Run Lua code directly:
[0x7f8a1c2b0]> :exec print("Hello from r2renef!")
Hello from r2renef!
[0x7f8a1c2b0]> :exec Module.list()
[0x7f8a1c2b0]> :exec Module.findExport("encrypt_buffer", "libexample.so")
Loading Lua Scripts
Load a script file:
[0x7f8a1c2b0]> :l /path/to/script.lua
[+] Script loaded
Hook Management
List active hooks:
[0x7f8a1c2b0]> :hooks
[1] 0x7a5c150000 SSL_read (libssl.so)
[2] 0x7a5c151000 SSL_write (libssl.so)
Remove a hook:
[0x7f8a1c2b0]> :unhook 1
[+] Hook removed
Monitor hooks in real-time:
[0x7f8a1c2b0]> :watch
[*] Watching hooks... (Ctrl+C to stop)
[0x7a5c150000] SSL_read called, size=1024
[0x7a5c150000] SSL_read returned, bytes=512
Practical Workflow
Finding and Analyzing a Function
- Find the function address:
[0x7f8a1c2b0]> :exec Module.findExport("encrypt_buffer", "libexample.so")
- Navigate and analyze with radare2:
[0x7f8a1c2b0]> s 0x7a5c102000
[0x7a5c102000]> af
[0x7a5c102000]> pdf
- Hook the function via Lua script and load with
:l.
Example: Monitoring Library Loading
Hook the linker to monitor when libraries are loaded:
-- dlopen_monitor.lua
local linker_name = "linker64"
local linker_base = Module.find(linker_name)
if linker_base then
print(string.format("[+] %s found at: 0x%x", linker_name, linker_base))
local linker_symbols = Module.symbols(linker_name)
for _, sym in ipairs(linker_symbols) do
if sym.name:find("do_dlopen") then
print(string.format("[+] Hooking %s at offset 0x%x", sym.name, sym.offset))
hook(linker_name, sym.offset, {
onEnter = function(args)
local path = Memory.readString(args[0])
if path then
print("[dlopen] Loading: " .. path)
end
end
})
break
end
end
end
Load and watch:
[0x7f8a1c2b0]> :l dlopen_monitor.lua
[+] linker64 found at: 0x7a5c000000
[+] Hooking do_dlopen at offset 0x1234
[0x7f8a1c2b0]> :watch
[dlopen] Loading: /data/app/com.example.app/lib/arm64/libflutter.so
[dlopen] Loading: /system/lib64/libssl.so
Runtime Patching
Patch a conditional jump to NOP:
[0x7a5c105000]> pd 2
0x7a5c105000 1f0000f1 cmp x0, 0
0x7a5c105004 41010054 b.ne 0x7a5c10502c
[0x7a5c105004]> w 1f2003d5
[0x7a5c105004]> pd 1
0x7a5c105004 1f2003d5 nop
r2yara
r2yara is the integration of Yara into radare2. Yara is a powerful binary analysis tool using rules to identity or classify patterns in a binaries.
Installation
r2yara is maintained in a separate repository. It can be installed with the r2pm package manager:
$ r2pm -ci r2yara
The package manager handle automatically the installation and compilation of the Yara library.
Usage
As soon as r2yara is installed, two sets of commands are available in r2. The first set of command are invoked with the command yara:
[0x00000000]> yara
Usage: yara [action] [args..] load and run yara rules inside r2
| yara add [file] Add yara rules from file, or open $EDITOR with yara rule template
| yara clear Clear all rules
| yara help Show this help (same as 'yara?')
| yara list List all rules
| yara scan[S] Scan the current file, if S option is given it prints matching strings
| yara show [name] Show rules containing name
| yara tag [name] List rules with tag 'name'
| yara tags List tags from the loaded rules
| yara version Show version information about r2yara and yara
The second kind of shorter commands start with yr:
[0x00000000]> yr
Usage: yr [action] [args..] load and run yara rules inside r2
| yr [file] add yara rules from file
| yr same as yr?
| yr-* unload all the rules
| yr? show this help (same as 'yara?')
| yrg[?][-sxf] generate yara rule
| yrl list loaded rules
| yrs[q] scan the current file, suffix with 'q' for quiet mode
| yrt ([tagname]) list tags from loaded rules, or list rules from given tag
| yrv show version information about r2yara and yara
Rule management
The plugin loads automatically the rules files from the folder rules-yara3 in the folder $R2PM_PLUGDIR. The already loaded rules can be listed:
[0x00055a40]> yrl
HelloWorld
BLOWFISH_Constants
MD5_Constants
RC6_Constants
RIPEMD160_Constants
SHA1_Constants
SHA256_Constants
SHA512_Constants
WHIRLPOOL_Constants
The rules can be cleared:
[0x00055a40]> yr-
INFO: Rules cleared
[0x00055a40]> yrl
Other rules can be added from an external files.
[0x00055a40]> yr r2yara/rules/crypto.yara
Scan
The current binary can be scanned with the currently loaded rules to see if any rule matches a pattern in the binary:
[0x00055a40]> yrs
BLOWFISH_Constants
0x004960c0: yara3.BLOWFISH_Constants_0 : a60b31d1
0x004960c4: yara3.BLOWFISH_Constants_1 : acb5df98
0x004960c8: yara3.BLOWFISH_Constants_2 : db72fd2f
0x004960cc: yara3.BLOWFISH_Constants_3 : b7df1ad0
0x004964c0: yara3.BLOWFISH_Constants_4 : e9707a4b
0x004968c8: yara3.BLOWFISH_Constants_5 : 1c264cf6
SHA256_Constants
0x001936c4: yara4.SHA256_Constants_0 : 982f8a42
0x0019372b: yara4.SHA256_Constants_1 : 91443771
0x0019379d: yara4.SHA256_Constants_2 : cffbc0b5
0x001937e5: yara4.SHA256_Constants_3 : a5dbb5e9
As soon as a pattern is identified, a flag is created at the pattern address.
Rule generator
r2yara allows the creation of YARA rules inside radare2 with the yrg group of commands:
[0x00000000]> yrg?
Usage: yrg [action] [args..] load and run yara rules inside r2
| yrg- delete last pattern added to the yara rule
| yrg-* delete all the patterns in the current rule
| yrgs ([len]) add string (optionally specify the length)
| yrgx ([len]) add hexpairs of blocksize (or custom length)
| yrgf ([len]) add function bytepattern signature
| yrgz add all strings referenced from current function
The current state of the YARA rule can be displayed with the yrg command:
[0x00000000]> yrg
WARN: See 'yrg?' to find out which subcommands use to append patterns to the rule
rule rulename : test {
meta:
author = "user"
description = "My first yara rule"
date = "2024-10-22"
version = "0.1"
}
Let's assumed we have found an interesting string during reversing:
[0x00132700]> ps
expand 32-byte k
To add into this pattern to the current YARA rule, the command yrgs can be used together with the length of the pattern to add:
[0x00132700]> yrgs 16
[0x00132700]> yrg
rule rulename : test {
meta:
author = "sylvain"
description = "My first yara rule"
date = "2024-10-22"
version = "0.1"
strings:
$ = "expand 32-byte k"
condition:
all of them
The rule parameters can be changed in the configuration. For example to change the name of the rule, use the following command:
[0x00132700]> e yara.rule = Salsa20
Once the rule is ready, it can be added to other active YARA rules:
[0x00132700]> yr+
INFO: Rule successfully added
[0x00132700]> yrl
Salsa20
Firmware reversing
Once we get a flash dump in our hands it usually requires so many different steps and workflows compared to normal userland programs that we are used to work on.
This chapter will guide you through the necessary steps to understand how to configure your environment, load the required files, analyze and emulate it the very beginning.
As long as these tasks require a lot of steps and tend to be tedious it is important to have some good habits and understand all the concepts before get your hands deep down.
Project Organization
The most common way to get ready with radare2 to analyze a firmware is usually to create a directory containing the firmware file, a makefile or shellscript and a directory to hold few companion files that will help us get all the stuff in place everytime we start the shell.
The reason for not using projects is because usually these targets require some special setups, custom scripts, manual tries and errors and obviously not using the default autoanalysis.
This way we have full control on how r2 will behave and we can always change any line of the scripts to get the right behaviour.
$ cat Makefile
BADDR=0x8000000
all:
r2 -i script.r2 -m $BADDR dump.bin
$ cat script.r2
f entry0=0x8005320
s entry0
CC everything starts here
afr
Cpu model
First of all we need to know or guess which is the target architecture the blob is suposed to be executed.
As long as this file is just a raw dump there is no metadata that can be retrieved from RBin to auto configure the asm.arch and asm.cpu variables.
In some cases the chip is covered with black plastic, hiding the actual model or architecture details. If looking for documentation online doesn't rings any bell we can always try for the most common options until we get a meaningful disassembly listing.
The most common architectures we will find when analysing firmwares or flash dumps are: arm, thumb, tricore, v850, mips, riscv, stm8, tms320 or mcs64.
You can change any of the following options inside the r2 shell after loading the file to see what's in the output of pd for us.
e asm.arch=?
e asm.bits=?
e asm.cpu=?
e cfg.bigendian=true|false
For example a big endian ARM-Thumb environment can be configured like this:
$ r2 -a arm -b 16 -e cfg.bigendian=true
Address Zero
At the beginning of the file we use to find the entrypoint for the boot and sometimes an interrupt vector table, also known as a list of pointers to functions handling specific hardware events.
Reading the code from the very beginning will teach us several things that need to be written down in our startup scripts to get proper analysis.
- Where the binary is located (base address)
- Magic header with branch to code and metadata
- The initial value for the stack pointer
- A branch to the firmware entrypoint
- Hardware initialization routines
- etc.
Boot loaders use to get all the initialization in the begining before jumping out to the main loop or logic, but microcontrollers in the other side use to have an array of pointers to functions.
Those pointers can give us some hints to know where the code is located and which addresses need to be mapped. The first pointer in this interrupt vector array is the RESET. Which points to the function that will be executed at boot time, or when the reset button is pressed.
Some critical systems will reset the hardware and trigger this function when there's a hardware error.
We can use the pxw or pv4 commands to read those pointers. Note that ad will analyze the data automatically for us and resolve the pointers and structures and possible logic behind each value. But we need to have -b 32 to take it as 32 bit dwords.
Another useful command to analyze pointers and vector interrupts is pxr which is a periscoped version of px. The same goes for drr that's applied for analyzing the cpu register values.
Base address
The base address is the address in memory where the firmware is mapped when loaded by the bootloader. This is defined at compile time and specified by the memory layout linker script that is usually tied to the hardware manufacturer and SoC model.
We can specify this using the -m flag of radare2.
Note that there's also -B which is refering to the base address. It's important to understand the difference between them because -m is mapping the whole binary in a specific address, which affects the physical addressing and -B just changes the virtual address rules used by RBin when mapping the binary segments in memory.
In other words:
- Use -B for normal binaries
- Use -m for firmwares and raw dumps
As previously said, by reading the disassembly in the address 0 we can usually find out this value. Let's take this TriCore binary
$ r2 -a tricore.cs -b 32 -e asm.emu=true raw.bin
[0x00000000]> pd 5
0x00000000 movh.a a2, 0x8000 ; a2=0x80000000
0x00000004 lea a2, [a2]0x3124 ; a2=0x80003124
0x00000008 nop
0x0000000a ji a2
0x0000000c nop
[0x00000000]>
We are using the -e asm.emu=true option to tell radare2 to emulate the code so we don't need to manually do the computations done by the assembly and find out the final values used.
This code does:
- a2 = (0x8000 << 16) + 0x3124
- goto a2 // pc=0x80003124
The information we get here is:
- firmware is mapped at address 0x80000000
- entrypoint is located at 0x80003124
So now we can update our script to use r2 -m 0x80000000 and set a flag in the entrypoint with f entry0=0x80003124
Memory layout
Flash dumps usually contain more than just code, the memory layout may differ depending on the device and we can find different setups for the MMU depending on the time of execution.
Most of the time the code will run in real mode, which means that there are no memory protections or isolated executions of different programs. So we can assume the following blocks to be mapped in memory:
- Flash at address zero
- RAM memory (used for stack and heap)
- ROM memory (read only)
- EEPROM (slow writing, used for configurations)
- Cached memory (a copy of another region)
- Peripherals (memory mapped devices)
Map attributes
To create the maps that hold all the memory layout needed to get proper disassembly, analysis and emulation of the firmware we will use different o subcommands.
Other reverse engineering tools are very limited and only allow you to define the following aspects:
- starting address
- ending address
- permissions (rwx)
- volatile (for ram)
- name
But radare2 provides many more options and ways to get your memory ready. The following options can't be found in any other reverse engineering tool out there:
- Multi layer caches
- Overlapping maps with priorities
- Multiple swapable memory banks
- Cyclic memory layouts
- Bound to Nth bits data buses
- Non-byte address spaces (7, 13 bit ...)
- Separate Code and Data
- Segmented memory
- Bake maps with data from files
- Sub-maps caching portions of other maps or files
For now we will just cover the basics which are important to understand and get right in order to understand the rest of the concepts.
Setting up the memory
We have already mapped the firmware to the base address using the -m commandline flag.
But now we need to create a new map for the RAM. Let's imagine our device have 8MB of ram located at address 0x4000_0000:
> on malloc://8M 0x40000000
What this command will do is open the uri malloc:// which opens a new file inside radare2, (the on command won't try to parse any binary header, which is unnecessary) and the 'file' part of the uri specifies the size (using the RNum library considers that it's about MegaBytes because the number ends with 'M').
The second argument tells where this file needs to be mapped in memory.
We can verify that everything worked as expected by using the om command like this:
[0x00000000]> om
- 2 fd: 4 +0x00000000 0x80000000 - 0x087fffff r-x
* 1 fd: 3 +0x00000000 0x40000000 - 0x007fffff rwx
[0x00000000]>
Naming maps is done with the omn. command:
[0x00000000]> omn. FLASH @ entry0
[0x00000000]> omn. RAM
- 2 fd: 4 +0x00000000 0x80000000 - 0x087fffff r-x FLASH
* 1 fd: 3 +0x00000000 0x40000000 - 0x007fffff rwx RAM
[0x00000000]>
We can change the permissions of each map using the omp command but bear in mind that we won't be able to make a page writeable if the underlying file descriptor is read-only.
To write the contents of a file inside a map we may use the wff command.
[0x00000000]> wff?
| wf[fs] -|file write contents of file at current offset
Peripherals
Buttons, screens, leds, serial ports and sensors are usually accessible through mapping their registers as part of the memory. Usually this memory can't be read or written directly because every single bit can cause a wait lock, infinite loops, undesired hardware changes, etc
The Intel X86 architecture used IO ports accessible through two instructions (IN/OUT) to communicate with hardware. But all the RISC machines end up using the memory unit to make them accessible by just using peek and poke operations.
This is we can find the clock timer in a dword around and we will have a different value each time we read from there. But writing in this dword won't do anything.
Use flags to name each of these addresses, and you may get xrefs to them when analysing the code.
Loading SVD files
SVD stands for System View Description. It is a standardized XML-based file format that provides detailed descriptions of the registers, memory, and peripheral mappings of a microcontroller or a system-on-chip (SoC).
These descriptions are crucial for reverse engineering efforts, as they allow engineers to understand how firmware interacts with the hardware at a low level, facilitating the identification of key functionality, debugging, and modification of firmware.
By parsing SVD files, reverse engineers can automate the process of mapping firmware code to hardware registers, streamlining the reverse engineering process and improving accuracy.
The r2svd program takes one of these XML files and creates an r2 script that sets all these flags in the right addresses.
$ head tc1767.pspec.r2
f pin.SBCU_ID=0xF0000108
f pin.SBCU_CON=0xF0000110
f pin.SBCU_ECON=0xF0000120
f pin.SBCU_EADD=0xF0000124
f pin.SBCU_EDAT=0xF0000128
f pin.SBCU_DBCNTL=0xF0000130
f pin.SBCU_DBGRNT=0xF0000134
f pin.SBCU_DBADR1=0xF0000138
Note that we can extract the ranges of memory where the peripherals are located and we should create new maps to cover them.
Crackmes
Reverse engineering is a crucial skill in today's digital landscape, and one of the best ways to hone this skill is by participating in crackme challenges. A crackme (short for "crack me" challenge) is a piece of software or firmware that has been intentionally obfuscated or encrypted, making it difficult to reverse engineer without the correct key or password.
In this chapter, we will explore how to use radare2 to defeat various crackmes and uncover their secrets. We will cover tutorials on how to analyze and disassemble different types of crackmes, including those that use encryption, compression, and other forms of obfuscation.
By following along with these tutorials, you will gain a deeper understanding of the reverse engineering process and develop the skills needed to tackle even the most challenging crackmes. Whether you're a beginner or an experienced reverser, this chapter is designed to provide you with the tools and knowledge necessary to take on any crackme that comes your way.
So let's get started!
IOLI CrackMes
The Ioli Crackmes are a series of reverse engineering exercises designed by Pau Oliva Fora for users of Radare1, this revision is up to date with the latest version of Radare2.
These exercises are intended to help you learn and practice reverse engineering techniques using Radare2. Each crackme is a self-contained challenge that requires you to analyze and understand executable files, gradually building your skills as you progress.
Each crackme in the series is slightly more difficult than the previous one, introducing new concepts and commands at a manageable pace. This incremental difficulty helps ease the learning process, ensuring that you gain a solid understanding of basic techniques before moving on to more complex tasks. As you advance, you will become more proficient in using Radare2 and develop a deeper understanding of reverse engineering principles.
Every crackme is presented in three sections:
- An introduction that explains the challenge to be solved,
- Hints that provide guidance on useful commands and steps to follow
- Solution section that offers a step-by-step guide to solving the challenge.
This structured approach ensures that you not only learn how to solve each specific crackme but also understand the underlying concepts and methodologies, allowing you to apply these skills to other reverse engineering tasks in the future.
Contents based on the dustri tutorials.
The binaries are available at mirror
IOLI 0x00
This first challenge is designed to introduce you to the basics of reverse engineering with Radare2. The objective is to find the correct password to unlock the program.
By executing the program you may see something like this:
$ ./crackme0x00
IOLI Crackme Level 0x00
Password: 1234
Invalid Password!
Hints
For this initial challenge, you won’t need to dive into complex disassembly. Instead, focus on searching for plaintext strings within the binary file.
There are multiple ways to find the strings embedded inside a binary, which are equivalents to the GNU strings utility.
- Check the manpage and help message of rabin2
- Use
man rabin2andrabin2 -hin your terminal
- Use
- Load the binary with radare2
- Append the question mark to the
iandizcommands to find relevant - Understand the difference between
iz,izzandizzz
- Append the question mark to the
- Read the output of those commands and make a blind guess
Solution
As explained in the hints, the first thing to check is if the password is just plaintext inside the file. In this case, we don't need to do any disassembly, and we can just use rabin2 with the -z flag to search for strings in the binary.
$ rabin2 -z ./crackme0x00
[Strings]
nth paddr vaddr len size section type string
-------------------------------------------------------
0 0x00000568 0x08048568 24 25 .rodata ascii IOLI Crackme Level 0x00\n
1 0x00000581 0x08048581 10 11 .rodata ascii Password:
2 0x0000058f 0x0804858f 6 7 .rodata ascii 250382
3 0x00000596 0x08048596 18 19 .rodata ascii Invalid Password!\n
4 0x000005a9 0x080485a9 15 16 .rodata ascii Password OK :)\n
Let's understand the output of this command line by line:
The first section is the header displayed when the application runs.
nth paddr vaddr len size section type string
-------------------------------------------------------
0 0x00000568 0x08048568 24 25 .rodata ascii IOLI Crackme Level 0x00\n
Next, we see the prompt for the password.
1 0x00000581 0x08048581 10 11 .rodata ascii Password:
Then, the error message for an invalid password.
3 0x00000596 0x08048596 18 19 .rodata ascii Invalid Password!\n
Finally, the message indicating a successful password entry.
4 0x000005a9 0x080485a9 15 16 .rodata ascii Password OK :)\n
What about this string? It hasn’t appeared when running the application yet.
2 0x0000058f 0x0804858f 6 7 .rodata ascii 250382
Let’s try using it as the password.
$ ./crackme0x00
IOLI Crackme Level 0x00
Password: 250382
Password OK :)
Now we know that 250382 is the correct password, completing this crackme!
IOLI 0x01
This second challenge is designed to introduce you to more advanced reverse engineering techniques using Radare2. The objective is to find the correct password to unlock the program by examining the binary’s disassembly.
$ ./crackme0x01
IOLI Crackme Level 0x01
Password: test
Invalid Password!
Hints
To solve this challenge, this time you will need to go beyond searching for plaintext strings.
Learn how to load the binary with radare2, analise the code and disassemble the main function.
- Load the binary with radare2 and use the
-Aor-AAflags to analyze the program before showing the prompt.
These flags will run aa or aaa. The more a's you append the deeper the analysis will be, so it will perform more actions, which in some cases it's useful, but in other can result on invalid results, learn about the differences and find the right balance for each target you face. For our needs aa should be probably enough.
$ r2 -A crackme0x01
To disassemble the main function you can use the pdf command. You can learn about other disassembly commands by typing pd?.
In the disassembled code, look for cmp (compare) instructions. These are often used to compare user input against hardcoded values. Identifying these values can help you find the correct password.
You can practice a little the | (pipe operator) or the ~ (internal grep) special characters to grep directly the instructions you need:
> s main
> pdf~cmp
Usually the immediate values displayed in the disassembly are formatted in hexadecimal. Use the rax2 program or the ? command to find out the representation in other bases (like base10)
$ rax2 0x123
291
Now it's probably a good time to make another blind guess trying the value by running the crackme and typing the number.
Solution
Let's go step by step to solve the second IOLI crackme. We can start by trying what we learned in the previous challenge by listing the strings with rabin2:
$ rabin2 -z ./crackme0x01
[Strings]
nth paddr vaddr len size section type string
-------------------------------------------------------
0 0x00000528 0x08048528 24 25 .rodata ascii IOLI Crackme Level 0x01\n
1 0x00000541 0x08048541 10 11 .rodata ascii Password:
2 0x0000054f 0x0804854f 18 19 .rodata ascii Invalid Password!\n
3 0x00000562 0x08048562 15 16 .rodata ascii Password OK :)\n
This isn't going to be as easy as 0x00. Let's try disassembly with r2.
$ r2 ./crackme0x01
[0x08048330]> aa
INFO: Analyze all flags starting with sym. and entry0 (aa)
INFO: Analyze imports (af@@@i)
INFO: Analyze entrypoint (af@ entry0)
INFO: Analyze symbols (af@@@s)
INFO: Recovering variables (afva@@@F)
INFO: Analyze all functions arguments/locals (afva@@@F)
[0x08048330]> -e asm.bytes=false # dont show the bytes
[0x08048330]> pdf@main
; DATA XREF from entry0 @ 0x8048347
/ 113: int main (int argc, char **argv, char **envp);
| ; var int32_t var_4h @ ebp-0x4
| ; var int32_t var_sp_4h @ esp+0x4
| 0x080483e4 push ebp
| 0x080483e5 mov ebp, esp
| 0x080483e7 sub esp, 0x18
| 0x080483ea and esp, 0xfffffff0
| 0x080483ed mov eax, 0
| 0x080483f2 add eax, 0xf
| 0x080483f5 add eax, 0xf
| 0x080483f8 shr eax, 4
| 0x080483fb shl eax, 4
| 0x080483fe sub esp, eax
| 0x08048400 mov dword [esp], str.IOLI_Crackme_Level_0x01
| 0x08048407 call sym.imp.printf
| 0x0804840c mov dword [esp], str.Password:
| 0x08048413 call sym.imp.printf
| 0x08048418 lea eax, [var_4h]
| 0x0804841b mov dword [var_sp_4h], eax
| 0x0804841f mov dword [esp], 0x804854c
| 0x08048426 call sym.imp.scanf
| 0x0804842b cmp dword [var_4h], 0x149a
| ,=< 0x08048432 je 0x8048442
| | 0x08048434 mov dword [esp], str.Invalid_Password
| | 0x0804843b call sym.imp.printf
| ,==< 0x08048440 jmp 0x804844e
| |`-> 0x08048442 mov dword [esp], str.Password_OK_:
| | 0x08048449 call sym.imp.printf
| `--> 0x0804844e mov eax, 0
| 0x08048453 leave
\ 0x08048454 ret
The aa command instructs r2 to analyze the whole binary, which gets you symbol names, among things.
The pdf stands for "Print" "Disassembly" of the "Function". The @ character will perform a temporal seek to the given address or symbol name.
This will print the disassembly of the main function, or the main() that everyone knows. You can see several things as well: weird names, arrows, etc.
imp.stands for imports. (Functions imported from libraries, likeprintfwhich is in the libc)str.stands for strings. (Usually those listed by theizcommand)
If you look carefully, you'll see a cmp instruction, with a constant, 0x149a. cmp is an x86 compare instruction, and the 0x in front of it specifies it is in base 16, or hex (hexadecimal).
[0x08048330]> pdf@main~cmp
0x0804842b 817dfc9a140. cmp dword [ebp + 0xfffffffc], 0x149a
You can use radare2's ? command to display 0x149a in another numeric base.
[0x08048330]> ? 0x149a
int32 5274
uint32 5274
hex 0x149a
octal 012232
unit 5.2K
segment 0000:049a
string "\x9a\x14"
fvalue: 5274.0
float: 0.000000f
double: 0.000000
binary 0b0001010010011010
trits 0t21020100
So now we know that 0x149a is 5274 in decimal. Let's try this as a password.
$ ./crackme0x01
IOLI Crackme Level 0x01
Password: 5274
Password OK :)
Bingo, the password was 5274. In this case, the password function at 0x0804842b was comparing the input against the value, 0x149a in hex. Since user input is usually decimal, it was a safe bet that the input was intended to be in decimal, or 5274. Now, since we're hackers, and curiosity drives us, let's see what happens when we input in hex.
$ ./crackme0x01
IOLI Crackme Level 0x01
Password: 0x149a
Invalid Password!
It was worth a shot, but it doesn't work. That's because scanf() will take the 0 in 0x149a to be a zero, rather than accepting the input as actually being the hex value.
And this concludes IOLI 0x01.
IOLI 0x02
This is the third one.
$ ./crackme0x02
IOLI Crackme Level 0x02
Password: hello
Invalid Password!
check it with rabin2.
$ rabin2 -z ./crackme0x02
[Strings]
nth paddr vaddr len size section type string
-------------------------------------------------------
0 0x00000548 0x08048548 24 25 .rodata ascii IOLI Crackme Level 0x02\n
1 0x00000561 0x08048561 10 11 .rodata ascii Password:
2 0x0000056f 0x0804856f 15 16 .rodata ascii Password OK :)\n
3 0x0000057f 0x0804857f 18 19 .rodata ascii Invalid Password!\n
similar to 0x01, no explicit password string here. so it's time to analyze it with r2.
[0x08048330]> aa
[x] Analyze all flags starting with sym. and entry0 (aa)
[0x08048330]> pdf@main
; DATA XREF from entry0 @ 0x8048347
/ 144: int main (int argc, char **argv, char **envp);
| ; var int32_t var_ch @ ebp-0xc
| ; var int32_t var_8h @ ebp-0x8
| ; var int32_t var_4h @ ebp-0x4
| ; var int32_t var_sp_4h @ esp+0x4
| 0x080483e4 55 push ebp
| 0x080483e5 89e5 mov ebp, esp
| 0x080483e7 83ec18 sub esp, 0x18
| 0x080483ea 83e4f0 and esp, 0xfffffff0
| 0x080483ed b800000000 mov eax, 0
| 0x080483f2 83c00f add eax, 0xf ; 15
| 0x080483f5 83c00f add eax, 0xf ; 15
| 0x080483f8 c1e804 shr eax, 4
| 0x080483fb c1e004 shl eax, 4
| 0x080483fe 29c4 sub esp, eax
| 0x08048400 c70424488504. mov dword [esp], str.IOLI_Crackme_Level_0x02 ; [0x8048548:4]=0x494c4f49 ; "IOLI Crackme Level 0x02\n"
| 0x08048407 e810ffffff call sym.imp.printf ; int printf(const char *format)
| 0x0804840c c70424618504. mov dword [esp], str.Password: ; [0x8048561:4]=0x73736150 ; "Password: "
| 0x08048413 e804ffffff call sym.imp.printf ; int printf(const char *format)
| 0x08048418 8d45fc lea eax, [var_4h]
| 0x0804841b 89442404 mov dword [var_sp_4h], eax
| 0x0804841f c704246c8504. mov dword [esp], 0x804856c ; [0x804856c:4]=0x50006425
| 0x08048426 e8e1feffff call sym.imp.scanf ; int scanf(const char *format)
| 0x0804842b c745f85a0000. mov dword [var_8h], 0x5a ; 'Z' ; 90
| 0x08048432 c745f4ec0100. mov dword [var_ch], 0x1ec ; 492
| 0x08048439 8b55f4 mov edx, dword [var_ch]
| 0x0804843c 8d45f8 lea eax, [var_8h]
| 0x0804843f 0110 add dword [eax], edx
| 0x08048441 8b45f8 mov eax, dword [var_8h]
| 0x08048444 0faf45f8 imul eax, dword [var_8h]
| 0x08048448 8945f4 mov dword [var_ch], eax
| 0x0804844b 8b45fc mov eax, dword [var_4h]
| 0x0804844e 3b45f4 cmp eax, dword [var_ch]
| ,=< 0x08048451 750e jne 0x8048461
| | 0x08048453 c704246f8504. mov dword [esp], str.Password_OK_: ; [0x804856f:4]=0x73736150 ; "Password OK :)\n"
| | 0x0804845a e8bdfeffff call sym.imp.printf ; int printf(const char *format)
| ,==< 0x0804845f eb0c jmp 0x804846d
| |`-> 0x08048461 c704247f8504. mov dword [esp], str.Invalid_Password ; [0x804857f:4]=0x61766e49 ; "Invalid Password!\n"
| | 0x08048468 e8affeffff call sym.imp.printf ; int printf(const char *format)
| | ; CODE XREF from main @ 0x804845f
| `--> 0x0804846d b800000000 mov eax, 0
| 0x08048472 c9 leave
\ 0x08048473 c3 ret
with the experience of solving crackme0x02, we first locate the position of cmp instruction by using this simple oneliner:
[0x08048330]> pdf@main | grep cmp
| 0x0804844e 3b45f4 cmp eax, dword [var_ch]
Unfortunately, the variable compared to eax is stored in the stack. we can't check the value of this variable directly. It's a common case in reverse engineerning that we have to derive the value of the variable from the previous sequence. As the amount of code is relatively small, it's possible.
for example:
| 0x080483ed b800000000 mov eax, 0
| 0x080483f2 83c00f add eax, 0xf ; 15
| 0x080483f5 83c00f add eax, 0xf ; 15
| 0x080483f8 c1e804 shr eax, 4
| 0x080483fb c1e004 shl eax, 4
| 0x080483fe 29c4 sub esp, eax
we can easily get the value of eax. it's 0x16.
It gets hard when the scale of program grows. radare2 provides a pseudo disassembler output in C-like syntax. It may be useful.
[0x08048330]> pdc@main
function main () {
// 4 basic blocks
loc_0x80483e4:
//DATA XREF from entry0 @ 0x8048347
push ebp
ebp = esp
esp -= 0x18
esp &= 0xfffffff0
eax = 0
eax += 0xf //15
eax += 0xf //15
eax >>>= 4
eax <<<= 4
esp -= eax
dword [esp] = "IOLI Crackme Level 0x02\n" //[0x8048548:4]=0x494c4f49 ; str.IOLI_Crackme_Level_0x02 ; const char *format
int printf("IOLI Crackme Level 0x02\n")
dword [esp] = "Password: " //[0x8048561:4]=0x73736150 ; str.Password: ; const char *format
int printf("Password: ")
eax = var_4h
dword [var_sp_4h] = eax
dword [esp] = 0x804856c //[0x804856c:4]=0x50006425 ; const char *format
int scanf("%d")
//sym.imp.scanf ()
dword [var_8h] = 0x5a //'Z' ; 90
dword [var_ch] = 0x1ec //492
edx = dword [var_ch]
eax = var_8h //"Z"
dword [eax] += edx
eax = dword [var_8h]
eax = eax * dword [var_8h]
dword [var_ch] = eax
eax = dword [var_4h]
var = eax - dword [var_ch]
if (var) goto 0x8048461 //likely
{
loc_0x8048461:
//CODE XREF from main @ 0x8048451
dword [esp] = s"Invalid Password!\n"//[0x804857f:4]=0x61766e49 ; str.Invalid_Password ; const char *format
int printf("Invalid ")
do
{
loc_0x804846d:
//CODE XREF from main @ 0x804845f
eax = 0
leave //(pstr 0x0804857f) "Invalid Password!\n" ebp ; str.Invalid_Password
return
} while (?);
} while (?);
}
return;
}
The pdc command is unreliable especially in processing loops (while, for, etc.). So I prefer to use the r2dec plugin in r2 repo to generate the pseudo C code. you can install it easily:
r2pm install r2dec
decompile main() with the following command (like F5 in IDA):
[0x08048330]> pdd@main
/* r2dec pseudo code output */
/* ./crackme0x02 @ 0x80483e4 */
#include <stdint.h>
int32_t main (void) {
uint32_t var_ch;
int32_t var_8h;
int32_t var_4h;
int32_t var_sp_4h;
eax = 0;
eax += 0xf;
eax += 0xf;
eax >>= 4;
eax <<= 4;
printf ("IOLI Crackme Level 0x02\n");
printf ("Password: ");
eax = &var_4h;
*((esp + 4)) = eax;
scanf (0x804856c);
var_8h = 0x5a;
var_ch = 0x1ec;
edx = 0x1ec;
eax = &var_8h;
*(eax) += edx;
eax = var_8h;
eax *= var_8h;
var_ch = eax;
eax = var_4h;
if (eax == var_ch) {
printf ("Password OK :)\n");
} else {
printf ("Invalid Password!\n");
}
eax = 0;
return eax;
}
It's more human-readable now. To check the string in 0x804856c, we can:
- seek
- print string
[0x08048330]> s 0x804856c
[0x0804856c]> ps
%d
it's exactly the format string of scanf(). But r2dec does not recognize the second argument (eax) which is a pointer. it points to var_4h and means our input will store in var_4h.
we can easily write out pseudo code here.
var_ch = (var_8h + var_ch)^2;
if (var_ch == our_input)
printf("Password OK :)\n");
given the initial status that var_8h is 0x5a, var_ch is 0x1ec, we have var_ch = 338724 (0x52b24):
$ rax2 '=10' '(0x5a+0x1ec)*(0x5a+0x1ec)'
338724
$ ./crackme0x02
IOLI Crackme Level 0x02
Password: 338724
Password OK :)
and we finish the crackme0x02.
IOLI 0x03
crackme 0x03, let's skip the string check part and analyze it directly.
[0x08048360]> aaa
[0x08048360]> pdd@sym.main
/* r2dec pseudo code output */
/* ./crackme0x03 @ 0x8048498 */
#include <stdint.h>
int32_t main (void) {
int32_t var_ch;
int32_t var_8h;
int32_t var_4h;
int32_t var_sp_4h;
eax = 0;
eax += 0xf;
eax += 0xf;
eax >>= 4;
eax <<= 4;
printf ("IOLI Crackme Level 0x03\n");
printf ("Password: ");
eax = &var_4h;
scanf (0x8048634, eax);
var_8h = 0x5a;
var_ch = 0x1ec;
edx = 0x1ec;
eax = &var_8h;
*(eax) += edx;
eax = var_8h;
eax *= var_8h;
var_ch = eax;
eax = var_4h;
test (eax, eax);
eax = 0;
return eax;
}
It looks straightforward except the function test(eax, eax). This is unusual to call a function with same two parameters , so I speculate that the decompiler has gone wrong. we can check it in disassembly.
[0x08048360]> pdf@sym.main
...
0x080484fc 8945f4 mov dword [var_ch], eax
0x080484ff 8b45f4 mov eax, dword [var_ch]
0x08048502 89442404 mov dword [var_sp_4h], eax ; uint32_t arg_ch
0x08048506 8b45fc mov eax, dword [var_4h]
0x08048509 890424 mov dword [esp], eax ; int32_t arg_8h
0x0804850c e85dffffff call sym.test
...
Here comes thesym.test, called with two parameters. One is var_4h (our input from scanf()). The other is var_ch. The value of var_ch (as the parameter of test()) can be calculated like it did in crackme_0x02. It's 0x52b24. Try it!
$ ./crackme0x03
IOLI Crackme Level 0x03
Password: 338724
Password OK!!! :)
Take a look at sym.test. It's a two path conditional jump which compares two parameters and then do shift. We can guess that shift is most likely the decryption part (shift cipher, e.g. Caesar cipher).
/* r2dec pseudo code output */
/* ./crackme0x03 @ 0x804846e */
#include <stdint.h>
int32_t test (int32_t arg_8h, uint32_t arg_ch) {
eax = arg_8h;
if (eax != arg_ch) {
shift ("Lqydolg#Sdvvzrug$");
} else {
shift ("Sdvvzrug#RN$$$#=,");
}
return eax;
}
can also reverse shift() to satisfy curiosity.
[0x08048360]> pdf@sym.shift
; CODE (CALL) XREF 0x08048491 (sym.test)
; CODE (CALL) XREF 0x08048483 (sym.test)
/ function: sym.shift (90)
| 0x08048414 sym.shift:
| 0x08048414 55 push ebp
| 0x08048415 89e5 mov ebp, esp
| 0x08048417 81ec98000000 sub esp, 0x98
| 0x0804841d c7458400000000 mov dword [ebp-0x7c], 0x0 ; this seems to be a counter
| . ; CODE (JMP) XREF 0x0804844e (sym.shift)
/ loc: loc.08048424 (74)
| . 0x08048424 loc.08048424:
| .--> 0x08048424 8b4508 mov eax, [ebp+0x8] ; ebp+0x8 = strlen(chain)
| | 0x08048427 890424 mov [esp], eax
| | 0x0804842a e811ffffff call dword imp.strlen
| | ; imp.strlen()
| | 0x0804842f 394584 cmp [ebp-0x7c], eax
| |,=< 0x08048432 731c jae loc.08048450
| || 0x08048434 8d4588 lea eax, [ebp-0x78]
| || 0x08048437 89c2 mov edx, eax
| || 0x08048439 035584 add edx, [ebp-0x7c]
| || 0x0804843c 8b4584 mov eax, [ebp-0x7c]
| || 0x0804843f 034508 add eax, [ebp+0x8]
| || 0x08048442 0fb600 movzx eax, byte [eax]
| || 0x08048445 2c03 sub al, 0x3
| || 0x08048447 8802 mov [edx], al
| || 0x08048449 8d4584 lea eax, [ebp-0x7c]
| || 0x0804844c ff00 inc dword [eax]
| `==< 0x0804844e ebd4 jmp loc.08048424
| | ; CODE (JMP) XREF 0x08048432 (sym.shift)
/ loc: loc.08048450 (30)
| | 0x08048450 loc.08048450:
| `-> 0x08048450 8d4588 lea eax, [ebp-0x78]
| 0x08048453 034584 add eax, [ebp-0x7c]
| 0x08048456 c60000 mov byte [eax], 0x0
| 0x08048459 8d4588 lea eax, [ebp-0x78]
| 0x0804845c 89442404 mov [esp+0x4], eax
| 0x08048460 c70424e8850408 mov dword [esp], 0x80485e8
| 0x08048467 e8e4feffff call dword imp.printf
| ; imp.printf()
| 0x0804846c c9 leave
\ 0x0804846d c3 ret
; ------------
you can read the assembly code and find the decryption is actually a "sub al, 0x3". we can write a python script for it:
print(''.join([chr(ord(i)-0x3) for i in 'SdvvzrugRN$$$']))
print(''.join([chr(ord(i)-0x3) for i in 'LqydolgSdvvzrug$']))
the easier way is to run the decryption code, that means debug it or emulate it. I used radare2 ESIL emulator but it got stuck when executed call dword imp.strlen. And I can't find the usage of hooking function / skip instruction in radare2. The following is an example to show u how to emulate ESIL.
[0x08048414]> s 0x08048445 # the 'sub al, 0x03'
[0x08048445]> aei # init VM
[0x08048445]> aeim # init memory
[0x08048445]> aeip # init ip
[0x08048445]> aer eax=0x41 # set eax=0x41 -- 'A'
[0x08048445]> aer # show current value of regs
oeax = 0x00000000
eax = 0x00000041
ebx = 0x00000000
ecx = 0x00000000
edx = 0x00000000
esi = 0x00000000
edi = 0x00000000
esp = 0x00178000
ebp = 0x00178000
eip = 0x08048445
eflags = 0x00000000
[0x08048445]> V # enter Visual mode
# 'p' or 'P' to change visual mode
# I prefer the [xaDvc] mode
# use 's' to step in and 'S' to step over
[0x08048442 [xaDvc]0 0% 265 ./crackme0x03]> diq;?0;f t.. @ sym.shift+46 # 0x8048442
dead at 0x00000000
- offset - 0 1 2 3 4 5 6 7 8 9 A B C D E F 0123456789ABCDEF
0x00178000 0000 0000 0000 0000 0000 0000 0000 0000 ................
0x00178010 0000 0000 0000 0000 0000 0000 0000 0000 ................
0x00178020 0000 0000 0000 0000 0000 0000 0000 0000 ................
0x00178030 0000 0000 0000 0000 0000 0000 0000 0000 ................
oeax 0x00000000 eax 0x00000041 ebx 0x00000000 ecx 0x00000000
edx 0x00000000 esi 0x00000000 edi 0x00000000 esp 0x00178000
ebp 0x00178000 eip 0x08048445 eflags 0x00000000
: 0x08048442 0fb600 movzx eax, byte [eax]
: ;-- eip:
: 0x08048445 2c03 sub al, 3
: 0x08048447 8802 mov byte [edx], al
: 0x08048449 8d4584 lea eax, [var_7ch]
: 0x0804844c ff00 inc dword [eax]
:=< 0x0804844e ebd4 jmp 0x8048424
; CODE XREF from sym.shift @ 0x8048432
0x08048450 8d4588 lea eax, [var_78h]
By the way, u can also open the file and use write data command to decrypt data.
$ r2 -w ./crackme0x03
[0x08048360]> aaa
[0x08048360]> fs strings
[0x08048360]> f
0x080485ec 18 str.Lqydolg_Sdvvzrug
0x080485fe 18 str.Sdvvzrug_RN
0x08048610 25 str.IOLI_Crackme_Level_0x03
0x08048629 11 str.Password:
[0x08048360]> s str.Lqydolg_Sdvvzrug
[0x080485ec]> wos 0x03 @ str.Lqydolg_Sdvvzrug!0x11
[0x080485ec]> px
- offset - 0 1 2 3 4 5 6 7 8 9 A B C D E F 0123456789ABCDEF
0x080485ec 496e 7661 6c69 6420 5061 7373 776f 7264 Invalid Password
0x080485fc 2100 5364 7676 7a72 7567 2352 4e24 2424 !.Sdvvzrug#RN$$$
0x0804860c 233d 2c00 494f 4c49 2043 7261 636b 6d65 #=,.IOLI Crackme
0x0804861c 204c 6576 656c 2030 7830 330a 0050 6173 Level 0x03..Pas
0x0804862c 7377 6f72 643a 2000 2564 0000 0000 0000 sword: .%d......
[0x080485ec]> wos 0x03 @ str.Sdvvzrug_RN!17
[0x080485ec]> px
- offset - 0 1 2 3 4 5 6 7 8 9 A B C D E F 0123456789ABCDEF
0x080485ec 496e 7661 6c69 6420 5061 7373 776f 7264 Invalid Password
0x080485fc 2100 5061 7373 776f 7264 204f 4b21 2121 !.Password OK!!!
0x0804860c 203a 2900 494f 4c49 2043 7261 636b 6d65 :).IOLI Crackme
0x0804861c 204c 6576 656c 2030 7830 330a 0050 6173 Level 0x03..Pas
0x0804862c 7377 6f72 643a 2000 2564 0000 0000 0000 sword: .%d......
[0x080485ec]>
IOLI 0x04
[0x080483d0]> pdd@main
/* r2dec pseudo code output */
/* ./crackme0x04 @ 0x8048509 */
#include <stdint.h>
int32_t main (void) {
int32_t var_78h;
int32_t var_4h;
eax = 0;
eax += 0xf;
eax += 0xf;
eax >>= 4;
eax <<= 4;
printf ("IOLI Crackme Level 0x04\n");
printf ("Password: ");
eax = &var_78h;
scanf (0x8048682, eax);
eax = &var_78h;
check (eax);
eax = 0;
return eax;
}
Let's enter check.
#include <stdint.h>
int32_t check (char * s) {
char * var_dh;
uint32_t var_ch;
uint32_t var_8h;
int32_t var_4h;
char * format;
int32_t var_sp_8h;
var_8h = 0;
var_ch = 0;
do {
eax = s;
eax = strlen (eax);
if (var_ch >= eax) {
goto label_0;
}
eax = var_ch;
eax += s;
eax = *(eax);
var_dh = al;
eax = &var_4h;
eax = &var_dh;
sscanf (eax, eax, 0x8048638);
edx = var_4h;
eax = &var_8h;
*(eax) += edx;
if (var_8h == 0xf) {
printf ("Password OK!\n");
exit (0);
}
eax = &var_ch;
*(eax)++;
} while (1);
label_0:
printf ("Password Incorrect!\n");
return eax;
}
manually analyze with both the assembly and pseudo code we can simply write down the C-like code to describe this function:
#include <stdint.h>
int32_t check(char *s)
{
var_ch = 0;
var_8h = 0;
for (var_ch = 0; var_ch < strlen(s); ++var_ch)
{
var_dh = s[var_ch];
sscanf(&var_dh, %d, &var_4h); // read from string[var_ch], store to var_4h
var_8h += var_4h;
if(var_8h == 0xf)
printf("Password OK\n");
}
printf("Password Incorrect!\n");
return 0;
}
In short, it calculates the Digit Sum of a number (add a number digit by digit. for example, 96 => 9 + 6 = 15) :
$ ./crackme0x04
IOLI Crackme Level 0x04
Password: 12345
Password OK!
$ ./crackme0x04
IOLI Crackme Level 0x04
Password: 96
Password OK!
IOLI 0x05
check again, it uses scanf() to get our input and pass it to check() as parameter.
[0x080483d0]> pdd@main
/* r2dec pseudo code output */
/* ./crackme0x05 @ 0x8048540 */
#include <stdint.h>
int32_t main (void) {
int32_t var_78h;
int32_t var_4h;
eax = 0;
eax += 0xf;
eax += 0xf;
eax >>= 4;
eax <<= 4;
printf ("IOLI Crackme Level 0x05\n");
printf ("Password: ");
eax = &var_78h;
scanf (0x80486b2, eax); // 0x80486b2 is %s
eax = &var_78h;
check (eax);
eax = 0;
return eax;
}
the check() function:
/* r2dec pseudo code output */
/* ./crackme0x05 @ 0x80484c8 */
#include <stdint.h>
int32_t check (char * s) {
char * var_dh;
uint32_t var_ch;
uint32_t var_8h;
int32_t var_4h;
char * format;
int32_t var_sp_8h;
var_8h = 0;
var_ch = 0;
do {
eax = s;
eax = strlen (eax);
if (var_ch >= eax) {
goto label_0;
}
eax = var_ch;
eax += s;
eax = *(eax);
var_dh = al;
eax = &var_4h;
eax = &var_dh;
sscanf (eax, eax, 0x8048668); // 0x8048668 is %d
edx = var_4h;
eax = &var_8h;
*(eax) += edx;
if (var_8h == 0x10) {
eax = s;
parell (eax);
}
eax = &var_ch;
*(eax)++;
} while (1);
label_0:
printf ("Password Incorrect!\n");
return eax;
}
The same, we can write our own C-like pseudo code.
#include <stdint.h>
int32_t check(char *s)
{
var_ch = 0;
var_8h = 0;
for (var_ch = 0; var_ch < strlen(s); ++var_ch)
{
var_dh = s[var_ch];
sscanf(&var_dh, %d, &var_4h); // read from string[var_ch], store to var_4h
var_8h += var_4h;
if(var_8h == 0x10)
parell(s);
}
printf("Password Incorrect!\n");
return 0;
}
The if condition becomes var_8h == 0x10. In addition, a new function call - parell(s) replace the printf("password OK")now. The next step is to reverse sym.parell.
[0x08048484]> s sym.parell
[0x08048484]> pdd@sym.parell
/* r2dec pseudo code output */
/* ./crackme0x05 @ 0x8048484 */
#include <stdint.h>
uint32_t parell (char * s) {
int32_t var_4h;
char * format;
int32_t var_8h;
eax = &var_4h;
eax = s;
sscanf (eax, eax, 0x8048668);
eax = var_4h;
eax &= 1;
if (eax == 0) {
printf ("Password OK!\n");
exit (0);
}
return eax;
}
the decompiled code looks well except the sscanf() function. It can be easily corrected by checking the assembly code.
/ 68: sym.parell (int32_t arg_8h);
| ; var int32_t var_4h @ ebp-0x4
| ; arg int32_t arg_8h @ ebp+0x8
| ; var int32_t var_sp_4h @ esp+0x4
| ; var int32_t var_8h @ esp+0x8
| 0x08048484 55 push ebp
| 0x08048485 89e5 mov ebp, esp
| 0x08048487 83ec18 sub esp, 0x18
| 0x0804848a 8d45fc lea eax, [var_4h]
| 0x0804848d 89442408 mov dword [var_8h], eax
| 0x08048491 c74424046886. mov dword [var_sp_4h], 0x8048668 ; [0x8048668:4]=0x50006425 %d
| 0x08048499 8b4508 mov eax, dword [arg_8h]
| 0x0804849c 890424 mov dword [esp], eax
| 0x0804849f e800ffffff call sym.imp.sscanf ; int sscanf(const char *s, const char *format, ...)
....
The mov dword [esp], eax is the nearest instruction to sscanf (and it's equivalent to a push instruction). It stores the string 's' to the stack top (arg1). mov dword [var_sp_4h], 0x8048668 push '%d' as arg2 into stack. var_8h (esp + 0x8) which keeps the address of var_4h is the arg3.
Finally we have the corrected pseudo code:
uint32_t parell (char * s) {
sscanf (s, %d, &var_4h);
if ((var_4h & 1) == 0) {
printf ("Password OK!\n");
exit(0);
}
return 0;
}
Now there are 2 constraints:
- Digit Sum is 16 (0x10)
- Must be an even number (1 & number == 0)
The password is at our fingertips now.
$ ./crackme0x05
IOLI Crackme Level 0x05
Password: 88
Password OK!
$ ./crackme0x05
IOLI Crackme Level 0x05
Password: 12346
Password OK!
we can also use angr to solve it since we have two constraints to the password.
IOLI 0x06
nearly a routine to check this binary (not complete output in the following):
$ rabin2 -z ./crackme0x06
[Strings]
nth paddr vaddr len size section type string
-------------------------------------------------------
0 0x00000738 0x08048738 4 5 .rodata ascii LOLO
1 0x00000740 0x08048740 13 14 .rodata ascii Password OK!\n
2 0x0000074e 0x0804874e 20 21 .rodata ascii Password Incorrect!\n
3 0x00000763 0x08048763 24 25 .rodata ascii IOLI Crackme Level 0x06\n
4 0x0000077c 0x0804877c 10 11 .rodata ascii Password:
$ rabin2 -I ./crackme0x06
arch x86
baddr 0x8048000
bintype elf
bits 32
compiler GCC: (GNU) 3.4.6 (Gentoo 3.4.6-r2, ssp-3.4.6-1.0, pie-8.7.10)
crypto false
endian little
havecode true
lang c
machine Intel 80386
maxopsz 16
minopsz 1
os linux
static false
va true
and analyze it then decompile main
[0x08048400]> pdd@main
/* r2dec pseudo code output */
/* ./crackme0x06 @ 0x8048607 */
#include <stdint.h>
int32_t main (int32_t arg_10h) {
int32_t var_78h;
int32_t var_4h;
// adjusting stack
eax = 0;
eax += 0xf;
eax += 0xf;
eax >>= 4;
eax <<= 4;
// main logic
printf ("IOLI Crackme Level 0x06\n");
printf ("Password: ");
eax = &var_78h;
scanf (0x8048787, eax);
eax = arg_10h;
eax = &var_78h;
check (eax, arg_10h);
eax = 0;
return eax;
}
main has 3 arguments argc, argv, envp, and this program is compiled with GCC, so the stack should be like this :
[esp + 0x10] - envp
[esp + 0x0c] - argv
[esp + 0x08] - argc
[esp + 0x04] - return address
enter the check() and decompile it. this function is different from 0x05 now. but they still have similar code structure.
int32_t check (char * s, int32_t arg_ch) {
char * var_dh;
uint32_t var_ch;
uint32_t var_8h;
int32_t var_4h;
char * format;
int32_t var_sp_8h;
var_8h = 0;
var_ch = 0;
do {
eax = s;
eax = strlen (eax);
if (var_ch >= eax) {
goto label_0;
}
eax = var_ch;
eax += s;
eax = *(eax);
var_dh = al;
eax = &var_4h;
eax = &var_dh;
sscanf (eax, eax, 0x804873d);
edx = var_4h;
eax = &var_8h;
*(eax) += edx;
if (var_8h == 0x10) {
eax = arg_ch;
eax = s;
parell (eax, arg_ch);
}
eax = &var_ch;
*(eax)++;
} while (1);
label_0:
printf ("Password Incorrect!\n");
return eax;
}
Correct the sscanf part and parell part, both of them were generated incorrectly:
int32_t check (char * s, void* envp)
{
var_ch = 0;
var_8h = 0;
for (var_ch = 0; var_ch < strlen(s); ++var_ch)
{
var_dh = s[var_ch];
sscanf(&var_dh, %d, &var_4h); // read from string[var_ch], store to var_4h
var_8h += var_4h;
if(var_8h == 0x10)
parell(s, envp);
}
printf("Password Incorrect!\n");
return 0;
}
no more info, we have to reverse parell() again.
#include <stdint.h>
uint32_t parell (char * s, char * arg_ch) {
sscanf (s, %d, &var_4h);
if (dummy (var_4h, arg_ch) == 0)
return 0;
for (var_bp_8h = 0; var_bp_8h <= 9; ++var_bp_8h){
if (var_4h & 1 == 0){
printf("Password OK!\n");
exit(0);
}
}
return 0;
}
well, there is a new check condition in parell() -- dummy (var_4h, arg_ch) == 0. then reverse dummy!
[0x080484b4]> pdd@sym.dummy
/* r2dec pseudo code output */
/* ./crackme0x06 @ 0x80484b4 */
#include <stdint.h>
int32_t dummy (char ** s1) {
int32_t var_8h;
int32_t var_4h;
char * s2;
size_t * n;
var_4h = 0;
do {
eax = 0;
edx = eax*4;
eax = s1;
if (*((edx + eax)) == 0) {
goto label_0;
}
eax = var_4h;
ecx = eax*4;
edx = s1;
eax = &var_4h;
*(eax)++;
eax = *((ecx + edx));
eax = strncmp (eax, 3, "LOLO");
} while (eax != 0);
var_8h = 1;
goto label_1;
label_0:
var_8h = 0;
label_1:
eax = 0;
return eax;
}
looks like a loop to process string. we can beautify it.
[0x080484b4]> pdd@sym.dummy
/* r2dec pseudo code output */
/* ./crackme0x06 @ 0x80484b4 */
#include <stdint.h>
int32_t dummy (char ** s1) {
for (var_4h = 0; strncmp(s1[var_4h], "LOLO", 3) != 0; var_4h++){
if (s1[i] == NULL)
return 0;
}
return 1;
}
There are 3 constraints to crackme_0x06:
- Digit Sum
- Odd Number
- should have an environment variable whose name started with "LOL".
$ ./crackme0x06
IOLI Crackme Level 0x06
Password: 12346
Password Incorrect!
$ export LOLAA=help
$ ./cracke0x06
IOLI Crackme Level 0x06
Password: 12346
Password OK!
IOLI 0x07
a weird "wtf?" string.
$ rabin2 -z ./crackme0x07
[Strings]
nth paddr vaddr len size section type string
-------------------------------------------------------
0 0x000007a8 0x080487a8 4 5 .rodata ascii LOLO
1 0x000007ad 0x080487ad 20 21 .rodata ascii Password Incorrect!\n
2 0x000007c5 0x080487c5 13 14 .rodata ascii Password OK!\n
3 0x000007d3 0x080487d3 5 6 .rodata ascii wtf?\n
4 0x000007d9 0x080487d9 24 25 .rodata ascii IOLI Crackme Level 0x07\n
5 0x000007f2 0x080487f2 10 11 .rodata ascii Password:
again, no password string or compare in main(). I put the simplified pseudo code here. var_78h is likely to a char *pointer (string) .
#include <stdint.h>
int32_t main (int32_t arg_10h) {
printf ("IOLI Crackme Level 0x07\n");
printf ("Password: ");
scanf (%s, &var_78h);
return fcn_080485b9 (&var_78h, arg_10h);
}
due to the symbol info lost, neither aa nor aaa show the name of functions. we can double check this in "flagspace". Radare2 use fcn_080485b9 as the function name. It's a common case in reverse engineering that we don't have any symbol info of the binary.
[0x080487fd]> fs symbols
[0x080487fd]> f
0x08048400 33 entry0
0x0804867d 92 main
0x080487a4 4 obj._IO_stdin_used
decompile the fcn_080485b9():
[0x080485b9]> pdfc
; CALL XREF from main @ 0x80486d4
/ 118: fcn.080485b9 (char *s, int32_t arg_ch);
| ; var char *var_dh @ ebp-0xd
| ; var signed int var_ch { >= 0xffffffffffffffff} @ ebp-0xc
| ; var uint32_t var_8h @ ebp-0x8
| ; var int32_t var_bp_4h @ ebp-0x4
| ; arg char *s @ ebp+0x8
| ; arg int32_t arg_ch @ ebp+0xc
| ; var char *format @ esp+0x4
| ; var int32_t var_sp_8h @ esp+0x8
| 0x080485b9 55 push ebp
| 0x080485ba 89e5 mov ebp, esp
| 0x080485bc 83ec28 sub esp, 0x28
| 0x080485bf c745f8000000. mov dword [var_8h], 0
| 0x080485c6 c745f4000000. mov dword [var_ch], 0
| ; CODE XREF from fcn.080485b9 @ 0x8048628
| .-> 0x080485cd 8b4508 mov eax, dword [s]
| : 0x080485d0 890424 mov dword [esp], eax ; const char *s
| : 0x080485d3 e8d0fdffff call sym.imp.strlen ; size_t strlen(const char *s)
| : 0x080485d8 3945f4 cmp dword [var_ch], eax
| ,==< 0x080485db 734d jae 0x804862a
| |: 0x080485dd 8b45f4 mov eax, dword [var_ch]
| |: 0x080485e0 034508 add eax, dword [s]
| |: 0x080485e3 0fb600 movzx eax, byte [eax]
| |: 0x080485e6 8845f3 mov byte [var_dh], al
| |: 0x080485e9 8d45fc lea eax, [var_bp_4h]
| |: 0x080485ec 89442408 mov dword [var_sp_8h], eax ; ...
| |: 0x080485f0 c7442404c287. mov dword [format], 0x80487c2 ; [0x80487c2:4]=0x50006425 ; const char *format
| |: ;-- eip:
| |: 0x080485f8 8d45f3 lea eax, [var_dh]
| |: 0x080485fb 890424 mov dword [esp], eax ; const char *s
| |: 0x080485fe e8c5fdffff call sym.imp.sscanf ; int sscanf(const char *s, const char *format, ...)
| |: 0x08048603 8b55fc mov edx, dword [var_bp_4h]
| |: 0x08048606 8d45f8 lea eax, [var_8h]
| |: 0x08048609 0110 add dword [eax], edx
| |: 0x0804860b 837df810 cmp dword [var_8h], 0x10
| ,===< 0x0804860f 7512 jne 0x8048623
| ||: 0x08048611 8b450c mov eax, dword [arg_ch]
| ||: 0x08048614 89442404 mov dword [format], eax ; char *arg_ch
| ||: 0x08048618 8b4508 mov eax, dword [s]
| ||: 0x0804861b 890424 mov dword [esp], eax ; char *s
| ||: 0x0804861e e81fffffff call fcn.08048542
| ||: ; CODE XREF from fcn.080485b9 @ 0x804860f
| `---> 0x08048623 8d45f4 lea eax, [var_ch]
| |: 0x08048626 ff00 inc dword [eax]
| |`=< 0x08048628 eba3 jmp 0x80485cd
| | ; CODE XREF from fcn.080485b9 @ 0x80485db
\ `--> 0x0804862a e8f5feffff call fcn.08048524
we got familiar with this code structure in the previous challenges (the check function). It's not difficult for us even we don't have the symbol info. you can also use afn command to rename the function name if you like.
int32_t fcn_080485b9 (char * s, void* envp)
{
var_ch = 0;
var_8h = 0;
for (var_ch = 0; var_ch < strlen(s); ++var_ch)
{
var_dh = s[var_ch];
sscanf(&var_dh, %d, &var_4h); // read from string[var_ch], store to var_4h
var_8h += var_4h;
if(var_8h == 0x10)
fcn_08048542(s, envp);
}
return fcn_08048524();
}
most part of crackme 0x07 is the same with 0x06. and it can be solved by the same password & environment:
$ export LOLAA=help
$ ./cracke0x07
IOLI Crackme Level 0x07
Password: 12346
Password OK!
wait ... where is the 'wtf?'. Often, we would like to find the cross reference (xref) to strings (or data, functions, etc.) in reverse engineering. The related commands in Radare2 are under "ax" namespace:
[0x08048400]> f
0x080487a8 5 str.LOLO
0x080487ad 21 str.Password_Incorrect
0x080487c5 14 str.Password_OK
0x080487d3 6 str.wtf
0x080487d9 25 str.IOLI_Crackme_Level_0x07
0x080487f2 11 str.Password:
[0x08048400]> axt 0x80487d3
(nofunc) 0x804865c [DATA] mov dword [esp], str.wtf
[0x08048400]> axF str.wtf
Finding references of flags matching 'str.wtf'...
[0x001eff28-0x001f0000] (nofunc) 0x804865c [DATA] mov dword [esp], str.wtf
Macro 'findstref' removed.
the [DATA] mov dword [esp], str.wtf at 0x804865c is an instruction of fcn.080485b9. But the analysis in my PC ignores the remained instructions and only display the incomplete assembly. the range of fcn.080485b9 should be 0x080485b9 ~ 0x0804867c . we can reset block size and print opcodes.
[0x08040000]> s 0x080485b9
[0x080485b9]> b 230
[0x08048400]> pd
...
0x0804862f 8b450c mov eax, dword [ebp + 0xc]
0x08048632 89442404 mov dword [esp + 4], eax
0x08048636 8b45fc mov eax, dword [ebp - 4]
0x08048639 890424 mov dword [esp], eax ; char **s1
0x0804863c e873feffff call fcn.080484b4
0x08048641 85c0 test eax, eax
,=< 0x08048643 7436 je 0x804867b
| 0x08048645 c745f4000000. mov dword [ebp - 0xc], 0
| ; CODE XREF from fcn.080485b9 @ +0xc0
.--> 0x0804864c 837df409 cmp dword [ebp - 0xc], 9
,===< 0x08048650 7f29 jg 0x804867b
|:| 0x08048652 8b45fc mov eax, dword [ebp - 4]
|:| 0x08048655 83e001 and eax, 1
|:| 0x08048658 85c0 test eax, eax
,====< 0x0804865a 7518 jne 0x8048674
||:| 0x0804865c c70424d38704. mov dword [esp], str.wtf ; [0x80487d3:4]=0x3f667477 ; "wtf?\n" ; const char *format
||:| 0x08048663 e850fdffff call sym.imp.printf ; int printf(const char *format)
||:| 0x08048668 c70424000000. mov dword [esp], 0 ; int status
||:| 0x0804866f e874fdffff call sym.imp.exit ; void exit(int status)
||:| ; CODE XREF from fcn.080485b9 @ +0xa1
`----> 0x08048674 8d45f4 lea eax, [ebp - 0xc]
|:| 0x08048677 ff00 inc dword [eax]
|`==< 0x08048679 ebd1 jmp 0x804864c
| | ; CODE XREFS from fcn.080485b9 @ +0x8a, +0x97
`-`-> 0x0804867b c9 leave
0x0804867c c3 ret
test eax, ea;je 0x804867b will jump to leave; ret, which forever skips the str.wtf part. only use aa to analyze this binary can display the whole function.
IOLI 0x08
we can reverse it and find it's similar to 0x07, and use the same password to solve it:
$ export LOLAA=help
$ ./cracke0x08
IOLI Crackme Level 0x08
Password: 12346
Password OK!
dustri provided a better way to check crackme0x08. 0x07 is the stripped version of 0x08.
$ radiff2 -A -C ./crackme0x07 ./crackme0x08
...
fcn.08048360 23 0x8048360 | MATCH (1.000000) | 0x8048360 23 sym._init
sym.imp.__libc_start_main 6 0x8048388 | MATCH (1.000000) | 0x8048388 6 sym.imp.__libc_start_main
sym.imp.scanf 6 0x8048398 | MATCH (1.000000) | 0x8048398 6 sym.imp.scanf
sym.imp.strlen 6 0x80483a8 | MATCH (1.000000) | 0x80483a8 6 sym.imp.strlen
sym.imp.printf 6 0x80483b8 | MATCH (1.000000) | 0x80483b8 6 sym.imp.printf
sym.imp.sscanf 6 0x80483c8 | MATCH (1.000000) | 0x80483c8 6 sym.imp.sscanf
sym.imp.strncmp 6 0x80483d8 | MATCH (1.000000) | 0x80483d8 6 sym.imp.strncmp
sym.imp.exit 6 0x80483e8 | MATCH (1.000000) | 0x80483e8 6 sym.imp.exit
entry0 33 0x8048400 | MATCH (1.000000) | 0x8048400 33 entry0
fcn.08048424 33 0x8048424 | MATCH (1.000000) | 0x8048424 33 fcn.08048424
fcn.08048450 47 0x8048450 | MATCH (1.000000) | 0x8048450 47 sym.__do_global_dtors_aux
fcn.08048480 50 0x8048480 | MATCH (1.000000) | 0x8048480 50 sym.frame_dummy
fcn.080484b4 112 0x80484b4 | MATCH (1.000000) | 0x80484b4 112 sym.dummy
fcn.08048524 30 0x8048524 | MATCH (1.000000) | 0x8048524 30 sym.che
fcn.08048542 119 0x8048542 | MATCH (1.000000) | 0x8048542 119 sym.parell
fcn.080485b9 118 0x80485b9 | MATCH (1.000000) | 0x80485b9 118 sym.check
main 92 0x804867d | MATCH (1.000000) | 0x804867d 92 main
fcn.08048755 4 0x8048755 | MATCH (1.000000) | 0x8048755 4 sym.__i686.get_pc_thunk.bx
fcn.08048760 35 0x8048760 | MATCH (1.000000) | 0x8048760 35 sym.__do_global_ctors_aux
fcn.0804878d 17 0x804878d | NEW (0.000000)
sym.__libc_csu_init 99 0x80486e0 | NEW (0.000000)
sym.__libc_csu_fini 5 0x8048750 | NEW (0.000000)
sym._fini 26 0x8048784 | NEW (0.000000)
IOLI 0x09
Hints: crackme0x09 hides the format string (%d and %s), and nothing more than 0x08.
$ export LOLA=help
$ ./crackme0x09
IOLI Crackme Level 0x09
Password: 12346
Password OK!
Avatao R3v3rs3 4
After a few years of missing out on wargames at Hacktivity, this year I've finally found the time to begin, and almost finish (yeah, I'm quite embarrassed about that unfinished webhack :) ) one of them. There were 3 different games at the conf, and I've chosen the one that was provided by avatao. It consisted of 8 challenges, most of them being basic web hacking stuff, one sandbox escape, one simple buffer overflow exploitation, and there were two reverse engineering exercises too. You can find these challenges on https://platform.avatao.com.
.radare2
I've decided to solve the reversing challenges using radare2, a free and open source reverse engineering framework. I have first learned about r2 back in 2011. during a huge project, where I had to reverse a massive, 11MB statically linked ELF. I simply needed something that I could easily patch Linux ELFs with. Granted, back then I've used r2 alongside IDA, and only for smaller tasks, but I loved the whole concept at first sight. Since then, radare2 evolved a lot, and I was planning for some time now to solve some crackmes with the framework, and write writeups about them. Well, this CTF gave me the perfect opportunity :)
Because this writeup aims to show some of r2's features besides how the crackmes can be solved, I will explain every r2 command I use in blockquote paragraphs like this one:
r2 tip: Always use ? or -h to get more information!
If you know r2, and just interested in the crackme, feel free to skip those parts! Also keep in mind please, that because of this tutorial style I'm going to do a lot of stuff that you just don't do during a CTF, because there is no time for proper bookkeeping (e.g. flag every memory area according to its purpose), and with such small executables you can succeed without doing these stuff.
A few advice if you are interested in learning radare2 (and frankly, if you are into RE, you should be interested in learning r2 :) ):
The framework has a lot of supplementary executables and a vast amount of functionality - and they are very well documented. I encourage you to read the available docs, and use the built-in help (by appending a ? to any command) extensively! E.g.:
[0x00000000]> ?
Usage: [.][times][cmd][~grep][@[@iter]addr!size][|>pipe] ; ...
Append '?' to any char command to get detailed help
Prefix with number to repeat command N times (f.ex: 3x)
|%var =valueAlias for 'env' command
| *off[=[0x]value] Pointer read/write data/values (see ?v, wx, wv)
| (macro arg0 arg1) Manage scripting macros
| .[-|(m)|f|!sh|cmd] Define macro or load r2, cparse or rlang file
| = [cmd] Run this command via rap://
| / Search for bytes, regexps, patterns, ..
| ! [cmd] Run given command as in system(3)
| # [algo] [len] Calculate hash checksum of current block
| #!lang [..] Hashbang to run an rlang script
| a Perform analysis of code
| b Get or change block size
...
[0x00000000]> a?
|Usage: a[abdefFghoprxstc] [...]
| ab [hexpairs] analyze bytes
| aa analyze all (fcns + bbs) (aa0 to avoid sub renaming)
| ac [cycles] analyze which op could be executed in [cycles]
| ad analyze data trampoline (wip)
| ad [from] [to] analyze data pointers to (from-to)
| ae [expr] analyze opcode eval expression (see ao)
| af[rnbcsl?+-*] analyze Functions
| aF same as above, but using anal.depth=1
...
Also, the project is under heavy development, there is no day without commits to the GitHub repo. So, as the readme says, you should always use the git version!
Some highly recommended reading materials:
.first_steps
OK, enough of praising r2, lets start reversing this stuff. First, you have to know your enemy:
[0x00 avatao]$ rabin2 -I reverse4
pic false
canary true
nx true
crypto false
va true
intrp /lib64/ld-linux-x86-64.so.2
bintype elf
class ELF64
lang c
arch x86
bits 64
machine AMD x86-64 architecture
os linux
subsys linux
endian little
stripped true
static false
linenum false
lsyms false
relocs false
rpath NONE
binsz 8620
r2 tip: rabin2 is one of the handy tools that comes with radare2. It can be used to extract information (imports, symbols, libraries, etc.) about binary executables. As always, check the help (rabin2 -h)!
So, its a dynamically linked, stripped, 64bit Linux executable - nothing fancy here. Let's try to run it:
[0x00 avatao]$ ./reverse4
?
Size of data: 2623
pamparam
Wrong!
[0x00 avatao]$ "\x01\x00\x00\x00" | ./reverse4
Size of data: 1
OK, so it reads a number as a size from the standard input first, than reads further, probably "size" bytes/characters, processes this input, and outputs either "Wrong!", nothing or something else, presumably our flag. But do not waste any more time monkeyfuzzing the executable, let's fire up r2, because in asm we trust!
[0x00 avatao]$ r2 -A reverse4
-- Heisenbug: A bug that disappears or alters its behavior when one attempts to probe or isolate it.
[0x00400720]>
r2 tip: The -A switch runs aaa command at start to analyze all referenced code, so we will have functions, strings, XREFS, etc. right at the beginning. As usual, you can get help with ?.
It is a good practice to create a project, so we can save our progress, and we can come back at a later time:
[0x00400720]> Ps avatao_reverse4
avatao_reverse4
[0x00400720]>
r2 tip: You can save a project using Ps [file], and load one using Po [file]. With the -p option, you can load a project when starting r2.
We can list all the strings r2 found:
[0x00400720]> fs strings
[0x00400720]> f
0x00400e98 7 str.Wrong_
0x00400e9f 27 str.We_are_in_the_outer_space_
0x00400f80 18 str.Size_of_data:__u_n
0x00400f92 23 str.Such_VM__MuCH_reV3rse_
0x00400fa9 16 str.Use_everything_
0x00400fbb 9 str.flag.txt
0x00400fc7 26 str.You_won__The_flag_is:__s_n
0x00400fe1 21 str.Your_getting_closer_
[0x00400720]>
r2 tip: r2 puts so called flags on important/interesting offsets, and organizes these flags into flagspaces (strings, functions, symbols, etc.) You can list all flagspaces using fs, and switch the current one using fs [flagspace] (the default is *, which means all the flagspaces). The command f prints all flags from the currently selected flagspace(s).
OK, the strings looks interesting, especially the one at 0x00400f92. It seems to hint that this crackme is based on a virtual machine. Keep that in mind!
These strings could be a good starting point if we were talking about a real-life application with many-many features. But we are talking about a crackme, and they tend to be small and simple, and focused around the problem to be solved. So I usually just take a look at the entry point(s) and see if I can figure out something from there. Nevertheless, I'll show you how to find where these strings are used:
[0x00400720]> axt @@=`f~[0]`
d 0x400cb5 mov edi, str.Size_of_data:__u_n
d 0x400d1d mov esi, str.Such_VM__MuCH_reV3rse_
d 0x400d4d mov edi, str.Use_everything_
d 0x400d85 mov edi, str.flag.txt
d 0x400db4 mov edi, str.You_won__The_flag_is:__s_n
d 0x400dd2 mov edi, str.Your_getting_closer_
r2 tip: We can list cross-references to addresses using the axt [addr] command (similarly, we can use axf to list references from the address). The @@ is an iterator, it just runs the command once for every arguments listed.
The argument list in this case comes from the command f~[0]. It lists the strings from the executable with f, and uses the internal grep command ~ to select only the first column ([0]) that contains the strings' addresses.
.main
As I was saying, I usually take a look at the entry point, so let's just do that:
[0x00400720]> s main
[0x00400c63]>
r2 tip: You can go to any offset, flag, expression, etc. in the executable using the s command (seek). You can use references, like $$ (current offset), you can undo (s-) or redo (s+) seeks, search strings (s/ [string]) or hex values (s/x 4142), and a lot of other useful stuff. Make sure to check out s?!
Now that we are at the beginning of the main function, we could use p to show a disassembly (pd, pdf), but r2 can do something much cooler: it has a visual mode, and it can display graphs similar to IDA, but way cooler, since they are ASCII-art graphs :)
r2 tip: The command family p is used to print stuff. For example it can show disassembly (pd), disassembly of the current function (pdf), print strings (ps), hexdump (px), base64 encode/decode data (p6e, p6d), or print raw bytes (pr) so you can for example dump parts of the binary to other files. There are many more functionalities, check ?!
R2 also has a minimap view which is incredibly useful for getting an overall look at a function:

r2 tip: With command V you can enter the so-called visual mode, which has several views. You can switch between them using p and P. The graph view can be displayed by hitting V in visual mode (or using VV at the prompt).
Hitting p in graph view will bring up the minimap. It displays the basic blocks and the connections between them in the current function, and it also shows the disassembly of the currently selected block (marked with @@@@@ on the minimap). You can select the next or the previous block using the *<TAB>* and the *<SHIFT><TAB>* keys respectively. You can also select the true or the false branches using the t and the f keys.
It is possible to bring up the prompt in visual mode using the : key, and you can use o to seek.
Lets read main node-by-node! The first block looks like this:
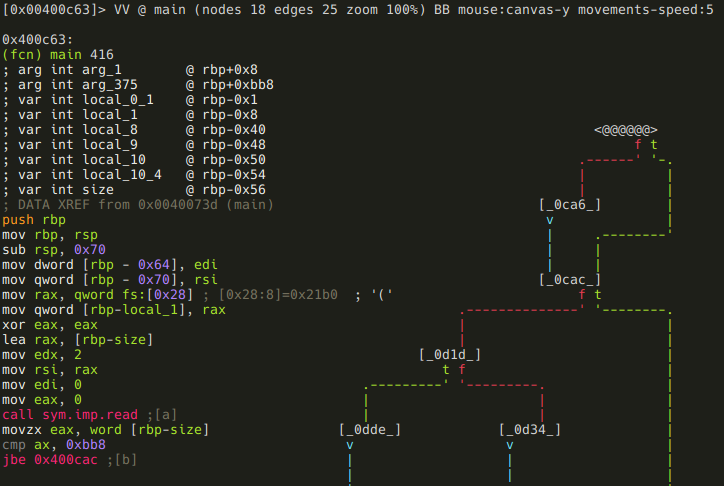
We can see that the program reads a word (2 bytes) into the local variable named local_10_6, and than compares it to 0xbb8. That's 3000 in decimal:
[0x00400c63]> ? 0xbb8
3000 0xbb8 05670 2.9K 0000:0bb8 3000 10111000 3000.0 0.000000f 0.000000
r2 tip: yep, ? will evaluate expressions, and print the result in various formats.
If the value is greater than 3000, then it will be forced to be 3000:
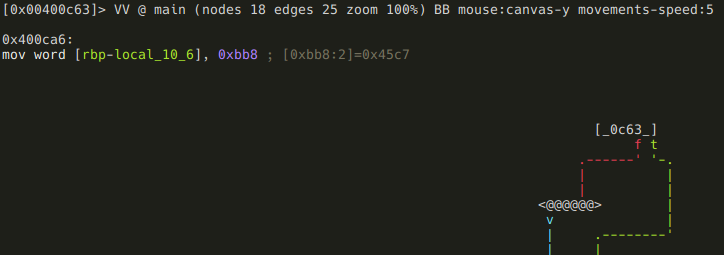
There are a few things happening in the next block:
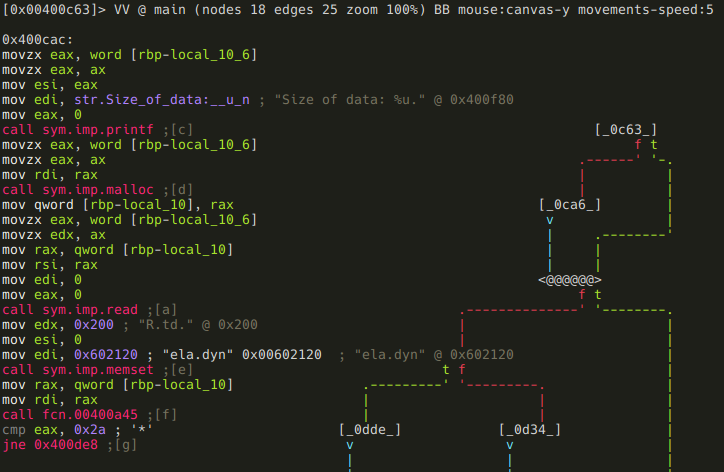
First, the "Size of data: " message we saw when we run the program is printed. So now we know that the local variable local_10_6 is the size of the input data - so lets name it accordingly (remember, you can open the r2 shell from visual mode using the : key!):
:> afvn local_10_6 input_size
r2 tip: The af command family is used to analyze functions. This includes manipulating arguments and local variables too, which is accessible via the afv commands. You can list function arguments (afa), local variables (afv), or you can even rename them (afan, afvn). Of course there are lots of other features too - as usual: use the "?", Luke!
After this an input_size bytes long memory chunk is allocated, and filled with data from the standard input. The address of this memory chunk is stored in local_10 - time to use afvn again:
:> afvn local_10 input_data
We've almost finished with this block, there are only two things remained. First, an 512 (0x200) bytes memory chunk is zeroed out at offset 0x00602120. A quick glance at XREFS to this address reveals that this memory is indeed used somewhere in the application:
:> axt 0x00602120
d 0x400cfe mov edi, 0x602120
d 0x400d22 mov edi, 0x602120
d 0x400dde mov edi, 0x602120
d 0x400a51 mov qword [rbp - 8], 0x602120
Since it probably will be important later on, we should label it:
:> f sym.memory 0x200 0x602120
r2 tip: Flags can be managed using the f command family. We've just added the flag sym.memory to a 0x200 bytes long memory area at 0x602120. It is also possible to remove (f-name), rename (fr [old] [new]), add comment (fC [name] [cmt]) or even color (fc [name] [color]) flags.
While we are here, we should also declare that memory chunk as data, so it will show up as a hexdump in disassembly view:
:> Cd 0x200 @ sym.memory
r2 tip: The command family C is used to manage metadata. You can set (CC) or edit (CC) comments, declare memory areas as data (Cd), strings (Cs), etc. These commands can also be issued via a menu in visual mode invoked by pressing d.
The only remaining thing in this block is a function call to 0x400a45 with the input data as an argument. The function's return value is compared to "*", and a conditional jump is executed depending on the result.
Earlier I told you that this crackme is probably based on a virtual machine. Well, with that information in mind, one can guess that this function will be the VM's main loop, and the input data is the instructions the VM will execute. Based on this hunch, I've named this function vmloop, and renamed input_data to bytecode and input_size to bytecode_length. This is not really necessary in a small project like this, but it's a good practice to name stuff according to their purpose (just like when you are writing programs).
:> af vmloop 0x400a45
:> afvn input_size bytecode_length
:> afvn input_data bytecode
r2 tip: The af command is used to analyze a function with a given name at the given address. The other two commands should be familiar from earlier.
After renaming local variables, flagging that memory area, and renaming the VM loop function the disassembly looks like this:
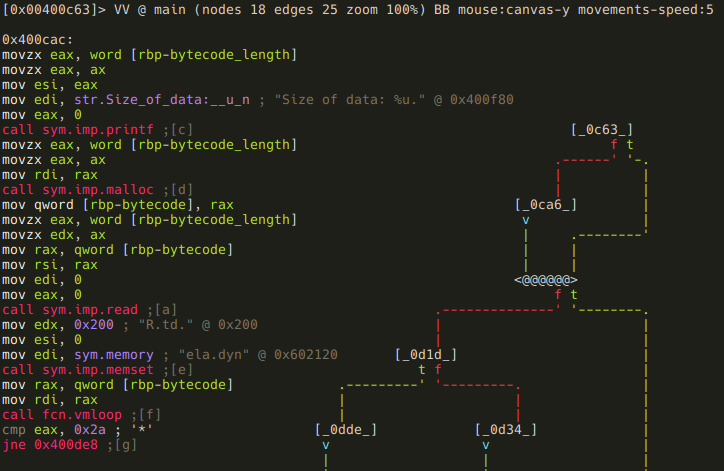
So, back to that conditional jump. If vmloop returns anything else than "*", the program just exits without giving us our flag. Obviously we don't want that, so we follow the false branch.
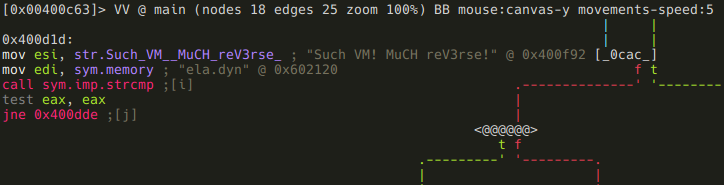
Now we see that a string in that 512 bytes memory area (sym.memory) gets compared to "Such VM! MuCH reV3rse!". If they are not equal, the program prints the bytecode, and exits:
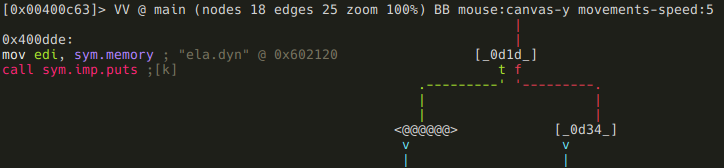
OK, so now we know that we have to supply a bytecode that will generate that string when executed. As we can see on the minimap, there are still a few more branches ahead, which probably means more conditions to meet. Lets investigate them before we delve into vmloop!
If you take a look at the minimap of the whole function, you can probably recognize that there is some kind of loop starting at block [0d34], and it involves the following nodes:
- [0d34]
- [0d65]
- [0d3d]
- [0d61]
Here are the assembly listings for those blocks. The first one puts 0 into local variable local_10_4:
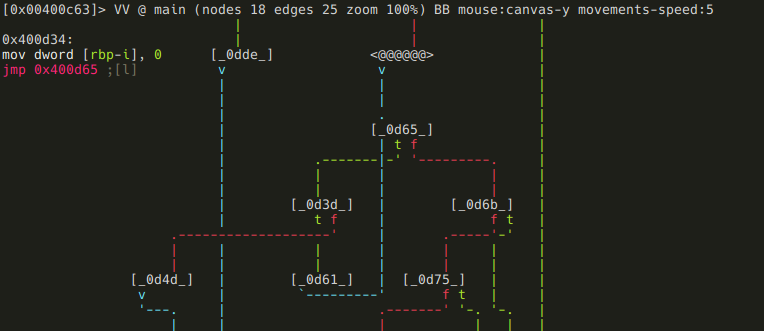
And this one compares local_10_4 to 8, and executing a conditional jump based on the result:
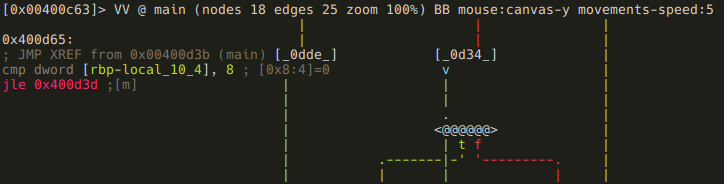
It's pretty obvious that local_10_4 is the loop counter, so lets name it accordingly:
:> afvn local_10_4 i
Next block is the actual loop body:
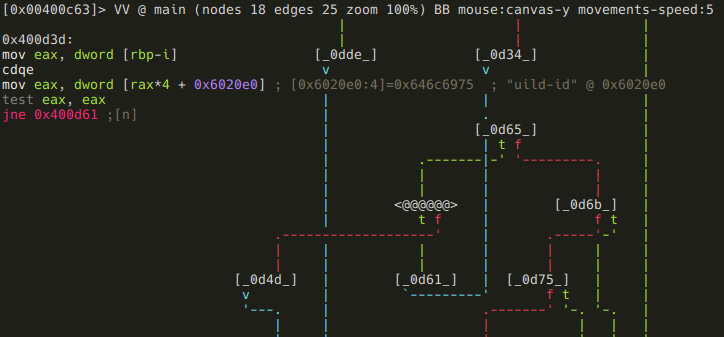
The memory area at 0x6020e0 is treated as an array of dwords (4 byte values), and checked if the ith value of it is zero. If it is not, the loop simply continues:

If the value is zero, the loop breaks and this block is executed before exiting:
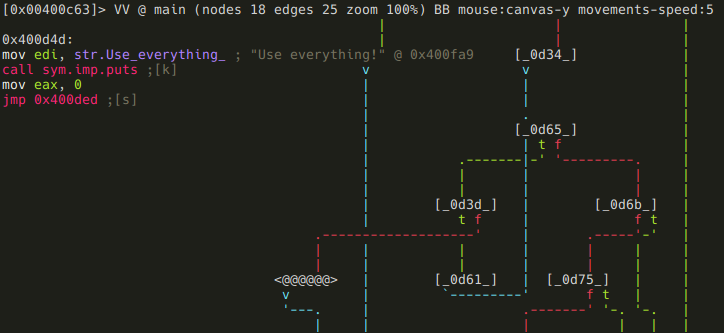
It prints the following message: Use everything!" As we've established earlier, we are dealing with a virtual machine. In that context, this message probably means that we have to use every available instructions. Whether we executed an instruction or not is stored at 0x6020e0 - so lets flag that memory area:
:> f sym.instr_dirty 4*9 0x6020e0
Assuming we don't break out and the loop completes, we are moving on to some more checks:
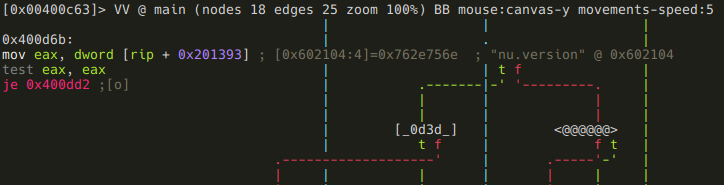
This piece of code may look a bit strange if you are not familiar with x86_64 specific stuff. In particular, we are talking about RIP-relative addressing, where offsets are described as displacements from the current instruction pointer, which makes implementing PIE easier. Anyways, r2 is nice enough to display the actual address (0x602104). Got the address, flag it!
:> f sym.good_if_ne_zero 4 0x602104
Keep in mind though, that if RIP-relative addressing is used, flags won't appear directly in the disassembly, but r2 displays them as comments:
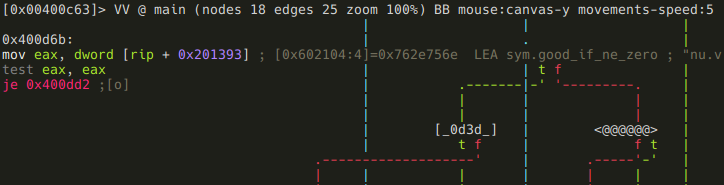
If sym.good_if_ne_zero is zero, we get a message ("Your getting closer!"), and then the program exits. If it is non-zero, we move to the last check:
Here the program compares a dword at 0x6020f0 (again, RIP-relative addressing) to 9. If its greater than 9, we get the same "Your getting closer!" message, but if it's lesser, or equal to 9, we finally reach our destination, and get the flag:
As usual, we should flag 0x6020f0:
:> f sym.good_if_le_9 4 0x6020f0
Well, it seems that we have fully reversed the main function. To summarize it: the program reads a bytecode from the standard input, and feeds it to a virtual machine. After VM execution, the program's state have to satisfy these conditions in order to reach the goodboy code:
- vmloop's return value has to be "*"
- sym.memory has to contain the string "Such VM! MuCH reV3rse!"
- all 9 elements of sym.instr_dirty array should not be zero (probably means that all instructions had to be used at least once)
- sym.good_if_ne_zero should not be zero
- sym.good_if_le_9 has to be lesser or equal to 9
This concludes our analysis of the main function, we can now move on to the VM itself.
.vmloop
[offset]> fcn.vmloop

Well, that seems disappointingly short, but no worries, we have plenty to reverse yet. The thing is that this function uses a jump table at 0x00400a74,
and r2 can't yet recognize jump tables (Issue 3201), so the analysis of this function is a bit incomplete. This means that we can't really use the graph view now, so either we just use visual mode, or fix those basic blocks. The entire function is just 542 bytes long, so we certainly could reverse it without the aid of the graph mode, but since this writeup aims to include as much r2 wisdom as possible, I'm going to show you how to define basic blocks.
First, lets analyze what we already have! First, rdi is put into local_3. Since the application is a 64bit Linux executable, we know that rdi is the first function argument (as you may have recognized, the automatic analysis of arguments and local variables was not entirely correct), and we also know that vmloop's first argument is the bytecode. So lets rename local_3:
:> afvn local_3 bytecode
Next, sym.memory is put into another local variable at rbp-8 that r2 did not recognize. So let's define it!
:> afv 8 memory qword
r2 tip: The afv [idx] [name] [type] command is used to define local variable at [frame pointer - idx] with the name [name] and type [type]. You can also remove local variables using the afv- [idx] command.
In the next block, the program checks one byte of bytecode, and if it is 0, the function returns with 1.
If that byte is not zero, the program subtracts 0x41 from it, and compares the result to 0x17. If it is above 0x17, we get the dreaded "Wrong!" message, and the function returns with 0. This basically means that valid bytecodes are ASCII characters in the range of "A" (0x41) through "X" (0x41 + 0x17). If the bytecode is valid, we arrive at the code piece that uses the jump table:
The jump table's base is at 0x400ec0, so lets define that memory area as a series of qwords:
[0x00400a74]> s 0x00400ec0
[0x00400ec0]> Cd 8 @@=`?s $$ $$+8*0x17 8`
r2 tip: Except for the ?s, all parts of this command should be familiar now, but lets recap it! Cd defines a memory area as data, and 8 is the size of that memory area. @@ is an iterator that make the preceding command run for every element that @@ holds. In this example it holds a series generated using the ?s command. ?s simply generates a series from the current seek ($$) to current seek + 80x17 ($$+80x17) with a step of 8.
This is how the disassembly looks like after we add this metadata:
[0x00400ec0]> pd 0x18
; DATA XREF from 0x00400a76 (unk)
0x00400ec0 .qword 0x0000000000400a80
0x00400ec8 .qword 0x0000000000400c04
0x00400ed0 .qword 0x0000000000400b6d
0x00400ed8 .qword 0x0000000000400b17
0x00400ee0 .qword 0x0000000000400c04
0x00400ee8 .qword 0x0000000000400c04
0x00400ef0 .qword 0x0000000000400c04
0x00400ef8 .qword 0x0000000000400c04
0x00400f00 .qword 0x0000000000400aec
0x00400f08 .qword 0x0000000000400bc1
0x00400f10 .qword 0x0000000000400c04
0x00400f18 .qword 0x0000000000400c04
0x00400f20 .qword 0x0000000000400c04
0x00400f28 .qword 0x0000000000400c04
0x00400f30 .qword 0x0000000000400c04
0x00400f38 .qword 0x0000000000400b42
0x00400f40 .qword 0x0000000000400c04
0x00400f48 .qword 0x0000000000400be5
0x00400f50 .qword 0x0000000000400ab6
0x00400f58 .qword 0x0000000000400c04
0x00400f60 .qword 0x0000000000400c04
0x00400f68 .qword 0x0000000000400c04
0x00400f70 .qword 0x0000000000400c04
0x00400f78 .qword 0x0000000000400b99
As we can see, the address 0x400c04 is used a lot, and besides that there are 9 different addresses. Lets see that 0x400c04 first!

We get the message "Wrong!", and the function just returns 0. This means that those are not valid instructions (they are valid bytecode though, they can be e.g. parameters!) We should flag 0x400c04 accordingly:
[0x00400ec0]> f not_instr @ 0x0000000000400c04
As for the other offsets, they all seem to be doing something meaningful, so we can assume they belong to valid instructions. I'm going to flag them using the instructions' ASCII values:
[0x00400ec0]> f instr_A @ 0x0000000000400a80
[0x00400ec0]> f instr_C @ 0x0000000000400b6d
[0x00400ec0]> f instr_D @ 0x0000000000400b17
[0x00400ec0]> f instr_I @ 0x0000000000400aec
[0x00400ec0]> f instr_J @ 0x0000000000400bc1
[0x00400ec0]> f instr_P @ 0x0000000000400b42
[0x00400ec0]> f instr_R @ 0x0000000000400be5
[0x00400ec0]> f instr_S @ 0x0000000000400ab6
[0x00400ec0]> f instr_X @ 0x0000000000400b99
Ok, so these offsets were not on the graph, so it is time to define basic blocks for them!
r2 tip: You can define basic blocks using the afb+ command. You have to supply what function the block belongs to, where does it start, and what is its size. If the block ends in a jump, you have to specify where does it jump too. If the jump is a conditional jump, the false branch's destination address should be specified too.
We can get the start and end addresses of these basic blocks from the full disasm of vmloop.
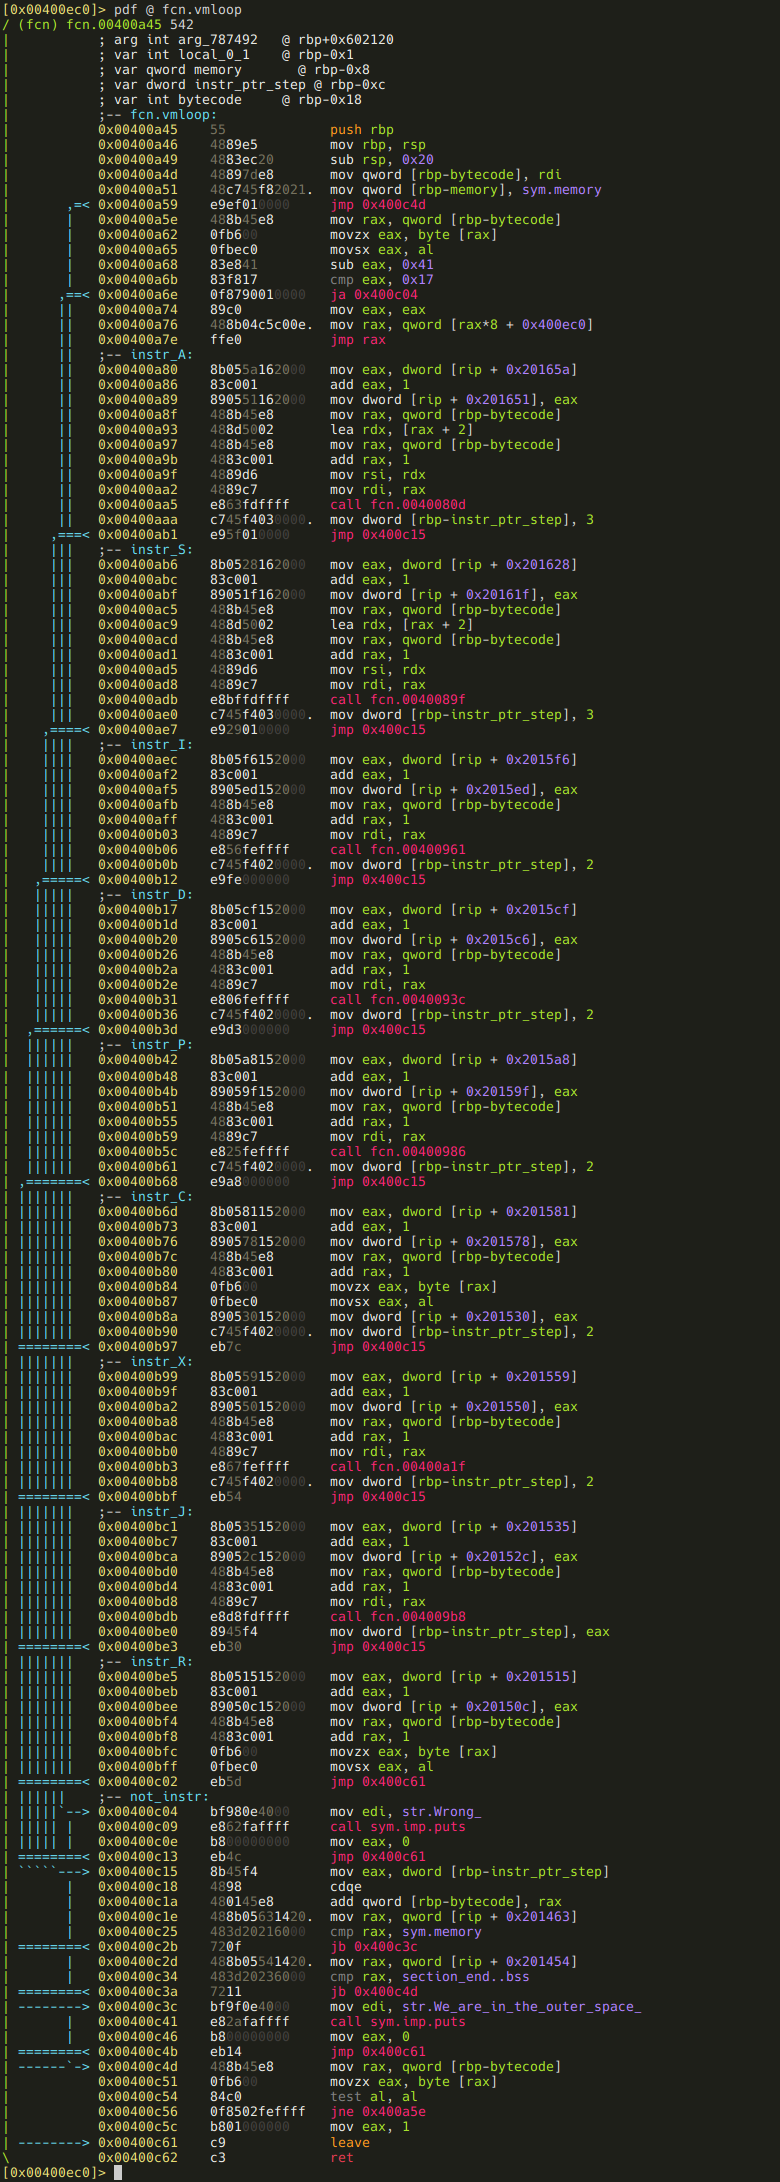
As I've mentioned previously, the function itself is pretty short, and easy to read, especially with our annotations. But a promise is a promise, so here is how we can create the missing basic blocks for the instructions:
[0x00400ec0]> afb+ 0x00400a45 0x00400a80 0x00400ab6-0x00400a80 0x400c15
[0x00400ec0]> afb+ 0x00400a45 0x00400ab6 0x00400aec-0x00400ab6 0x400c15
[0x00400ec0]> afb+ 0x00400a45 0x00400aec 0x00400b17-0x00400aec 0x400c15
[0x00400ec0]> afb+ 0x00400a45 0x00400b17 0x00400b42-0x00400b17 0x400c15
[0x00400ec0]> afb+ 0x00400a45 0x00400b42 0x00400b6d-0x00400b42 0x400c15
[0x00400ec0]> afb+ 0x00400a45 0x00400b6d 0x00400b99-0x00400b6d 0x400c15
[0x00400ec0]> afb+ 0x00400a45 0x00400b99 0x00400bc1-0x00400b99 0x400c15
[0x00400ec0]> afb+ 0x00400a45 0x00400bc1 0x00400be5-0x00400bc1 0x400c15
[0x00400ec0]> afb+ 0x00400a45 0x00400be5 0x00400c04-0x00400be5 0x400c15
It is also apparent from the disassembly that besides the instructions there are three more basic blocks. Lets create them too!
[0x00400ec0]> afb+ 0x00400a45 0x00400c15 0x00400c2d-0x00400c15 0x400c3c 0x00400c2d
[0x00400ec0]> afb+ 0x00400a45 0x00400c2d 0x00400c3c-0x00400c2d 0x400c4d 0x00400c3c
[0x00400ec0]> afb+ 0x00400a45 0x00400c3c 0x00400c4d-0x00400c3c 0x400c61
Note that the basic blocks starting at 0x00400c15 and 0x00400c2d ending in a conditional jump, so we had to set the false branch's destination too!
And here is the graph in its full glory after a bit of manual restructuring:
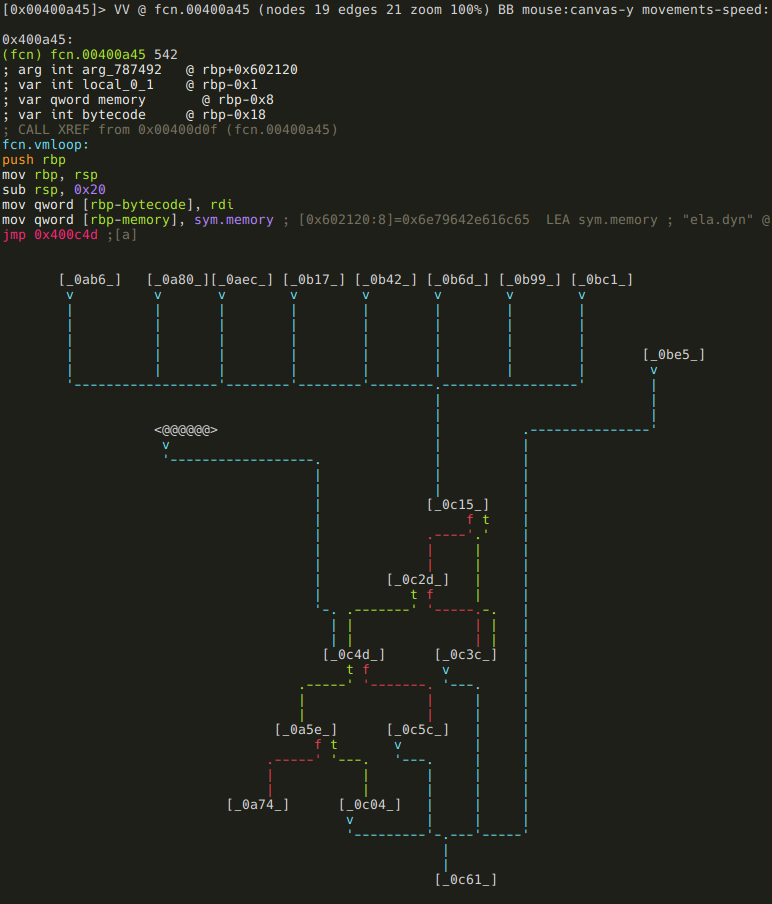
I think it worth it, don't you? :) (Well, the restructuring did not really worth it, because it is apparently not stored when you save the project.)
r2 tip: You can move the selected node around in graph view using the HJKL keys.
By the way, here is how IDA's graph of this same function looks like for comparison:
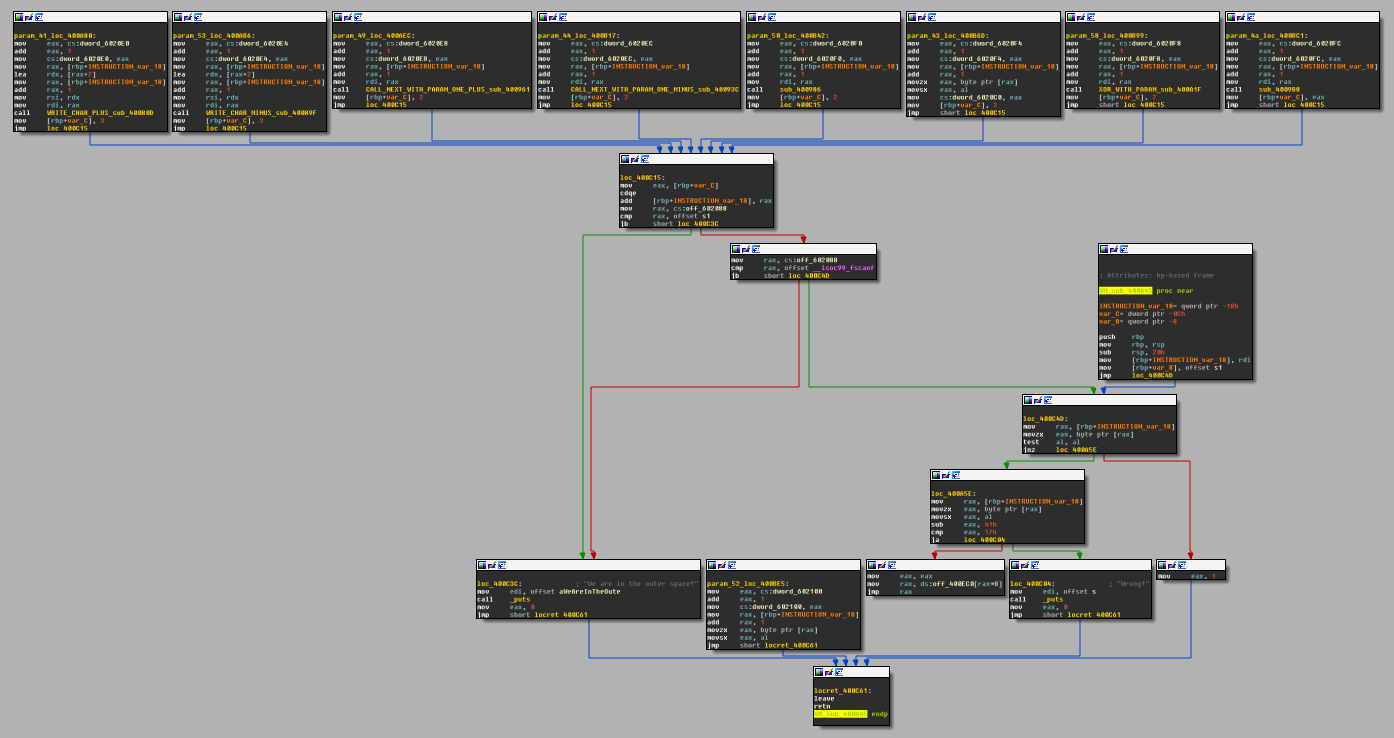
As we browse through the disassembly of the instr_LETTER basic blocks, we should realize a few things. The first: all of the instructions starts with a sequence like these:


It became clear now that the 9 dwords at sym.instr_dirty are not simply indicators that an instruction got executed, but they are used to count how many times an instruction got called. Also I should have realized earlier that sym.good_if_le_9 (0x6020f0) is part of this 9 dword array, but yeah, well, I didn't, I have to live with it... Anyways, what the condition "sym.good_if_le_9 have to be lesser or equal 9" really means is that instr_P can not be executed more than 9 times:

Another similarity of the instructions is that 7 of them calls a function with either one or two parameters, where the parameters are the next, or the next two bytecodes. One parameter example:
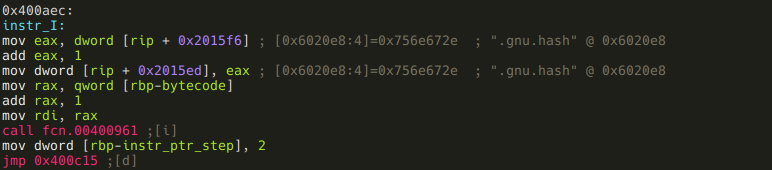
And a two parameters example:
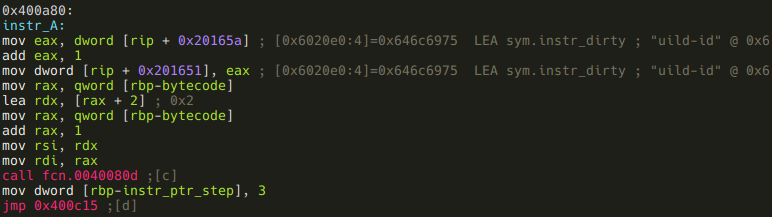
We should also realize that these blocks put the number of bytes they eat up of the bytecode (1 byte instruction + 1 or 2 bytes arguments = 2 or 3) into a local variable at 0xc. r2 did not recognize this local var, so lets do it manually!
:> afv 0xc instr_ptr_step dword
If we look at instr_J we can see that this is an exception to the above rule, since it puts the return value of the called function into instr_ptr_step instead of a constant 2 or 3:
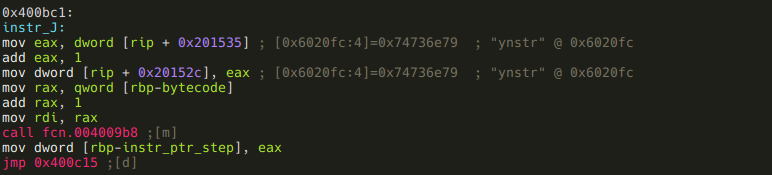
And speaking of exceptions, here are the two instructions that do not call functions:
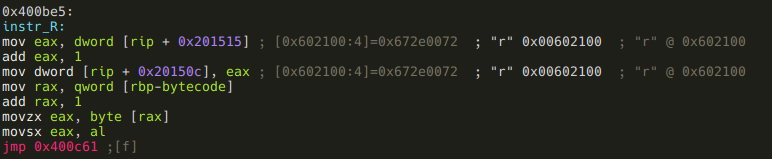
This one simply puts the next bytecode (the first the argument) into eax, and jumps to the end of vmloop. So this is the VM's ret instruction, and we know that vmloop has to return "*", so "R*" should be the last two bytes of our bytecode.
The next one that does not call a function:
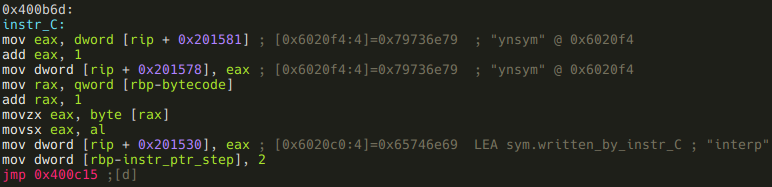
This is a one argument instruction, and it puts its argument to 0x6020c0. Flag that address!
:> f sym.written_by_instr_C 4 @ 0x6020c0
Oh, and by the way, I do have a hunch that instr_C also had a function call in the original code, but it got inlined by the compiler. Anyways, so far we have these two instructions:
- instr_R(a1): returns with a1
- instr_C(a1): writes a1 to sym.written_by_instr_C
And we also know that these accept one argument,
- instr_I
- instr_D
- instr_P
- instr_X
- instr_J
and these accept two:
- instr_A
- instr_S
What remains is the reversing of the seven functions that are called by the instructions, and finally the construction of a valid bytecode that gives us the flag.
instr_A
The function this instruction calls is at offset 0x40080d, so lets seek there!
[offset]> 0x40080d
r2 tip: In visual mode you can just hit <Enter> when the current line is a jump or a call, and r2 will seek to the destination address.
If we seek to that address from the graph mode, we are presented with a message that says "Not in a function. Type 'df' to define it here. This is because the function is called from a basic block r2 did not recognize, so r2 could not find the function either. Lets obey, and type df! A function is indeed created, but we want some meaningful name for it. So press dr while still in visual mode, and name this function instr_A!
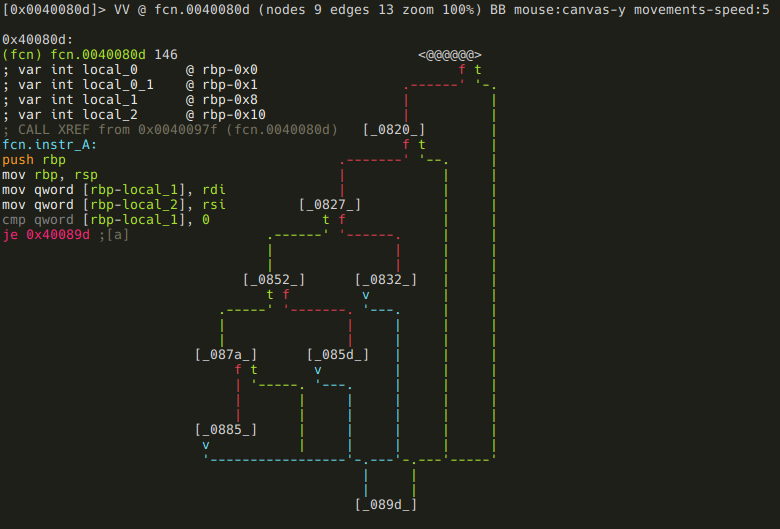
r2 tip: You should realize that these commands are all part of the same menu system in visual mode I was talking about when we first used Cd to declare sym.memory as data.
Ok, now we have our shiny new fcn.instr_A, lets reverse it! We can see from the shape of the minimap that probably there is some kind cascading if-then-elif, or a switch-case statement involved in this function. This is one of the reasons the minimap is so useful: you can recognize some patterns at a glance, which can help you in your analysis (remember the easily recognizable for loop from a few paragraphs before?) So, the minimap is cool and useful, but I've just realized that I did not yet show you the full graph mode, so I'm going to do this using full graph. The first basic blocks:
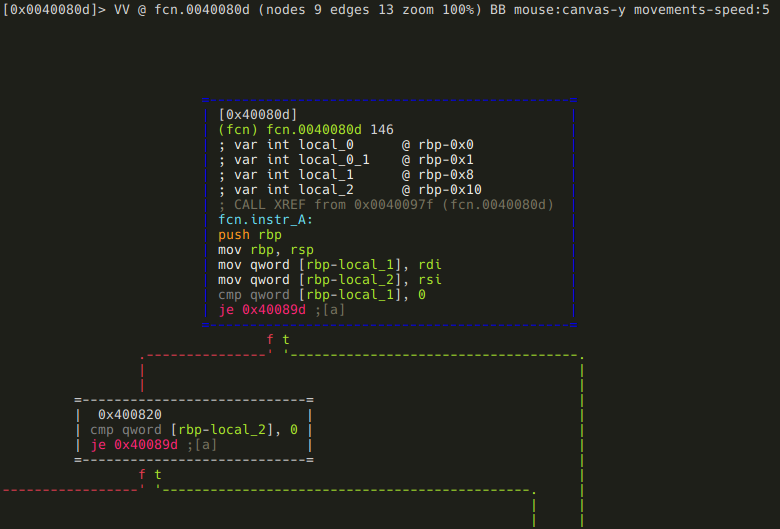
The two function arguments (rdi and rsi) are stored in local variables, and the first is compared to 0. If it is, the function returns (you can see it on the minimap), otherwise the same check is executed on the second argument. The function returns from here too, if the argument is zero. Although this function is really tiny, I am going to stick with my methodology, and rename the local vars:
:> afvn local_1 arg1
:> afvn local_2 arg2
And we have arrived to the predicted switch-case statement, and we can see that arg1's value is checked against "M", "P", and "C".
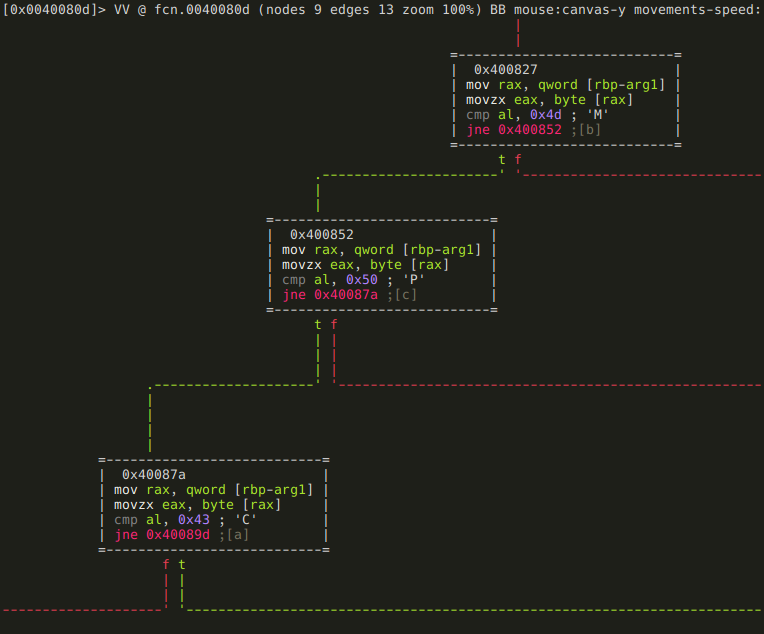
This is the "M" branch:
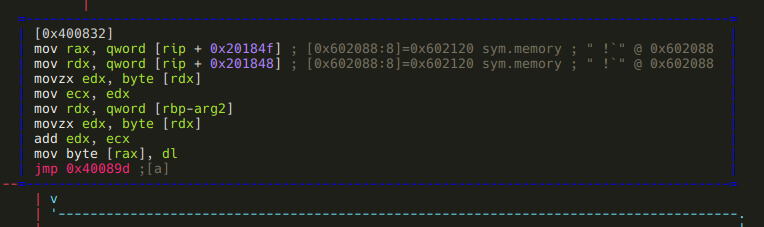
It basically loads an address from offset 0x602088 and adds arg2 to the byte at that address. As r2 kindly shows us in a comment, 0x602088 initially holds the address of sym.memory, the area where we have to construct the "Such VM! MuCH reV3rse!" string. It is safe to assume that somehow we will be able to modify the value stored at 0x602088, so this "M" branch will be able to modify bytes other than the first. Based on this assumption, I'll flag 0x602088 as sym.current_memory_ptr:
:> f sym.current_memory_ptr 8 @ 0x602088
Moving on to the "P" branch:
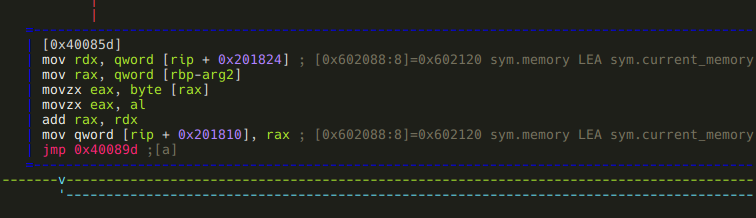
Yes, this is the piece of code that allows us to modify sym.current_memory_ptr: it adds arg2 to it.
Finally, the "C" branch:
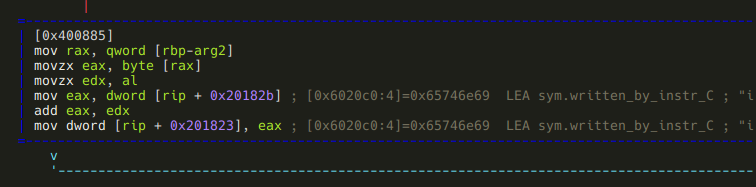
Well, it turned out that instr_C is not the only instruction that modifies sym.written_by_instr_C: this piece of code adds arg2 to it.
And that was instr_A, lets summarize it! Depending on the first argument, this instruction does the following:
- arg1 == "M": adds arg2 to the byte at sym.current_memory_ptr.
- arg1 == "P": steps sym.current_memory_ptr by arg2 bytes.
- arg1 == "C": adds arg2 to the value at sym.written_by_instr_C.
instr_S
This function is not recognized either, so we have to manually define it like we did with instr_A. After we do, and take a look at the minimap, scroll through the basic blocks, it is pretty obvious that these two functions are very-very similar. We can use radiff2 to see the difference.
r2 tip: radiff2 is used to compare binary files. There's a few options we can control the type of binary diffing the tool does, and to what kind of output format we want. One of the cool features is that it can generate DarumGrim-style bindiff graphs using the -g option.
Since now we want to diff two functions from the same binary, we specify the offsets with -g, and use reverse4 for both binaries. Also, we create the graphs for comparing instr_A to instr_S and for comparing instr_S to instr_A.
[0x00 ~]$ radiff2 -g 0x40080d,0x40089f reverse4 reverse4 | xdot -

[0x00 ~]$ radiff2 -g 0x40089f,0x40080d reverse4 reverse4 | xdot -
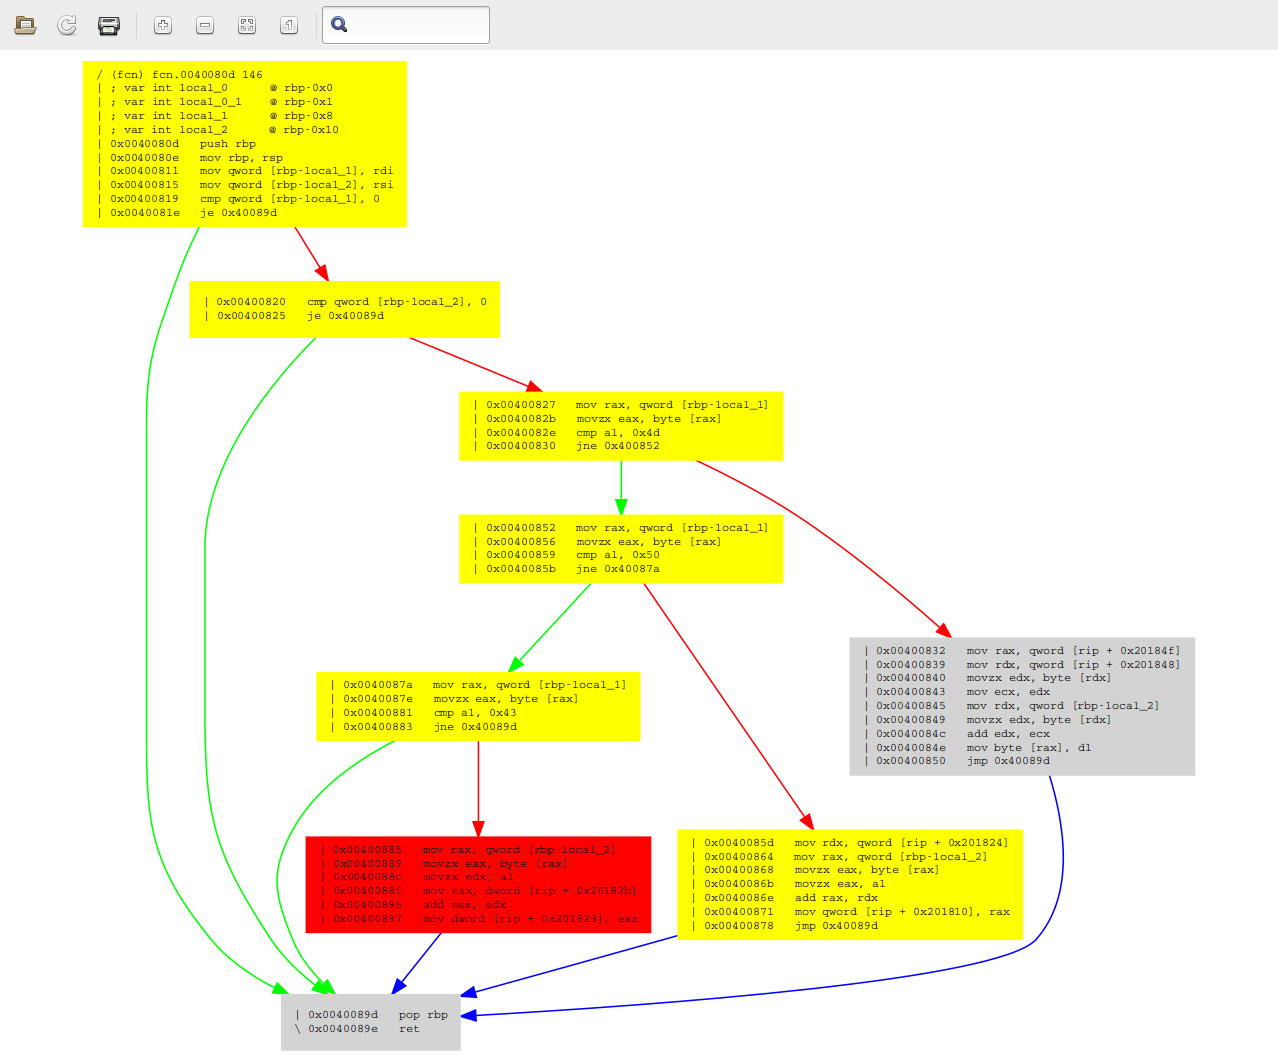
A sad truth reveals itself after a quick glance at these graphs: radiff2 is a liar! In theory, grey boxes should be identical, yellow ones should differ only at some offsets, and red ones should differ seriously. Well this is obviously not the case here - e.g. the larger grey boxes are clearly not identical. This is something I'm definitely going to take a deeper look at after I've finished this writeup.
Anyways, after we get over the shock of being lied to, we can easily recognize that instr_S is basically a reverse-instr_A: where the latter does addition, the former does subtraction. To summarize this:
- arg1 == "M": subtracts arg2 from the byte at sym.current_memory_ptr.
- arg1 == "P": steps sym.current_memory_ptr backwards by arg2 bytes.
- arg1 == "C": subtracts arg2 from the value at sym.written_by_instr_C.
instr_I
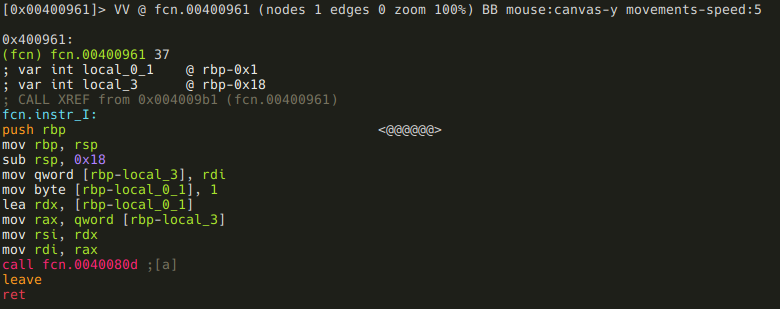
This one is simple, it just calls instr_A(arg1, 1). As you may have noticed
the function call looks like call fcn.0040080d instead of call fcn.instr_A.
This is because when you save and open a project, function names get lost -
another thing to examine and patch in r2!
instr_D
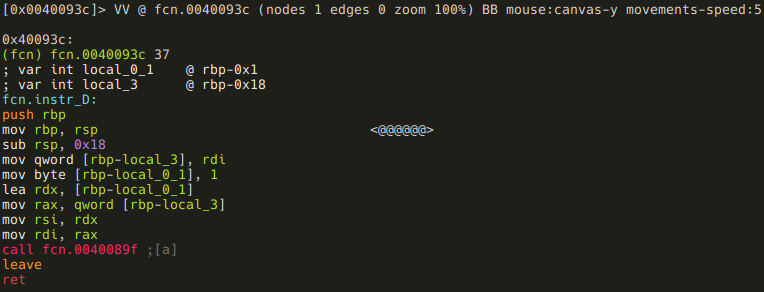
Again, simple: it calls instr_S(arg1, 1).
instr_P
It's local var rename time again!
:> afvn local_0_1 const_M
:> afvn local_0_2 const_P
:> afvn local_3 arg1
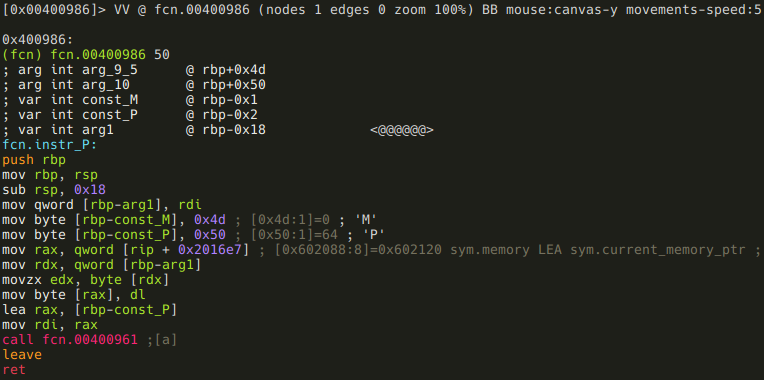
This function is pretty straightforward also, but there is one oddity: const_M is never used. I don't know why it is there - maybe it is supposed to be some kind of distraction? Anyways, this function simply writes arg1 to sym.current_memory_ptr, and than calls instr_I("P"). This basically means that instr_P is used to write one byte, and put the pointer to the next byte. So far this would seem the ideal instruction to construct most of the "Such VM! MuCH reV3rse!" string, but remember, this is also the one that can be used only 9 times!
instr_X
Another simple one, rename local vars anyways!
:> afvn local_1 arg1
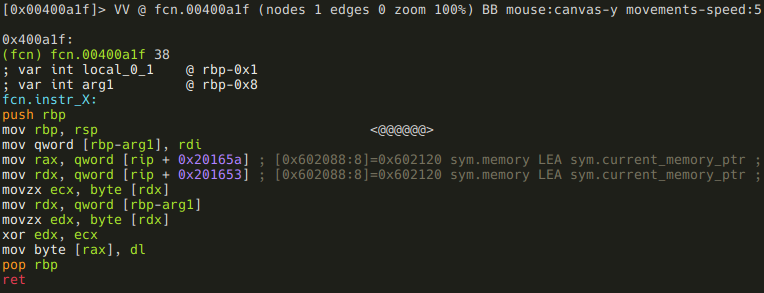
This function XORs the value at sym.current_memory_ptr with arg1.
instr_J
This one is not as simple as the previous ones, but it's not that complicated either. Since I'm obviously obsessed with variable renaming:
:> afvn local_3 arg1
:> afvn local_0_4 arg1_and_0x3f
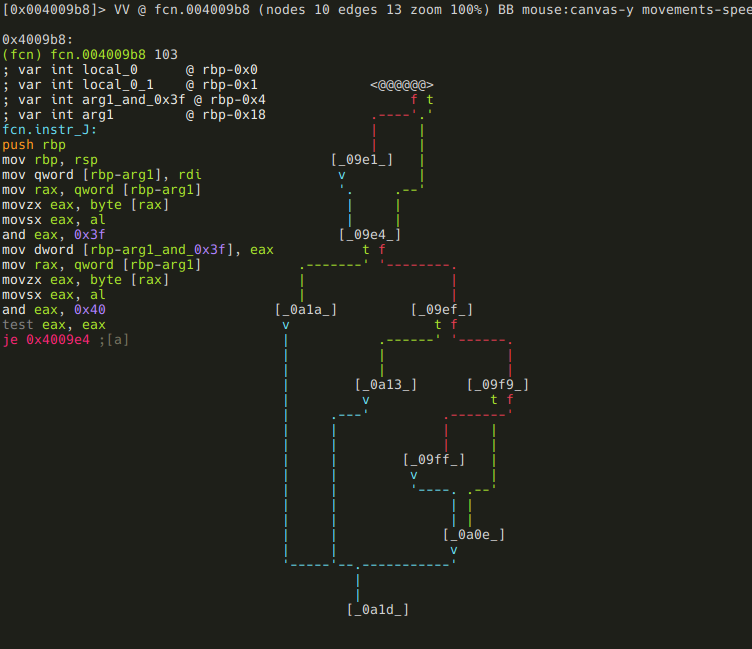
After the result of arg1 & 0x3f is put into a local variable, arg1 & 0x40 is checked against 0. If it isn't zero, arg1_and_0x3f is negated:

The next branching: if arg1 >= 0, then the function returns arg1_and_0x3f,


else the function branches again, based on the value of sym.written_by_instr_C:
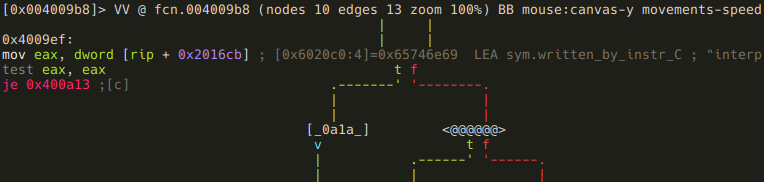
If it is zero, the function returns 2,

else it is checked if arg1_and_0x3f is a negative number,

and if it is, sym.good_if_ne_zero is incremented by 1:
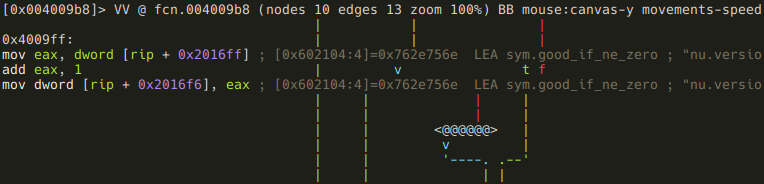
After all this, the function returns with arg1_and_0x3f:

.instructionset
We've now reversed all the VM instructions, and have a full understanding about how it works. Here is the VM's instruction set:
| Instruction | 1st arg | 2nd arg | What does it do? |
|---|---|---|---|
| "A" | "M" | arg2 | *sym.current_memory_ptr += arg2 |
| "P" | arg2 | sym.current_memory_ptr += arg2 | |
| "C" | arg2 | sym.written_by_instr_C += arg2 | |
| "S" | "M" | arg2 | *sym.current_memory_ptr -= arg2 |
| "P" | arg2 | sym.current_memory_ptr -= arg2 | |
| "C" | arg2 | sym.written_by_instr_C -= arg2 | |
| "I" | arg1 | n/a | instr_A(arg1, 1) |
| "D" | arg1 | n/a | instr_S(arg1, 1) |
| "P" | arg1 | n/a | *sym.current_memory_ptr = arg1; instr_I("P") |
| "X" | arg1 | n/a | *sym.current_memory_ptr ^= arg1 |
| "J" | arg1 | n/a | arg1_and_0x3f = arg1 & 0x3f; if (arg1 & 0x40 != 0) arg1_and_0x3f *= -1 if (arg1 >= 0) return arg1_and_0x3f; else if (*sym.written_by_instr_C != 0) { if (arg1_and_0x3f < 0) ++*sym.good_if_ne_zero; return arg1_and_0x3f; } else return 2; |
| "C" | arg1 | n/a | *sym.written_by_instr_C = arg1 |
| "R" | arg1 | n/a | return(arg1) |
.bytecode
Well, we did the reverse engineering part, now we have to write a program for the VM with the instruction set described in the previous paragraph. Here is the program's functional specification:
- the program must return "*"
- sym.memory has to contain the string "Such VM! MuCH reV3rse!" after execution
- all 9 instructions have to be used at least once
- sym.good_if_ne_zero should not be zero
- instr_P is not allowed to be used more than 9 times
Since this document is about reversing, I'll leave the programming part to the fellow reader :) But I'm not going to leave you empty-handed, I'll give you one advice: Except for "J", all of the instructions are simple, easy to use, and it should not be a problem to construct the "Such VM! MuCH reV3rse!" using them. "J" however is a bit complicated compared to the others. One should realize that its sole purpose is to make sym.good_if_ne_zero bigger than zero, which is a requirement to access the flag. In order to increment sym.good_if_ne_zero, three conditions should be met:
- arg1 should be a negative number, otherwise we would return early
- sym.written_by_instr_C should not be 0 when "J" is called. This means that "C", "AC", or "SC" instructions should be used before calling "J".
- arg1_and_0x3f should be negative when checked. Since 0x3f's sign bit is zero, no matter what arg1 is, the result of arg1 & 0x3f will always be non-negative. But remember that "J" negates arg1_and_0x3f if arg1 & 0x40 is not zero. This basically means that arg1's 6th bit should be 1 (0x40 = 01000000b). Also, because arg1_and_0x3f can't be 0 either, at least one of arg1's 0th, 1st, 2nd, 3rd, 4th or 5th bits should be 1 (0x3f = 00111111b).
I think this is enough information, you can go now and write that program. Or, you could just reverse engineer the quick'n'dirty one I've used during the CTF:
\x90\x00PSAMuAP\x01AMcAP\x01AMhAP\x01AM AP\x01AMVAP\x01AMMAP\x01AM!AP\x01AM AP\x01AMMAP\x01AMuAP\x01AMCAP\x01AMHAP\x01AM AP\x01AMrAP\x01AMeAP\x01AMVAP\x01AM3AP\x01AMrAP\x01AMsAP\x01AMeIPAM!X\x00CAJ\xc1SC\x00DCR*
Keep in mind though, that it was written on-the-fly, parallel to the reversing phase - for example there are parts that was written without the knowledge of all possible instructions. This means that the code is ugly and inefficient.
.outro
Well, what can I say? Such VM, much reverse! :)
What started out as a simple writeup for a simple crackme, became a rather lengthy writeup/r2 tutorial, so kudos if you've read through it. I hope you enjoyed it (I know I did), and maybe even learnt something from it. I've surely learnt a lot about r2 during the process, and I've even contributed some small patches, and got a few ideas of more possible improvements.
R2Wars
R2wars is an exciting and unique way to use radare2, allow users to engage in programming duels using real assembly languages in this game-like environment confronting two programs against each other in a virtual memory space, where they compete to overwrite each other's code to make the opponent crash.
Players must get familiar with the radare2 toolchain, assembly language and the rules of the game.
Implementations
The intial implementation of the r2wars game was done in a Python r2pipe script. But this served as a proof-of-concept for another more performant implementation written in C# and available on this repository. This implementation is the one used in the official competitions at r2con.
Supported Architectures
R2wars supports various architectures, and it used as an excuse to improve the state of the assembler, disassemblers and emulation capabilities of radare2.
The most relevant are: x86, 8051, ARM32, ARM64, MIPS and RISC-V.
Players can choose their preferred architecture or agree on a specific one for each battle, as specified by the competition rules if inter-arch bots are permitted.
Writing Warriors
To create a warrior for r2wars, participants write assembly code tailored to their chosen architecture.
Note that the assembly code should be optimized for size and efficiency, as space in the virtual memory is limited. Other strategies are:
- Creating small, fast-moving code that's hard to target
- Exploiting the use of memory scanning and copying data
- Note that turns depend on the instruction cost not the instruction count
- Developing efficient scanning techniques to locate the opponent quickly
- Drawing images and text in the r2wars panel GUI for fun
- Use instructions with low cycle count costs
Battle Mechanics
When a battle begins, both programs are loaded into the shared memory space. Execution alternates between the two programs, with each getting a turn to execute a single instruction. This continues until one program crashes or a predefined number of cycles is reached.
The r2wars interface provides real-time visualization of the memory space, allowing spectators to observe the battle as it unfolds. This includes tracking changes in memory, register values, and the current execution point of each program.
Examples
These are some of the bots used in real r2wars competitions.
jordi.x86-32.asm
call label
label:
pop eax
loop:
sub eax, 10
cmp dword ptr[eax], 0
je loop
mov dword ptr[eax], 0
jmp loop
pancake.mips-64.asm
bal 0 + getpc
getpc:
move v0, ra
lui v1, 1
loop:
sw v0, 0(v1)
addiu v1, v1, v0
b loop
nop
ricardoapl.x86-32.asm
mov edi, 0x0f60fc83
mov esi, 0x6060e04c
mov ebp, 0xffe4ff60
mov esp, 0x00000200
mov ebx, 0xffffffff
mov edx, 0xffffffff
mov ecx, 0xffffffff
mov eax, 0x00000400
pushal
jmp esp
zeta.arm-32.asm
_start:
ldr r0, [pc, #48]
ldr r1, [pc, #48]
ldr r2, [pc, #48]
ldr r3, [pc, #44]
ldr r4, [pc, #40]
ldr r5, [pc, #36]
ldr r6, [pc, #36]
movt r7, #0xffff
movt r8, #0xffff
movt r9, #0xffff
movw r10, #256
movw sp, #0x0400
push {r0, r1, r2, r3, r4, r5, r6, r7, r8, sb, sl, fp, ip, sp, lr, pc}
bx sp
_data:
cmp sp, r10
movlt sp, 0x400
push {r0, r1, r2, r3, r4, r5, r6, r7, r8, sb, sl, fp, ip, sp, lr, pc}
bx sp
Reference Card
This chapter is based on the Radare 2 reference card by Thanat0s, which is written under the GNU/GPL licence.
This card may be freely distributed under the terms of the GNU
general public licence — Copyright by Thanat0s - v0.1 -
Cheatsheets
If you are looking for updated and ready to be printed cheatsheets please check the radare2-cheatsheets repository.
Survival Guide
Those are the basic commands you will want to know and use for moving around a binary and getting information about it.
| Command | Description |
|---|---|
| s (tab) | Seek to a different place |
| x [nbytes] | Hexdump of nbytes, $b by default |
| aa | Auto analyze |
| pdf@ [funcname](Tab) | Disassemble function (main, fcn, etc.) |
| f fcn(Tab) | List functions |
| f str(Tab) | List strings |
| fr [flagname] [newname] | Rename flag |
| psz [offset]~grep | Print strings and grep for one |
| axF [flag] | Find cross reference for a flag |
Flags
Flags are like bookmarks, but they carry some extra information like size, tags or associated flagspace. Use the f command to list, set, get them.
| Command | Description |
|---|---|
| f | List flags |
| fd $$ | Describe an offset |
| fj | Display flags in JSON |
| fl | Show flag length |
| fx [flagname] | Show hexdump of flag |
| fC [name] [comment] | Set flag comment |
Flagspaces
Flags are created into a flagspace, by default none is selected,
and listing flags will list them all. To display a subset of flags
you can use the fs command to restrict it.
| Command | Description |
|---|---|
| fs | Display flagspaces |
| fs * | Select all flagspaces |
| fs [space] | Select one flagspace |
Information
Binary files have information stored inside the headers. The i
command uses the RBin api and allows us to the same things rabin2
do. Those are the most common ones.
| Command | Description |
|---|---|
| ii | Information on imports |
| iI | Info on binary |
| ie | Display entrypoint |
| iS | Display sections |
| ir | Display relocations |
| iz | List strings (izz, izzz) |
Print string
There are different ways to represent a string in memory. The ps command
allows us to print it in utf-16, pascal, zero terminated, .. formats.
| Command | Description |
|---|---|
| psz [offset] | Print zero terminated string |
| psb [offset] | Print strings in current block |
| psx [offset] | Show string with scaped chars |
| psp [offset] | Print pascal string |
| psw [offset] | Print wide string |
Visual mode
The visual mode is the standard interactive interface of radare2.
To enter in visual mode use the v or V command, and then you'll only
have to press keys to get the actions happen instead of commands.
| Command | Description |
|---|---|
| V | Enter visual mode |
| p/P | Rotate modes (hex, disasm, debug, words, buf) |
| c | Toggle (c)ursor |
| q | Back to Radare shell |
| hjkl | Move around (or HJKL) (left-down-up-right) |
| Enter | Follow address of jump/call |
| sS | Step/step over |
| o | Toggle asm.pseudo and asm.esil |
| . | Seek to program counter |
| / | In cursor mode, search in current block |
| :cmd | Run radare command |
| ;[-]cmt | Add/remove comment |
| /*+-[] | Change block size, [] = resize hex.cols |
| <,> | Seek aligned to block size |
| i/a/A | (i)nsert hex, (a)ssemble code, visual (A)ssembler |
| b | Toggle breakpoint |
| B | Browse evals, symbols, flags, classes, ... |
| d[f?] | Define function, data, code, .. |
| D | Enter visual diff mode (set diff.from/to) |
| e | Edit eval configuration variables |
| f/F | Set/unset flag |
| gG | Go seek to begin and end of file (0-$s) |
| mK/’K | Mark/go to Key (any key) |
| M | Walk the mounted filesystems |
| n/N | Seek next/prev function/flag/hit (scr.nkey) |
| C | Toggle (C)olors |
| R | Randomize color palette (ecr) |
| tT | Tab related. see also tab |
| v | Visual code analysis menu |
| V | (V)iew graph (agv?) |
| wW | Seek cursor to next/prev word |
| uU | Undo/redo seek |
| x | Show xrefs of current func from/to data/code |
| yY | Copy and paste selection |
| z | fold/unfold comments in diassembly |
Searching
There are many situations where we need to find a value inside a binary
or in some specific regions. Use the e search.in=? command to choose
where the / command may search for the given value.
| Command | Description |
|---|---|
| / foo\00 | Search for string ’foo\0’ |
| /b | Search backwards |
| // | Repeat last search |
| /w foo | Search for wide string ’f\0o\0o\0’ |
| /wi foo | Search for wide string ignoring case |
| /! ff | Search for first occurrence not matching |
| /i foo | Search for string ’foo’ ignoring case |
| /e /E.F/i | Match regular expression |
| /x a1b2c3 | Search for bytes; spaces and uppercase nibbles are allowed, same as /x A1 B2 C3 |
| /x a1..c3 | Search for bytes ignoring some nibbles (auto-generates mask, in this example: ff00ff) |
| /x a1b2:fff3 | Search for bytes with mask (specify individual bits) |
| /d 101112 | Search for a deltified sequence of bytes |
| /!x 00 | Inverse hexa search (find first byte != 0x00) |
| /c jmp [esp] | Search for asm code (see search.asmstr) |
| /a jmp eax | Assemble opcode and search its bytes |
| /A | Search for AES expanded keys |
| /r sym.printf | Analyze opcode reference an offset |
| /R | Search for ROP gadgets |
| /P | Show offset of previous instruction |
| /m magicfile | Search for matching magic file |
| /p patternsize | Search for pattern of given size |
| /z min max | Search for strings of given size |
| /v[?248] num | Look for a asm.bigendian 32bit value |
Saving (Broken)
This feature has broken and not been resolved at the time of writing these words (Nov.16th 2020). check #Issue 6945: META - Project files and #Issue 17034 for more details.
To save your analysis for now, write your own script which records the function name, variable name, etc. for example:
$ vim sample_A.r2
e scr.utf8 = false
s 0x000403ce0
aaa
s fcn.00403130
afn return_delta_to_heapaddr
afvn iter var_04h
...
Usable variables in expression
The ?$? command will display the variables that can be used in any math
operation inside the r2 shell. For example, using the ? $$ command to evaluate
a number or ?v to just the value in one format.
All commands in r2 that accept a number supports the use of those variables.
| Command | Description |
|---|---|
| $$ | here (current virtual seek) |
| $$$ | current non-temporary virtual seek |
| $? | last comparison value |
| $alias=value | alias commands (simple macros) |
| $b | block size |
| $B | base address (aligned lowest map address) |
| $f | jump fail address (e.g. jz 0x10 => next instruction) |
| $fl | flag length (size) at current address (fla; pD $l @ entry0) |
| $F | current function size |
| $FB | begin of function |
| $Fb | address of the current basic block |
| $Fs | size of the current basic block |
| $FE | end of function |
| $FS | function size |
| $Fj | function jump destination |
| $Ff | function false destination |
| $FI | function instructions |
| $c,$r | get width and height of terminal |
| $Cn | get nth call of function |
| $Dn | get nth data reference in function |
| $D | current debug map base address ?v $D @ rsp |
| $DD | current debug map size |
| $e | 1 if end of block, else 0 |
| $j | jump address (e.g. jmp 0x10, jz 0x10 => 0x10) |
| $Ja | get nth jump of function |
| $Xn | get nth xref of function |
| $l | opcode length |
| $m | opcode memory reference (e.g. mov eax,[0x10] => 0x10) |
| $M | map address (lowest map address) |
| $o | here (current disk io offset) |
| $p | getpid() |
| $P | pid of children (only in debug) |
| $s | file size |
| $S | section offset |
| $SS | section size |
| $v | opcode immediate value (e.g. lui a0,0x8010 => 0x8010) |
| $w | get word size, 4 if asm.bits=32, 8 if 64, ... |
| ${ev} | get value of eval config variable |
| $r{reg} | get value of named register |
| $k{kv} | get value of an sdb query value |
| $s{flag} | get size of flag |
| RNum | $variables usable in math expressions |
Authors And Contributors
This book wouldn't be possible without the help of a large list of contributors who have been reviewing, writing and reporting bugs and stuff in the radare2 project as well as in this book.
The radare2 book
The original radare book was written by pancake, the work towards syncing it with the latest radare2 was started by Maijin, nowadays this book is mainly maintained by pancake again and updated in a collaborative way by the community.
Many thanks to everyone who have contributed to this book.
$ git log | grep ^Author | cut -d ':' -f 2- | cut -d '<' -f 1 | sort -u |xargs echo '* '
- 7flying
- Adrian Studer
- Agustín Dall'Alba
- Ahmed Mohamed Abd El-MAwgood
- Akshay Krishnan R
- Ali Raheem
- Andrew Hoog
- Anton Kochkov
- Antonio Sánchez
- Apkunpacker
- Aswin
- Aswin C
- Austin Hartzheim
- Bob131
- Braiden Kindt
- Connor Armand Du Plooy
- Cyrill Leutwiler
- DZ_ruyk
- David Tomaschik
- Deepak Chethan
- Dennis Goodlett
- Dennis van der Schagt
- Dāvis
- Enshin Andrey
- Eric
- Evgeny Cherkashin
- Fangrui Song
- Francesco Tamagni
- FreeArtMan
- Gerardo García Peña
- Giovanni
- Giovanni Dante Grazioli
- Giuseppe
- Grigory Rechistov
- GustavoLCR
- Heersin
- Hui Peng
- ITAYC0HEN
- Itay Cohen
- Jacob Rosenthal
- Jeffrey Crowell
- John
- Judge Dredd (key 6E23685A)
- Jupiter
- Jürgen Hötzel
- Kali Kaneko
- Kevin Grandemange
- Kevin Laeufer
- LGTM Migrator
- Lazula
- Lev Aronsky
- Liumeo
- Luca Di Bartolomeo
- Lukas Dresel
- Maijin
- Martin Brunner
- Michael Scherer
- Michele
- Mike
- Nikita Abdullin
- Nikolaos Chatzikonstantinou
- Pau RE
- Paul
- Paweł Łukasik
- Peter C
- Rafael Rivera
- RandomLive
- Ren Kimura
- Reto Schneider
- Riccardo Schirone
- Roman Valls Guimera
- Ryan Geary
- SchumBlubBlub
- SkUaTeR
- Solomon
- Sophie Chen
- Srimanta Barua
- Sushant Dinesh
- Sylvain Pelissier
- TDKPS
- Thanat0s
- Tomasz Różański
- Vanellope
- Vasilij Schneidermann
- Vex Woo
- Vitaly Bogdanov
- Vorlent
- XYlearn
- Yuri Slobodyanyuk
- Zelalem Mekonnen
- Zi Fan
- adwait1-g
- aemmitt-ns
- ali
- aoighost
- ayedaemon
- ckanibal
- condret
- dependabot[bot]
- dodococo
- dreamist
- gogo
- gogo2464
- grepharder
- h0pp
- hdznrrd
- hmht
- ivan tkachenko
- izhuer
- jvoisin
- karliss
- kij
- krmpotic
- leongross
- lowsec
- madblobfish
- meowmeowxw
- mrmacete
- ms111ds
- muzlightbeer
- officialcjunior
- pancake
- pickDefault
- polym (Tim)
- puddl3glum
- ratijas
- sghctoma
- shakreiner
- sivaramaaa
- taiyu
- tick
- vane11ope
- xarkes
- xunoaib
- yep
- yossizap
- yurayake
- Óscar Carrasco
- Florian Best